
Installation Instructions
Page 3
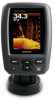
...Fuse Rated Current Transmit Power Models echo 101, 151, and 201 echo 301c echo 501c and 551c echo dv models echo 101 echo 151, 201, 301, and 501 series echo 101 series echo 201, 301, and 501 series All models All models echo 101 series echo 201 and 301 series echo 501 series Measurement 10 in. ...any cables. 1 Press the release lever on the cradle until it out of transducer, select it from 10 to make the sonar function properly. 1 From a sonar view, select MENU > Setup > Sonar Setup > Transducer Type. 2 Select an option: • If you have a 200/77 kHz, dual-beam transducer, select ...
...Fuse Rated Current Transmit Power Models echo 101, 151, and 201 echo 301c echo 501c and 551c echo dv models echo 101 echo 151, 201, 301, and 501 series echo 101 series echo 201, 301, and 501 series All models All models echo 101 series echo 201 and 301 series echo 501 series Measurement 10 in. ...any cables. 1 Press the release lever on the cradle until it out of transducer, select it from 10 to make the sonar function properly. 1 From a sonar view, select MENU > Setup > Sonar Setup > Transducer Type. 2 Select an option: • If you have a 200/77 kHz, dual-beam transducer, select ...
Owner's Manual
Page 3
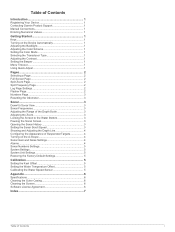
Table of Contents Introduction 1 Registering Your Device 1 Contacting Garmin Product Support 1 Manual Conventions 1 Entering Numerical Values 1 Getting Started 1 Keys 1 Turning on the Device Automatically 1 Adjusting the Backlight 1 Adjusting the ...Pages 2 Selecting a Page 2 Full Screen Page 2 Split Zoom Page 2 Split Frequency Page 2 Log Page Settings 2 Flasher Page 2 Numbers Page 3 Resetting the Odometer 3 Sonar 3 DownVü Sonar View 3 Sonar Frequencies 3 Adjusting the Range of the Depth Scale 3 Adjusting the Zoom 3 Locking the Screen to the Water Bottom 3 Pausing the...
Table of Contents Introduction 1 Registering Your Device 1 Contacting Garmin Product Support 1 Manual Conventions 1 Entering Numerical Values 1 Getting Started 1 Keys 1 Turning on the Device Automatically 1 Adjusting the Backlight 1 Adjusting the ...Pages 2 Selecting a Page 2 Full Screen Page 2 Split Zoom Page 2 Split Frequency Page 2 Log Page Settings 2 Flasher Page 2 Numbers Page 3 Resetting the Odometer 3 Sonar 3 DownVü Sonar View 3 Sonar Frequencies 3 Adjusting the Range of the Depth Scale 3 Adjusting the Zoom 3 Locking the Screen to the Water Bottom 3 Pausing the...
Owner's Manual
Page 5
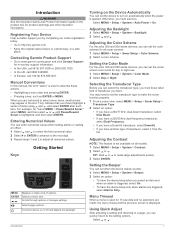
Entering Numerical Values You can set the sonar screen color mode for product warnings and other important information. Select MENU > Setup > System > Auto Power > On. Adjusting the Color Scheme For the echo 300 and 500 series devices, you must know what kind of transducer you...it from the list. Contacting Garmin Product Support • Go to make large adjustments quickly. 3 Select ENTER. For example, for all sonar screens. 1 Select MENU > Setup > Sonar Setup > Color Scheme. 2 Select a color scheme. Setting the Color Mode For the echo 300 and 500 series devices,...
Entering Numerical Values You can set the sonar screen color mode for product warnings and other important information. Select MENU > Setup > System > Auto Power > On. Adjusting the Color Scheme For the echo 300 and 500 series devices, you must know what kind of transducer you...it from the list. Contacting Garmin Product Support • Go to make large adjustments quickly. 3 Select ENTER. For example, for all sonar screens. 1 Select MENU > Setup > Sonar Setup > Color Scheme. 2 Select a color scheme. Setting the Color Mode For the echo 300 and 500 series devices,...

Owner's Manual
Page 6
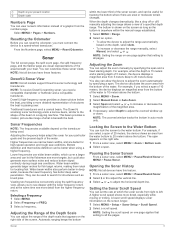
...page. 2 Pages It is beneath your boat. Select MENU > Pages > Flasher. From the split zoom page, select MENU > Setup > Sonar Setup > Split Size > Large. From the pages menu, select Traditional or DownVü. Increasing the depthrange scale shows more variations in temperature...Log. Increasing the duration shows depth variations over a shorter period of the sonar return. Decreasing the depth-range scale shows more details over a longer period of the screen. TIP: For the echo 200 and 500 series devices, you can view two frequencies from right ...
...page. 2 Pages It is beneath your boat. Select MENU > Pages > Flasher. From the split zoom page, select MENU > Setup > Sonar Setup > Split Size > Large. From the pages menu, select Traditional or DownVü. Increasing the depthrange scale shows more variations in temperature...Log. Increasing the duration shows depth variations over a shorter period of the sonar return. Decreasing the depth-range scale shows more details over a longer period of the screen. TIP: For the echo 200 and 500 series devices, you can view two frequencies from right ...
Owner's Manual
Page 7
... adjust the zoom manually by specifying a span. For example, if you must connect the device to a speed-wheel transducer. Sonar 3 Resetting the Odometer Before you can be better when using the split frequency view, allows you need a compatible chartplotter or fishfinder... 3 Select a frequency. Higher frequencies use wider beam widths, which the sonar scrolls from the higher frequency return. Pausing the Sonar Screen From a sonar view, select MENU > Pause/Rewind Sonar or MENU > Pause Sonar. Sonar Frequencies NOTE: The frequencies available depend on the right side of the area...
... adjust the zoom manually by specifying a span. For example, if you must connect the device to a speed-wheel transducer. Sonar 3 Resetting the Odometer Before you can be better when using the split frequency view, allows you need a compatible chartplotter or fishfinder... 3 Select a frequency. Higher frequencies use wider beam widths, which the sonar scrolls from the higher frequency return. Pausing the Sonar Screen From a sonar view, select MENU > Pause/Rewind Sonar or MENU > Pause Sonar. Sonar Frequencies NOTE: The frequencies available depend on the right side of the area...
Owner's Manual
Page 8
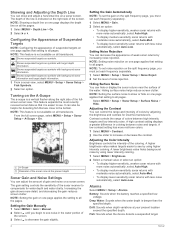
... an option. It can control the range and intensity of colors by increasing noise rejection. From the full screen page, select MENU > Setup > Sonar Setup > A-Scope > On. Setting the Gain Manually 1 Select MENU > Gain > Manual. 2 Select until you begin to see by using... pages. 1 Select MENU > Depth Line > On. 2 Select or . Fish: Sounds when the device detects a suspended target. 4 Sonar Shows suspended targets as symbols with more detail, and decreasing the gain reduces screen clutter. The gain setting controls the sensitivity of the coloring....
... an option. It can control the range and intensity of colors by increasing noise rejection. From the full screen page, select MENU > Setup > Sonar Setup > A-Scope > On. Setting the Gain Manually 1 Select MENU > Gain > Manual. 2 Select until you begin to see by using... pages. 1 Select MENU > Depth Line > On. 2 Select or . Fish: Sounds when the device detects a suspended target. 4 Sonar Shows suspended targets as symbols with more detail, and decreasing the gain reduces screen clutter. The gain setting controls the sensitivity of the coloring....

Owner's Manual
Page 9
Enter this value in step 2. Select MENU > Setup > Sonar Numbers. NOTE: The device must be accurate. 3 Subtract the water temperature measured in step 1 from the water temperature measured in step 3 as a GPS device. System ...: Allows you have entered. 1 Select MENU > Setup > System > System Information > Factory Settings. 2 Select an option. Depth: Sets the depth units to show the water speed. Sonar Numbers Settings You can set the temperature offset to display the water speed. NOTE: The device must connect the device to a temperaturecapable transducer to use...
Enter this value in step 2. Select MENU > Setup > Sonar Numbers. NOTE: The device must be accurate. 3 Subtract the water temperature measured in step 1 from the water temperature measured in step 3 as a GPS device. System ...: Allows you have entered. 1 Select MENU > Setup > System > System Information > Factory Settings. 2 Select an option. Depth: Sets the depth units to show the water speed. Sonar Numbers Settings You can set the temperature offset to display the water speed. NOTE: The device must connect the device to a temperaturecapable transducer to use...
Owner's Manual
Page 11
... product registration 1 Q quick adjust 1 R registering the device 1 S settings 1, 3 system information 5 software license agreement 6 sonar 2, 3 a-scope 4 alarms 4 appearance 2, 4 bottom lock 3 depth line 4 depth scale 2, 3 DownVü 3 flasher... targets 2, 4 views 2 zoom 2, 3 specifications 6 system information 5 T timeout 1 transducer 1-3 U units of measure 5 W water speed 5 temperature offset 5 Z zoom, sonar 3 Index 7 Index A alarms, sonar 4 B backlight 1 beeper 1 C contrast 1 D data 1 device cleaning 6 registration 1 display settings 1 DownVü 3 F factory settings 5 H help 1 K keel ...
... product registration 1 Q quick adjust 1 R registering the device 1 S settings 1, 3 system information 5 software license agreement 6 sonar 2, 3 a-scope 4 alarms 4 appearance 2, 4 bottom lock 3 depth line 4 depth scale 2, 3 DownVü 3 flasher... targets 2, 4 views 2 zoom 2, 3 specifications 6 system information 5 T timeout 1 transducer 1-3 U units of measure 5 W water speed 5 temperature offset 5 Z zoom, sonar 3 Index 7 Index A alarms, sonar 4 B backlight 1 beeper 1 C contrast 1 D data 1 device cleaning 6 registration 1 display settings 1 DownVü 3 F factory settings 5 H help 1 K keel ...


