Quick Setup
Page 6
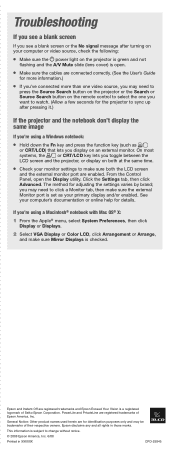
... may be trademarks of their respective owners. PowerLite and PrivateLine are registered trademarks and Epson Exceed Your Vision is a registered logomark of Epson America, Inc. On most systems, the or CRT/LCD key lets you toggle between the LCD screen and the projector, or display on both the LCD screen and the external monitor port are enabled...
... may be trademarks of their respective owners. PowerLite and PrivateLine are registered trademarks and Epson Exceed Your Vision is a registered logomark of Epson America, Inc. On most systems, the or CRT/LCD key lets you toggle between the LCD screen and the projector, or display on both the LCD screen and the external monitor port are enabled...

User's Guide
Page 33
Connecting an External Monitor (PowerLite S6 Series or PowerLite 78 only) If you want to monitor your computer presentation close-up (on a monitor placed beside the projector) as well as shown: Monitor Out port note Some LCD monitors may be turned on for the Monitor Out port to send a signal to a different ... on the screen, you can use it may not be able to display the image correctly. You can connect an external monitor. The projector must be in standby mode). If you're projecting computer images, make sure your presentation even if you have trouble displaying the image, ...
Connecting an External Monitor (PowerLite S6 Series or PowerLite 78 only) If you want to monitor your computer presentation close-up (on a monitor placed beside the projector) as well as shown: Monitor Out port note Some LCD monitors may be turned on for the Monitor Out port to send a signal to a different ... on the screen, you can use it may not be able to display the image correctly. You can connect an external monitor. The projector must be in standby mode). If you're projecting computer images, make sure your presentation even if you have trouble displaying the image, ...
User's Guide
Page 62
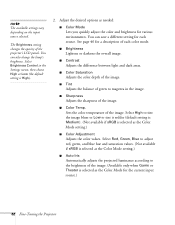
...then choose High or Low (the default setting is selected as the Color Mode for the current input source.) 62 Fine-Tuning the Projector note The available settings vary depending on the input source selected. Select Brightness Control in the image. ■ Sharpness Adjusts the sharpness ...of each source. Sets the color temperature of the projector's LCD panels. Select Red, Green, Blue to adjust red, green, and blue hue and saturation values. (Not available if sRGB is selected as...
...then choose High or Low (the default setting is selected as the Color Mode for the current input source.) 62 Fine-Tuning the Projector note The available settings vary depending on the input source selected. Select Brightness Control in the image. ■ Sharpness Adjusts the sharpness ...of each source. Sets the color temperature of the projector's LCD panels. Select Red, Green, Blue to adjust red, green, and blue hue and saturation values. (Not available if sRGB is selected as...
User's Guide
Page 90
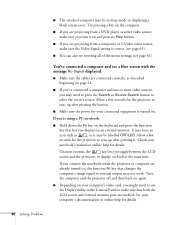
... and then back on again. ■ Depending on your computer's video card, you toggle between the LCD screen and the projector, or display on both the LCD screen and external monitor port are already turned on, the function Fn key that changes the computer's image signal to external output may...in sleep mode or displaying a black screen saver. See your computer's documentation or online help for your notebook's manual or online help for the projector to select the correct source. If you may be in the Control Panel to sync up after pressing the button. ■ Make sure the...
... and then back on again. ■ Depending on your computer's video card, you toggle between the LCD screen and the projector, or display on both the LCD screen and external monitor port are already turned on, the function Fn key that changes the computer's image signal to external output may...in sleep mode or displaying a black screen saver. See your computer's documentation or online help for your notebook's manual or online help for the projector to select the correct source. If you may be in the Control Panel to sync up after pressing the button. ■ Make sure the...
User's Guide
Page 91
...System Preferences. 2. See page 64 for more information. ■ Press the Aspect button on the projector. ■ Make sure the image Position setting is selected. 5. Make sure the VGA Display or Color LCD dialog box is correct in the Signal menu (see page 63). ■ Make sure your ...computer's resolution setting is supported by the projector (see page 103). Click Detect Displays. 4. Only part of the computer image is displayed. ■ Press the Auto button on the remote control or the Enter button on the remote control (PowerLite W6 Series only) or select the correct...
...System Preferences. 2. See page 64 for more information. ■ Press the Aspect button on the projector. ■ Make sure the image Position setting is selected. 5. Make sure the VGA Display or Color LCD dialog box is correct in the Signal menu (see page 63). ■ Make sure your ...computer's resolution setting is supported by the projector (see page 103). Click Detect Displays. 4. Only part of the computer image is displayed. ■ Press the Auto button on the remote control or the Enter button on the remote control (PowerLite W6 Series only) or select the correct...
User's Guide
Page 92
...(see page 64). ■ If you've used the Keystone adjustment, you may be reduced. ■ Keep your notebook computer and the projector, turn off the notebook's LCD display. ■ Make sure the correct input signal is selected in the Image menu (see page 62). ■ If you're projecting ...from a computer, make sure its shape as possible to prevent interference. ■ The video signal may need to reset the projector's Tracking, Sync, ...
...(see page 64). ■ If you've used the Keystone adjustment, you may be reduced. ■ Keep your notebook computer and the projector, turn off the notebook's LCD display. ■ Make sure the correct input signal is selected in the Image menu (see page 62). ■ If you're projecting ...from a computer, make sure its shape as possible to prevent interference. ■ The video signal may need to reset the projector's Tracking, Sync, ...


