Product Information Guide
Page 1
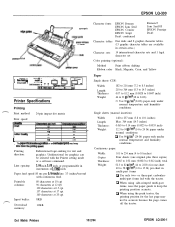
EPSON LQ-300 n----7 paper supports sw/ itch amsuifo 0 Couriers 0 Printer Specifications Printing Print method: Print speed: 24-pin impact dot matrix I 12 I 240 J is 300 Le4terQuatity 10 67 12 60 1 I 15 I 100 I l The paper-thidoress lever posltbn or an oveftmmd Pttnt head ... humidity conditions. or three-part carbonless multi-part forms fed with the Printer setting mode or a software command. Q When using the push tractor, the printing position for text and graphics. Dot Matrix Printers 10/2/94 EPSON LQ-300-1 Paper feed speed 80 ms per sheet in multi-part forms a ...
EPSON LQ-300 n----7 paper supports sw/ itch amsuifo 0 Couriers 0 Printer Specifications Printing Print method: Print speed: 24-pin impact dot matrix I 12 I 240 J is 300 Le4terQuatity 10 67 12 60 1 I 15 I 100 I l The paper-thidoress lever posltbn or an oveftmmd Pttnt head ... humidity conditions. or three-part carbonless multi-part forms fed with the Printer setting mode or a software command. Q When using the push tractor, the printing position for text and graphics. Dot Matrix Printers 10/2/94 EPSON LQ-300-1 Paper feed speed 80 ms per sheet in multi-part forms a ...

Product Information Guide
Page 4
.... Micro Adjust While in effect until you change it again or turn on the printer, you enter the Printer Setting mode, where you turn on the printer, the light flashes briefly. These settings take effect each selection. EPSON LQ-300-4 10/2/94 Dot Matrix Printers Hold it again to make with your software will cancel your current selection. The...
.... Micro Adjust While in effect until you change it again or turn on the printer, you enter the Printer Setting mode, where you turn on the printer, the light flashes briefly. These settings take effect each selection. EPSON LQ-300-4 10/2/94 Dot Matrix Printers Hold it again to make with your software will cancel your current selection. The...

Product Information Guide
Page 6
... have made remain in the table. ll.Whenyouarefinished,tumtheprinteroff.Anysettings you have changed the printer settings bejke and do not need the help text. 1. EPSON LQ-300-6 10/2/94 Dot Matrix Printers otherwise the print heud prints directly on to Table B. EPSON LQ-300 Changing the printer settings If you cannot use your choice, and then StOpS. Hold down the Font...
... have made remain in the table. ll.Whenyouarefinished,tumtheprinteroff.Anysettings you have changed the printer settings bejke and do not need the help text. 1. EPSON LQ-300-6 10/2/94 Dot Matrix Printers otherwise the print heud prints directly on to Table B. EPSON LQ-300 Changing the printer settings If you cannot use your choice, and then StOpS. Hold down the Font...
Product Information Guide
Page 8
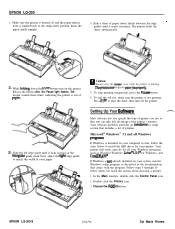
... the Pause light flashes. RI Caution: Always close the printer cover while the printer is turned off the printer. Setting Up Your software Most software lets you specify the type of printer you use so that includes a list of printers. Raise the guides until it meets resistance. sheet automatically....is pushed back to install the right driver for your paper. To stop printing temporarily, press the Taupe button 6. EPSON LQ-300-8 10/2/94 Dot Matrix Printers Make sure the printer is printing. The printer loads the paper guide upright. Press LF/FF to match the width of the...
... the Pause light flashes. RI Caution: Always close the printer cover while the printer is turned off the printer. Setting Up Your software Most software lets you specify the type of printer you use so that includes a list of printers. Raise the guides until it meets resistance. sheet automatically....is pushed back to install the right driver for your paper. To stop printing temporarily, press the Taupe button 6. EPSON LQ-300-8 10/2/94 Dot Matrix Printers Make sure the printer is printing. The printer loads the paper guide upright. Press LF/FF to match the width of the...
Product Information Guide
Page 9
... built-in tractor in your computer. Will you added) and click the button labeled Set As Default Printer. 11 .Click the Close button. EPSON LQ-300 ,f---Y 4. Depending on Continuous Paper Your printer can use color. Select the appropriate resolution. 8. Dot Matrix Printers 10/2/94 EPSON LQ-300-9 Choose the OK button. Press the LF/FF button to feed the paper...
... built-in tractor in your computer. Will you added) and click the button labeled Set As Default Printer. 11 .Click the Close button. EPSON LQ-300 ,f---Y 4. Depending on Continuous Paper Your printer can use color. Select the appropriate resolution. 8. Dot Matrix Printers 10/2/94 EPSON LQ-300-9 Choose the OK button. Press the LF/FF button to feed the paper...
Product Information Guide
Page 10
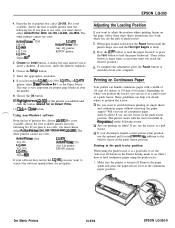
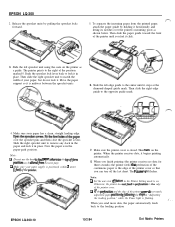
...holding it in the Printer Setting mode to the loading position EPSON LQ-300-10 10/2/94 Dot Matrix Printers f----* 5. Slide the left edge guide to the center until you finish printing (the printer receives no data for three seconds) the printer feeds the perforation of ...paper guide by pulling the sprocket locks forward. Open~sprocketcwers.Fit~firstholesof~paper over the printer's mounting posts as a guide. a M(3faekeet)soufrethyeouprrinptaepre.r supply is closed. EPSON LQ-300 2. The printer prints to the opposite guide mark. 4. Make sure your paper, but do not ...
...holding it in the Printer Setting mode to the loading position EPSON LQ-300-10 10/2/94 Dot Matrix Printers f----* 5. Slide the left edge guide to the center until you finish printing (the printer receives no data for three seconds) the printer feeds the perforation of ...paper guide by pulling the sprocket locks forward. Open~sprocketcwers.Fit~firstholesof~paper over the printer's mounting posts as a guide. a M(3faekeet)soufrethyeouprrinptaepre.r supply is closed. EPSON LQ-300 2. The printer prints to the opposite guide mark. 4. Make sure your paper, but do not ...
Product Information Guide
Page 11
... (3 feet) of the position marked 0. 3. Dot Matrix Printers 10/2/94 EPSON LQ-300-11 Slide the left sprocket unit so that its sprockets match the position of the holes in the paper and lock the unit in the Printer Setting mode to 8; a caution: When using the pull tractor, set the auto tear offfeature in place. Release the...
... (3 feet) of the position marked 0. 3. Dot Matrix Printers 10/2/94 EPSON LQ-300-11 Slide the left sprocket unit so that its sprockets match the position of the holes in the paper and lock the unit in the Printer Setting mode to 8; a caution: When using the pull tractor, set the auto tear offfeature in place. Release the...
User Manual
Page 10
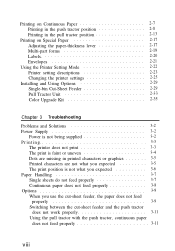
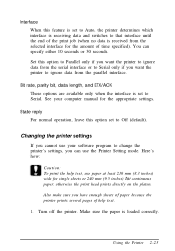
... 2-13 Printing on Special Paper 2-17 Adjusting the paper-thickness lever 2-17 Multi-part forms 2-19 Labels 2-20 Envelopes 2-21 Using the Printer Setting Mode 2-22 Printer setting descriptions 2-23 Changing the printer settings 2-25 Installing and Using Options 2-29 Single-bin Cut-Sheet Feeder 2-29 Pull Tractor Unit 2-33 Color Upgrade Kit 2-35 Chapter 3 Troubleshooting...
... 2-13 Printing on Special Paper 2-17 Adjusting the paper-thickness lever 2-17 Multi-part forms 2-19 Labels 2-20 Envelopes 2-21 Using the Printer Setting Mode 2-22 Printer setting descriptions 2-23 Changing the printer settings 2-25 Installing and Using Options 2-29 Single-bin Cut-Sheet Feeder 2-29 Pull Tractor Unit 2-33 Color Upgrade Kit 2-35 Chapter 3 Troubleshooting...
User Manual
Page 32
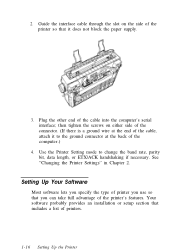
then tighten the screws on the side of the printer's features. See "Changing the Printer Settings" in Chapter 2. Setting Up Your Software Most software lets you specify the type of printer you can take full advantage of the printer so that it to change the baud rate, parity bit, data ...length, or ETX/ACK handshaking if necessary. Plug the other end of the computer.) 4. Use the Printer Setting mode to the ground connector at the end of printers. 1-16 Setting Up the Printer Your software probably provides an installation or setup section that you use so that includes a list of...
then tighten the screws on the side of the printer's features. See "Changing the Printer Settings" in Chapter 2. Setting Up Your Software Most software lets you specify the type of printer you can take full advantage of the printer so that it to change the baud rate, parity bit, data ...length, or ETX/ACK handshaking if necessary. Plug the other end of the computer.) 4. Use the Printer Setting mode to the ground connector at the end of printers. 1-16 Setting Up the Printer Your software probably provides an installation or setup section that you use so that includes a list of...
User Manual
Page 35
Chapter 2 Using the Printer Using the Control Panel 2-2 Lights and buttons 2-2 Selecting fonts 2-4 Printing on Single Sheets 2-5 Loading single sheets 2-5 Getting the results you expect 2-6 Printing on Continuous Paper 2-7 ... 2-13 Printing on Special Paper 2-17 Adjusting the paper-thickness lever 2-17 Multi-part forms 2-19 Labels 2-20 Envelopes 2-21 Using the Printer Setting Mode 2-22 Printer setting descriptions 2-23 Changing the printer settings 2-25 Installing and Using Options 2-29 Single-bin Cut-Sheet Feeder 2-29 Pull Tractor Unit 2-33 Color Upgrade Kit 2-35 Using the...
Chapter 2 Using the Printer Using the Control Panel 2-2 Lights and buttons 2-2 Selecting fonts 2-4 Printing on Single Sheets 2-5 Loading single sheets 2-5 Getting the results you expect 2-6 Printing on Continuous Paper 2-7 ... 2-13 Printing on Special Paper 2-17 Adjusting the paper-thickness lever 2-17 Multi-part forms 2-19 Labels 2-20 Envelopes 2-21 Using the Printer Setting Mode 2-22 Printer setting descriptions 2-23 Changing the printer settings 2-25 Installing and Using Options 2-29 Single-bin Cut-Sheet Feeder 2-29 Pull Tractor Unit 2-33 Color Upgrade Kit 2-35 Using the...
User Manual
Page 37
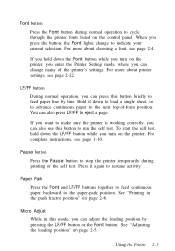
... Font and LF/FF buttons together to feed continuous paper backward to the next top-of the printer's settings. See "Printing in this mode, you turn on the printer, you enter the Printer Setting mode, where you can adjust the loading position by line. See "Adjusting the loading position" ...on page 2-8. For more about printer settings, see page 2-22. You can also press LF/FF to cycle through the printer fonts listed on the printer. For complete instructions, see page 2-4. Font button Press the Font button during printing ...
... Font and LF/FF buttons together to feed continuous paper backward to the next top-of the printer's settings. See "Printing in this mode, you turn on the printer, you enter the Printer Setting mode, where you can adjust the loading position by line. See "Adjusting the loading position" ...on page 2-8. For more about printer settings, see page 2-22. You can also press LF/FF to cycle through the printer fonts listed on the printer. For complete instructions, see page 2-4. Font button Press the Font button during printing ...

User Manual
Page 42
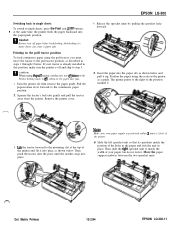
Release the sprocket units by pulling the sprocket locks forward. 2-8 Using the Printer Here's how to On. Printing in the push tractor position When using the push tractor: 1. See "Changing the printer settings" on page 2-25. Make sure the printer is a good idea to set the auto tear off . Remove the paper guide and place the paper-release lever in the Printer Setting mode to load continuous paper using the push tractor, it is turned off feature in the continuous paper position. 2.
Release the sprocket units by pulling the sprocket locks forward. 2-8 Using the Printer Here's how to On. Printing in the push tractor position When using the push tractor: 1. See "Changing the printer settings" on page 2-25. Make sure the printer is a good idea to set the auto tear off . Remove the paper guide and place the paper-release lever in the Printer Setting mode to load continuous paper using the push tractor, it is turned off feature in the continuous paper position. 2.
User Manual
Page 46
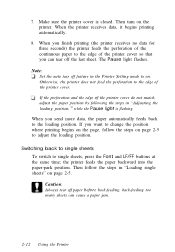
...12 Using the Printer the printer feeds the paper backward into the paper-park position. If you send more data, the paper automatically feeds back to on the printer. 7. When you want to change the position where printing begins on the page, follow the steps in the Printer Setting mode to the... loading position. Note: Set the auto tear off paper before back-feeding;
...12 Using the Printer the printer feeds the paper backward into the paper-park position. If you send more data, the paper automatically feeds back to on the printer. 7. When you want to change the position where printing begins on the page, follow the steps in the Printer Setting mode to the... loading position. Note: Set the auto tear off paper before back-feeding;

User Manual
Page 47
... the paper guide. Printing in the pull tractor position To load continuous paper using the pull tractor, set the auto tear Off feature in this position, make sure the printer is already installed in the Printer Setting mode to step 5. Caution: When using the pull tractor, you must move the tractor to the pull...
... the paper guide. Printing in the pull tractor position To load continuous paper using the pull tractor, set the auto tear Off feature in this position, make sure the printer is already installed in the Printer Setting mode to step 5. Caution: When using the pull tractor, you must move the tractor to the pull...
User Manual
Page 56
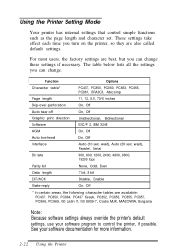
..., Serial 300, 600, 1200, 2400, 4800, 9600, 19200 bps Parity bit Data length EXT/ACK State reply None, Odd, Even 7 bit, 8 bit Disable, Enable On, Off * In certain areas, the following character tables are also called default settings. The table below lists all the settings you can... change . For most users, the factory settings are best, but you turn on the printer, so they are available: PC437. Using the Printer Setting Mode Your printer has internal settings that control simple functions such ...
..., Serial 300, 600, 1200, 2400, 4800, 9600, 19200 bps Parity bit Data length EXT/ACK State reply None, Odd, Even 7 bit, 8 bit Disable, Enable On, Off * In certain areas, the following character tables are also called default settings. The table below lists all the settings you can... change . For most users, the factory settings are best, but you turn on the printer, so they are available: PC437. Using the Printer Setting Mode Your printer has internal settings that control simple functions such ...

User Manual
Page 57
...you turn on this feature, the printer skips over the perforations of continuous paper, providing a 1-inch margin between the last line printed on one page and the first line printed on labels, set the page length to Off. Printer setting descriptions This section describes all of the... next sheet. Your printer includes a wide variety of character tables. Character table Character tables contain the characters and...
...you turn on this feature, the printer skips over the perforations of continuous paper, providing a 1-inch margin between the last line printed on one page and the first line printed on labels, set the page length to Off. Printer setting descriptions This section describes all of the... next sheet. Your printer includes a wide variety of character tables. Character table Character tables contain the characters and...
User Manual
Page 59
...sheets of paper because the printer prints several pages of time specified). Make sure the paper is set to Serial. You can use the Printer Setting mode. Here's how: Caution: To print the help text. 1. Set this option set to Off (default). Changing the printer settings If you can specify ...either 10 seconds or 30 seconds. Using the Printer 2-25 State reply For ...
...sheets of paper because the printer prints several pages of time specified). Make sure the paper is set to Serial. You can use the Printer Setting mode. Here's how: Caution: To print the help text. 1. Set this option set to Off (default). Changing the printer settings If you can specify ...either 10 seconds or 30 seconds. Using the Printer 2-25 State reply For ...
User Manual
Page 60
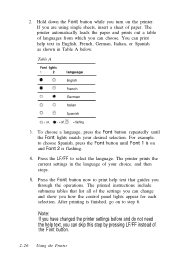
...table of languages from which you can skip this step by pressing LF/FF instead of your desired selection. Note: If you have changed the printer settings before and do not need the help text, you can change and show you through the operations. To choose a language, press the Font ...Spanish as shown in the language of the Font button. 2-26 Using the Printer Press the Font button now to step 6. Hold down the Font button while you are using single sheets, insert a sheet of the settings you can choose. 2. The printed instructions include submenu tables that guides you how...
...table of languages from which you can skip this step by pressing LF/FF instead of your desired selection. Note: If you have changed the printer settings before and do not need the help text, you can change and show you through the operations. To choose a language, press the Font ...Spanish as shown in the language of the Font button. 2-26 Using the Printer Press the Font button now to step 6. Hold down the Font button while you are using single sheets, insert a sheet of the settings you can choose. 2. The printed instructions include submenu tables that guides you how...

User Manual
Page 61
Table B Font lights 1 2 Pause light Setting Go to submenu Character table Page length Skip-over-perforation Auto tear off Graphic print direction Table C Table D Table E Table E Table F Software AGM Auto line ... off , = flashing For example, if you want to indicate your position. Press the Font or LF/FF button to move through the printer settings listed in Table B, and notice how the control panel lights change to change the Interface setting, press Font or LF/FF until Font 1 is flashing, Font 2 is flashing. The...
Table B Font lights 1 2 Pause light Setting Go to submenu Character table Page length Skip-over-perforation Auto tear off Graphic print direction Table C Table D Table E Table E Table F Software AGM Auto line ... off , = flashing For example, if you want to indicate your position. Press the Font or LF/FF button to move through the printer settings listed in Table B, and notice how the control panel lights change to change the Interface setting, press Font or LF/FF until Font 1 is flashing, Font 2 is flashing. The...
User Manual
Page 62
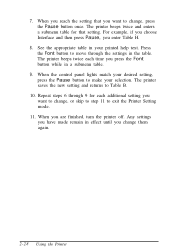
... Font button to move through 9 for that you change them again. 2-28 Using the Printer Repeat steps 6 through the settings in your selection. See the appropriate table in the table. The printer saves the new setting and returns to exit the Printer Setting mode. 11. When you enter Table H. 8. For example, if you choose Interface and...
... Font button to move through 9 for that you change them again. 2-28 Using the Printer Repeat steps 6 through the settings in your selection. See the appropriate table in the table. The printer saves the new setting and returns to exit the Printer Setting mode. 11. When you enter Table H. 8. For example, if you choose Interface and...


