
Technical Brief (Impact Printers)
Page 5
... change the printer's default settings. Utility EPSON Remote! Technical Brief-Multimedia projectors Page 5 Versatility-Computer-based set-up EPSON Remote! This utility program provides printer status, error conditions, and trouble shooting instructions to the user. Start UP Utility Ver. 1.22 Copyright (C) SEIKO EPSON CORP. 1992 Printer: FX-2180 Mode: ESC/P Port: LPT1 Font : Roman Pitch : 10CPI Print Quality : LQ...
... change the printer's default settings. Utility EPSON Remote! Technical Brief-Multimedia projectors Page 5 Versatility-Computer-based set-up EPSON Remote! This utility program provides printer status, error conditions, and trouble shooting instructions to the user. Start UP Utility Ver. 1.22 Copyright (C) SEIKO EPSON CORP. 1992 Printer: FX-2180 Mode: ESC/P Port: LPT1 Font : Roman Pitch : 10CPI Print Quality : LQ...

Product Information Guide
Page 4
...change it again to show the current. stop the printer temporarily during normal operation to stop when you reach the desired font Your Action stays in this mode, you can adjust the loading position by line. Your printer has internal settings that control simple functions such as the page length and character set. EPSON LQ-300...-4 10/2/94 Dot Matrix Printers When the printer is l l O=on l =ofi 6sflashing Printer Settings - Font 1 and Font 2 lights The green Font lights, 1 and 2, indicate the current font settingFont button . Press the Font button during...
...change it again to show the current. stop the printer temporarily during normal operation to stop when you reach the desired font Your Action stays in this mode, you can adjust the loading position by line. Your printer has internal settings that control simple functions such as the page length and character set. EPSON LQ-300...-4 10/2/94 Dot Matrix Printers When the printer is l l O=on l =ofi 6sflashing Printer Settings - Font 1 and Font 2 lights The green Font lights, 1 and 2, indicate the current font settingFont button . Press the Font button during...

Product Information Guide
Page 6
...EPSON LQ-300 Changing the printer settings If you cannot use your software program to change the printer's settings, you can use paper w&for single Sheets or 240 kn a(9t.5leainstch2e1s0) fmomr (8.3 inches) wntinuous~ paper; Also make your selection. For example, to choose Spanish, press the Font button until the Font... in effect until Font 1 is flashing, Font 2 is off, and the Pause light is loaded correctly. 2. The printer saves the new setting and returns to select the language. EPSON LQ-300-6 10/2/94 Dot Matrix Printers The printer automatically loads the paper...
...EPSON LQ-300 Changing the printer settings If you cannot use your software program to change the printer's settings, you can use paper w&for single Sheets or 240 kn a(9t.5leainstch2e1s0) fmomr (8.3 inches) wntinuous~ paper; Also make your selection. For example, to choose Spanish, press the Font button until the Font... in effect until Font 1 is flashing, Font 2 is off, and the Pause light is loaded correctly. 2. The printer saves the new setting and returns to select the language. EPSON LQ-300-6 10/2/94 Dot Matrix Printers The printer automatically loads the paper...
User Manual
Page 35
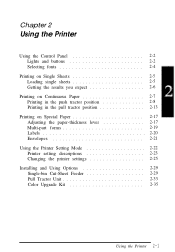
Chapter 2 Using the Printer Using the Control Panel 2-2 Lights and buttons 2-2 Selecting fonts 2-4 Printing on Single Sheets 2-5 Loading single sheets 2-5 Getting the results you expect 2-6 Printing on Continuous Paper 2-7 Printing in the push tractor position... Special Paper 2-17 Adjusting the paper-thickness lever 2-17 Multi-part forms 2-19 Labels 2-20 Envelopes 2-21 Using the Printer Setting Mode 2-22 Printer setting descriptions 2-23 Changing the printer settings 2-25 Installing and Using Options 2-29 Single-bin Cut-Sheet Feeder 2-29 Pull Tractor Unit 2-33 Color Upgrade Kit...
Chapter 2 Using the Printer Using the Control Panel 2-2 Lights and buttons 2-2 Selecting fonts 2-4 Printing on Single Sheets 2-5 Loading single sheets 2-5 Getting the results you expect 2-6 Printing on Continuous Paper 2-7 Printing in the push tractor position... Special Paper 2-17 Adjusting the paper-thickness lever 2-17 Multi-part forms 2-19 Labels 2-20 Envelopes 2-21 Using the Printer Setting Mode 2-22 Printer setting descriptions 2-23 Changing the printer settings 2-25 Installing and Using Options 2-29 Single-bin Cut-Sheet Feeder 2-29 Pull Tractor Unit 2-33 Color Upgrade Kit...
User Manual
Page 37
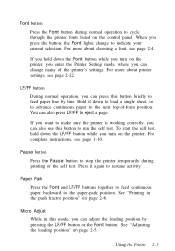
...or to advance continuous paper to feed paper line by pressing the LF/FF button or the Font button. To start the self test, hold down the Font button while you turn on the printer, you enter the Printer Setting mode, where you can change to run the self test. When you turn on the... printer. Hold it again to make sure the printer is working correctly, you can also use this button briefly ...
...or to advance continuous paper to feed paper line by pressing the LF/FF button or the Font button. To start the self test, hold down the Font button while you turn on the printer, you enter the Printer Setting mode, where you can change to run the self test. When you turn on the... printer. Hold it again to make sure the printer is working correctly, you can also use this button briefly ...

User Manual
Page 38
... cancel your control panel selection. O = on (0), go off the printer. Press the button repeatedly to show the current selection. However, any font choices you reach the desired font. Your selection stays in effect until you change it again or turn off (•), or flash (0) to cycle through... all of the seven internal fonts listed on the control panel, press the Font button. Selecting fonts To choose one ...
... cancel your control panel selection. O = on (0), go off the printer. Press the button repeatedly to show the current selection. However, any font choices you reach the desired font. Your selection stays in effect until you change it again or turn off (•), or flash (0) to cycle through... all of the seven internal fonts listed on the control panel, press the Font button. Selecting fonts To choose one ...
User Manual
Page 46
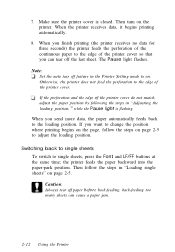
...of the continuous paper to the edge of the printer cover so that you can cause a paper jam. 2-12 Using the Printer the printer feeds the paper backward into the paper-park position. Then follow the steps on page 2-5 to change the position where printing begins on the page, follow... the steps in "Loading single sheets" on page 2-5. Make sure the printer cover is flashing. When the printer receives data, it begins printing automatically. 8. 7. If you send more data, the paper automatically feeds back to single sheets, press the Font and LF/FF buttons at the same time;
...of the continuous paper to the edge of the printer cover so that you can cause a paper jam. 2-12 Using the Printer the printer feeds the paper backward into the paper-park position. Then follow the steps on page 2-5 to change the position where printing begins on the page, follow... the steps in "Loading single sheets" on page 2-5. Make sure the printer cover is flashing. When the printer receives data, it begins printing automatically. 8. 7. If you send more data, the paper automatically feeds back to single sheets, press the Font and LF/FF buttons at the same time;
User Manual
Page 60
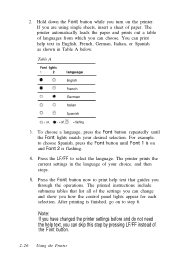
You can skip this step by pressing LF/FF instead of the Font button. 2-26 Using the Printer Table A Font lights 1 2 language English French German Italian Spanish on the printer. The printer prints the current settings in Table A below. Note: If you have changed the printer settings before and do not need the help text, you can print...
You can skip this step by pressing LF/FF instead of the Font button. 2-26 Using the Printer Table A Font lights 1 2 language English French German Italian Spanish on the printer. The printer prints the current settings in Table A below. Note: If you have changed the printer settings before and do not need the help text, you can print...

User Manual
Page 61
... once each time you want to change to move through the printer settings listed in Table B. At this point, you are in Table B, and notice how the control panel lights change the Interface setting, press Font or LF/FF until Font 1 is flashing, Font 2 is off , = flashing For example, if you press the button while in...
... once each time you want to change to move through the printer settings listed in Table B. At this point, you are in Table B, and notice how the control panel lights change the Interface setting, press Font or LF/FF until Font 1 is flashing, Font 2 is off , = flashing For example, if you press the button while in...
User Manual
Page 62
...time you are finished, turn the printer off. The printer beeps twice each additional setting you change , or skip to step 11 to Table B. 10. When you press the Font button while in effect until you want to change, press the Pause button once. Press the Font button to make your selection. ...When the control panel lights match your printed help text. Any settings you have made remain in a submenu table. 9. See the appropriate table in the table. 7. The printer saves the new ...
...time you are finished, turn the printer off. The printer beeps twice each additional setting you change , or skip to step 11 to Table B. 10. When you press the Font button while in effect until you want to change, press the Pause button once. Press the Font button to make your selection. ...When the control panel lights match your printed help text. Any settings you have made remain in a submenu table. 9. See the appropriate table in the table. 7. The printer saves the new ...
User Manual
Page 81
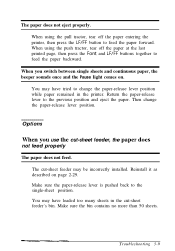
...paper-release lever to the single-sheet position. When using the pull tractor, tear off the paper at the last printed page, then press the Font and LF/FF buttons together to feed the paper backward. The paper does not eject properly. The cut -sheet feeder, the paper does not ...feed properly The paper does not feed. Troubleshooting 3-9 When using the push tractor, tear off the paper entering the printer, then press the LF/FF button to change the paper-release lever position. You may have tried to feed the paper forward. Reinstall it as described on . When you...
...paper-release lever to the single-sheet position. When using the pull tractor, tear off the paper at the last printed page, then press the Font and LF/FF buttons together to feed the paper backward. The paper does not eject properly. The cut -sheet feeder, the paper does not ...feed properly The paper does not feed. Troubleshooting 3-9 When using the push tractor, tear off the paper entering the printer, then press the LF/FF button to change the paper-release lever position. You may have tried to feed the paper forward. Reinstall it as described on . When you...

User Manual
Page 97
... X nn 88 58 Description Select Typeface n = 0: Roman 1: Sans Serif 2: Courier 3: Prestige 4: Script 10: Roman T 11: Sans Serif H Select Font by 0 Tab Horizontally Set Vertical Tabs Up to 360/m cpi m = 0: No change in pitch m = 1: Select proportional m = 0, 1, 18, 27, 24, 30, 36, 42, 48, 60, or 72 n = n1 +... n2 x 256 n: Set point size in 0.5 points Total points = (n1 + n2 x 256) x 0.5 n = 0: No change in ascending order Terminated by Pitch and Point ESC X m n1 n2 m: Set pitch to 16 tabs (1-255); last n should be 0 Tab Vertically Advance n/180-inch...
... X nn 88 58 Description Select Typeface n = 0: Roman 1: Sans Serif 2: Courier 3: Prestige 4: Script 10: Roman T 11: Sans Serif H Select Font by 0 Tab Horizontally Set Vertical Tabs Up to 360/m cpi m = 0: No change in pitch m = 1: Select proportional m = 0, 1, 18, 27, 24, 30, 36, 42, 48, 60, or 72 n = n1 +... n2 x 256 n: Set point size in 0.5 points Total points = (n1 + n2 x 256) x 0.5 n = 0: No change in ascending order Terminated by Pitch and Point ESC X m n1 n2 m: Set pitch to 16 tabs (1-255); last n should be 0 Tab Vertically Advance n/180-inch...
User Manual
Page 113
... 2-22-23 B Bit rate, 2-22, 2-25 Buttons, 2-2-3 C Changing printer settings, 2-25-28 Character handling, A-16 table, 2-22-23 Choosing a place for the printer, 1-3 Color Upgrade Kit, 1, 2-35-38 Command summary, A-10-19 Connecting printer to computer, 1-13-16 Continuous paper, 2-7-17 Control panel, 2-2-4 Cut...-sheet feeder, 2-29-33 D Data length, 2-22, 2-25 E Envelopes, 2-21 ETX/ACK, 2-22, 2-25 F Features, 1 Feeder, cut-sheet, 2-29-33 Finding your way around, 2 Font button, 2-2-3, 2-22-28 lights, 2-2, 2-22-28 Fonts,...
... 2-22-23 B Bit rate, 2-22, 2-25 Buttons, 2-2-3 C Changing printer settings, 2-25-28 Character handling, A-16 table, 2-22-23 Choosing a place for the printer, 1-3 Color Upgrade Kit, 1, 2-35-38 Command summary, A-10-19 Connecting printer to computer, 1-13-16 Continuous paper, 2-7-17 Control panel, 2-2-4 Cut...-sheet feeder, 2-29-33 D Data length, 2-22, 2-25 E Envelopes, 2-21 ETX/ACK, 2-22, 2-25 F Features, 1 Feeder, cut-sheet, 2-29-33 Finding your way around, 2 Font button, 2-2-3, 2-22-28 lights, 2-2, 2-22-28 Fonts,...

User Manual
Page 114
... lever, adjusting 2-17 Parallel interface, 1-13-14 Parity bit, 2-22, 2-25 Pause button, 2-3 light, 2-2 Plugging in the printer, 1-9 Power supply, troubleshooting, 3-2-3 Printer assembling, 1-4-9 changing the settings, 2-25-28 choosing a place for, 1-3 commands, sending, A-10 plugging in, 1-9 settings, 2-25-28, A-9 ... test, 1-10-12 S Safety information, v-vi, 4-5 Selecting fonts, 2-4 Self test, 1-10-12 Sending printer commands, A-10 Serial interface, 1-15-16 Setting up the printer, 1-l-16 your software, 1-16-18 Settings, changing printer, 2-22-28 Single sheets, 2-5-6 Single-bin Cut-Sheet Feeder,...
... lever, adjusting 2-17 Parallel interface, 1-13-14 Parity bit, 2-22, 2-25 Pause button, 2-3 light, 2-2 Plugging in the printer, 1-9 Power supply, troubleshooting, 3-2-3 Printer assembling, 1-4-9 changing the settings, 2-25-28 choosing a place for, 1-3 commands, sending, A-10 plugging in, 1-9 settings, 2-25-28, A-9 ... test, 1-10-12 S Safety information, v-vi, 4-5 Selecting fonts, 2-4 Self test, 1-10-12 Sending printer commands, A-10 Serial interface, 1-15-16 Setting up the printer, 1-l-16 your software, 1-16-18 Settings, changing printer, 2-22-28 Single sheets, 2-5-6 Single-bin Cut-Sheet Feeder,...


