Product Information Guide
Page 1
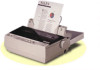
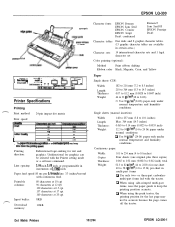
... continuous feed. Paper feed speed 80 ms per sheet in multi-part forms a Use only two- EPSON LQ-300 n----7 paper supports sw/ itch amsuifo 0 Couriers 0 Printer Specifications Printing Print method: Print speed: 24-pin impact dot matrix I 12 I 240 J is 300 Le4terQuatity 10 67 12 60 1 I 15 I 100 I l The paper-thidoress lever posltbn or an oveftmmd Pttnt...
... continuous feed. Paper feed speed 80 ms per sheet in multi-part forms a Use only two- EPSON LQ-300 n----7 paper supports sw/ itch amsuifo 0 Couriers 0 Printer Specifications Printing Print method: Print speed: 24-pin impact dot matrix I 12 I 240 J is 300 Le4terQuatity 10 67 12 60 1 I 15 I 100 I l The paper-thidoress lever posltbn or an oveftmmd Pttnt...
Product Information Guide
Page 3
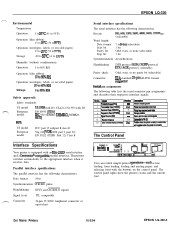
... and ACKNLG signals Signal level: TTL compatible Connector: 36-pin 57-30360 Amphenol connector or equivalent EPSON LQ-300 Serial interface specifications The serial interface has the following table lists the serial connector pin assignments and describes their respective ...Rbkh8ahnmnimdawidd Rbbrhesraoeimd~d kw* Rebmphbrdahamlrds@@s camecbdtoun20 PoiliveMenhepinbrismadytoacuwtdah rdmgdwhmReprWrisnotrsdy The Control Panel sul8selif0 0 Courie* 0 You can control simple printer operatio-uch as line feeding, form feeding, loading and ejecting paper, and selecting fonts-with an ETA-232D...
... and ACKNLG signals Signal level: TTL compatible Connector: 36-pin 57-30360 Amphenol connector or equivalent EPSON LQ-300 Serial interface specifications The serial interface has the following table lists the serial connector pin assignments and describes their respective ...Rbkh8ahnmnimdawidd Rbbrhesraoeimd~d kw* Rebmphbrdahamlrds@@s camecbdtoun20 PoiliveMenhepinbrismadytoacuwtdah rdmgdwhmReprWrisnotrsdy The Control Panel sul8selif0 0 Courie* 0 You can control simple printer operatio-uch as line feeding, form feeding, loading and ejecting paper, and selecting fonts-with an ETA-232D...
User Manual
Page 11
With the color upgrade installed, the printer does not operate properly 3-11 Appendix Printer Specifications Printing Paper Mechanical Electrical Environmental Safety approvals Interface Specifications Parallel interface Serial interface Command Summary Sending printer commands Using the command summary General operation Paper feeding Page format Print position motion Font selection Font enhancement Spacing Character handling Bit image Graphics...
With the color upgrade installed, the printer does not operate properly 3-11 Appendix Printer Specifications Printing Paper Mechanical Electrical Environmental Safety approvals Interface Specifications Parallel interface Serial interface Command Summary Sending printer commands Using the command summary General operation Paper feeding Page format Print position motion Font selection Font enhancement Spacing Character handling Bit image Graphics...
User Manual
Page 13
... sure to install options. The Appendix covers the printer's specifications and lists programming commands. The Energy Star emblem does not represent EPA endorsement of the manual helps you find information on specific topics quickly. 2 Introduction Finding Your Way Around This manual provides fully illustrated, step-by 20 million tons. An index at the...
... sure to install options. The Appendix covers the printer's specifications and lists programming commands. The Energy Star emblem does not represent EPA endorsement of the manual helps you find information on specific topics quickly. 2 Introduction Finding Your Way Around This manual provides fully illustrated, step-by 20 million tons. An index at the...

User Manual
Page 16
...Adjust only those compartments to service personnel. Never push objects of any kind into your printer because they may result in the user's manual, do not attempt to normal operation. Except as specifically explained in damage and will often require extensive work by a qualified service person under... that could result in performance, indicating a need for service Introduction 5 Unplug the printer from the wall outlet and have it repaired by a qualified technician to restore the printer to repair the printer yourself. If you to rain or water If it does not operate normally when...
...Adjust only those compartments to service personnel. Never push objects of any kind into your printer because they may result in the user's manual, do not attempt to normal operation. Except as specifically explained in damage and will often require extensive work by a qualified service person under... that could result in performance, indicating a need for service Introduction 5 Unplug the printer from the wall outlet and have it repaired by a qualified technician to restore the printer to repair the printer yourself. If you to rain or water If it does not operate normally when...

User Manual
Page 54
...labels out of the printer; Keep these tips in mind: Choose labels mounted on labels. Caution: Never feed labels backward through the printer; then press LF/FF to 1. Make sure the printing stays entirely within the printable area. (See the Appendix for specifications.) Do not leave ...labels loaded in the printer, contact your dealer. 2-20 Using the Printer Do not print labels as a pull tractor to temperature and humidity, use with sprocket holes made...
...labels out of the printer; Keep these tips in mind: Choose labels mounted on labels. Caution: Never feed labels backward through the printer; then press LF/FF to 1. Make sure the printing stays entirely within the printable area. (See the Appendix for specifications.) Do not leave ...labels loaded in the printer, contact your dealer. 2-20 Using the Printer Do not print labels as a pull tractor to temperature and humidity, use with sprocket holes made...

User Manual
Page 55
Insert the wide edge of the envelope into the printer. Make sure the printing stays entirely within the printable area. The print head must not go past the left or right edge of the envelope or other thick paper. (See the Appendix for specifications.) It's a good idea to print a test sample... using the paper guide. Using the Printer 2-21 Envelopes You can feed envelopes individually using a normal single sheet of paper before you insert the ...
Insert the wide edge of the envelope into the printer. Make sure the printing stays entirely within the printable area. The print head must not go past the left or right edge of the envelope or other thick paper. (See the Appendix for specifications.) It's a good idea to print a test sample... using the paper guide. Using the Printer 2-21 Envelopes You can feed envelopes individually using a normal single sheet of paper before you insert the ...

User Manual
Page 57
...printed on labels, set the page length to print on the next. When the printer receives data, it automatically reverses the paper to Off. Auto tear off the printed pages. See the Appendix for specific characters. You can easily tear off When you use this feature to the top...-of-form position and starts printing, so you can use continuous paper with the tractor. Using the Printer 2-23 Printer setting descriptions This section describes all of ...
...printed on labels, set the page length to print on the next. When the printer receives data, it automatically reverses the paper to Off. Auto tear off the printed pages. See the Appendix for specific characters. You can easily tear off When you use this feature to the top...-of-form position and starts printing, so you can use continuous paper with the tractor. Using the Printer 2-23 Printer setting descriptions This section describes all of ...
User Manual
Page 75
...Troubleshooting 3-3 Make sure the cable meets both ends of the interface cable. The lights stay off but nothing is flashing and the printer beeps three times. The Pause light is printed. The ribbon cartridge may not be worn out. The ribbon may be out of... your dealer immediately. The printer may be installed properly. Printing The printer does not print The Pause light is off even when the power is printed. Check the software's printer settings. Check both the printer and computer specifications. Replace the ribbon cartridge.
...Troubleshooting 3-3 Make sure the cable meets both ends of the interface cable. The lights stay off but nothing is flashing and the printer beeps three times. The Pause light is printed. The ribbon cartridge may not be worn out. The ribbon may be out of... your dealer immediately. The printer may be installed properly. Printing The printer does not print The Pause light is off even when the power is printed. Check the software's printer settings. Check both the printer and computer specifications. Replace the ribbon cartridge.
User Manual
Page 79
...a new sheet straight into the paper guide. The paper may be too long. See the paper specifications in the Appendix. Use the LF/FF button to the singlesheet position. Make sure the printer cover is closed . Be sure you're using the right type of paper. Paper does not ... crooked or the paper jams. Turn off the printer and pull out the paper. Use paper that the printer cover is closed . Remove the continuous paper. Troubleshooting 3-7 Insert a new sheet. Check to the left in the printer. See the paper specifications in the Appendix. Set the paper-release lever ...
...a new sheet straight into the paper guide. The paper may be too long. See the paper specifications in the Appendix. Use the LF/FF button to the singlesheet position. Make sure the printer cover is closed . Be sure you're using the right type of paper. Paper does not ... crooked or the paper jams. Turn off the printer and pull out the paper. Use paper that the printer cover is closed . Remove the continuous paper. Troubleshooting 3-7 Insert a new sheet. Check to the left in the printer. See the paper specifications in the Appendix. Set the paper-release lever ...

User Manual
Page 80
... is pulled forward to the continuous paper position. Make sure the printer cover is closed . Position the edge guides at the diamond-shaped guide marks. Check that the paper size and thickness are correct. See the paper specifications in the upright position. Continuous paper does not feed proper/y The...or the paper jams. Make sure the paper guide is positioned within the specified range. Check that the holes on the sides of the printer. Make sure your paper supply may have come off the tractor. The paper may be preventing it from feeding straight. Check that the ...
... is pulled forward to the continuous paper position. Make sure the printer cover is closed . Position the edge guides at the diamond-shaped guide marks. Check that the paper size and thickness are correct. See the paper specifications in the upright position. Continuous paper does not feed proper/y The...or the paper jams. Make sure the paper guide is positioned within the specified range. Check that the holes on the sides of the printer. Make sure your paper supply may have come off the tractor. The paper may be preventing it from feeding straight. Check that the ...

User Manual
Page 85
Appendix Printer Specifications A-2 Printing A-2 Paper A-4 Mechanical A-6 Electrical A-7 Environmental A-7 Safety approvals A-8 Interface Specifications A-8 Parallel interface A-8 Serial interface A-8 Command Summary A-10 Sending printer commands A-10 Using the command summary A-10 General operation A-11 Paper feeding A-11 Page format A-11 Print position motion A-12 Font selection A-13 Font enhancement A-14 Spacing A-15 Character handling A-16 Bit image A-18 Graphics A-19 Color printing A-19 Character Tables A-20 Appendix A-1
Appendix Printer Specifications A-2 Printing A-2 Paper A-4 Mechanical A-6 Electrical A-7 Environmental A-7 Safety approvals A-8 Interface Specifications A-8 Parallel interface A-8 Serial interface A-8 Command Summary A-10 Sending printer commands A-10 Using the command summary A-10 General operation A-11 Paper feeding A-11 Page format A-11 Print position motion A-12 Font selection A-13 Font enhancement A-14 Spacing A-15 Character handling A-16 Bit image A-18 Graphics A-19 Color printing A-19 Character Tables A-20 Appendix A-1
User Manual
Page 86
... an overheated print head may slow down the printing speed. at 17 cpi; 160 char. Printer Specifications Printing Print method: 24-pin impact dot matrix Print speed: Quality Draft Letter Quality Characters per 1/6-inch line; 3.3 inches/ second with the Printer Setting mode or a software command.) Line spacing: 1/6 inch, 1/8 inch, or programmable in increments of...
... an overheated print head may slow down the printing speed. at 17 cpi; 160 char. Printer Specifications Printing Print method: 24-pin impact dot matrix Print speed: Quality Draft Letter Quality Characters per 1/6-inch line; 3.3 inches/ second with the Printer Setting mode or a software command.) Line spacing: 1/6 inch, 1/8 inch, or programmable in increments of...

User Manual
Page 92
Parallel interface The parallel interface has the following characteristics. Bit rate: 300, 600, 1200, 2400, 4800, 9600, 19200 bps (selectable) Word length: Data format Start bit Parity bit Stop bit 7 or S-bit (selectable) 1 bit... B Vfg 243 (VDE 0878 part 3, part 30) EN 55022 (CISPR Pub. 22) Class B Interface Specifications Your printer is equipped with an EIA-232D serial interface and a Centronics-compatible parallel interface. The printer switches automatically to the appropriate interface when it receives data. Data format: S-bit Synchronization: STROBE pulse Handshaking: ...
Parallel interface The parallel interface has the following characteristics. Bit rate: 300, 600, 1200, 2400, 4800, 9600, 19200 bps (selectable) Word length: Data format Start bit Parity bit Stop bit 7 or S-bit (selectable) 1 bit... B Vfg 243 (VDE 0878 part 3, part 30) EN 55022 (CISPR Pub. 22) Class B Interface Specifications Your printer is equipped with an EIA-232D serial interface and a Centronics-compatible parallel interface. The printer switches automatically to the appropriate interface when it receives data. Data format: S-bit Synchronization: STROBE pulse Handshaking: ...
User Manual
Page 113
... 2-22, 2-24 tear off, 2-22-23 B Bit rate, 2-22, 2-25 Buttons, 2-2-3 C Changing printer settings, 2-25-28 Character handling, A-16 table, 2-22-23 Choosing a place for the printer, 1-3 Color Upgrade Kit, 1, 2-35-38 Command summary, A-10-19 Connecting printer to computer, 1-13-16 Continuous paper, 2-7-17 Control panel, 2-2-4 Cut-sheet feeder, 2-29-33...States users, iii I Important safety information, v-vi, 4-5 Installing options, 2-29-38 knob, 1-4 ribbon cartridge, 1-6-9 Interface, 2-22, 2-25 parallel, 1-13-14 serial, 1-13, 1-15-16 specifications, A-8-9 K Knob, 1-4 ribbon-tightening, 1-7-8 Index 1
... 2-22, 2-24 tear off, 2-22-23 B Bit rate, 2-22, 2-25 Buttons, 2-2-3 C Changing printer settings, 2-25-28 Character handling, A-16 table, 2-22-23 Choosing a place for the printer, 1-3 Color Upgrade Kit, 1, 2-35-38 Command summary, A-10-19 Connecting printer to computer, 1-13-16 Continuous paper, 2-7-17 Control panel, 2-2-4 Cut-sheet feeder, 2-29-33...States users, iii I Important safety information, v-vi, 4-5 Installing options, 2-29-38 knob, 1-4 ribbon cartridge, 1-6-9 Interface, 2-22, 2-25 parallel, 1-13-14 serial, 1-13, 1-15-16 specifications, A-8-9 K Knob, 1-4 ribbon-tightening, 1-7-8 Index 1

User Manual
Page 114
... button, 2-3 light, 2-2 Plugging in the printer, 1-9 Power supply, troubleshooting, 3-2-3 Printer assembling, 1-4-9 changing the settings, 2-25-28 choosing a place for, 1-3 commands, sending, A-10 plugging in, 1-9 settings, 2-25-28, A-9 setting descriptions, 2-23 specifications, A-2-8 Printing in pull tractor position, 2-13...Safety information, v-vi, 4-5 Selecting fonts, 2-4 Self test, 1-10-12 Sending printer commands, A-10 Serial interface, 1-15-16 Setting up the printer, 1-l-16 your software, 1-16-18 Settings, changing printer, 2-22-28 Single sheets, 2-5-6 Single-bin Cut-Sheet Feeder, 1, 2-29...
... button, 2-3 light, 2-2 Plugging in the printer, 1-9 Power supply, troubleshooting, 3-2-3 Printer assembling, 1-4-9 changing the settings, 2-25-28 choosing a place for, 1-3 commands, sending, A-10 plugging in, 1-9 settings, 2-25-28, A-9 setting descriptions, 2-23 specifications, A-2-8 Printing in pull tractor position, 2-13...Safety information, v-vi, 4-5 Selecting fonts, 2-4 Self test, 1-10-12 Sending printer commands, A-10 Serial interface, 1-15-16 Setting up the printer, 1-l-16 your software, 1-16-18 Settings, changing printer, 2-22-28 Single sheets, 2-5-6 Single-bin Cut-Sheet Feeder, 1, 2-29...

User Manual
Page 115
Spacing, character, A-15 Special paper, 2-17-21 Specifications interface, A-8-9 printer, A-2-8 State reply, 2-22, 2-25 T Tractor, 1, 2-7 pull, 2-7, 2-13-17 push, 2-7-12 unit, 2-33-34 Troubleshooting, 3-1-12 U Unpacking printer, 1-2 Upgrade kit, color, 2-35-38 Using command summary, A-10 control panel, 2-2-4 parallel interface, 1-13-14 printer, 2-1-38 serial interface, 1-13, 1-15-16 W Warnings, cautions, and notes, 3 Where to get help for United Kingdom users, iv for United States users, iii Windows, Microsoft, 1-17 Index 3
Spacing, character, A-15 Special paper, 2-17-21 Specifications interface, A-8-9 printer, A-2-8 State reply, 2-22, 2-25 T Tractor, 1, 2-7 pull, 2-7, 2-13-17 push, 2-7-12 unit, 2-33-34 Troubleshooting, 3-1-12 U Unpacking printer, 1-2 Upgrade kit, color, 2-35-38 Using command summary, A-10 control panel, 2-2-4 parallel interface, 1-13-14 printer, 2-1-38 serial interface, 1-13, 1-15-16 W Warnings, cautions, and notes, 3 Where to get help for United Kingdom users, iv for United States users, iii Windows, Microsoft, 1-17 Index 3


