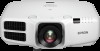
Operation Guide - EasyMP Monitor v4.53
Page 2
... name of the buttons on the EasyMP Monitor or OS screens. Select Timer - Example: Esc button Indicates the name of the buttons on the projector's remote control or the control panel. Timer Settings. q Indicates additional information and points which may be useful to know regarding a topic can be carried out in...
Operation Guide - EasyMP Multi PC Projection
Page 2
Contents 2 About EasyMP Multi PC Projection Meeting Styles Proposed by EasyMP Multi PC Projection 5 Holding Meetings Using Multiple Images 5 Holding Remote Meetings Over a Network 5 Installing the Software 6 Software Requirements 6 Installing 7 Operations During a Meeting Project Screens 23 Using the Projection Control Screen 23 Changing the Number of ...
Operation Guide - EasyMP Multi PC Projection
Page 5
... connect up to four of the connected user icons into the projection area. You can project the same screen. Share notes in remote locations can project the same image. Holding Remote Meetings Over a Network s "Connecting to Projectors on another part of four projectors can then select up to 32 computers to one...
Operation Guide - EasyMP Multi PC Projection
Page 21
... screen is displayed. s "Manual search" p.19 • Perform a search based on different subnets). You cannot connect to a computer, you can project the computer's screen at remote locations (on a profile. Connecting to Projectors on a Different Network By connecting the projectors to projectors that group.
Operation Guide - EasyMP Multi PC Projection
Page 24
... User's area Displays the user names for details on Web Remote. When you click the projector name next to Connected Projector Name, Web Remote is displayed. You can change the user name in the same way as using the remote control. Right-click the icon, and then select the number ...the computer's screens in all four panels in the projection area. The projected screen is the computer name. The selected screen is projected. In Web Remote, you can also change the number of the panels in the projection area are projected. A Select the user's icon in a white panel, a...
Quick Reference
Page 2
...not appear, see "Switching Between Image Sources" or "Troubleshooting." Changing the Language of the Projector Menus The default language of the source buttons (remote control), or the Source Search button (projector). Press the Aspect button on this feature, see the online User's Guide. 4. If your ...size and shape. 4. When you're done, press Menu to exit. Note: After changing the screen type, you can turn on the remote control to change it in or flip the switch controlling the outlet to acess the projector's menu system. 2. Select Extended and press . 3. After...
Quick Reference
Page 3
... as H/V-Keystone and Quick Corner® to reduce/enlarge the image. Turning the Projector Off Press the power (projector) or Standby (remote control) button to sharpen the image. With Epson's Instant Off® technology, you are done making adjustments, secure the lens shift dial lock. If the projector is uneven on the...
Quick Reference
Page 5
...down and use numeric keys to select projector to control Control one or all projectors Port to enter passwords, IP settings, etc. Remote Control Map Turn the projector on Turn the projector off display and audio Cancel current operation or return to previous menu; right mouse ... or previous image when projecting from a computer over the network Control volume Open menus assigned by user Use numeric keys to connect remote control cable Illuminate buttons temporarily Switch image sources Select color modes Temporarily turn off Select a source Automatically adjust computer image Change the ...
Operation Guide - EasyMP Network Updater
Page 9
... Making a Projector List You can make a list of the following is not available: Set DHCP to save your computer or network adapter. 3. Turn on the remote control or the control panel, select the Network menu, and select Network Configuration. 6. Note: To set up a network connection, if necessary, see the documentation supplied...
Operation Guide - EasyMP Monitor v4.54
Page 2
... This Guide The following table shows the symbols used in the order of the numbered steps. Indicates the name of the buttons on the projector's remote control or the control panel. Indicates operating methods and the order of what they mean. Example: Select "Timer" - "Timer Settings". The procedure indicated should be...
Operation Guide - EasyMP Network Projection
Page 7
... well as project images from different computers without having to the projector over a network. Sharing the projector over a network allows you to project images from a remote location. Parent topic: Introduction to learn more about EasyMP Network Projection software. Introduction to EasyMP Network Projection See the following sections to EasyMP Network Projection...
Operation Guide - EasyMP Network Projection
Page 17
A screen like one of the following is displayed. 17 Select the necessary settings to connect your computer for more details. 2. Turn on the remote control or the control panel, select the Network menu, and select Network Configuration. 5. See the documentation supplied with the projector for more details. 3. See the ...
Operation Guide - EasyMP Network Projection
Page 19
... Menu button on the projector. 5. Select other options as necessary for your computer or network adapter. 3. Connect the computer to the network. Turn on the remote control or the control panel, select the Network menu, and select Network Configuration. 6. 2. Install the wireless LAN unit in the projector, if necessary. A screen like...
Operation Guide - EasyMP Network Projection
Page 20
... your network administrator and check that are available for your settings and exit the menus. Press the Menu button on the projector. 5. Turn on the remote control or the control panel, select the Network menu, and select Network Configuration. 6. Connect a LAN cable to the network. Select Wired LAN. A screen like one...
Operation Guide - EasyMP Network Projection
Page 23
The LAN standby screen is projected. 2. 1. Start EasyMP Network Projection. • Windows XP, Windows Vista, and Windows 7: Click Start, select Programs (or All Programs), EPSON Projector, EasyMP Network Projection, and then click EasyMP Network Projection Ver.X.XX. • Windows 8: Navigate to the Start screen and select EasyMP Network Projection Ver.X.XX. • Mac OS X: Double-click EasyMP Network Projection from the Applications folder. 23 Press the LAN button on the remote control.
Operation Guide - EasyMP Network Projection
Page 26
If the input source does not automatically switch to the LAN source, press the LAN button. Press the LAN button on the remote control. Parent topic: Connection Methods Related tasks Setting Up a Projector to Connect in Quick Connection Mode Searching for Network Projectors Automatically Searching for the projector ...
Operation Guide - EasyMP Network Projection
Page 29
Start EasyMP Network Projection. • Windows XP, Windows Vista, and Windows 7: Click Start, select Programs (or All Programs), EPSON Projector, EasyMP Network Projection, and then click EasyMP Network Projection Ver.X.XX. • Windows 8: Navigate to the network. 1. Press the LAN button on the remote control. The LAN standby screen is projected. 2. Note: Make sure you connect a computer to the Start screen and select EasyMP Network Projection Ver.X.XX. • Mac OS X: Double-click EasyMP Network Projection from the Applications folder. 29
Operation Guide - EasyMP Network Projection
Page 32
.... • Searching for Network Projectors Using a Profile You can save network projector information as a profile, and then specify the profile to search for projectors at remote locations on the network, and then project images by using Advanced Connection Mode, you can search for the same projector instead of the other search...
Users Guide
Page 3
Contents PowerLite® Pro G6050W/G6150/G6450WU/G6550WU/ G6750WU/G6800/G6900WU User's Guide ....... 9 Introduction to Your Projector ...10 Projector Features...10 Product Box Contents...11 Additional Components ...... for Additional Information 16 Projector Part Locations ...16 Projector Parts - Rear ...18 Projector Parts - Control Panel ...21 Projector Parts - Base...20 Projector Parts - Remote Control 23 Setting Up the Projector ...26 Projector Placement...26 Projector Setup and Installation Options 26 Projection Distance...29 Projector Connections...31 Connecting to Computer...
Users Guide
Page 4
... Unit ...43 Removing the Lens Unit ...45 Attaching and Removing the Cable Cover 47 Attaching and Removing the Cable Clips 48 Installing Batteries in the Remote Control 49 Using the Projector on a Network ...52 Wired Network Projection...52 Connecting to a Wired Network ...53 Selecting Wired Network Settings 53 Wireless Network Projection...