
Technical Brief (Impact Printers)
Page 1
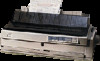
...assembly Functionality-Printing technology LL Why buy an impact printer? These printers have paper loaded and waiting. Contents This technical brief provides detailed information on the following topics, related to all EPSON impact printers: Functionality M Printing technology M Control code/...EPSON's impact printer tells you if it has a narrow or wide carriage: LLL L Nine-pin printers all begin with FX, LX, or DFX Twenty-four pin printers all begin with tireless printheads and superior quality ribbons. These printers have 3 numbers in their names Narrow carriage printers...
...assembly Functionality-Printing technology LL Why buy an impact printer? These printers have paper loaded and waiting. Contents This technical brief provides detailed information on the following topics, related to all EPSON impact printers: Functionality M Printing technology M Control code/...EPSON's impact printer tells you if it has a narrow or wide carriage: LLL L Nine-pin printers all begin with FX, LX, or DFX Twenty-four pin printers all begin with tireless printheads and superior quality ribbons. These printers have 3 numbers in their names Narrow carriage printers...

User Manual
Page 68
... best results with continuous multipart forms, you set the loading position as single sheets or continuous paper. For details, see the Appendix.) Use multipart forms only under normal operating conditions. Multipart forms Your printer can print on the printable area, see "Using Single Sheets" or "Loading Continuous Paper," earlier in this chapter...
... best results with continuous multipart forms, you set the loading position as single sheets or continuous paper. For details, see the Appendix.) Use multipart forms only under normal operating conditions. Multipart forms Your printer can print on the printable area, see "Using Single Sheets" or "Loading Continuous Paper," earlier in this chapter...

User Manual
Page 69
...the pull tractor position. Labels When selecting labels for printing, always choose the type mounted on a continuous backing sheet with sprocket holes for details. Labels can easily peel off the labels at a point before the paper slot. You load them only under normal operating conditions. Since ...labels are especially sensitive to temperature and humidity, use the LF/FF button to advance the remaining labels out of the printer. 2-28 Paper Handling Then use them the same way that you load continuous paper, except you resume printing. Load labels from the...
...the pull tractor position. Labels When selecting labels for printing, always choose the type mounted on a continuous backing sheet with sprocket holes for details. Labels can easily peel off the labels at a point before the paper slot. You load them only under normal operating conditions. Since ...labels are especially sensitive to temperature and humidity, use the LF/FF button to advance the remaining labels out of the printer. 2-28 Paper Handling Then use them the same way that you load continuous paper, except you resume printing. Load labels from the...

User Manual
Page 70
... feed an envelope by pushing the wide edge into the printer until it meets resistance. Make sure the printing stays entirely within the printable area of an envelope can damage the print head. See the Appendix for details. Use postcards only under normal operating conditions. Postcards You .... Caution: Use envelopes only under normal operating conditions. Set the Card mode using the Tear Off/Bin button. See the Appendix for details. Paper Handling 2-29 See the Tear Off/Bin light and button descriptions in Chapter 4 for more information. Note: When the length of...
... feed an envelope by pushing the wide edge into the printer until it meets resistance. Make sure the printing stays entirely within the printable area of an envelope can damage the print head. See the Appendix for details. Use postcards only under normal operating conditions. Postcards You .... Caution: Use envelopes only under normal operating conditions. Set the Card mode using the Tear Off/Bin button. See the Appendix for details. Paper Handling 2-29 See the Tear Off/Bin light and button descriptions in Chapter 4 for more information. Note: When the length of...

User Manual
Page 74
... selects the cut-sheet feed bin number. Load/Eject Press this button to temporarily stop printing and to resume printing. Hold the button down for details. When cut -sheet feeder or to feed continuous paper from the cut sheets are used, pressing it again disables this button moves a page to ... the micro adjust function. Holding it again moves the next page to the top-of paper from the standby position to turn the printer on postcards. 3-4 using the Printer See "Micro Adjust" later in this button to the loading position. Use the Card mode (Bin 1 selected) to print on or off...
... selects the cut-sheet feed bin number. Load/Eject Press this button to temporarily stop printing and to resume printing. Hold the button down for details. When cut -sheet feeder or to feed continuous paper from the cut sheets are used, pressing it again disables this button moves a page to ... the micro adjust function. Holding it again moves the next page to the top-of paper from the standby position to turn the printer on postcards. 3-4 using the Printer See "Micro Adjust" later in this button to the loading position. Use the Card mode (Bin 1 selected) to print on or off...

User Manual
Page 76
See Chapter 1 for details. Starts the Bid adjustment. To activate the functions listed below, turn on the printer while pressing one of buttons, as hexadecimal numbers and corresponding characters. All the input data are printed as follows: Load/Eject LF/FF...FF Pause Performs a near letter quality self test. See "Bid Adjustment" in Chapter 6. See "Problems and Solutions" in this chapter. See Chapter 1 for details. Prints a data dump. Performs a draft self test. Other control panel features The control panel also gives you to access to several other functions. See "...
See Chapter 1 for details. Starts the Bid adjustment. To activate the functions listed below, turn on the printer while pressing one of buttons, as hexadecimal numbers and corresponding characters. All the input data are printed as follows: Load/Eject LF/FF...FF Pause Performs a near letter quality self test. See "Bid Adjustment" in Chapter 6. See "Problems and Solutions" in this chapter. See Chapter 1 for details. Prints a data dump. Performs a draft self test. Other control panel features The control panel also gives you to access to several other functions. See "...
User Manual
Page 94
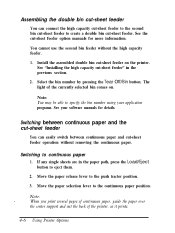
... paper. Switching between continuous paper and cut-sheet feeder operation without the high capacity feeder. 1. See the cut-sheet feeder option manuals for details. If any single sheets are in the previous section. 2. Assembling the double bin cut-sheet feeder You can easily switch between continuous paper ...print several pages of continuous paper, guide the paper over the center support and out the back of the currently selected bin comes on the printer. Note: You may be able to continuous paper 1. See "Installing the high capacity cut-sheet feeder" in the paper path, press ...
... paper. Switching between continuous paper and cut-sheet feeder operation without the high capacity feeder. 1. See the cut-sheet feeder option manuals for details. If any single sheets are in the previous section. 2. Assembling the double bin cut-sheet feeder You can easily switch between continuous paper ...print several pages of continuous paper, guide the paper over the center support and out the back of the currently selected bin comes on the printer. Note: You may be able to continuous paper 1. See "Installing the high capacity cut-sheet feeder" in the paper path, press ...

User Manual
Page 97
... cause it prints. See "Changing the Default Settings" in the paper. 9. To use roll paper, set the default setting of the printer, as it to lose the top-of the printer except to the push tractor position. 10. Raise the paper path guide and rest it out the back of roll paper... to remove any slack in Chapter 3 for details. Move the paper release lever back to clear paper jams when the printer is off the printer and make sure the paper release lever is not available in all countries. 1. Turn off . Before you...
... cause it prints. See "Changing the Default Settings" in the paper. 9. To use roll paper, set the default setting of the printer, as it to lose the top-of the printer except to the push tractor position. 10. Raise the paper path guide and rest it out the back of roll paper... to remove any slack in Chapter 3 for details. Move the paper release lever back to clear paper jams when the printer is off the printer and make sure the paper release lever is not available in all countries. 1. Turn off . Before you...