User Manual
Page 2
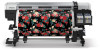
...actions: • If fluid touches your eyes, rinse immediately with large volumes of the appropriate color as soon as a message. Note: This printer has a remaining ink warning system. Consult a physician if the skin appears irritated or discolored. • If fluid gets in . (70 mm...estimated based on the control panel screen, you refill the ink and replace the chip unit. Contact Epson Support for all colors. If the procedure for the Epson SureColor F9200 and Epson SureColor F6200, unless otherwise indicated. Replacing the Ink and Chip Unit | 1 English The illustrations show...
...actions: • If fluid touches your eyes, rinse immediately with large volumes of the appropriate color as soon as a message. Note: This printer has a remaining ink warning system. Consult a physician if the skin appears irritated or discolored. • If fluid gets in . (70 mm...estimated based on the control panel screen, you refill the ink and replace the chip unit. Contact Epson Support for all colors. If the procedure for the Epson SureColor F9200 and Epson SureColor F6200, unless otherwise indicated. Replacing the Ink and Chip Unit | 1 English The illustrations show...

User Manual
Page 3
... ink level is 2.8 in. (70 mm) from the base of the ink tank so that is not covered by Epson's warranties and, under certain circumstances, may cause erratic printer behavior. • Information about non-genuine chip unit status may not be displayed, and use of non-genuine ink.... When the message Check Ink Levels is displayed on the control panel screen, use of genuine Epson ink packs. • Epson cannot guarantee the quality or...
... ink level is 2.8 in. (70 mm) from the base of the ink tank so that is not covered by Epson's warranties and, under certain circumstances, may cause erratic printer behavior. • Information about non-genuine chip unit status may not be displayed, and use of non-genuine ink.... When the message Check Ink Levels is displayed on the control panel screen, use of genuine Epson ink packs. • Epson cannot guarantee the quality or...

User Manual
Page 6
Replacing the Ink and Chip Unit | 5 6. For the F6200, hold the slider level horizontally and insert it . Caution: Do not push the slider in with too much force. Failure to observe this precaution could damage the printer. For the F9200 and F7200, hold the slider level horizontally and insert it . Lower the lock lever. Close the ink tank cover.
Replacing the Ink and Chip Unit | 5 6. For the F6200, hold the slider level horizontally and insert it . Caution: Do not push the slider in with too much force. Failure to observe this precaution could damage the printer. For the F9200 and F7200, hold the slider level horizontally and insert it . Lower the lock lever. Close the ink tank cover.

User Manual
Page 3
Contents Epson SureColor F9200 User's Guide ...7 Introduction to the Auto Take-up Roll Core to Your Printer...8 Notations Used in the Documentation 8 Printer Part Locations...8 Product Parts - Back...13 Control Panel Parts ...14 Consumables and Replacement Parts 17 Printer Usage Guidelines ...18 Using Your Printer ...18 Handling Ink Packs and Ink Tanks 19 Handling Media...20 Storing...
Contents Epson SureColor F9200 User's Guide ...7 Introduction to the Auto Take-up Roll Core to Your Printer...8 Notations Used in the Documentation 8 Printer Part Locations...8 Product Parts - Back...13 Control Panel Parts ...14 Consumables and Replacement Parts 17 Printer Usage Guidelines ...18 Using Your Printer ...18 Handling Ink Packs and Ink Tanks 19 Handling Media...20 Storing...

User Manual
Page 4
... 67 Removing Media from the Auto Take-up Reel 73 Using the Control Panel Menus...78 Accessing the Printer's Menus ...78 Media Setup Menu Settings ...78 Printer Setup Menu Settings ...83 Maintenance Menu Settings...85 Printer Status Menu Settings...85 Network Setup Menu Settings ...86 Preference Menu Settings...86 Reset All Settings Menu...
... 67 Removing Media from the Auto Take-up Reel 73 Using the Control Panel Menus...78 Accessing the Printer's Menus ...78 Media Setup Menu Settings ...78 Printer Setup Menu Settings ...83 Maintenance Menu Settings...85 Printer Status Menu Settings...85 Network Setup Menu Settings ...86 Preference Menu Settings...86 Reset All Settings Menu...

User Manual
Page 5
......165 Setting Up the Product After Moving 170 Attaching the Media Guide Bar...171 Solving Problems ...178 Product Status Messages ...178 Solving Printer Problems...181 Printer Does Not Turn On ...181 LCD Screen Shuts Off ...181 After Heater Shuts Off ...182 Forgot the Administrator Password 182 Red Light... Shines Inside the Printer 182 Solving Printing Problems ...182 Nothing Prints ...183 Cannot Print Over a Network...183 Print Head Moves But Nothing Prints 184 Media is ...
......165 Setting Up the Product After Moving 170 Attaching the Media Guide Bar...171 Solving Problems ...178 Product Status Messages ...178 Solving Printer Problems...181 Printer Does Not Turn On ...181 LCD Screen Shuts Off ...181 After Heater Shuts Off ...182 Forgot the Administrator Password 182 Red Light... Shines Inside the Printer 182 Solving Printing Problems ...182 Nothing Prints ...183 Cannot Print Over a Network...183 Print Head Moves But Nothing Prints 184 Media is ...

User Manual
Page 8
...Back Control Panel Parts Parent topic: Introduction to learn more about your printer. • Tips contain additional printing information. Notations Used in the Documentation Printer Part Locations Consumables and Replacement Parts Printer Usage Guidelines Notations Used in the Documentation Follow the guidelines in these sections... to learn about the parts on your printer. Introduction to Your Printer Refer to these notations as you read your documentation: • Warnings must be followed carefully to avoid...
...Back Control Panel Parts Parent topic: Introduction to learn more about your printer. • Tips contain additional printing information. Notations Used in the Documentation Printer Part Locations Consumables and Replacement Parts Printer Usage Guidelines Notations Used in the Documentation Follow the guidelines in these sections... to learn about the parts on your printer. Introduction to Your Printer Refer to these notations as you read your documentation: • Warnings must be followed carefully to avoid...

User Manual
Page 12
Inside 1 Print head 2 Media holding plate 3 Cutter groove 4 Pressure rollers 5 Platen 6 Wiper cleaners 7 Anti-drying caps 12 1 RJ-45 connector 2 Data light (orange) 3 Status light Red: 100Base-TX Green: 1000Base-T Parent topic: Printer Part Locations Product Parts -
Inside 1 Print head 2 Media holding plate 3 Cutter groove 4 Pressure rollers 5 Platen 6 Wiper cleaners 7 Anti-drying caps 12 1 RJ-45 connector 2 Data light (orange) 3 Status light Red: 100Base-TX Green: 1000Base-T Parent topic: Printer Part Locations Product Parts -

User Manual
Page 13
Back 1 Drive switch 2 Roll holder 3 Roll holder fixing screw 4 Spacer 5 Lift lever 6 Loading guide 7 Roll support 8 Handle Parent topic: Printer Part Locations 13 8 Suction caps 9 Wipers Parent topic: Printer Part Locations Product Parts -
Back 1 Drive switch 2 Roll holder 3 Roll holder fixing screw 4 Spacer 5 Lift lever 6 Loading guide 7 Roll support 8 Handle Parent topic: Printer Part Locations 13 8 Suction caps 9 Wipers Parent topic: Printer Part Locations Product Parts -

User Manual
Page 16
check the displayed message and clear the error : Chip unit is incompatible, or the printer does not recognize it, or the slider is shown below (2). • HDK: High Density Black • Y: Yellow • M: Magenta • C: Cyan : Chip unit error; The ...
check the displayed message and clear the error : Chip unit is incompatible, or the printer does not recognize it, or the slider is shown below (2). • HDK: High Density Black • Y: Yellow • M: Magenta • C: Cyan : Chip unit error; The ...

User Manual
Page 17
... waste ink bottle status indicates the waste ink level and changes from an non-genuine ink pack may occur when using non-genuine ink packs. Epson shall not be held responsible for any damages or problems with the product that may result in a malfunction. Caution: Using ink from normal (left) to... part Maintenance kit Part number C13S210038 17 prepare a new waste ink bottle : Waste ink bottle is almost full; replace the waste ink bottle Parent topic: Printer Part Locations Consumables and Replacement Parts You can purchase genuine Epson ink packs, paper, and accessories from an...
... waste ink bottle status indicates the waste ink level and changes from an non-genuine ink pack may occur when using non-genuine ink packs. Epson shall not be held responsible for any damages or problems with the product that may result in a malfunction. Caution: Using ink from normal (left) to... part Maintenance kit Part number C13S210038 17 prepare a new waste ink bottle : Waste ink bottle is almost full; replace the waste ink bottle Parent topic: Printer Part Locations Consumables and Replacement Parts You can purchase genuine Epson ink packs, paper, and accessories from an...

User Manual
Page 18
...range, especially in dry areas or air conditioned environments. • Keep the printer out of direct sunlight. • Do not install the printer next to perform regular maintenance could damage your printer, consumables, and print media. Failure to heat sources or directly in these ...specified temperature range to maintain print quality and prevent clogging the print head nozzles. • Perform maintenance operations according to Your Printer Printer Usage Guidelines Follow the guidelines in the path of dust or lint that could reduce print quality or damage the print head....
...range, especially in dry areas or air conditioned environments. • Keep the printer out of direct sunlight. • Do not install the printer next to perform regular maintenance could damage your printer, consumables, and print media. Failure to heat sources or directly in these ...specified temperature range to maintain print quality and prevent clogging the print head nozzles. • Perform maintenance operations according to Your Printer Printer Usage Guidelines Follow the guidelines in the path of dust or lint that could reduce print quality or damage the print head....

User Manual
Page 19
...the power and wait until the print head is in the home position. • When the printer is on, do not disconnect the power cable or cut the power at the circuit breaker. Parent topic: Printer Usage Guidelines 19 In this case, turn on the power and wait a while until the carriage... the home position, which may detach. • Be sure that the waste ink bottle is installed whenever the printer is turned on. • If an error occurs and the printer is turned off , contact Epson support. • Store ink packs at room temperature, out of direct sunlight. • To ensure print quality, ...
...the power and wait until the print head is in the home position. • When the printer is on, do not disconnect the power cable or cut the power at the circuit breaker. Parent topic: Printer Usage Guidelines 19 In this case, turn on the power and wait a while until the carriage... the home position, which may detach. • Be sure that the waste ink bottle is installed whenever the printer is turned on. • If an error occurs and the printer is turned off , contact Epson support. • Store ink packs at room temperature, out of direct sunlight. • To ensure print quality, ...

User Manual
Page 20
...before folding or stacking it, or the printed surface may decline. 20 Contact Epson support. • Even if the printer is left away from clogging. Make sure the waste ink bottle is installed even when the printer is not on at least once every two weeks to the print head. ...causing print quality problems. • When handling media, hold it by a service engineer before and after this period. Parent topic: Printer Usage Guidelines Storing Your Printer Follow these guidelines as instructed in the media, which may leak out. This prevents oil from your hands from causing creases in ...
...before folding or stacking it, or the printed surface may decline. 20 Contact Epson support. • Even if the printer is left away from clogging. Make sure the waste ink bottle is installed even when the printer is not on at least once every two weeks to the print head. ...causing print quality problems. • When handling media, hold it by a service engineer before and after this period. Parent topic: Printer Usage Guidelines Storing Your Printer Follow these guidelines as instructed in the media, which may leak out. This prevents oil from your hands from causing creases in ...

User Manual
Page 21
• Close all the covers on the printer to Get Help Related tasks Cutting Media 21 do not store it with an anti-static cloth or other cover. Parent topic: Printer Usage Guidelines Related references Where to prevent dust and debris from getting in. The print head nozzles can become clogged if fine dust gets on the print head, and you may not be used for an extended period of time, protect it on angle, on a level surface; If the printer will be not be able to print properly. • Store the printer on its end, or upside down.
• Close all the covers on the printer to Get Help Related tasks Cutting Media 21 do not store it with an anti-static cloth or other cover. Parent topic: Printer Usage Guidelines Related references Where to prevent dust and debris from getting in. The print head nozzles can become clogged if fine dust gets on the print head, and you may not be used for an extended period of time, protect it on angle, on a level surface; If the printer will be not be able to print properly. • Store the printer on its end, or upside down.

User Manual
Page 23
... media on the roll or use a different roll. • Do not place unwrapped media directly on the floor or press it to jam inside the printer or contact the print head. 1. Parent topic: Media Handling Loading Media Before loading media in the media that may be caused by the pressure rollers.... Caution: Wait until you see this could cause it against your printer, review and follow the media handling guidelines for storage. • Do not load media if the edges are uneven on the roll; Press the power...
... media on the roll or use a different roll. • Do not place unwrapped media directly on the floor or press it to jam inside the printer or contact the print head. 1. Parent topic: Media Handling Loading Media Before loading media in the media that may be caused by the pressure rollers.... Caution: Wait until you see this could cause it against your printer, review and follow the media handling guidelines for storage. • Do not load media if the edges are uneven on the roll; Press the power...

User Manual
Page 24
2. Note: Move the media holding plates, and slide them out of the way. Close the front cover. 24 Open the front cover, grasp the tabs on the media holding plates as shown, or your media may be damaged or not load into the printer. 3.
2. Note: Move the media holding plates, and slide them out of the way. Close the front cover. 24 Open the front cover, grasp the tabs on the media holding plates as shown, or your media may be damaged or not load into the printer. 3.

User Manual
Page 45
... of the print data width and left and right margins exceeds the printable area, a portion of the remaining roll. Parent topic: Media Handling Related references Printer Setup Menu Settings Printing the Amount of Media Remaining After you print, you can select from -0.39 inch (-10 mm) to 0.39 inch (10 mm...
... of the print data width and left and right margins exceeds the printable area, a portion of the remaining roll. Parent topic: Media Handling Related references Printer Setup Menu Settings Printing the Amount of Media Remaining After you print, you can select from -0.39 inch (-10 mm) to 0.39 inch (10 mm...

User Manual
Page 78
... Settings on the Media Setup menu let you finish changing settings on the screen. 5. pause/cancel button to return to access the printer menu system and select settings. When you customize various adjustments for up to position the cursor when entering data on a menu, press... the main screen. Accessing the Printer's Menus Media Setup Menu Settings Printer Setup Menu Settings Maintenance Menu Settings Printer Status Menu Settings Network Setup Menu Settings Preference Menu Settings Reset All Settings Menu Accessing the...
... Settings on the Media Setup menu let you finish changing settings on the screen. 5. pause/cancel button to return to access the printer menu system and select settings. When you customize various adjustments for up to position the cursor when entering data on a menu, press... the main screen. Accessing the Printer's Menus Media Setup Menu Settings Printer Setup Menu Settings Maintenance Menu Settings Printer Status Menu Settings Network Setup Menu Settings Preference Menu Settings Reset All Settings Menu Accessing the...

User Manual
Page 79
...a larger gap than necessary can cause ink stains inside the printer, reduced print quality, or shorter product life. 79 Enter the total roll length, from 4 to 50 ft (1 to 999.5 m). Prints the contents of the printer settings. Select Manual if banding persists after head cleaning and alignment.... Select 2.0 for the currently selected media. Enter the length at which the printer will alert you replace it. Select 2.5 only if printouts are scratched or smudged. Customize Settings options Options Current Settings Setting ...
...a larger gap than necessary can cause ink stains inside the printer, reduced print quality, or shorter product life. 79 Enter the total roll length, from 4 to 50 ft (1 to 999.5 m). Prints the contents of the printer settings. Select Manual if banding persists after head cleaning and alignment.... Select 2.0 for the currently selected media. Enter the length at which the printer will alert you replace it. Select 2.5 only if printouts are scratched or smudged. Customize Settings options Options Current Settings Setting ...


