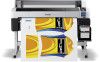
User Manual
Page 3
...Your Printer ...18 Media Handling...20 Loading Media...20 Viewing and Changing Media Settings 27 Saving Sets of Media Settings...28 Printable Area and Media Size Checking 29 Adjusting the Media Feed...33 Adjusting the Media Feed During Printing 34 Cutting Media ...35 Removing Media ...36 Using the Control Panel Menus...39 Accessing the Printer's Menus ...39 Paper Menu Settings...39 Maintenance Menu Settings...41 Setup Menu Settings ...43 Maintenance...48 Maintenance Precautions...48 Cleaning the Product...49 Stirring High Density Black Ink ...51 3 Contents Epson SureColor F6200 User's Guide...
...Your Printer ...18 Media Handling...20 Loading Media...20 Viewing and Changing Media Settings 27 Saving Sets of Media Settings...28 Printable Area and Media Size Checking 29 Adjusting the Media Feed...33 Adjusting the Media Feed During Printing 34 Cutting Media ...35 Removing Media ...36 Using the Control Panel Menus...39 Accessing the Printer's Menus ...39 Paper Menu Settings...39 Maintenance Menu Settings...41 Setup Menu Settings ...43 Maintenance...48 Maintenance Precautions...48 Cleaning the Product...49 Stirring High Density Black Ink ...51 3 Contents Epson SureColor F6200 User's Guide...
User Manual
Page 4
... Status Messages ...84 Solving Printer Problems...87 Printer Does Not Turn On ...87 Product Turns Off Automatically ...87 LCD Screen Shuts Off ...88 Forgot the Administrator Password 88 Red Light Shines Inside the Printer 88 Solving Printing Problems ...88 Nothing Prints ...88 Cannot Print Over a Network...89 Print Head Moves But Nothing Prints 89 Removing Jammed Media...90 Media Does Not Feed or Eject Correctly 91 Media Does Not Cut Cleanly ...91 Solving Print Quality Problems ...91 Nozzle Check...
... Status Messages ...84 Solving Printer Problems...87 Printer Does Not Turn On ...87 Product Turns Off Automatically ...87 LCD Screen Shuts Off ...88 Forgot the Administrator Password 88 Red Light Shines Inside the Printer 88 Solving Printing Problems ...88 Nothing Prints ...88 Cannot Print Over a Network...89 Print Head Moves But Nothing Prints 89 Removing Jammed Media...90 Media Does Not Feed or Eject Correctly 91 Media Does Not Cut Cleanly ...91 Solving Print Quality Problems ...91 Nozzle Check...
User Manual
Page 16
... Waste ink bottle Head maintenance kit Part number S902006 C12C811391 T724000 S210042 Parent topic: Introduction to Your Printer Printer Usage Guidelines Follow the guidelines in these guidelines as you use your printer: • Operate the printer only within the specified operating temperature and humidity range for your product and your media. • Check to make sure you use your product or clog the print head nozzles. • Use the...
... Waste ink bottle Head maintenance kit Part number S902006 C12C811391 T724000 S210042 Parent topic: Introduction to Your Printer Printer Usage Guidelines Follow the guidelines in these guidelines as you use your printer: • Operate the printer only within the specified operating temperature and humidity range for your product and your media. • Check to make sure you use your product or clog the print head nozzles. • Use the...
User Manual
Page 33
... feed using the same media type and print conditions you use for printing. Note: You can also adjust the feed during printing without printing a test pattern. 1. The Custom Paper Setting menu appears. 33 You may need to adjust the feed again if you load media of the media. Before adjusting the feed, make sure you have correctly loaded the media you plan to print on and selected all the options you plan to use for printing. On the product control panel...
... feed using the same media type and print conditions you use for printing. Note: You can also adjust the feed during printing without printing a test pattern. 1. The Custom Paper Setting menu appears. 33 You may need to adjust the feed again if you load media of the media. Before adjusting the feed, make sure you have correctly loaded the media you plan to print on and selected all the options you plan to use for printing. On the product control panel...
User Manual
Page 39
Accessing the Printer's Menus Paper Menu Settings Maintenance Menu Settings Setup Menu Settings Accessing the Printer's Menus You can also use the printer menus to adjust the settings that control how your product works. 1. To change the highlighted setting, press the OK button. 4. Press the up or down arrow button to scroll through the options. 5. To select an option, press the OK button. 6. You can use these buttons to position the cursor when entering data on the screen...
Accessing the Printer's Menus Paper Menu Settings Maintenance Menu Settings Setup Menu Settings Accessing the Printer's Menus You can also use the printer menus to adjust the settings that control how your product works. 1. To change the highlighted setting, press the OK button. 4. Press the up or down arrow button to scroll through the options. 5. To select an option, press the OK button. 6. You can use these buttons to position the cursor when entering data on the screen...
User Manual
Page 85
... turn off the Paper Size Check setting and try printing again. If this message appears even when the media is compatible with the service code shown on . Restart the printer. Status Icons 85 Then reinstall the firmware again. Paper Cut Error Remove uncut paper. If you continue to print, a call for support. Make sure the installed RIP software is the correct width, turn it on the LCD screen, contact Epson for service has occurred, the printer automatically stops printing. Paper Size Error Loaded paper...
... turn off the Paper Size Check setting and try printing again. If this message appears even when the media is compatible with the service code shown on . Restart the printer. Status Icons 85 Then reinstall the firmware again. Paper Cut Error Remove uncut paper. If you continue to print, a call for support. Make sure the installed RIP software is the correct width, turn it on the LCD screen, contact Epson for service has occurred, the printer automatically stops printing. Paper Size Error Loaded paper...
User Manual
Page 87
... references Setup Menu Settings Where to Get Help Related tasks Replacing the Waste Ink Bottle Replacing the Chip Unit and Refilling Ink Cutting Media Related topics Replacing the Ink and Chip Unit Solving Printer Problems Check these solutions: • Make sure the power cable is securely connected. • Make sure the power outlet works by connecting the power cable for another electronic device. Printer Does Not Turn On Product Turns Off Automatically LCD Screen Shuts Off Forgot the Administrator Password Red Light...
... references Setup Menu Settings Where to Get Help Related tasks Replacing the Waste Ink Bottle Replacing the Chip Unit and Refilling Ink Cutting Media Related topics Replacing the Ink and Chip Unit Solving Printer Problems Check these solutions: • Make sure the power cable is securely connected. • Make sure the power outlet works by connecting the power cable for another electronic device. Printer Does Not Turn On Product Turns Off Automatically LCD Screen Shuts Off Forgot the Administrator Password Red Light...
User Manual
Page 88
... the power button to exit sleep mode. You can adjust the delay time before the product enters sleep mode in Sleep Mode. Parent topic: Solving Printer Problems Red Light Shines Inside the Printer The red light always shines inside the printer. Parent topic: Solving Printer Problems Related references Setup Menu Settings Forgot the Administrator Password If you forgot the administrator password you have sent a print job and nothing prints, try connecting with your printer is normal. Nothing Prints Cannot Print Over a Network Print Head Moves...
... the power button to exit sleep mode. You can adjust the delay time before the product enters sleep mode in Sleep Mode. Parent topic: Solving Printer Problems Red Light Shines Inside the Printer The red light always shines inside the printer. Parent topic: Solving Printer Problems Related references Setup Menu Settings Forgot the Administrator Password If you forgot the administrator password you have sent a print job and nothing prints, try connecting with your printer is normal. Nothing Prints Cannot Print Over a Network Print Head Moves...
User Manual
Page 89
... message Motor Self Adjustment on the product control panel screen, the printer is adjusting its internal motor. Disconnect all USB hubs from another computer on the network. If the link LED is off the printer. 89 Parent topic: Solving Printing Problems Cannot Print Over a Network If you cannot print over a network, try these solutions: • Print a nozzle check pattern. Parent topic: Solving Printing Problems Related references Setup Menu Settings Print Head Moves But Nothing Prints...
... message Motor Self Adjustment on the product control panel screen, the printer is adjusting its internal motor. Disconnect all USB hubs from another computer on the network. If the link LED is off the printer. 89 Parent topic: Solving Printing Problems Cannot Print Over a Network If you cannot print over a network, try these solutions: • Print a nozzle check pattern. Parent topic: Solving Printing Problems Related references Setup Menu Settings Print Head Moves But Nothing Prints...
User Manual
Page 92
... and Replacement Parts 92 If you are comparing the print result with the image on at the strongest level, leave the product turned off overnight and check the nozzles again. Then clean the print head, if necessary. • Align the print head. • Use genuine Epson ink packs and make sure the ink packs have adhered to see if any printer covers during printing. Since monitors and printers produce colors differently, printed colors and screen colors...
... and Replacement Parts 92 If you are comparing the print result with the image on at the strongest level, leave the product turned off overnight and check the nozzles again. Then clean the print head, if necessary. • Align the print head. • Use genuine Epson ink packs and make sure the ink packs have adhered to see if any printer covers during printing. Since monitors and printers produce colors differently, printed colors and screen colors...
User Manual
Page 93
...: Solving Print Quality Problems Related references Paper Menu Settings Setup Menu Settings Paper Specifications Related tasks Loading Media Cleaning the Product Image is not Positioned Correctly on the Media If the printed image is not positioned correctly on your media, try these solutions: • Make sure you loaded the media correctly and selected the correct margin settings for Clogged Print Head Nozzles Cleaning the Print Head Aligning the Print Head Viewing and Changing Media Settings Printed Media is Stained or Marred If the printed media is stained...
...: Solving Print Quality Problems Related references Paper Menu Settings Setup Menu Settings Paper Specifications Related tasks Loading Media Cleaning the Product Image is not Positioned Correctly on the Media If the printed image is not positioned correctly on your media, try these solutions: • Make sure you loaded the media correctly and selected the correct margin settings for Clogged Print Head Nozzles Cleaning the Print Head Aligning the Print Head Viewing and Changing Media Settings Printed Media is Stained or Marred If the printed media is stained...
Warranty Statement
Page 4
... first end-user customer that the Epson SureColor F6200 44-inch wide printer covered by this limited warranty statement, if purchased and used in the United States, Canada, or Puerto Rico, will conform to Epson standards. If service is being setup. The technician will be new or remanufactured to the manufacturer's specifications and will provide additional instructions about the program at your location for...
... first end-user customer that the Epson SureColor F6200 44-inch wide printer covered by this limited warranty statement, if purchased and used in the United States, Canada, or Puerto Rico, will conform to Epson standards. If service is being setup. The technician will be new or remanufactured to the manufacturer's specifications and will provide additional instructions about the program at your location for...
User Manual
Page 8
... can use the printer on the TCP/IP network and install the printer driver. It includes how to use those protocols. Note: The EpsonNet Config utility configures the network interface to work only with your product, to quickly and easily configure the network interface to set up the network interface, install the configuration software, and modify network settings of the above-mentioned protocols on the operating system and the network configuration. Because the network interface supports multiple...
... can use the printer on the TCP/IP network and install the printer driver. It includes how to use those protocols. Note: The EpsonNet Config utility configures the network interface to work only with your product, to quickly and easily configure the network interface to set up the network interface, install the configuration software, and modify network settings of the above-mentioned protocols on the operating system and the network configuration. Because the network interface supports multiple...
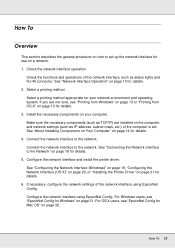
User Manual
Page 12
... Mac OS" on page 32. Configure the network interface using EpsonNet Config. How To 12 For OS X users, see "EpsonNet Config for details. 5. See "Network Interface Operation" on page 10 for Windows" on page 31. Connect the network interface to the network. Connect the network interface to the network. Configure the network interface and install the printer driver. For Windows users, see "Printing from Windows" on page 13 or "Printing from OS X" on page 13 for use on a network. 1. Select a printing method. See "Configuring the Network...
... Mac OS" on page 32. Configure the network interface using EpsonNet Config. How To 12 For OS X users, see "EpsonNet Config for details. 5. See "Network Interface Operation" on page 10 for Windows" on page 31. Connect the network interface to the network. Connect the network interface to the network. Configure the network interface and install the printer driver. For Windows users, see "Printing from Windows" on page 13 or "Printing from OS X" on page 13 for use on a network. 1. Select a printing method. See "Configuring the Network...
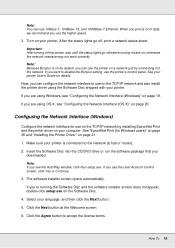
User Manual
Page 19
... Print and the printer driver on the Software Disc. 4. Note: If you see "Configuring the Network Interface (Windows)" on page 20. If you see "Configuring the Network Interface (OS X)" on page 19. After the status lights go off , print a network status sheet. See your language, and then click the Next button. 5. If you downloaded. If you are using OS X, see the AutoPlay window, click Run setup.exe. Make sure your printer. Note: You can use the printer's control panel...
... Print and the printer driver on the Software Disc. 4. Note: If you see "Configuring the Network Interface (Windows)" on page 20. If you see "Configuring the Network Interface (OS X)" on page 19. After the status lights go off , print a network status sheet. See your language, and then click the Next button. 5. If you downloaded. If you are using OS X, see the AutoPlay window, click Run setup.exe. Make sure your printer. Note: You can use the printer's control panel...
User Manual
Page 21
.... Click Add a printer to install the printer driver manually. Click the + button to install the printer driver on page 36 for your operating system. Now you can use the printer on the printing method you prefer. How To 21 2. Note: If your printer supports scanning, see the product's User's Guide to configure the settings. TCP/IP printing Note: If you need to add a new printer. 4. Open Print & Fax. 3. Windows 8.x/7/Vista/Server 2012/Server 2008 The printer driver installation procedure differs depending on the TCP/IP network. Open the Control Panel...
.... Click Add a printer to install the printer driver manually. Click the + button to install the printer driver on page 36 for your operating system. Now you can use the printer on the printing method you prefer. How To 21 2. Note: If your printer supports scanning, see the product's User's Guide to configure the settings. TCP/IP printing Note: If you need to add a new printer. 4. Open Print & Fax. 3. Windows 8.x/7/Vista/Server 2012/Server 2008 The printer driver installation procedure differs depending on the TCP/IP network. Open the Control Panel...
User Manual
Page 30
.... 5. Note: Make sure that is installed on your printer for instructions on -screen instructions to add a new printer. 4. Enter the host name or IP address of the printer. 7. Choose whether to add a new printer. 4. See the manual shipped with Bonjour. 5. Click Add. Open Print & Fax. 3. Open System Preferences. 2. Open Print & Fax. 3. Bonjour printing 1. Click the + button to print a test page, and then click the Next button. 8. Click the + button to complete the setup. Select the desired printer model that the printer driver is connected with...
.... 5. Note: Make sure that is installed on your printer for instructions on -screen instructions to add a new printer. 4. Enter the host name or IP address of the printer. 7. Choose whether to add a new printer. 4. See the manual shipped with Bonjour. 5. Click Add. Open Print & Fax. 3. Open System Preferences. 2. Open Print & Fax. 3. Bonjour printing 1. Click the + button to print a test page, and then click the Next button. 8. Click the + button to complete the setup. Select the desired printer model that the printer driver is connected with...
User Manual
Page 40
... page 42. Windows 8x/7/Vista/Server 2012/Server 2008: Open the Control Panel, and then View devices and printers (Windows 8.1/8/7/Server 2012), or Printers (Windows Vista/Server 2008). Under Printer Tasks, click Add a printer to the system and close the Add EpsonNet Print Port Wizard. Click Next. Network Software 40 IP Address (Auto): Configure the port automatically. Go back to start the Add Printer Wizard. Close the Add EpsonNet Print Port Wizard. IP Address (Manual): Use the printer's IP Address for a printer assigned with a static IP address 1. The new printer port...
... page 42. Windows 8x/7/Vista/Server 2012/Server 2008: Open the Control Panel, and then View devices and printers (Windows 8.1/8/7/Server 2012), or Printers (Windows Vista/Server 2008). Under Printer Tasks, click Add a printer to the system and close the Add EpsonNet Print Port Wizard. Click Next. Network Software 40 IP Address (Auto): Configure the port automatically. Go back to start the Add Printer Wizard. Close the Add EpsonNet Print Port Wizard. IP Address (Manual): Use the printer's IP Address for a printer assigned with a static IP address 1. The new printer port...
Product Specifications
Page 2
... 10/15 Specification Sheet | Page 2 of cartridges or inks. Total throughput depends upon front-end driver/RIP, file size, printing resolution, ink coverage, network speed, etc. | 2 The SureColor F-Series printers are based upon print engine speeds only. Copyright 2015 Epson America, Inc. SureColor F-Series SureColor® F6200 Print Printing Technology Advanced PrecisionCore® TFP® 8-channel, drop-on-demand, inkjet printhead with ink-repelling coating technology Ink Type UltraChrome DS with Epson ink packs only...
... 10/15 Specification Sheet | Page 2 of cartridges or inks. Total throughput depends upon front-end driver/RIP, file size, printing resolution, ink coverage, network speed, etc. | 2 The SureColor F-Series printers are based upon print engine speeds only. Copyright 2015 Epson America, Inc. SureColor F-Series SureColor® F6200 Print Printing Technology Advanced PrecisionCore® TFP® 8-channel, drop-on-demand, inkjet printhead with ink-repelling coating technology Ink Type UltraChrome DS with Epson ink packs only...
Warranty and notices
Page 7
..., covers, trays) or replenishing supplies and consumables (ink cartridges, knobs, and print heads), which, due to the purchaser at the rates in the purchaser's proprietary software or of a computer "virus". Upon calling an Authorized Epson Service Center, the purchaser will appear on page 8). an appropriate working area; a safety environment for recovery backup files in the country of purchase). As part of the installation process, Epson...
..., covers, trays) or replenishing supplies and consumables (ink cartridges, knobs, and print heads), which, due to the purchaser at the rates in the purchaser's proprietary software or of a computer "virus". Upon calling an Authorized Epson Service Center, the purchaser will appear on page 8). an appropriate working area; a safety environment for recovery backup files in the country of purchase). As part of the installation process, Epson...


