

Technical Brief (Impact Printers)
Page 1
...printers are renowned for their respective owners. These printers have paper loaded and waiting. only impact printers can handle multi-part forms and multiple paper paths that the printer are the property of printing. L LL L Nine-pin impact printers - These printers...This technical brief provides detailed information on the following topics, related to all begin with FX, LX, or DFX Twenty-four pin printers all EPSON impact printers: Functionality M Printing technology M Control code/emulation M Paper handling M SmartPark™ settings Versatility M Flexible ...
...printers are renowned for their respective owners. These printers have paper loaded and waiting. only impact printers can handle multi-part forms and multiple paper paths that the printer are the property of printing. L LL L Nine-pin impact printers - These printers...This technical brief provides detailed information on the following topics, related to all begin with FX, LX, or DFX Twenty-four pin printers all EPSON impact printers: Functionality M Printing technology M Control code/emulation M Paper handling M SmartPark™ settings Versatility M Flexible ...
Technical Brief (Impact Printers)
Page 2
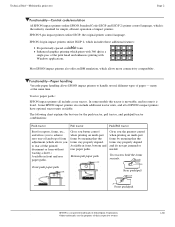
... the forms stay properly aligned. Technical Brief-Multimedia projectors Page 2 Functionality-Control code/emulation All EPSON impact printers utilize EPSON Standard Code (ESC/P and ESC/P 2) printer control language, which is fixed. Gives you better control when printing on multi-part forms by ensuring that the forms stay properly aligned and do not get jammed or...
... the forms stay properly aligned. Technical Brief-Multimedia projectors Page 2 Functionality-Control code/emulation All EPSON impact printers utilize EPSON Standard Code (ESC/P and ESC/P 2) printer control language, which is fixed. Gives you better control when printing on multi-part forms by ensuring that the forms stay properly aligned and do not get jammed or...

Technical Brief (Impact Printers)
Page 3
... using the rear push and pull tractor in combination. The DFX series EPSON impact printers have a Paper Thickness Lever that allows the printer to the thickness of their respective owners. L Paper thickness adjustment: Most EPSON impact printers have an Automatic Platten Gap Adjustment which helps eliminate paper jams...use the paper release lever to indicate the paper source you can handle single sheet paper and single sheet multi-part forms, many EPSON impact printers have both front and top paper paths: Front paper path The front paper path has an almost straight-through paper...
... using the rear push and pull tractor in combination. The DFX series EPSON impact printers have a Paper Thickness Lever that allows the printer to the thickness of their respective owners. L Paper thickness adjustment: Most EPSON impact printers have an Automatic Platten Gap Adjustment which helps eliminate paper jams...use the paper release lever to indicate the paper source you can handle single sheet paper and single sheet multi-part forms, many EPSON impact printers have both front and top paper paths: Front paper path The front paper path has an almost straight-through paper...
Product Information Guide
Page 1
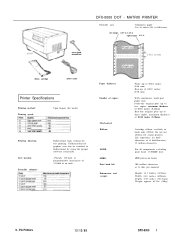
...Printer Specifications Printing method: Printing speed: 9-pin Impact dot matrix Printing direction: Line spacing: Printable columns: Bidirectional logic seeking for text printing. MATRIX PRINTER...With continuous, multi-part paper only: ...dot/character): 15 million characters For all components excluding print head: 13,500,000 lines 6000 power-on hours 200 million characters at 14 dots per character Height: 14.5 Inches (367mm) Width: 26.8 inches (680mm) Depth: 15.0 inches (382.5mm) Weight: approx. 65 lbs. (30kg) 9 - Pin Printers 12/12/88 DFX-5000 1 cross-head screwdriver DFX-5000 DOT...
...Printer Specifications Printing method: Printing speed: 9-pin Impact dot matrix Printing direction: Line spacing: Printable columns: Bidirectional logic seeking for text printing. MATRIX PRINTER...With continuous, multi-part paper only: ...dot/character): 15 million characters For all components excluding print head: 13,500,000 lines 6000 power-on hours 200 million characters at 14 dots per character Height: 14.5 Inches (367mm) Width: 26.8 inches (680mm) Depth: 15.0 inches (382.5mm) Weight: approx. 65 lbs. (30kg) 9 - Pin Printers 12/12/88 DFX-5000 1 cross-head screwdriver DFX-5000 DOT...
Product Support Bulletin(s)
Page 3
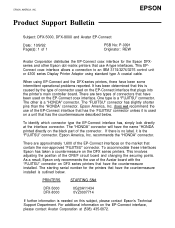
... or 4300 series Display Printer Adaptor using EP-Connect and the DFX-series printers, there have the countermeasure installed is outlined below . One type is a "HONDA" connector. The other Epson dot-matrix printers that use of the ...DFX series printers that this subject, please contact Epson's Technical Support Department. For additional information on the black part of 1 PSB No: P-0091 Originator: REW Avatar Corporation distributes the EP-Connect coax interface for the printers that has the countermeasure described below . Product Support Bulletin EPSON Subject: DFX-5000, DFX...
... or 4300 series Display Printer Adaptor using EP-Connect and the DFX-series printers, there have the countermeasure installed is outlined below . One type is a "HONDA" connector. The other Epson dot-matrix printers that use of the ...DFX series printers that this subject, please contact Epson's Technical Support Department. For additional information on the black part of 1 PSB No: P-0091 Originator: REW Avatar Corporation distributes the EP-Connect coax interface for the printers that has the countermeasure described below . Product Support Bulletin EPSON Subject: DFX-5000, DFX...
User Manual
Page 5
... with respect to the use or combination of any Epson printer with any means, mechanical, photocopying, recording or otherwise, without the prior written permission of Seiko Epson Corporation. Neither is a registered trademark of International Business...Epson Corporation. No part of this book, Seiko Epson Corporation assumes no responsibility for additional suggestions. All rights reserved. It has been type tested and found to radio and television reception. The user may find the following measures: -Reorient the receiving antenna -Relocate the printer with Epson printers...
... with respect to the use or combination of any Epson printer with any means, mechanical, photocopying, recording or otherwise, without the prior written permission of Seiko Epson Corporation. Neither is a registered trademark of International Business...Epson Corporation. No part of this book, Seiko Epson Corporation assumes no responsibility for additional suggestions. All rights reserved. It has been type tested and found to radio and television reception. The user may find the following measures: -Reorient the receiving antenna -Relocate the printer with Epson printers...
User Manual
Page 8
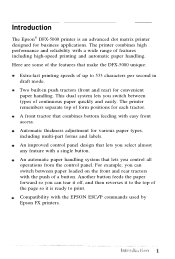
...control all operations from the control panel. Introduction The Epson® DFX-5000 printer is ready to print. Two built-in draft mode. For example, you can tear it off, and then reverses it is an advanced dot matrix printer designed for convenient paper handling. Compatibility with the ...range of form positions for various paper types, including multi-part forms and labels. This dual system lets you select almost any feature with a single button. Automatic thickness adjustment for each tractor. The printer remembers separate top of features including high-speed printing and ...
...control all operations from the control panel. Introduction The Epson® DFX-5000 printer is ready to print. Two built-in draft mode. For example, you can tear it off, and then reverses it is an advanced dot matrix printer designed for convenient paper handling. Compatibility with the ...range of form positions for various paper types, including multi-part forms and labels. This dual system lets you select almost any feature with a single button. Automatic thickness adjustment for each tractor. The printer remembers separate top of features including high-speed printing and ...
User Manual
Page 9
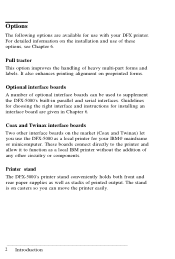
... as a local printer for your DFX printer. For detailed information on casters so you use of these options, see Chapter 6. Guidelines for choosing the right interface and instructions for use with your IBM@ mainframe or minicomputer. The stand is on the installation and use the DFX-5000 as stacks of heavy multi-part forms and labels...
... as a local printer for your DFX printer. For detailed information on casters so you use of these options, see Chapter 6. Guidelines for choosing the right interface and instructions for use with your IBM@ mainframe or minicomputer. The stand is on the installation and use the DFX-5000 as stacks of heavy multi-part forms and labels...
User Manual
Page 10
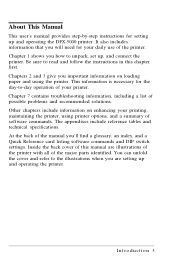
... sure to -day operation of your printer. Other chapters include information on loading paper and using printer options, and a summary of the major parts identified. Introduction 3 This information is necessary for the day-to read and follow the instructions in this manual are setting up and operating the DFX-5000 printer. It also includes information that...
... sure to -day operation of your printer. Other chapters include information on loading paper and using printer options, and a summary of the major parts identified. Introduction 3 This information is necessary for the day-to read and follow the instructions in this manual are setting up and operating the DFX-5000 printer. It also includes information that...

User Manual
Page 12
Chapter 1 Setting Up the Printer Unpacking the Printer 1-2 Checking the parts 1-2 Removing the protective materials 1-3 Choosing a Place for the Printer 1-4 A Look at Your Printer 1-6 The printer parts 1-7 Control panel indicator lights 1-8 Control panel buttons 1-9 Assembling the Printer 1-10 Installing the ribbon cartridge 1-10 Attaching the power cable 1-14 Testing the Printer 1-15 Plugging in the printer 1-15 Loading paper for the...
Chapter 1 Setting Up the Printer Unpacking the Printer 1-2 Checking the parts 1-2 Removing the protective materials 1-3 Choosing a Place for the Printer 1-4 A Look at Your Printer 1-6 The printer parts 1-7 Control panel indicator lights 1-8 Control panel buttons 1-9 Assembling the Printer 1-10 Installing the ribbon cartridge 1-10 Attaching the power cable 1-14 Testing the Printer 1-15 Plugging in the printer 1-15 Loading paper for the...

User Manual
Page 13
Two people should not lift or carry it by yourself. Checking the parts Check to transport the printer. 1-2 Setting Up the Printer cross-head screwdriver connector lock nuts ribbon cartridge power cable After you unpack the printer, store the packaging materials in case you ever need to see that you should carry it by the bottom. Unpacking the Printer Because the printer weighs approximately 65 pounds, you have the parts shown below and that nothing has been damaged during transportation.
Two people should not lift or carry it by yourself. Checking the parts Check to transport the printer. 1-2 Setting Up the Printer cross-head screwdriver connector lock nuts ribbon cartridge power cable After you unpack the printer, store the packaging materials in case you ever need to see that you should carry it by the bottom. Unpacking the Printer Because the printer weighs approximately 65 pounds, you have the parts shown below and that nothing has been damaged during transportation.
User Manual
Page 17
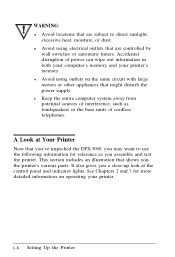
... from potential sources of interference, such as you assemble and test the printer. A Look at the control panel and indicator lights. It also gives you a close-up look at Your Printer Now that you've unpacked the DFX-5000, you the printer's various parts. See Chapters 2 and 3 for reference as loudspeakers or the base units of...
... from potential sources of interference, such as you assemble and test the printer. A Look at the control panel and indicator lights. It also gives you a close-up look at Your Printer Now that you've unpacked the DFX-5000, you the printer's various parts. See Chapters 2 and 3 for reference as loudspeakers or the base units of...

User Manual
Page 18
tear-off edge paper separator cover aper separator back flap serial interface interface cover w paper platen mask Setting Up the Printer 1-7 You can refer to this illustration when you a detailed view of the printer and the names of this manual. This illustration is also on the inside back cover of the important parts. The printer parts The following illustration gives you set up and operate the printer.
tear-off edge paper separator cover aper separator back flap serial interface interface cover w paper platen mask Setting Up the Printer 1-7 You can refer to this illustration when you a detailed view of the printer and the names of this manual. This illustration is also on the inside back cover of the important parts. The printer parts The following illustration gives you set up and operate the printer.

User Manual
Page 33
... a series of a typical self test printout in the printer's memory. While holding down the LINE FEED button, turn off the printer. 1-22 Setting Up the Printer Your printer's default setting is part of characters. A list of your printer's settings is at least 15 inches wide when running the printer's self test. 1. Running the self test The self...
... a series of a typical self test printout in the printer's memory. While holding down the LINE FEED button, turn off the printer. 1-22 Setting Up the Printer Your printer's default setting is part of characters. A list of your printer's settings is at least 15 inches wide when running the printer's self test. 1. Running the self test The self...

User Manual
Page 34
... mode, follow Steps 1 and 2 above using the FORM FEED button instead of the LINE FEED button. This procedure is part of a self test printout run the self test by changing your printer's DIP switch settings. Here is set for the normal draft mode rather than high-speed draft, you can run in...
... mode, follow Steps 1 and 2 above using the FORM FEED button instead of the LINE FEED button. This procedure is part of a self test printout run the self test by changing your printer's DIP switch settings. Here is set for the normal draft mode rather than high-speed draft, you can run in...

User Manual
Page 44
Chapter 2 Loading and Using Paper Using the Two-Tractor System 2-2 Positioning the paper supply 2-2 Loading Paper onto the Front Tractor 2-3 Loading Paper onto the Rear Tractor 2-9 Adjusting the Top of Form Position 2-17 Adjusting the Printing Position 2-19 Using Automatic Tear-Off 2-20 Switching Between Front and Rear Tractors 2-24 Changing the Paper 2-26 Printing on Special Paper 2-30 Using multi-part forms 2-30 Using labels 2-31
Chapter 2 Loading and Using Paper Using the Two-Tractor System 2-2 Positioning the paper supply 2-2 Loading Paper onto the Front Tractor 2-3 Loading Paper onto the Rear Tractor 2-9 Adjusting the Top of Form Position 2-17 Adjusting the Printing Position 2-19 Using Automatic Tear-Off 2-20 Switching Between Front and Rear Tractors 2-24 Changing the Paper 2-26 Printing on Special Paper 2-30 Using multi-part forms 2-30 Using labels 2-31
User Manual
Page 45
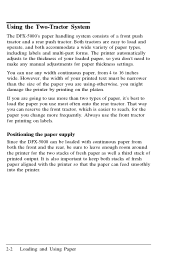
... use most often onto the rear tractor. Using the Two-Tractor System The DFX-5000's paper handling system consists of your printed text must be sure to load the paper you might damage the printer by printing on labels. Both tractors are easy to load and operate, and ...front push tractor and a rear push tractor. That way you can feed smoothly into the printer. 2-2 Loading and Using Paper However, the width of paper types, including labels and multi-part forms. The printer automatically adjusts to use the front tractor for paper thickness settings. It is also important to...
... use most often onto the rear tractor. Using the Two-Tractor System The DFX-5000's paper handling system consists of your printed text must be sure to load the paper you might damage the printer by printing on labels. Both tractors are easy to load and operate, and ...front push tractor and a rear push tractor. That way you can feed smoothly into the printer. 2-2 Loading and Using Paper However, the width of paper types, including labels and multi-part forms. The printer automatically adjusts to use the front tractor for paper thickness settings. It is also important to...

User Manual
Page 53
Open the printer's top cover by lifting its front edge up and away from you, as shown below , is on the top part of the cover and the other, shown below . 3. Open the back flap. 2-10 Loading and Using Paper One flap is on the back side. 2. The top cover has two flaps that can be opened independently.
Open the printer's top cover by lifting its front edge up and away from you, as shown below , is on the top part of the cover and the other, shown below . 3. Open the back flap. 2-10 Loading and Using Paper One flap is on the back side. 2. The top cover has two flaps that can be opened independently.

User Manual
Page 64
Press the TEAR OFF button to the printer's tear-off mode. The TEAR OFF light goes on and the printer feeds the paper's perforation to enter the tear-off edge. If the printer is on the top part of the printer's top cover). 1. Loading and Using Paper 2-21 Now open the paper separator cover (the flap on line, press the ON LINE button to take it off edge. 2. This exposes the printer's tear-off line.
Press the TEAR OFF button to the printer's tear-off mode. The TEAR OFF light goes on and the printer feeds the paper's perforation to enter the tear-off edge. If the printer is on the top part of the printer's top cover). 1. Loading and Using Paper 2-21 Now open the paper separator cover (the flap on line, press the ON LINE button to take it off edge. 2. This exposes the printer's tear-off line.
User Manual
Page 73
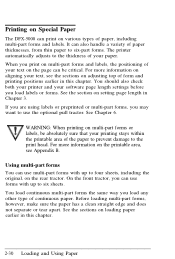
... chapter. 2-30 Loading and Using Paper Printing on Special Paper The DFX-5000 can use multi-part forms with up to four sheets, including the original, on the rear tractor. It can also handle a variety of paper thicknesses, from thin paper to six-part forms. The printer automatically adjusts to use the optional pull tractor.
... chapter. 2-30 Loading and Using Paper Printing on Special Paper The DFX-5000 can use multi-part forms with up to four sheets, including the original, on the rear tractor. It can also handle a variety of paper thicknesses, from thin paper to six-part forms. The printer automatically adjusts to use the optional pull tractor.


