User Manual
Page 2
... installation. No patent liability is a registered trademark of the information contained herein. Apex is encouraged to try to the use of International Business Machines Corporation. If this device and may cause interference to this equipment. The user may be determined by one or more than one interface connector, do not leave cables connected to the receiver - Government Printing...
... installation. No patent liability is a registered trademark of the information contained herein. Apex is encouraged to try to the use of International Business Machines Corporation. If this device and may cause interference to this equipment. The user may be determined by one or more than one interface connector, do not leave cables connected to the receiver - Government Printing...

User Manual
Page 3
...This Manual 2 Where to Get Help 2 Chapter 1 Setting Up Identifying Printer Parts 1-1 Selecting a Place for the Printer 1-2 Installing the Paper Feed Knob 1-3 Installing the Ribbon 1-3 Replacing the Ribbon 1-6 Plugging in the Printer 1-7 Using Continuous-feed Paper 1-7 Using Single-sheet Paper 1-15 Operating the Control Panel 1-19 Connecting the Apex80 to Your Computer 1-23 Chapter 2 Using the Apex80 with Application Programs Printer Selection Menus 2-1 Computer-Printer Communication 2-2 Word Processors 2-3 Spreadsheets 2 -4 Graphics Programs 2-6 Programming Languages...
...This Manual 2 Where to Get Help 2 Chapter 1 Setting Up Identifying Printer Parts 1-1 Selecting a Place for the Printer 1-2 Installing the Paper Feed Knob 1-3 Installing the Ribbon 1-3 Replacing the Ribbon 1-6 Plugging in the Printer 1-7 Using Continuous-feed Paper 1-7 Using Single-sheet Paper 1-15 Operating the Control Panel 1-19 Connecting the Apex80 to Your Computer 1-23 Chapter 2 Using the Apex80 with Application Programs Printer Selection Menus 2-1 Computer-Printer Communication 2-2 Word Processors 2-3 Spreadsheets 2 -4 Graphics Programs 2-6 Programming Languages...

User Manual
Page 5
... Error Warnings C-4 Data Dump Mode C-4 Coding Solutions C-6 Solutions for Specific Systems C-7 Maintaining Your Printer C-9 Appendix D Defaults and DIP Switches Default and Initialization Settings D-1 DIP Switch Settings D-2 International Character Sets D-3 Appendix E Choosing and Setting Up Optional Interfaces Compatible Interfaces E-1 Choosing an Interface E-1 Installing an Interface E-2 Serial Interface Settings E-8 Appendix F Technical Specifications Printing F- 1 Paper F-1 Mechanical F-2 Electrical F- 2 Environment F-3 Parallel Interface F-3 Data Transfer...
... Error Warnings C-4 Data Dump Mode C-4 Coding Solutions C-6 Solutions for Specific Systems C-7 Maintaining Your Printer C-9 Appendix D Defaults and DIP Switches Default and Initialization Settings D-1 DIP Switch Settings D-2 International Character Sets D-3 Appendix E Choosing and Setting Up Optional Interfaces Compatible Interfaces E-1 Choosing an Interface E-1 Installing an Interface E-2 Serial Interface Settings E-8 Appendix F Technical Specifications Printing F- 1 Paper F-1 Mechanical F-2 Electrical F- 2 Environment F-3 Parallel Interface F-3 Data Transfer...
User Manual
Page 13
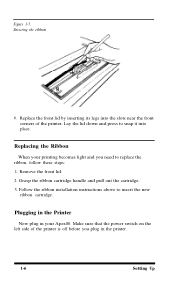
... down and press to snap it into the slots near the front corners of the printer is off before you need to insert the new ribbon cartridge. Grasp the ribbon cartridge handle and pull out the cartridge. 3. Remove the front lid. 2. Plugging in the Printer Now plug in your printing becomes light and you plug in the printer. 1-6 Setting Up Directing the ribbon 6.
... down and press to snap it into the slots near the front corners of the printer is off before you need to insert the new ribbon cartridge. Grasp the ribbon cartridge handle and pull out the cartridge. 3. Remove the front lid. 2. Plugging in the Printer Now plug in your printing becomes light and you plug in the printer. 1-6 Setting Up Directing the ribbon 6.

User Manual
Page 14
... the paper guide is installed, remove it by fitting it into place. (See Figure 1-7.) Then see the instructions later in this chapter. Installing the tractor unit You will need to use paper with your printer with the tractor unit installed, simply install the paper rest by tipping it out. 2. It may help to 10 inches, including the pin feed holes. Setting Up 1-7 Using Continuous-feed Paper The following section covers use of continuous-feed paper...
... the paper guide is installed, remove it by fitting it into place. (See Figure 1-7.) Then see the instructions later in this chapter. Installing the tractor unit You will need to use paper with your printer with the tractor unit installed, simply install the paper rest by tipping it out. 2. It may help to 10 inches, including the pin feed holes. Setting Up 1-7 Using Continuous-feed Paper The following section covers use of continuous-feed paper...

User Manual
Page 19
... below. Feed the paper into place. 1-12 Setting Up Push and maneuver the paper through the slot until the top is installed in place. Pull the paper up until it comes up between the ribbon guide and the platen. 8. Figure 1-12. Installing the paper guide Install the paper guide, which is used here as a paper separator, as described here, and sits upright for loading single-sheet paper. 1. Make sure...
... below. Feed the paper into place. 1-12 Setting Up Push and maneuver the paper through the slot until the top is installed in place. Pull the paper up until it comes up between the ribbon guide and the platen. 8. Figure 1-12. Installing the paper guide Install the paper guide, which is used here as a paper separator, as described here, and sits upright for loading single-sheet paper. 1. Make sure...

User Manual
Page 22
... remove the paper. 6. To remove the unit, follow these steps: 1. Using Single-sheet Paper The automatic loading feature handles individual sheets quickly and easily. This enables you finish printing a document, push the ON/OFF LINE button to put the printer offline and then push the FORM FEED button once to advance the paper one sheet. Once you have set the top of form, each time you to tear off the unit. 4. Open the pin feed covers and...
... remove the paper. 6. To remove the unit, follow these steps: 1. Using Single-sheet Paper The automatic loading feature handles individual sheets quickly and easily. This enables you finish printing a document, push the ON/OFF LINE button to put the printer offline and then push the FORM FEED button once to advance the paper one sheet. Once you have set the top of form, each time you to tear off the unit. 4. Open the pin feed covers and...

User Manual
Page 26
... LINE light goes off . Printing multi-part forms and copies If you wish to print multi-part forms or carbon copies, use no more than one page long using single- The factory setting for the paper thickness lever, located inside the front lid on . First, see what the indicators and buttons on the control panel do is on the left side, accommodates both single sheets and multiple forms. There is time to adjust...
... LINE light goes off . Printing multi-part forms and copies If you wish to print multi-part forms or carbon copies, use no more than one page long using single- The factory setting for the paper thickness lever, located inside the front lid on . First, see what the indicators and buttons on the control panel do is on the left side, accommodates both single sheets and multiple forms. There is time to adjust...

User Manual
Page 32
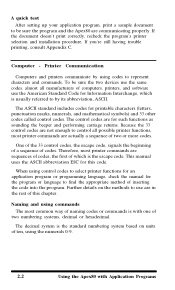
... this printer, choose one of printers to find out whether an update is available. Chapter 2 Using the Apex80 with Application Programs Now that you've set up and tested the printer, you need to start using so that presents a list of the following. If your software has a printer selection menu, simply choose Apex80. Menu selections If your application program has a printer selection menu, use the instructions below. Using the...
... this printer, choose one of printers to find out whether an update is available. Chapter 2 Using the Apex80 with Application Programs Now that you've set up and tested the printer, you need to start using so that presents a list of the following. If your software has a printer selection menu, simply choose Apex80. Menu selections If your application program has a printer selection menu, use the instructions below. Using the...
User Manual
Page 33
... the code into the program. When using codes to be sure the two devices use are sequences of codes, the first of codes. If you're still having trouble printing, consult Appendix C. Further details on units of two numbering systems, decimal or hexadecimal. Printer Communication Computers and printers communicate by its abbreviation, ASCII. If the document doesn't print correctly, recheck the program's printer selection and installation...
... the code into the program. When using codes to be sure the two devices use are sequences of codes, the first of codes. If you're still having trouble printing, consult Appendix C. Further details on units of two numbering systems, decimal or hexadecimal. Printer Communication Computers and printers communicate by its abbreviation, ASCII. If the document doesn't print correctly, recheck the program's printer selection and installation...

User Manual
Page 38
...printed output is included with the LPRINT statement: 110 LPRINT CHR$ (27); Also see , Microsoft BASIC uses &H to be printed enclosed in quotation marks, as above) or hexadecimal. Sending printer commands with BASIC You can send printer commands with Application Programs 2-7 Using the Apex80 with any programming language. This line sends ASCII codes...other forms: LPRINT CHR$ (27); Individual printer control codes can be sent by the text to denote hexadecimal numbers. Also, if the code corresponds to be printed." The examples in this manual are written in the CHR$ function to a...
...printed output is included with the LPRINT statement: 110 LPRINT CHR$ (27); Also see , Microsoft BASIC uses &H to be printed enclosed in quotation marks, as above) or hexadecimal. Sending printer commands with BASIC You can send printer commands with Application Programs 2-7 Using the Apex80 with any programming language. This line sends ASCII codes...other forms: LPRINT CHR$ (27); Individual printer control codes can be sent by the text to denote hexadecimal numbers. Also, if the code corresponds to be printed." The examples in this manual are written in the CHR$ function to a...

User Manual
Page 41
..., follow these codes cancel SelecType settings, you will have to use it whenever you wish. Press the LINE FEED button. 6. l If you left off. Press the FORM FEED button. 3. You should be aware of an entire file or document, not an individual line or word. Press the FORM FEED button. 5. Because these steps to select your typestyles. Therefore, if SelecType does not work with...
..., follow these codes cancel SelecType settings, you will have to use it whenever you wish. Press the LINE FEED button. 6. l If you left off. Press the FORM FEED button. 3. You should be aware of an entire file or document, not an individual line or word. Press the FORM FEED button. 5. Because these steps to select your typestyles. Therefore, if SelecType does not work with...

User Manual
Page 42
... the printer is turned off and back on a mode with SelecType, it stays in effect until you send a software command that overrides it. (In general, software commands override SelecType settings.) If, for example, you use SelecType with files that will override your Apex80 follows the SelecType instructions for only part of a document, print codes in the document may conflict with the SelecType modes. l If there are print codes...
... the printer is turned off and back on a mode with SelecType, it stays in effect until you send a software command that overrides it. (In general, software commands override SelecType settings.) If, for example, you use SelecType with files that will override your Apex80 follows the SelecType instructions for only part of a document, print codes in the document may conflict with the SelecType modes. l If there are print codes...

User Manual
Page 112
...-free number for several directions. Both the POWER and ON LINE lights should be on line. Be certain you are connected. If the printer still does not print, try the self test procedure (see Chapter 1). Problem Printer does not print Solution Make sure that the printer and computer are using the correct cable. The first section uses a columnar format to match solutions with problems. Other sections cover beeper error warnings, hexadecimal data dumping, coding...
...-free number for several directions. Both the POWER and ON LINE lights should be on line. Be certain you are connected. If the printer still does not print, try the self test procedure (see Chapter 1). Problem Printer does not print Solution Make sure that the printer and computer are using the correct cable. The first section uses a columnar format to match solutions with problems. Other sections cover beeper error warnings, hexadecimal data dumping, coding...

User Manual
Page 113
... they are set DIP switch 1-3. C-2 Problem Solving and Maintenance Printing is patchy, faint, uneven, or intermittent Solution Check that the ribbon is seated correctly If you have correctly set according to wear out if the printer is printed with an extra blank line between Some of the characters printed do not affect the position of DIP switch 2-4. See the instructions on replacing the print head at a time. Horizontal...
... they are set DIP switch 1-3. C-2 Problem Solving and Maintenance Printing is patchy, faint, uneven, or intermittent Solution Check that the ribbon is seated correctly If you have correctly set according to wear out if the printer is printed with an extra blank line between Some of the characters printed do not affect the position of DIP switch 2-4. See the instructions on replacing the print head at a time. Horizontal...

User Manual
Page 115
... paper. C-4 Problem Solving and Maintenance The beeper can use a longer page as a backing sheet. If the printer beeps and does not print again, take it gives a printout of problems. Called the data dump mode, it to a qualified service person. Data Dump Mode The Apex80 has a special feature that makes it easy for experienced printer users to 16 numbers), and the guide section (16 characters at the end of switch 1-4. Each line...
... paper. C-4 Problem Solving and Maintenance The beeper can use a longer page as a backing sheet. If the printer beeps and does not print again, take it gives a printout of problems. Called the data dump mode, it to a qualified service person. Data Dump Mode The Apex80 has a special feature that makes it easy for experienced printer users to 16 numbers), and the guide section (16 characters at the end of switch 1-4. Each line...

User Manual
Page 117
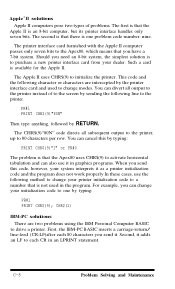
... ASCII equivalents. Some computer systems change one appendix. If any , are skipped or repeated, you 've determined that changes hex 09, which is sending. The following test program lets you check to see which codes are creating problems for your printing, either by trial and error or by using the data dumping capability of the Apex80 to make the Apex80 print the final line.
... ASCII equivalents. Some computer systems change one appendix. If any , are skipped or repeated, you 've determined that changes hex 09, which is sending. The following test program lets you check to see which codes are creating problems for your printing, either by trial and error or by using the data dumping capability of the Apex80 to make the Apex80 print the final line.
User Manual
Page 119
... does not work properly In these cases, use the following method to initialize the printer. The CHR$(9)"80N" code directs all output to the printer instead of problems. The first is that the Apex80 uses CHR$(9) to activate horizontal tabulation and can divert all subsequent output to the printer, up to the screen by typing: PR#l PRINT CHR$(9); For example, you need an 8-bit...
... does not work properly In these cases, use the following method to initialize the printer. The CHR$(9)"80N" code directs all output to the printer instead of problems. The first is that the Apex80 uses CHR$(9) to activate horizontal tabulation and can divert all subsequent output to the printer, up to the screen by typing: PR#l PRINT CHR$(9); For example, you need an 8-bit...
User Manual
Page 121
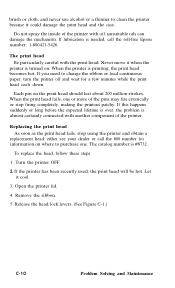
... the toll-free Epson number: 1-800421-5426. The catalog number is printing, the print head becomes hot. If the printer has been recently used, the print head will be hot. Open the printer lid. 4. brush or cloth, and never use alcohol or a thinner to clean the printer because it cool. 3. Never move it when the printer is turned on where to change the ribbon or load continuous paper, turn the printer off and...
... the toll-free Epson number: 1-800421-5426. The catalog number is printing, the print head becomes hot. If the printer has been recently used, the print head will be hot. Open the printer lid. 4. brush or cloth, and never use alcohol or a thinner to clean the printer because it cool. 3. Never move it when the printer is turned on where to change the ribbon or load continuous paper, turn the printer off and...

User Manual
Page 143
... Double-strike, 3-2, 4-3 Double-wide, 4-2-3 DRAFT/LINE FEED button, 1-21 Draft mode, 1-20-22, 4-1 E Edge guides, 1-12-13, 1-16-17 Elite, 3-2, 4-2 Emphasized, 3-2, 4-3 Epson Character Graphics, 4-4. See also Character tables Escape code (ESC), 2-2. Index Command descriptions are not indexed here. A American Standard Code for specific commands, see pages A-4-6 or the Quick Reference card. For page references for Information Interchange, 2-2 ASCII, 2-2 AUTO LOAD, 1-17-19, 1-21 Automatic paper loading, 1-17-19 Connecting printer to...
... Double-strike, 3-2, 4-3 Double-wide, 4-2-3 DRAFT/LINE FEED button, 1-21 Draft mode, 1-20-22, 4-1 E Edge guides, 1-12-13, 1-16-17 Elite, 3-2, 4-2 Emphasized, 3-2, 4-3 Epson Character Graphics, 4-4. See also Character tables Escape code (ESC), 2-2. Index Command descriptions are not indexed here. A American Standard Code for specific commands, see pages A-4-6 or the Quick Reference card. For page references for Information Interchange, 2-2 ASCII, 2-2 AUTO LOAD, 1-17-19, 1-21 Automatic paper loading, 1-17-19 Connecting printer to...


