
User Manual
Page 9
... be observed to avoid damage to -day operation of your printer. Warnings, Cautions, and Notes WARNINGS must be followed to read this chapter first. Introduction l Film Ribbon Cartridge ( # 7768) An optional film ribbon cartridge provides you expect, see Chapter 6 for setting up , ...testing, and connecting the printer. Finding Your Way Around This manual provides fully illustrated, step-by-step ...
... be observed to avoid damage to -day operation of your printer. Warnings, Cautions, and Notes WARNINGS must be followed to read this chapter first. Introduction l Film Ribbon Cartridge ( # 7768) An optional film ribbon cartridge provides you expect, see Chapter 6 for setting up , ...testing, and connecting the printer. Finding Your Way Around This manual provides fully illustrated, step-by-step ...

User Manual
Page 10
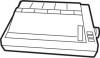
Name of the Parts paper release lever printer cover control panel Introduction edge guides paper guide compartment cover slot cover platen knob print head ribbon cartridge parallel interface AC inlet power switch Note: In some locations, the power cord is attached to the printer. Introduction 3
Name of the Parts paper release lever printer cover control panel Introduction edge guides paper guide compartment cover slot cover platen knob print head ribbon cartridge parallel interface AC inlet power switch Note: In some locations, the power cord is attached to the printer. Introduction 3

User Manual
Page 12
Chapter 1 Setting Up the Printer Unpacking the Printer 1-2 Choosing a Place for the Printer 1-4 Assembling the Printer 1-6 Installing the platen knob 1-6 Installing the ribbon cartridge 1-6 Testing the Printer 1-10 Plugging in the printer 1-10 Loading paper 1-11 Running the self test 1-17 Connecting the Printer to Your Computer 1-19 The parallel interface 1-19 Setting Up Your Application Software 1-21 Choosing from a menu 1-21 Setting Up the Printer 1-1
Chapter 1 Setting Up the Printer Unpacking the Printer 1-2 Choosing a Place for the Printer 1-4 Assembling the Printer 1-6 Installing the platen knob 1-6 Installing the ribbon cartridge 1-6 Testing the Printer 1-10 Plugging in the printer 1-10 Loading paper 1-11 Running the self test 1-17 Connecting the Printer to Your Computer 1-19 The parallel interface 1-19 Setting Up Your Application Software 1-21 Choosing from a menu 1-21 Setting Up the Printer 1-1

User Manual
Page 13
tractor cover printer paper guide paper rest printer cover platen knob power cord ribbon cartridge Selec Type sticker 1-2 Setting Up the Printer Unpacking the Printer When you unpack the printer, make sure that you have all the parts shown below and that none has been damaged.
tractor cover printer paper guide paper rest printer cover platen knob power cord ribbon cartridge Selec Type sticker 1-2 Setting Up the Printer Unpacking the Printer When you unpack the printer, make sure that you have all the parts shown below and that none has been damaged.

User Manual
Page 17
.... Insert the knob into an electrical outlet. 1-6 Setting Up the Printer Push firmly on the printer's side and rotate it until it slips onto the shaft. 2. Installing the ribbon cartridge Before installing the ribbon cartridge, make sure that the printer is turned off. Installing the platen knob You use the platen knob to manually feed...
.... Insert the knob into an electrical outlet. 1-6 Setting Up the Printer Push firmly on the printer's side and rotate it until it slips onto the shaft. 2. Installing the ribbon cartridge Before installing the ribbon cartridge, make sure that the printer is turned off. Installing the platen knob You use the platen knob to manually feed...

User Manual
Page 19
Turn the ribbon-tightening knob in the ribbon to make it firmly down into position, making sure the plastic hooks fit into the slots. Assembling the Printer 3. Press lightly on both ends of the arrow. Hold the ribbon cartridge by its handle and push it easier to be sure the hooks are properly seated. 1-8 Setting Up the Printer This removes any slack in the direction of the cartridge to install. 4.
Turn the ribbon-tightening knob in the ribbon to make it firmly down into position, making sure the plastic hooks fit into the slots. Assembling the Printer 3. Press lightly on both ends of the arrow. Hold the ribbon cartridge by its handle and push it easier to be sure the hooks are properly seated. 1-8 Setting Up the Printer This removes any slack in the direction of the cartridge to install. 4.

User Manual
Page 78
Note: l Use the optional film ribbon only when you need especially high quality printing. For everyday operations, use ribbons designed for nine-pin printers. Maintenance and Transportation 5-3 l Do not use the standard ribbon. The Epson # 7753 standard fabric or # 7768 film replacement ribbon cartridges are recommended. See Installing the ribbon cartridge in Chapter 1. Replacing the Ribbon When your printing becomes too faint, you need to replace the ribbon.
Note: l Use the optional film ribbon only when you need especially high quality printing. For everyday operations, use ribbons designed for nine-pin printers. Maintenance and Transportation 5-3 l Do not use the standard ribbon. The Epson # 7753 standard fabric or # 7768 film replacement ribbon cartridges are recommended. See Installing the ribbon cartridge in Chapter 1. Replacing the Ribbon When your printing becomes too faint, you need to replace the ribbon.

User Manual
Page 79
...and the tractor cover, replace them now according to drop the printer. 5-4 Maintenance and Transportation Remove the paper guide and paper rest. 3. Remove the ribbon cartridge and platen knob. 5. This cover could come off the printer. 2. If you to the instructions in Chapter 2. then ...disconnect the interface cable from the electrical outlet; CAUTION: Never hold the printer by the compartment cover even if you...
...and the tractor cover, replace them now according to drop the printer. 5-4 Maintenance and Transportation Remove the paper guide and paper rest. 3. Remove the ribbon cartridge and platen knob. 5. This cover could come off the printer. 2. If you to the instructions in Chapter 2. then ...disconnect the interface cable from the electrical outlet; CAUTION: Never hold the printer by the compartment cover even if you...

User Manual
Page 83
... print head is on ribbon installation in the printer. Make sure your dealer or a qualified service person. The ribbon cartridge may be installed properly. Wait a few minutes; Check both the printer and computer specifications. the printer resumes printing automatically when the print head cools. 6 4 Troubleshooting l The printer sounds like it stops printing abruptly. l The ON...
... print head is on ribbon installation in the printer. Make sure your dealer or a qualified service person. The ribbon cartridge may be installed properly. Wait a few minutes; Check both the printer and computer specifications. the printer resumes printing automatically when the print head cools. 6 4 Troubleshooting l The printer sounds like it stops printing abruptly. l The ON...

User Manual
Page 84
... that are set correctly for your software, but the characters are printed in a different font. l Printed characters have the printer serviced. See the section on ribbon installation in random positions. The print head is selected in SelecType. l The typestyle or... characters that the correct font is damaged. Troubleshooting 6-5 The ribbon cartridge may be worn out. Stop printing and contact your software cannot be installed properly. Replace the ribbon cartridge. Reinstall the ribbon cartridge. l The font is correctly installed for the paper you expect....
... that are set correctly for your software, but the characters are printed in a different font. l Printed characters have the printer serviced. See the section on ribbon installation in random positions. The print head is selected in SelecType. l The typestyle or... characters that the correct font is damaged. Troubleshooting 6-5 The ribbon cartridge may be worn out. Stop printing and contact your software cannot be installed properly. Replace the ribbon cartridge. Reinstall the ribbon cartridge. l The font is correctly installed for the paper you expect....

User Manual
Page 95
Printer Specifications Mechanical Paper-feed methods: Friction Pull tractor Single-bin cut-sheet feeder (optional) Ribbon: Black ribbon cartridge #7753: Life expectancy (in LQ, at 48 dots/character): 2 million characters Film ribbon cartridge # 7768 (optional): Life expectancy (in LQ): 0.2 million characters MCBF: For all components (excluding print head): 3 million lines MTBF: 4000 power on...
Printer Specifications Mechanical Paper-feed methods: Friction Pull tractor Single-bin cut-sheet feeder (optional) Ribbon: Black ribbon cartridge #7753: Life expectancy (in LQ, at 48 dots/character): 2 million characters Film ribbon cartridge # 7768 (optional): Life expectancy (in LQ): 0.2 million characters MCBF: For all components (excluding print head): 3 million lines MTBF: 4000 power on...

User Manual
Page 124
..., 7-6 Print speed, 7-2 Problems, see Troubleshooting Proportional spacing, 3-15, 7-2 Pull tractor installing, 2-6-7 removing, 2-12-13 R READY light, 3-2 Ribbon cartridge installing, 1-7-9 replacing, 5-3 specifications, 7-6 Tractor-unit slot cover, 2-6, 2-13 Transporting printer, 5-4 Troubleshooting, 6-2-10 Typestyles, see also Fonts U Unpacking printer, 1-2-3 V Voltage, 7-7 S SelecType, 3-4, 3-12-14 SelecType light, 3-4, 3-12 Self test, 1-17-18, 3-4 Single-sheet paper, 2-2-5 loading, 2-3-5 Skip-over...
..., 7-6 Print speed, 7-2 Problems, see Troubleshooting Proportional spacing, 3-15, 7-2 Pull tractor installing, 2-6-7 removing, 2-12-13 R READY light, 3-2 Ribbon cartridge installing, 1-7-9 replacing, 5-3 specifications, 7-6 Tractor-unit slot cover, 2-6, 2-13 Transporting printer, 5-4 Troubleshooting, 6-2-10 Typestyles, see also Fonts U Unpacking printer, 1-2-3 V Voltage, 7-7 S SelecType, 3-4, 3-12-14 SelecType light, 3-4, 3-12 Self test, 1-17-18, 3-4 Single-sheet paper, 2-2-5 loading, 2-3-5 Skip-over...

