Getting Started - ColorBurst RIP
Page 2
...; Windows: My Computer > C:\ColorBurst Epson > SpectralVision.pdf Note: The file names may be slightly different, depending on your Epson Stylus® Pro manual to the computer that will run the RIP server. If you are using the Epson Stylus Pro 7800 or 9800 printer, you need to attach the included USB key to set up the Stylus Pro printer on -screen instructions.
...; Windows: My Computer > C:\ColorBurst Epson > SpectralVision.pdf Note: The file names may be slightly different, depending on your Epson Stylus® Pro manual to the computer that will run the RIP server. If you are using the Epson Stylus Pro 7800 or 9800 printer, you need to attach the included USB key to set up the Stylus Pro printer on -screen instructions.

Getting Started - ColorBurst RIP
Page 3
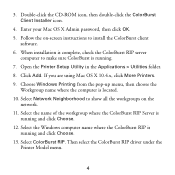
... the ColorBurst Client Installer icon. 4. Mac OS X Clients Printing to a Mac OS X RIP Server These instructions are on -screen instructions to install the ColorBurst client software. 6. Follow the on the same subnet as the ColorBurst RIP server computer. 2. Enter your computer is connected to the same network as the ColorBurst RIP...
... the ColorBurst Client Installer icon. 4. Mac OS X Clients Printing to a Mac OS X RIP Server These instructions are on -screen instructions to install the ColorBurst client software. 6. Follow the on the same subnet as the ColorBurst RIP server computer. 2. Enter your computer is connected to the same network as the ColorBurst RIP...
Getting Started - ColorBurst RIP
Page 5
... 4 3. Follow the on the network. 11. If you are using Mac OS X 10.4.x, click More Printers. 9. Enter your Mac OS X Admin password, then click OK. 5. Open the Printer Setup Utility in the Applications > Utilities folder. 8. Click Add. Select Network Neighborhood to show all the workgroups ... Server is running and click Choose. 12. When installation is complete, check the ColorBurst RIP server computer to install the ColorBurst client software. 6. Double-click the CD-ROM icon, then double-click the ColorBurst Client Installer icon. 4. Choose Windows Printing from the pop-up...
... 4 3. Follow the on the network. 11. If you are using Mac OS X 10.4.x, click More Printers. 9. Enter your Mac OS X Admin password, then click OK. 5. Open the Printer Setup Utility in the Applications > Utilities folder. 8. Click Add. Select Network Neighborhood to show all the workgroups ... Server is running and click Choose. 12. When installation is complete, check the ColorBurst RIP server computer to install the ColorBurst client software. 6. Double-click the CD-ROM icon, then double-click the ColorBurst Client Installer icon. 4. Choose Windows Printing from the pop-up...

Getting Started - ColorBurst RIP
Page 9
.... © 2006 Epson America, Inc. 11/06 8 Epson and Epson Stylus are for identification purposes only and may be trademarks of Seiko Epson Corporation. Printed on -screen instructions to install the software. 24. Browse to the Install from Disk window. 20. Then click Next. 23. 16. Epson disclaims any and all rights in the Printer name box. Click...
.... © 2006 Epson America, Inc. 11/06 8 Epson and Epson Stylus are for identification purposes only and may be trademarks of Seiko Epson Corporation. Printed on -screen instructions to install the software. 24. Browse to the Install from Disk window. 20. Then click Next. 23. 16. Epson disclaims any and all rights in the Printer name box. Click...
Printer Guide
Page 5
... 15 1 Setting Up the Printer Unpacking and Assembling the Epson Stylus Pro 7800 17 Unpacking and Assembling the Stand 18 Unpacking the Printer 20 Mounting the Printer on the Stand 22 Attaching the Paper Basket 25 Unpacking and Assembling the Epson Stylus Pro 9800 27 Unpacking and Assembling the ...Stand 28 Unpacking the Printer 29 Mounting the Printer on the Stand 31 Attaching the Basket 34 Connecting the Power Cord 37 Installing Ink 38 Connecting to Your System 40 Connecting to the Network 41 Installing the Software...
... 15 1 Setting Up the Printer Unpacking and Assembling the Epson Stylus Pro 7800 17 Unpacking and Assembling the Stand 18 Unpacking the Printer 20 Mounting the Printer on the Stand 22 Attaching the Paper Basket 25 Unpacking and Assembling the Epson Stylus Pro 9800 27 Unpacking and Assembling the ...Stand 28 Unpacking the Printer 29 Mounting the Printer on the Stand 31 Attaching the Basket 34 Connecting the Power Cord 37 Installing Ink 38 Connecting to Your System 40 Connecting to the Network 41 Installing the Software...
Printer Guide
Page 9
... Epson® printer drivers, and replacing ink cartridges. You can read the guide using the printer's menu system. Warnings, Cautions, Notes, and Tips Please follow these guidelines as SafariT,M Mozilla FireFox, or Netscape® Navigator® or Microsoft® Internet Explorer, versions 4.0 or later. Notes contain important information about the printer, drivers, and utility software...
... Epson® printer drivers, and replacing ink cartridges. You can read the guide using the printer's menu system. Warnings, Cautions, Notes, and Tips Please follow these guidelines as SafariT,M Mozilla FireFox, or Netscape® Navigator® or Microsoft® Internet Explorer, versions 4.0 or later. Notes contain important information about the printer, drivers, and utility software...
Printer Guide
Page 12
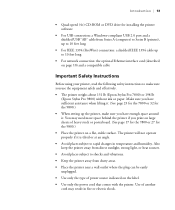
... (2GB for Mac OS X 10.4) • At least 60MB of free hard disk space to install the software, and at least 2GB of free hard disk space for processing files (8GB or more available hard disk space ...215;) or faster CD-ROM or DVD drive for installing the printer software • For USB connection: a compliant USB 2.0 port and a shielded USB "AB" cable from Series A (computer) to Series B (printer), up to 10 feet long • For IEEE 1394 ... or more than 10 feet long-may cause the printer to run the printer at least 2GB of free hard disk space to install the software, and at full speed.
... (2GB for Mac OS X 10.4) • At least 60MB of free hard disk space to install the software, and at least 2GB of free hard disk space for processing files (8GB or more available hard disk space ...215;) or faster CD-ROM or DVD drive for installing the printer software • For USB connection: a compliant USB 2.0 port and a shielded USB "AB" cable from Series A (computer) to Series B (printer), up to 10 feet long • For IEEE 1394 ... or more than 10 feet long-may cause the printer to run the printer at least 2GB of free hard disk space to install the software, and at full speed.
Printer Guide
Page 13
... cord may need more space behind the printer if you use the equipment safely and effectively. • The printer weighs about 131 lb (Epson Stylus Pro 7800) or 198 lb (Epson Stylus Pro 9800) without ink or paper. Introduction | 13 • Quad-speed (4×) CD-ROM or DVD drive for installing the printer software • For USB connection: a Windows-compliant USB...
... cord may need more space behind the printer if you use the equipment safely and effectively. • The printer weighs about 131 lb (Epson Stylus Pro 7800) or 198 lb (Epson Stylus Pro 9800) without ink or paper. Introduction | 13 • Quad-speed (4×) CD-ROM or DVD drive for installing the printer software • For USB connection: a Windows-compliant USB...

Printer Guide
Page 17
... cordless phones, TVs, or air conditioners. Unpacking and Assembling the Epson Stylus Pro 7800 Follow these steps to assemble your system • Connecting to the network • Installing the printer software • Updating the printer firmware Caution: Two people are required to unpack and set up ...up and use the printer. Note: When choosing a place for the printer, leave adequate room for using the Epson Stylus Pro 7800: 8 in. 6 in. 24 in. 12 in. If you have the Epson Stylus Pro 9800, see page 27 instead. 17 Chapter 1: Setting Up the Printer This chapter includes the...
... cordless phones, TVs, or air conditioners. Unpacking and Assembling the Epson Stylus Pro 7800 Follow these steps to assemble your system • Connecting to the network • Installing the printer software • Updating the printer firmware Caution: Two people are required to unpack and set up ...up and use the printer. Note: When choosing a place for the printer, leave adequate room for using the Epson Stylus Pro 7800: 8 in. 6 in. 24 in. 12 in. If you have the Epson Stylus Pro 9800, see page 27 instead. 17 Chapter 1: Setting Up the Printer This chapter includes the...

Printer Guide
Page 42
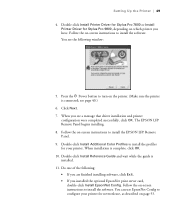
...your computer's Ethernet port. 8. Use the two screws included with the card to secure it in firmly to fully insert the connector into the printer's internal slot. 6. Follow the instructions in the next section to remove the card and replace the cover. 5. Push it . 7. Plug in the... printer's power cord. Slide the card along the slots inside the compartment. 42 | Setting Up the Printer Make sure you keep the screws in case you need to install your printer software, then configure the printer for your network as described on page 53. 1-42
...your computer's Ethernet port. 8. Use the two screws included with the card to secure it in firmly to fully insert the connector into the printer's internal slot. 6. Follow the instructions in the next section to remove the card and replace the cover. 5. Push it . 7. Plug in the... printer's power cord. Slide the card along the slots inside the compartment. 42 | Setting Up the Printer Make sure you keep the screws in case you need to install your printer software, then configure the printer for your network as described on page 53. 1-42
Printer Guide
Page 43
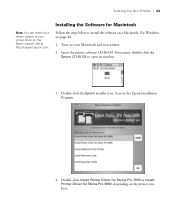
... Macintosh Follow the steps below to open its window. 3. Installing the Software for Stylus Pro 9800, depending on the printer you have. 1-43 Insert the printer software CD-ROM. Setting Up the Printer | 43 Note: You can check for a newer version of your printer. 2. For Windows, see the Epson Installation Program. 4. You see page 48. 1. If necessary, double-click the...
... Macintosh Follow the steps below to open its window. 3. Installing the Software for Stylus Pro 9800, depending on the printer you have. 1-43 Insert the printer software CD-ROM. Setting Up the Printer | 43 Note: You can check for a newer version of your printer. 2. For Windows, see the Epson Installation Program. 4. You see page 48. 1. If necessary, double-click the...

Printer Guide
Page 44
... your password and follow the on -screen instructions to configure your printer for your printer driver. 6. Double-click Install Additional Color Profiles to install the EPSON LFP Remote Panel. 7. 44 | Setting Up the Printer 5. Do one of the following: • If you are finished installing software, click Exit. • If you see the prompt, click Restart...
... your password and follow the on -screen instructions to configure your printer for your printer driver. 6. Double-click Install Additional Color Profiles to install the EPSON LFP Remote Panel. 7. 44 | Setting Up the Printer 5. Do one of the following: • If you are finished installing software, click Exit. • If you see the prompt, click Restart...

Printer Guide
Page 48
Go to page 50 to install the software for Windows Follow these steps to update your computer. 3. Installing the Software for Windows. 1. Then double-click your printer is turned off. 2. Make sure your CD-ROM icon. 1-48 Insert the printer software CD-ROM in your printer in the Printer List. 6. If it doesn't start, double-click My Computer or click Start > My Computer. 48 | Setting Up the Printer You see your computer. Turn on your printer firmware, if necessary. The installer starts automatically.
Go to page 50 to install the software for Windows Follow these steps to update your computer. 3. Installing the Software for Windows. 1. Then double-click your printer is turned off. 2. Make sure your CD-ROM icon. 1-48 Insert the printer software CD-ROM in your printer in the Printer List. 6. If it doesn't start, double-click My Computer or click Start > My Computer. 48 | Setting Up the Printer You see your computer. Turn on your printer firmware, if necessary. The installer starts automatically.
Printer Guide
Page 49
... following : • If you are finished installing software, click Exit. • If you see a message that driver installation and printer configuration were completed successfully, click OK. Double-click Install Additional Color Profiles to install the profiles for your printer for Stylus Pro 9800, depending on -screen instructions to install the EPSON LFP Remote Panel. 9. Follow the on the...
... following : • If you are finished installing software, click Exit. • If you see a message that driver installation and printer configuration were completed successfully, click OK. Double-click Install Additional Color Profiles to install the profiles for your printer for Stylus Pro 9800, depending on -screen instructions to install the EPSON LFP Remote Panel. 9. Follow the on the...
Printer Guide
Page 52
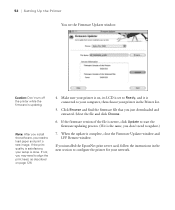
...network. 1-52 52 | Setting Up the Printer You see the Firmware Updater window. If the print quality is done. Select the file and click Choose. 6. If you don't need to load paper and print a test image. Note: After you install the software, you just downloaded and extracted. Caution: Don...'t turn off the printer while the firmware is complete, close the Firmware Updater window and LFP Remote window.
...network. 1-52 52 | Setting Up the Printer You see the Firmware Updater window. If the print quality is done. Select the file and click Choose. 6. If you don't need to load paper and print a test image. Note: After you install the software, you just downloaded and extracted. Caution: Don...'t turn off the printer while the firmware is complete, close the Firmware Updater window and LFP Remote window.
Printer Guide
Page 53
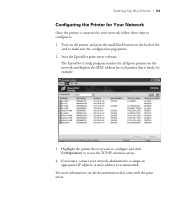
...software. If necessary, contact your network, follow these steps to assign an appropriate IP address. A static address is connected to your network administrator to configure it finds, for example: 3. For more information, see the documentation that it : 1. The EpsonNet Config program searches for all Epson printers... on the back of the card to access the TCP/IP selection screen. 4. Highlight the printer that you want to configure and click Configuration to make sure the ...
...software. If necessary, contact your network, follow these steps to assign an appropriate IP address. A static address is connected to your network administrator to configure it finds, for example: 3. For more information, see the documentation that it : 1. The EpsonNet Config program searches for all Epson printers... on the back of the card to access the TCP/IP selection screen. 4. Highlight the printer that you want to configure and click Configuration to make sure the ...

Printer Guide
Page 56
...instructions on selecting the paper source in your printer software. • Keep unused media in its original packaging and store it in your paper package, when printing on the printer's control panel. Check the Epson Pro Graphics web site (http://prographics.epson.com) or your printouts where they will be... exposed to 24 inches wide (7800) or 44 inches wide (9800). Handle media by the edges or use roll...
...instructions on selecting the paper source in your printer software. • Keep unused media in its original packaging and store it in your paper package, when printing on the printer's control panel. Check the Epson Pro Graphics web site (http://prographics.epson.com) or your printouts where they will be... exposed to 24 inches wide (7800) or 44 inches wide (9800). Handle media by the edges or use roll...
Printer Guide
Page 64
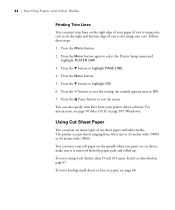
An asterisk appears next to exit the menu. Press the Pause button to ON. 7. The printer accepts sheets ranging from letter size to highlight PAGE LINE. 4. If you 're loading small sheets or fine art paper, see page 90 (Mac OS X) ... d button to 24 inches wide (7800) or 44 inches wide (9800). For instructions, see page 66. 2-64 If you 're using stock thicker than 19 mil (0.5 mm), load it is removed from your printer driver software. Press the button to select the Printer Setup menu and highlight PLATEN GAP. 3. make sure it as described...
An asterisk appears next to exit the menu. Press the Pause button to ON. 7. The printer accepts sheets ranging from letter size to highlight PAGE LINE. 4. If you 're loading small sheets or fine art paper, see page 90 (Mac OS X) ... d button to 24 inches wide (7800) or 44 inches wide (9800). For instructions, see page 66. 2-64 If you 're using stock thicker than 19 mil (0.5 mm), load it is removed from your printer driver software. Press the button to select the Printer Setup menu and highlight PLATEN GAP. 3. make sure it as described...
Printer Guide
Page 75
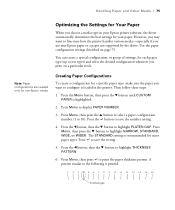
... the number setting. 4. Press Menu, then press the d button to display PAPER NUMBER. 3. The STANDARD setting is loaded in your Epson printer software, the driver automatically determines the best settings for your paper. You can create a special configuration, or group of settings, for each paper... various media-especially if you choose a media type in the printer. Use the paper configuration settings described on a particular stock. Press the button to configure is recommended for non-Epson media. Press the l button, then the d button to 10). Handling Paper and Other ...
... the number setting. 4. Press Menu, then press the d button to display PAPER NUMBER. 3. The STANDARD setting is loaded in your Epson printer software, the driver automatically determines the best settings for your paper. You can create a special configuration, or group of settings, for each paper... various media-especially if you choose a media type in the printer. Use the paper configuration settings described on a particular stock. Press the button to configure is recommended for non-Epson media. Press the l button, then the d button to 10). Handling Paper and Other ...
Printer Guide
Page 76
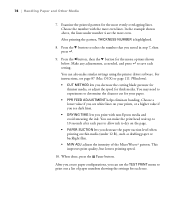
...; M/W ADJ adjusts the intensity of paper numbers showing the settings for the menu options shown below. You can make similar settings using the printer driver software. After you create paper configurations, you can use the TEST PRINT menu to save each setting. In the example shown above, the lines ...under 12 lb), such as needed, and press to print out a list of the MicroWeave® pattern. Choose the number with non-Epson media ...
...; M/W ADJ adjusts the intensity of paper numbers showing the settings for the menu options shown below. You can make similar settings using the printer driver software. After you create paper configurations, you can use the TEST PRINT menu to save each setting. In the example shown above, the lines ...under 12 lb), such as needed, and press to print out a list of the MicroWeave® pattern. Choose the number with non-Epson media ...


