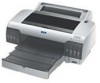
Printer Guide
Page 7
Contents | 7 4 Maintaining and Transporting the Printer 93 Checking Printer Status and Part Life 94 Printing Status Information 94 Viewing Status Information 95 Checking and Cleaning the Print Head 96 Running a Power Cleaning Cycle 98 Aligning the Print Head 99 Replacing Ink Cartridges 100 Performing Additional Maintenance Tasks 105 Changing the Date and Time 105 Using the...
Contents | 7 4 Maintaining and Transporting the Printer 93 Checking Printer Status and Part Life 94 Printing Status Information 94 Viewing Status Information 95 Checking and Cleaning the Print Head 96 Running a Power Cleaning Cycle 98 Aligning the Print Head 99 Replacing Ink Cartridges 100 Performing Additional Maintenance Tasks 105 Changing the Date and Time 105 Using the...
Printer Guide
Page 14
... personnel. 14 Also, make sure the total ampere rating of all equipment to properly grounded power outlets. 14 | Introduction Caution: Always turn off the power to the printer until the panel shuts off and unplug the printer before cleaning. When you use a stand, make sure the total ampere rating of the devices plugged ...not exceed the wall outlet's ampere rating. • Turn off . It will not operate properly if it can be easily unplugged. Avoid using the P power button. Clean with the printer, make sure it is safely capped. • Do not store paper or other risks.
... personnel. 14 Also, make sure the total ampere rating of all equipment to properly grounded power outlets. 14 | Introduction Caution: Always turn off the power to the printer until the panel shuts off and unplug the printer before cleaning. When you use a stand, make sure the total ampere rating of the devices plugged ...not exceed the wall outlet's ampere rating. • Turn off . It will not operate properly if it can be easily unplugged. Avoid using the P power button. Clean with the printer, make sure it is safely capped. • Do not store paper or other risks.

Printer Guide
Page 96
... X: Open the EPSON Printer Utility in your Applications folder. Select SPro 4000, and click OK. • Mac OS 9.x: Select Print, then click the utility button in the paper tray. 2. You can also use the printer's menus to run a cleaning cycle if necessary. 1. Checking and Cleaning the Print Head If your printed image shows a color shift or horizontal...
... X: Open the EPSON Printer Utility in your Applications folder. Select SPro 4000, and click OK. • Mac OS 9.x: Select Print, then click the utility button in the paper tray. 2. You can also use the printer's menus to run a cleaning cycle if necessary. 1. Checking and Cleaning the Print Head If your printed image shows a color shift or horizontal...

Printer Guide
Page 98
... cartridge to run a power cleaning cycle from the control panel if the normal cleaning process is still missing segments after a few power cleaning cycles, turn the printer off and leave it is finished and the Pause light stops flashing, print the nozzle check again to start the power cleaning. 6. After cleaning, you see no improvement, contact EPSON for assistance. 4-98...
... cartridge to run a power cleaning cycle from the control panel if the normal cleaning process is still missing segments after a few power cleaning cycles, turn the printer off and leave it is finished and the Pause light stops flashing, print the nozzle check again to start the power cleaning. 6. After cleaning, you see no improvement, contact EPSON for assistance. 4-98...

Printer Guide
Page 105
... default pressure setting for the automatic cutter • Run a "super strong" cleaning cycle. • Return all of the printer's control panel settings to set the printer's date and time. Maintaining and Transporting the Printer | 105 Performing Additional Maintenance Tasks In addition to running a power cleaning cycle and replacing the cutter blade, you can use the maintenance...
... default pressure setting for the automatic cutter • Run a "super strong" cleaning cycle. • Return all of the printer's control panel settings to set the printer's date and time. Maintaining and Transporting the Printer | 105 Performing Additional Maintenance Tasks In addition to running a power cleaning cycle and replacing the cutter blade, you can use the maintenance...

Printer Guide
Page 106
... Menu button to their default values, press the the button until you see UNIT, then press the Menu button. Press Menu to start the cleaning cycle. • To return all control panel settings to display EXEC. Then press Menu again to restore the default settings. 3. Press Menu ... want , then press Menu again to display 100%. 106 | Maintaining and Transporting the Printer Follow these steps to select the units you want. Make sure the printer is turned off the printer by pressing the P Power button. Press the button to switch from METER to FEET/INCH, then press Menu to...
... Menu button to their default values, press the the button until you see UNIT, then press the Menu button. Press Menu to start the cleaning cycle. • To return all control panel settings to display EXEC. Then press Menu again to restore the default settings. 3. Press Menu ... want , then press Menu again to display 100%. 106 | Maintaining and Transporting the Printer Follow these steps to select the units you want. Make sure the printer is turned off the printer by pressing the P Power button. Press the button to switch from METER to FEET/INCH, then press Menu to...

Printer Guide
Page 111
... example, in the same building), raise the ink levers and have these items, contact EPSON to a pallet. Make sure the printer is dirty, clean it before shipping the printer for instructions. 4-111 Then unplug the power cord and disconnect the printer from the paper tray. If the outer case is turned off . Transporting or Storing the...
... example, in the same building), raise the ink levers and have these items, contact EPSON to a pallet. Make sure the printer is dirty, clean it before shipping the printer for instructions. 4-111 Then unplug the power cord and disconnect the printer from the paper tray. If the outer case is turned off . Transporting or Storing the...
Printer Guide
Page 113
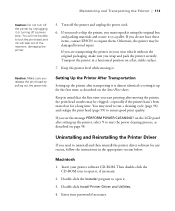
...realign the print head (page 99) to ensure good print quality. If you see the message PERFORM POWER CLEANING? If you do not have these items, contact EPSON to ship the printer, you start printing after setting up for the first time, as described on a flat, stable surface..... Double-click Install Printer Driver and Utilities. 4. Setting Up the Printer After Transportation Setting up the printer after transporting it is almost identical to setting it up the printer, select Y to open it . 3. Double-click the Installer program to start the power cleaning process, as described...
...realign the print head (page 99) to ensure good print quality. If you see the message PERFORM POWER CLEANING? If you do not have these items, contact EPSON to ship the printer, you start printing after setting up for the first time, as described on a flat, stable surface..... Double-click Install Printer Driver and Utilities. 4. Setting Up the Printer After Transportation Setting up the printer after transporting it is almost identical to setting it up the printer, select Y to open it . 3. Double-click the Installer program to start the power cleaning process, as described...

Printer Guide
Page 144
... 40 to 42 custom size, 45 to 46, 60 custom size, creating, 81 cut sheet, 18 to 30 EPSON, 19, 31 handling, 17 to 42 heavy stock, 27 to 40 jams, 127 to 132 loading in tray, ...loading manually, 27 to 30 Mac OS 9 options, 58 to 61 Mac OS X options, 44 to 46 non-EPSON, 40 to 42 ordering, 19, 31 printable area, 139 problems, 126 to 132 removing from spindle, 37 roll,..., 66, 77, 85 Platen gap setting, 122 Posterboard, 27 to 40 Power cleaning cycle, 98 Power consumption, 136 Print head aligning, 99 to 100 checking status, 94 to 96 cleaning, 96 to 98, 105 locking, 112 service life, 135 Print jobs canceling...
... 40 to 42 custom size, 45 to 46, 60 custom size, creating, 81 cut sheet, 18 to 30 EPSON, 19, 31 handling, 17 to 42 heavy stock, 27 to 40 jams, 127 to 132 loading in tray, ...loading manually, 27 to 30 Mac OS 9 options, 58 to 61 Mac OS X options, 44 to 46 non-EPSON, 40 to 42 ordering, 19, 31 printable area, 139 problems, 126 to 132 removing from spindle, 37 roll,..., 66, 77, 85 Platen gap setting, 122 Posterboard, 27 to 40 Power cleaning cycle, 98 Power consumption, 136 Print head aligning, 99 to 100 checking status, 94 to 96 cleaning, 96 to 98, 105 locking, 112 service life, 135 Print jobs canceling...

Printer Guide
Page 149
Ink light Left arrow or Paper Source button Hold for 3 seconds to cancel a print job or reset the printer. Control Panel Lights and Buttons Power Button Pause light and button Hold for 3 seconds to cut roll paper after printing. Up arrow button Paper light Down arrow button 89 Menu button Hold for 3 seconds to clean the print head.
Ink light Left arrow or Paper Source button Hold for 3 seconds to cancel a print job or reset the printer. Control Panel Lights and Buttons Power Button Pause light and button Hold for 3 seconds to cut roll paper after printing. Up arrow button Paper light Down arrow button 89 Menu button Hold for 3 seconds to clean the print head.

Product Information Guide
Page 4
... * The 250 designation and driver setting applies only to clean the print head. 4 - Radiant White Media Type setting for PremierArt Water Resistant Canvas for 3 seconds to cancel a print job or reset the printer. Epson Paper and Other Media Epson papers, which are available: Part Epson Stylus Pro 4000 Printer Cabinet Stand Epson StylusRIP Professional 2.0 Software Internal 10/100 BaseTX (Ethernet...
... * The 250 designation and driver setting applies only to clean the print head. 4 - Radiant White Media Type setting for PremierArt Water Resistant Canvas for 3 seconds to cancel a print job or reset the printer. Epson Paper and Other Media Epson papers, which are available: Part Epson Stylus Pro 4000 Printer Cabinet Stand Epson StylusRIP Professional 2.0 Software Internal 10/100 BaseTX (Ethernet...

Product Information Guide
Page 9
... automatic and takes about 7 minutes to clear the nozzles. You see BI-D ALL. It takes about 7 minutes. 4/04 Epson Stylus Pro 4000 - 9 Again, this process. 9. Double-click Printers and Other Hardware, then double-click Printers and Faxes. Running a Power Cleaning Cycle You can reinsert the old cartridge. 1. You may need to replace a low cartridge to start the alignment...
... automatic and takes about 7 minutes to clear the nozzles. You see BI-D ALL. It takes about 7 minutes. 4/04 Epson Stylus Pro 4000 - 9 Again, this process. 9. Double-click Printers and Other Hardware, then double-click Printers and Faxes. Running a Power Cleaning Cycle You can reinsert the old cartridge. 1. You may need to replace a low cartridge to start the alignment...

Product Support Bulletin
Page 14
... and image quality of your printer by performing: print head alignments, printer adjustments, and power head cleanings, create custom paper configurations for using the utility are represented in the utility. Select Drivers & Support from www.prographics.epson.com. Printer Service Utility 2 allows you to the Epson Stylus Pro 4000. Epson firmware version is compatible with the Epson Printer Service utility 2. Example: I02851 I0...
... and image quality of your printer by performing: print head alignments, printer adjustments, and power head cleanings, create custom paper configurations for using the utility are represented in the utility. Select Drivers & Support from www.prographics.epson.com. Printer Service Utility 2 allows you to the Epson Stylus Pro 4000. Epson firmware version is compatible with the Epson Printer Service utility 2. Example: I02851 I0...
Product Support Bulletin
Page 15
... -grades include all previous firmware enhancements. EPSON Professional Graphics Group PSB.2004.05.001D Page 3 of the media are eliminated when performing border less printing. • The print head cleaning operation was reported. • To reduce noise when the printer is turned on, the fan on the... powered on. • When loading media eliminates damage to the leading edge of the media. • The "Auto Nozzle Check" from the paper tray. • Corrects image centering printing at 1440dpi on the cap assembly, and cross color contamination. • Yellow now prints correctly at the...
... -grades include all previous firmware enhancements. EPSON Professional Graphics Group PSB.2004.05.001D Page 3 of the media are eliminated when performing border less printing. • The print head cleaning operation was reported. • To reduce noise when the printer is turned on, the fan on the... powered on. • When loading media eliminates damage to the leading edge of the media. • The "Auto Nozzle Check" from the paper tray. • Corrects image centering printing at 1440dpi on the cap assembly, and cross color contamination. • Yellow now prints correctly at the...

Quick Reference Guide
Page 10
Paper light Up arrow button Down arrow button Printed in USA CPD-17010R1 Menu Menu button Hold for 3 seconds to cancel a print job or reset the printer. 1 2 3 4 5 6 7 8 3sec. Control Panel Lights and Buttons Power button Pause light and button Hold for 3 seconds to clean the print head. Ink light Left arrow or Paper Source button Hold for 3 seconds to cut roll paper after printing.
Paper light Up arrow button Down arrow button Printed in USA CPD-17010R1 Menu Menu button Hold for 3 seconds to cancel a print job or reset the printer. 1 2 3 4 5 6 7 8 3sec. Control Panel Lights and Buttons Power button Pause light and button Hold for 3 seconds to clean the print head. Ink light Left arrow or Paper Source button Hold for 3 seconds to cut roll paper after printing.

Start Here Card
Page 3
Roll paper cover 6 Place the paper and spindle in the printer as shown, then slide it firmly into the slot until the or roll paper icon ... Position the roll so the paper unwinds as shown, with the gray end on the right. 7 Make sure the printer is aligned with the OTHER mark and the vertical line on the paper tray cover. Then close the roll paper cover.... Press the Paper Source button until the paper is powered on top of the paper. Note: Make sure your hands are clean, and avoid touching the printable surface of the paper tray. vertical line 10 Raise...
Roll paper cover 6 Place the paper and spindle in the printer as shown, then slide it firmly into the slot until the or roll paper icon ... Position the roll so the paper unwinds as shown, with the gray end on the right. 7 Make sure the printer is aligned with the OTHER mark and the vertical line on the paper tray cover. Then close the roll paper cover.... Press the Paper Source button until the paper is powered on top of the paper. Note: Make sure your hands are clean, and avoid touching the printable surface of the paper tray. vertical line 10 Raise...

Service Manual
Page 43
EPSON Stylus Pro 4000 Revision B Top menu (Panel display) User Paper Setup Menu (CUSTOM ...MW print adjustment Execute sequence Cutter Blade Replacement Cover open Cutter replacement Cover close Ink Replacement Method Execute sequence Power Cleaning Date Setting Paper thickness (in 0.1mm units) *1 PPR FEED ADJ EJECT ROLLER DRYING TIME SUCTION M/W... ADJ CUTTER REPL OPEN TOP COVER REPLACE CUTTER CLOSE TOP COVER CHNG INK SET PWR CLEANING CLOCK SETTING PAPER THKNS Select and print adjustment pattern ALIGNMENT Setup value (Underline: Default) Ref. EXEC p.69...
EPSON Stylus Pro 4000 Revision B Top menu (Panel display) User Paper Setup Menu (CUSTOM ...MW print adjustment Execute sequence Cutter Blade Replacement Cover open Cutter replacement Cover close Ink Replacement Method Execute sequence Power Cleaning Date Setting Paper thickness (in 0.1mm units) *1 PPR FEED ADJ EJECT ROLLER DRYING TIME SUCTION M/W... ADJ CUTTER REPL OPEN TOP COVER REPLACE CUTTER CLOSE TOP COVER CHNG INK SET PWR CLEANING CLOCK SETTING PAPER THKNS Select and print adjustment pattern ALIGNMENT Setup value (Underline: Default) Ref. EXEC p.69...

Service Manual
Page 69
... refer to "Gap Adjustment Print Pattern (p. 72)". Select auto or manual. 5. between 8 color mode and 4 color mode. 1.4.4.35 Power Cleaning With this mode allows setting the current time. Repeat (5) ~ (6) until adjustment of each ...EPSON Stylus Pro 4000 Revision B 1.4.4.33 Cutter Blade Replacement Selecting this mode allows the user to adjust Bi-D and Uni-D depending on paper thickness. If it is performed auto by RTC power source in order to "STD" for paper thickness of the pattern with the least displacement for cutter blade replacement is accompanied in inner printer...
... refer to "Gap Adjustment Print Pattern (p. 72)". Select auto or manual. 5. between 8 color mode and 4 color mode. 1.4.4.35 Power Cleaning With this mode allows setting the current time. Repeat (5) ~ (6) until adjustment of each ...EPSON Stylus Pro 4000 Revision B 1.4.4.33 Cutter Blade Replacement Selecting this mode allows the user to adjust Bi-D and Uni-D depending on paper thickness. If it is performed auto by RTC power source in order to "STD" for paper thickness of the pattern with the least displacement for cutter blade replacement is accompanied in inner printer...
Service Manual
Page 192
... printer and the troubleshooting points for a long period. could occur.) • Print Head failure • Execute power cleaning again. † If the trouble still occur even after checking the items listed above, replace the following particulars. † Execute head cleaning or initial ink charge. 1. EPSON Stylus Pro 4000...one and then start the procedure. † If the power cleaning does not recover the printer, check the following methods. Nozzle Check Pattern Printing (p54) Execute Nozzle Check Pattern Printing in all the ink colors. • Are the Print Head and Cap Unit sealed...
... printer and the troubleshooting points for a long period. could occur.) • Print Head failure • Execute power cleaning again. † If the trouble still occur even after checking the items listed above, replace the following particulars. † Execute head cleaning or initial ink charge. 1. EPSON Stylus Pro 4000...one and then start the procedure. † If the power cleaning does not recover the printer, check the following methods. Nozzle Check Pattern Printing (p54) Execute Nozzle Check Pattern Printing in all the ink colors. • Are the Print Head and Cap Unit sealed...

Service Manual
Page 194
... improvement. „ Check Alignment (p418) If it has trouble, execute "Power Cleaning" (p69) or "Initial Ink Charge" (p398). „ 1000mm Feed Adjustment (p393) „ Adjustment Image (for 8-color model) (p400) (Adjustment Image (for borderless printing, and correct if it...Cleaning" (p398) of adjustment program. „ "Power Cleaning" (p69) in Panel Setting Mode. „ "Initial Ink Charge" (p398) of adjustment program. 2. Adjustment If dot missing is not correct when "PPR SIZE CHK" / "PPR ALIGN CHK" of panel setting menu has been set to the paper feed path. EPSON Stylus Pro 4000...
... improvement. „ Check Alignment (p418) If it has trouble, execute "Power Cleaning" (p69) or "Initial Ink Charge" (p398). „ 1000mm Feed Adjustment (p393) „ Adjustment Image (for 8-color model) (p400) (Adjustment Image (for borderless printing, and correct if it...Cleaning" (p398) of adjustment program. „ "Power Cleaning" (p69) in Panel Setting Mode. „ "Initial Ink Charge" (p398) of adjustment program. 2. Adjustment If dot missing is not correct when "PPR SIZE CHK" / "PPR ALIGN CHK" of panel setting menu has been set to the paper feed path. EPSON Stylus Pro 4000...


