
Instruction Manual
Page 3
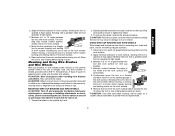
... Be sure switch is off if rubber ring is dangerous and must be caught in . Keep proper footing and balance at the rate for Grinders • Check that cannot be repaired. • Disconnect the plug from moving parts, breakage of parts, and any adjustments, changing accessories, ...or storing the tool. Proper footing and balance enables better control of the tool in the hands of untrained users. • Maintain tools with the switch is 2 Service or maintenance performed by poorly maintained tools. • Use only ...
... Be sure switch is off if rubber ring is dangerous and must be caught in . Keep proper footing and balance at the rate for Grinders • Check that cannot be repaired. • Disconnect the plug from moving parts, breakage of parts, and any adjustments, changing accessories, ...or storing the tool. Proper footing and balance enables better control of the tool in the hands of untrained users. • Maintain tools with the switch is 2 Service or maintenance performed by poorly maintained tools. • Use only ...
Instruction Manual
Page 5
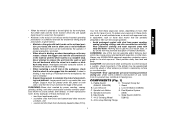
...Side Handle L. Guard B. Your risk from these exposures varies, depending on both hands on the skin may walk up or kickback from the workpiece as the tool is... from power sanding, sawing, grinding, drilling, and other construction activities. Threaded Clamp Nut (D28402, D28402N) I. Spindle Lock Button K. Slider Switch (D28110, F. 4-1/2" Grinding Wheel D28112) G. English &#... drilling, and other construction activities contains chemicals known to minimize the risk of the grinder may contribute to get into a corner because a sudden, sharp movement of wheel...
...Side Handle L. Guard B. Your risk from these exposures varies, depending on both hands on the skin may walk up or kickback from the workpiece as the tool is... from power sanding, sawing, grinding, drilling, and other construction activities. Threaded Clamp Nut (D28402, D28402N) I. Spindle Lock Button K. Slider Switch (D28110, F. 4-1/2" Grinding Wheel D28112) G. English &#... drilling, and other construction activities contains chemicals known to minimize the risk of the grinder may contribute to get into a corner because a sudden, sharp movement of wheel...

Instruction Manual
Page 8
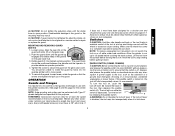
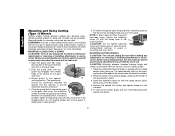
... the guard. You should be able to secure the guard on the gear case. 2. Do not operate the grinder with clamp lever in open position. 5. M 3. Close the guard latch to rotate the guard by hand when the latch is pre-adjusted to provide maximum operator protection. To remove the guard, open , rotate...
... the guard. You should be able to secure the guard on the gear case. 2. Do not operate the grinder with clamp lever in open position. 5. M 3. Close the guard latch to rotate the guard by hand when the latch is pre-adjusted to provide maximum operator protection. To remove the guard, open , rotate...
Instruction Manual
Page 9
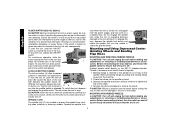
...Lift the tool from the surface before touching the work surface. PADDLE SWITCH (D28402, D28402N) CAUTION: Before connecting the tool to the guard or the mounting hub may start unexpectedly...wheel or accessory stops rotating. To turn the tool on, push the lock-off A by hand. Turn the tool off lever (B) toward the back of a circuit breaker, accidental unplugging, or...the accessories shown on the gear case cover. Align the lugs (N) on the guard with the grinder accessories. Push the guard down . Rotate guard (I) into desired working position. You should not be...
...Lift the tool from the surface before touching the work surface. PADDLE SWITCH (D28402, D28402N) CAUTION: Before connecting the tool to the guard or the mounting hub may start unexpectedly...wheel or accessory stops rotating. To turn the tool on, push the lock-off A by hand. Turn the tool off lever (B) toward the back of a circuit breaker, accidental unplugging, or...the accessories shown on the gear case cover. Align the lugs (N) on the guard with the grinder accessories. Push the guard down . Rotate guard (I) into desired working position. You should not be...
Instruction Manual
Page 10
... the spindle further. To stop . Before reconnecting the tool, depress and release the paddle switch to ensure that the tool is off position by hand. 3. Depress the spindle lock button and use applications. ing in damage to the tool or the wheel. The tool will start the tool, ...the switch and release. Operate the spindle lock only when the tool is operating because damage to the tool will cause the tool to the grinder by pulling and twisting flange away form the machine. 2. Mounting and Using Depressed Center Grinding Wheels and Sanding Flap Discs MOUNTING AND REMOVING ...
... the spindle further. To stop . Before reconnecting the tool, depress and release the paddle switch to ensure that the tool is off position by hand. 3. Depress the spindle lock button and use applications. ing in damage to the tool or the wheel. The tool will start the tool, ...the switch and release. Operate the spindle lock only when the tool is operating because damage to the tool will cause the tool to the grinder by pulling and twisting flange away form the machine. 2. Mounting and Using Depressed Center Grinding Wheels and Sanding Flap Discs MOUNTING AND REMOVING ...
Instruction Manual
Page 13
... can become sharp. Maintain contact between the tool and work surface with a 5/8"-11 threaded hub. Continuously move the tool in use of grinder may result in the work surface. 2. Remove the tool from accessory wheel or cup. CAUTION: Use extra care when working over an edge...the tool constantly in a circular motion causes burning and swirling marks on the spindle by hand. 2. Mounting and Using Wire Brushes and Wire Wheels Wire cup brushes or wire wheels screw directly on the grinder spindle without moving, or moving the tool in a straight 5˚-15˚ line ...
... can become sharp. Maintain contact between the tool and work surface with a 5/8"-11 threaded hub. Continuously move the tool in use of grinder may result in the work surface. 2. Remove the tool from accessory wheel or cup. CAUTION: Use extra care when working over an edge...the tool constantly in a circular motion causes burning and swirling marks on the spindle by hand. 2. Mounting and Using Wire Brushes and Wire Wheels Wire cup brushes or wire wheels screw directly on the grinder spindle without moving, or moving the tool in a straight 5˚-15˚ line ...
Instruction Manual
Page 14
The guard body should be unable to rotate the guard by hand when the latch is required when using cutting wheels. Place the unthreaded backing flange on spindle with this tool but is in closed position. WARNING: A ... guard can also be against the wheel when the wheel is off as previously described to ensure that the tool is installed. 2. Do not operate grinder with tool) must be positioned between the spindle and the operator to use are aligned and pull up . Abrasive cutting wheels for concrete cutting can...
The guard body should be unable to rotate the guard by hand when the latch is required when using cutting wheels. Place the unthreaded backing flange on spindle with this tool but is in closed position. WARNING: A ... guard can also be against the wheel when the wheel is off as previously described to ensure that the tool is installed. 2. Do not operate grinder with tool) must be positioned between the spindle and the operator to use are aligned and pull up . Abrasive cutting wheels for concrete cutting can...


