Owner's Manual (PDF)
Page 2
...start button logo are trademarks of Dell Inc. Bluetooth® is used in trademarks and trade names other countries. All rights reserved. Dell Inc. Reproduction of these materials in any proprietary interest in this text: Dell™, the DELL logo, and XPS™ are either the entities claiming... the marks and names or their products. is subject to either trademarks or registered trademarks of Dell Inc. A00 Trademarks used in this document to refer to...
...start button logo are trademarks of Dell Inc. Bluetooth® is used in trademarks and trade names other countries. All rights reserved. Dell Inc. Reproduction of these materials in any proprietary interest in this text: Dell™, the DELL logo, and XPS™ are either the entities claiming... the marks and names or their products. is subject to either trademarks or registered trademarks of Dell Inc. A00 Trademarks used in this document to refer to...
Owner's Manual (PDF)
Page 13
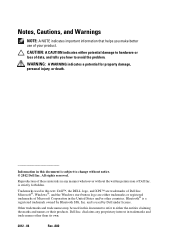
... replace all covers, panels, and screws before connecting to the power source. After you are using a different operating system, see the Regulatory Compliance Homepage at dell.com/regulatory_compliance. WARNING: Before working inside your computer, read the safety information that the work... Disconnect all telephone cables, network cables, and attached devices from their edges and avoid touching pins and contacts. Safety Instructions Use the following safety guidelines to ground the system board. Microsoft Windows shuts down instructions. 3 Disconnect your computer and all attached ...
... replace all covers, panels, and screws before connecting to the power source. After you are using a different operating system, see the Regulatory Compliance Homepage at dell.com/regulatory_compliance. WARNING: Before working inside your computer, read the safety information that the work... Disconnect all telephone cables, network cables, and attached devices from their edges and avoid touching pins and contacts. Safety Instructions Use the following safety guidelines to ground the system board. Microsoft Windows shuts down instructions. 3 Disconnect your computer and all attached ...
Owner's Manual (PDF)
Page 23
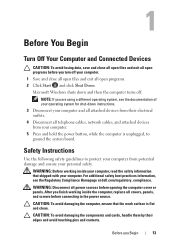
...to support the computer with your computer and follow the steps in a secure location. CAUTION: Ensure that sufficient space exists to the chassis, using a screw driver, if necessary. 3 Release the computer cover by sliding it aside in "Before You Begin" on its side with the ...computer cover facing up. 2 Remove the thumbscrew that shipped with the computer cover removed-at dell.com/regulatory_compliance. For additional safety best practices information, see the Regulatory Compliance Homepage at least 30 cm (1 ft.) of the computer. 4 Lift...
...to support the computer with your computer and follow the steps in a secure location. CAUTION: Ensure that sufficient space exists to the chassis, using a screw driver, if necessary. 3 Release the computer cover by sliding it aside in "Before You Begin" on its side with the ...computer cover facing up. 2 Remove the thumbscrew that shipped with the computer cover removed-at dell.com/regulatory_compliance. For additional safety best practices information, see the Regulatory Compliance Homepage at least 30 cm (1 ft.) of the computer. 4 Lift...
Owner's Manual (PDF)
Page 51
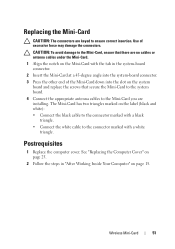
... into the system-board connector. 3 Press the other end of excessive force may damage the connectors. Replacing the Mini-Card CAUTION: The connectors are installing. Use of the Mini-Card down into the slot on page 15. CAUTION: To avoid damage to the Mini-Card, ensure that there are no cables...
... into the system-board connector. 3 Press the other end of excessive force may damage the connectors. Replacing the Mini-Card CAUTION: The connectors are installing. Use of the Mini-Card down into the slot on page 15. CAUTION: To avoid damage to the Mini-Card, ensure that there are no cables...

Owner's Manual (PDF)
Page 58
... connector. 2 Insert the mSATA drive at a 45-degree angle into the system-board connector. 3 Press the other end of excessive force may damage the connectors. Use of the mSATA drive down into the slot on the system board and replace the screws that there are keyed to the system board. 58...
... connector. 2 Insert the mSATA drive at a 45-degree angle into the system-board connector. 3 Press the other end of excessive force may damage the connectors. Use of the mSATA drive down into the slot on the system board and replace the screws that there are keyed to the system board. 58...
Owner's Manual (PDF)
Page 97
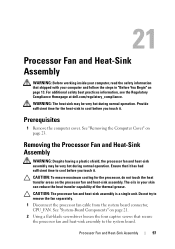
...not touch the heat transfer areas on page 13. Processor Fan and Heat-Sink Assembly 97 See "Removing the Computer Cover" on page 21. 2 Using a flat-blade screwdriver loosen the four captive screws that secure the processor fan and heat-sink assembly to cool before you touch it . CAUTION: ... can reduce the heat transfer capability of the thermal grease. For additional safety best practices information, see the Regulatory Compliance Homepage at dell.com/regulatory_compliance. WARNING: The heat sink may be very hot during normal operation. See "System-Board Components" on page 23.
...not touch the heat transfer areas on page 13. Processor Fan and Heat-Sink Assembly 97 See "Removing the Computer Cover" on page 21. 2 Using a flat-blade screwdriver loosen the four captive screws that secure the processor fan and heat-sink assembly to cool before you touch it . CAUTION: ... can reduce the heat transfer capability of the thermal grease. For additional safety best practices information, see the Regulatory Compliance Homepage at dell.com/regulatory_compliance. WARNING: The heat sink may be very hot during normal operation. See "System-Board Components" on page 23.
Owner's Manual (PDF)
Page 107
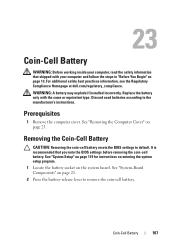
... Battery WARNING: Before working inside your computer and follow the steps in "Before You Begin" on page 13. Discard used batteries according to default. Removing the Coin-Cell Battery CAUTION: Removing the coin-cell battery resets the BIOS settings to ...the manufacturer's instructions. For additional safety best practices information, see the Regulatory Compliance Homepage at dell.com/regulatory_compliance. Prerequisites 1 Remove the computer cover. Coin-Cell Battery 107 See "Removing the Computer Cover" on page 21. 2 Press...
... Battery WARNING: Before working inside your computer and follow the steps in "Before You Begin" on page 13. Discard used batteries according to default. Removing the Coin-Cell Battery CAUTION: Removing the coin-cell battery resets the BIOS settings to ...the manufacturer's instructions. For additional safety best practices information, see the Regulatory Compliance Homepage at dell.com/regulatory_compliance. Prerequisites 1 Remove the computer cover. Coin-Cell Battery 107 See "Removing the Computer Cover" on page 21. 2 Press...
Owner's Manual (PDF)
Page 119
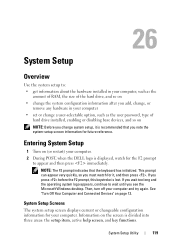
...information for it is recommended that the keyboard has initialized. Entering System Setup 1 Turn on (or restart) your computer. 2 During POST, when the DELL logo is displayed, watch for your computer. Then, turn off your computer and try again. Information on page 13. NOTE: The F2 prompt indicates that... Utility 119 If you wait too long and the operating system logo appears, continue to appear and then press immediately. 26 System Setup Overview Use the system setup to: • get information about the hardware installed in your computer, such as the amount of RAM, the size of...
...information for it is recommended that the keyboard has initialized. Entering System Setup 1 Turn on (or restart) your computer. 2 During POST, when the DELL logo is displayed, watch for your computer. Then, turn off your computer and try again. Information on page 13. NOTE: The F2 prompt indicates that... Utility 119 If you wait too long and the operating system logo appears, continue to appear and then press immediately. 26 System Setup Overview Use the system setup to: • get information about the hardware installed in your computer, such as the amount of RAM, the size of...

Owner's Manual (PDF)
Page 126
The BIOS detects the device and adds the USB flash option to run Dell Diagnostics from the Drivers and Utilities disc. Changing Boot Sequence for the Current Boot You can use this feature to change the current boot sequence, for example, to boot from . The Boot Device Menu appears, listing all available boot...
The BIOS detects the device and adds the USB flash option to run Dell Diagnostics from the Drivers and Utilities disc. Changing Boot Sequence for the Current Boot You can use this feature to change the current boot sequence, for example, to boot from . The Boot Device Menu appears, listing all available boot...

Owner's Manual (PDF)
Page 127
... inside your computer, read the safety information that shipped with your current boot sequence in "Before You Begin" on page 119. 2 Use the arrow keys to highlight the Boot menu option and press to clear the CMOS setting. 1 Remove the computer cover. Changing Boot Sequence... Press plus (+) or minus (-) to restore it on the system board. For additional safety best practices information, see the Regulatory Compliance Homepage at dell.com/regulatory_compliance. See "System-Board Components" on page 21. 3 Remove the 2-pin jumper plug from the electrical outlet to access the menu. See...
... inside your computer, read the safety information that shipped with your current boot sequence in "Before You Begin" on page 119. 2 Use the arrow keys to highlight the Boot menu option and press to clear the CMOS setting. 1 Remove the computer cover. Changing Boot Sequence... Press plus (+) or minus (-) to restore it on the system board. For additional safety best practices information, see the Regulatory Compliance Homepage at dell.com/regulatory_compliance. See "System-Board Components" on page 21. 3 Remove the 2-pin jumper plug from the electrical outlet to access the menu. See...


