Get support for Dell XPS 8500

Dell XPS 8500 Support Question

Dell XPS 8500 Support Question

Find answers below for this question about Dell XPS 8500.
Need a Dell XPS 8500 manual? We have 2 online manuals for this item!
Question posted by pavin on May 25th, 2014

How To Use Sd Card In Xps 8500

The person who posted this question about this Dell product did not include a detailed explanation. Please use the "Request More Information" button to the right if more details would help you to answer this question.

Current Answers

Answer #1: Posted by RaviCatDell on May 25th, 2014 10:58 AM
This answer was accepted by the poster of the original question.
RaviCatDell

Member since:
April 18th, 2014

Points: 294,210
1,100
points
Hi pavin,

I'm a part of Dell Social Media Team. You can plugin the Card in the card reader located on the top of the Tower, once you insert the card, you will see an auto play dialog to access the card. If you are unable to see the same, check the Computer folder. Further, if you still unable to access the card, download and update all the available chipset drivers located here: http://dell.to/1lLHiUu and test the same.

Hope that helps.


Dell-Ravi C
#IWorkforDell
Follow me on Twitter: @RaviCAtDell
Social Media & communities Professional

Related Dell XPS 8500 Manual Pages

Owner's Manual (PDF) - Page 2

... death. CAUTION: A CAUTION indicates either potential damage to hardware or loss of data, and tells you make better use of your product. Bluetooth® is subject to change without the written permission of Dell Inc. Notes, Cautions, and... Information in this text: Dell™, the DELL logo, and XPS™ are either the entities claiming the marks and names or their products. Trademarks...
Owner's Manual (PDF) - Page 4

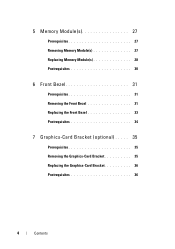
...(s 27 Replacing Memory Module(s 28 Postrequisites 30 6 Front Bezel 31 Prerequisites 31 Removing the Front Bezel 31 Replacing the Front Bezel 33 Postrequisites 34 7 Graphics-Card Bracket (optional) . . . . . 35 Prerequisites 35 Removing the Graphics-Card Bracket 35 Replacing the Graphics-Card Bracket 36 Postrequisites 36 4 Contents
Owner's Manual (PDF) - Page 5

8 Graphics Card 37 Prerequisites 37 Removing the Graphics Card 37 Replacing the Graphics Card 39 Postrequisites 41 9 PCI-Express x1 Card(s 43 Prerequisites 43 Removing the PCI-Express x1 Card(s 44 Replacing the PCI-Express x1 Card(s 46 Postrequisites 48 10 Wireless Mini-Card 49 Prerequisites 49 Removing the Mini-Card 50 Replacing the Mini-Card 51 Postrequisites 51 Contents 5
Owner's Manual (PDF) - Page 6

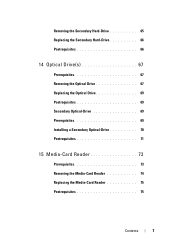
... 53 Prerequisites 53 Removing the Mini-Card Antennas 53 Replacing the Mini-Card Antennas 55 Postrequisites 55 12 mSATA Drive 57 Prerequisites 57 Removing the mSATA Drive 57 Replacing the mSATA Drive 58 Postrequisites 59 13 Hard Drive(s ...
Owner's Manual (PDF) - Page 7

... Optical Drive 67 Replacing the Optical Drive 69 Postrequisites 69 Secondary Optical-Drive 69 Prerequisites 69 Installing a Secondary Optical-Drive 70 Postrequisites 71 15 Media-Card Reader 73 Prerequisites 73 Removing the Media-Card Reader 74 Replacing the Media-Card Reader 75 Postrequisites 75 Contents 7
Owner's Manual (PDF) - Page 13

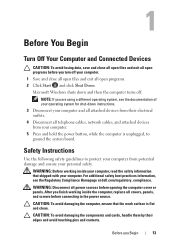
... work surface is unplugged, to protect your personal safety. Before you turn off . After you are using a different operating system, see the Regulatory Compliance Homepage at dell.com/regulatory_compliance. 1 Before You Begin.... CAUTION: To avoid damaging the components and cards, handle them by their electrical outlets. 4 Disconnect all open programs. 2 Click Start and click Shut ...
Owner's Manual (PDF) - Page 15

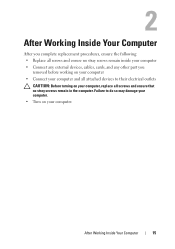
... complete replacement procedures, ensure the following: • Replace all screws and ensure no stray screws remain inside your computer • Connect any external devices, cables, cards, and any other part you removed before working on your computer • Connect your computer and all attached devices to do so may damage your...
Owner's Manual (PDF) - Page 19

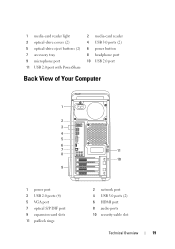
...-drive eject buttons (2) 7 accessory tray 9 microphone port 11 USB 2.0 port with PowerShare 2 media-card reader 4 USB 3.0 ports (2) 6 power button 8 headphone port 10 USB 2.0 port Back View of Your Computer 1 2 3 4 5 6 7 8 9 1 power port 3 USB 2.0 ports (4) 5 VGA port 7 optical S/P DIF port 9 expansion-card slots 11 padlock rings 11 10 2 network port 4 USB 3.0 ports (2) 6 HDMI port...
Owner's Manual (PDF) - Page 20

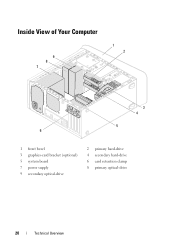
Inside View of Your Computer 9 8 7 1 2 3 4 5 6 1 front bezel 3 graphics-card bracket (optional) 5 system board 7 power supply 9 secondary optical-drive 2 primary hard-drive 4 secondary hard-drive 6 card retention clamp 8 primary optical-drive 20 Technical Overview
Owner's Manual (PDF) - Page 23

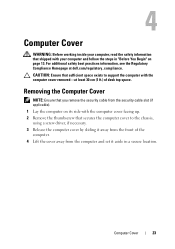
CAUTION: Ensure that sufficient space exists to the chassis, using a screw driver, if necessary. 3 Release the computer cover by sliding it away from the security cable slot (if applicable). 1 Lay the computer on page 13. 4 ...
Owner's Manual (PDF) - Page 35

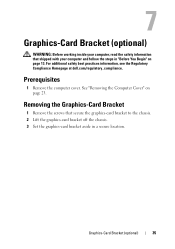
... with your computer, read the safety information that secure the graphics-card bracket to the chassis. 2 Lift the graphics-card bracket off the chassis. 3 Set the graphics-card bracket aside in "Before You Begin" on page 23. Graphics-Card Bracket (optional) 35 7 Graphics-Card Bracket (optional) WARNING: Before working inside your computer and follow the...
Owner's Manual (PDF) - Page 36

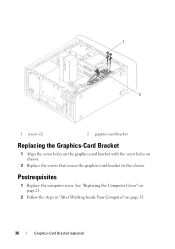
... Cover" on page 25. 2 Follow the steps in "After Working Inside Your Computer" on chassis. 2 Replace the screws that secure the graphics-card bracket to the chassis. 1 2 1 screws (2) 2 graphics-card bracket Replacing the Graphics-Card Bracket 1 Align the screw holes on the graphics-card bracket with the screw holes on page 15. 36 Graphics...
Owner's Manual (PDF) - Page 37

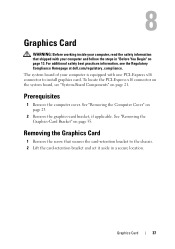
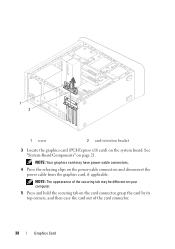
... system board of your computer is equipped with your computer, read the safety information that secures the card-retention bracket to install graphics card. See "Removing the Graphics-Card Bracket" on page 23. 2 Remove the graphics-card bracket, if applicable. For additional safety best practices information, see "System-Board Components" on the system board...
Owner's Manual (PDF) - Page 38

... 21. See "System-Board Components" on the system board. NOTE: Your graphics card may be different on your computer. 5 Press and hold the securing tab on the power-cable connectors and disconnect the power cable from the graphics card, if applicable. NOTE: The appearance of the securing tab may have power-cable...
Owner's Manual (PDF) - Page 39

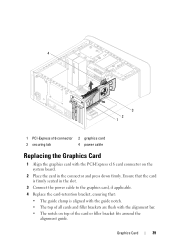
... guide clamp is aligned with the guide notch. • The top of all cards and filler brackets are flush with the PCI-Express x16 card connector on top of the card or filler bracket fits around the alignment guide. Ensure that the card is firmly seated in the connector and press down firmly. Graphics...
Owner's Manual (PDF) - Page 40

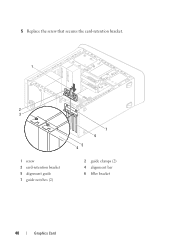
5 Replace the screw that secures the card-retention bracket. 1 2 3 1 screw 3 card-retention bracket 5 alignment guide 7 guide notches (2) 7 6 5 4 2 guide clamps (2) 4 alignment bar 6 filler bracket 40 Graphics Card
Owner's Manual (PDF) - Page 41

See "Replacing the Computer Cover" on page 25. 3 Follow the steps in "After Working Inside Your Computer" on page 36. 2 Replace the computer cover. Postrequisites 1 Replace the graphics-card bracket, if applicable. See "Replacing the Graphics-Card Bracket" on page 15. Graphics Card 41
Owner's Manual (PDF) - Page 43

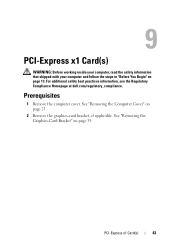
... 1 Remove the computer cover. PCI-Express x1 Card(s) 43 See "Removing the Graphics-Card Bracket" on page 13. 9 PCI-Express x1 Card(s) WARNING: Before working inside your computer, read ... the Computer Cover" on page 23. 2 Remove the graphics-card bracket, if applicable. For additional safety best practices information, see the Regulatory Compliance Homepage at dell.com/...
Owner's Manual (PDF) - Page 44

Removing the PCI-Express x1 Card(s) 1 Remove the screw that secures the card-retention bracket. 2 Lift the card-retention bracket and set it aside in a secure location. 1 2 1 screw 2 card-retention bracket 44 PCI-Express x1 Card(s)
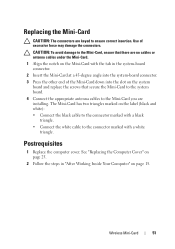
Owner's Manual (PDF) - Page 51

...black and white): • Connect the black cable to the connector marked with a white triangle. Use of the Mini-Card down into the system-board connector. 3 Press the other end of excessive force may damage the ...Follow the steps in the system-board connector. 2 Insert the Mini-Card at a 45-degree angle into the slot on the system board and replace the screws that there are ...

Similar Questions

Xps 8500 Does Not See Sd Card
(Posted by tomhappy 10 years ago)
Using Sd Card Reader
I inserted a SD photo card in the reader, small light comes on next to it, but no pop-up menu, no li...
(Posted by pablo72900 11 years ago)
Ask a New Question
Use the box below to post a new question about this Dell product .
Points & Prizes
  • You can earn points for nearly everything you do on HelpOwl.com
  • You can trade in those points for gift cards at leading retailers such as Amazon.com and Walmart
  • It's that simple!
See How it Works
Create a Free Account

Dell Manuals

Find free Dell XPS 8500 manuals and user guides available at ManualOwl.com. Try out our unique manual viewer allowing you to interact with manuals from directly within your browser!

Dell Reviews

View thousands of Dell user reviews and customer ratings available at ReviewOwl.com.

Contact Information

Complete Dell customer service contact information including steps to reach representatives, hours of operation, customer support links and more from ContactHelp.com.

Scoreboard Ratings

See detailed Dell customer service rankings, employee comments and much more from our sister site.

Dell Recalls

Find comprehensive Dell recall information updated hourly on RecallOwl.com.