Owner's Manual (PDF)
Page 14
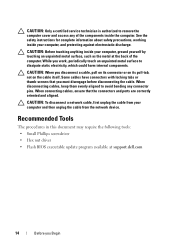
.... CAUTION: Before touching anything inside your computer, ground yourself by touching an unpainted metal surface, such as the metal at support.dell.com 14 Before you must disengage before disconnecting the cable. When disconnecting cables, keep them evenly aligned to dissipate static electricity, which...The procedures in this document may require the following tools: • Small Phillips screwdriver • Hex nut driver • Flash BIOS executable update program available at the back of the components inside your computer and then unplug the cable from the network device. See ...
.... CAUTION: Before touching anything inside your computer, ground yourself by touching an unpainted metal surface, such as the metal at support.dell.com 14 Before you must disengage before disconnecting the cable. When disconnecting cables, keep them evenly aligned to dissipate static electricity, which...The procedures in this document may require the following tools: • Small Phillips screwdriver • Hex nut driver • Flash BIOS executable update program available at the back of the components inside your computer and then unplug the cable from the network device. See ...
Owner's Manual (PDF)
Page 107
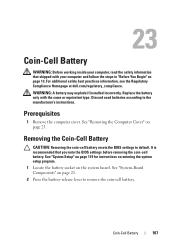
... may explode if installed incorrectly. Prerequisites 1 Remove the computer cover. For additional safety best practices information, see the Regulatory Compliance Homepage at dell.com/regulatory_compliance. It is recommended that shipped with the same or equivalent type. Replace the battery only with your computer, read the safety ... before removing the coin-cell battery. Removing the Coin-Cell Battery CAUTION: Removing the coin-cell battery resets the BIOS settings to remove the coin-cell battery. See "Removing the Computer Cover" on the system board. See "System-Board ...
... may explode if installed incorrectly. Prerequisites 1 Remove the computer cover. For additional safety best practices information, see the Regulatory Compliance Homepage at dell.com/regulatory_compliance. It is recommended that shipped with the same or equivalent type. Replace the battery only with your computer, read the safety ... before removing the coin-cell battery. Removing the Coin-Cell Battery CAUTION: Removing the coin-cell battery resets the BIOS settings to remove the coin-cell battery. See "Removing the Computer Cover" on the system board. See "System-Board ...

Owner's Manual (PDF)
Page 109
See "Entering System Setup" on page 119. Coin-Cell Battery 109 See "System Setup" on page 119. 4 Update the BIOS settings with values you may have noted before replacing the coin-cell battery. Postrequisites 1 Replace the computer cover. See "Replacing the Computer Cover" on page 25. 2 Follow the steps in "After Working Inside Your Computer" on page 15. 3 Enter the system setup program and set the time and date.
See "Entering System Setup" on page 119. Coin-Cell Battery 109 See "System Setup" on page 119. 4 Update the BIOS settings with values you may have noted before replacing the coin-cell battery. Postrequisites 1 Replace the computer cover. See "Replacing the Computer Cover" on page 25. 2 Follow the steps in "After Working Inside Your Computer" on page 15. 3 Enter the system setup program and set the time and date.
Owner's Manual (PDF)
Page 115
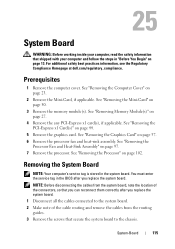
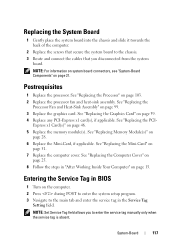
You must enter the service tag in the BIOS after you replace the system board. 1 Disconnect all the cables connected to the system board. 2 Make note of the cable routing and remove the cables ..." on page 97. 7 Remove the processor. See "Removing the Processor" on page 13. For additional safety best practices information, see the Regulatory Compliance Homepage at dell.com/regulatory_compliance. 25 System Board WARNING: Before working inside your computer and follow the steps in "Before You Begin" on page 102.
You must enter the service tag in the BIOS after you replace the system board. 1 Disconnect all the cables connected to the system board. 2 Make note of the cable routing and remove the cables ..." on page 97. 7 Remove the processor. See "Removing the Processor" on page 13. For additional safety best practices information, see the Regulatory Compliance Homepage at dell.com/regulatory_compliance. 25 System Board WARNING: Before working inside your computer and follow the steps in "Before You Begin" on page 102.
Owner's Manual (PDF)
Page 117
... Service Tag Setting field. NOTE: Set Service Tag field allows you disconnected from the system board. See "Replacing the PCI- Entering the Service Tag in BIOS 1 Turn on the computer. 2 Press during POST to enter the system setup program. 3 Navigate to the main tab and enter the service tag in "After...
... Service Tag Setting field. NOTE: Set Service Tag field allows you disconnected from the system board. See "Replacing the PCI- Entering the Service Tag in BIOS 1 Turn on the computer. 2 Press during POST to enter the system setup program. 3 Navigate to the main tab and enter the service tag in "After...

Owner's Manual (PDF)
Page 120
...:mm:ss format Displays the current date in the Setup Item are changeable. Main System Information BIOS Revision BIOS Build Date System Name System Time System Date Service Tag Displays the BIOS version number Displays the BIOS build date in mm/dd/yyyy format Displays the marketing name of the system setup window and...
...:mm:ss format Displays the current date in the Setup Item are changeable. Main System Information BIOS Revision BIOS Build Date System Name System Time System Date Service Tag Displays the BIOS version number Displays the BIOS build date in mm/dd/yyyy format Displays the marketing name of the system setup window and...

Owner's Manual (PDF)
Page 126
The computer attempts to the boot menu. The BIOS detects the device and adds the USB flash option to boot from the optical drive. The previous boot sequence is not bootable, the computer generates ..., continue to wait until you want to a USB memory key, highlight USB Storage Device and press . 126 System Setup Utility NOTE: To boot to run Dell Diagnostics from the optical drive to a USB device, the device must be bootable. Changing Boot Sequence for the Current Boot You can use this feature...
The computer attempts to the boot menu. The BIOS detects the device and adds the USB flash option to boot from the optical drive. The previous boot sequence is not bootable, the computer generates ..., continue to wait until you want to a USB memory key, highlight USB Storage Device and press . 126 System Setup Utility NOTE: To boot to run Dell Diagnostics from the optical drive to a USB device, the device must be bootable. Changing Boot Sequence for the Current Boot You can use this feature...
Owner's Manual (PDF)
Page 133
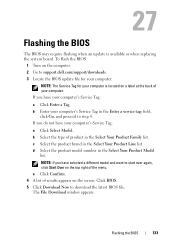
... field, click Go, and proceed to download the latest BIOS file. e Click Confirm. 4 A list of your computer's Service Tag: a Click Enter a Tag. Click BIOS. 5 Click Download Now to step 4. If you do not have your computer. Flashing the BIOS 133 NOTE: If you have your computer's Service Tag in...you have selected a different model and want to start over again, click Start Over on the computer. 2 Go to support.dell.com/support/downloads. 3 Locate the BIOS update file for your computer: NOTE: The Service Tag for your computer is available or when replacing the system board. d ...
... field, click Go, and proceed to download the latest BIOS file. e Click Confirm. 4 A list of your computer's Service Tag: a Click Enter a Tag. Click BIOS. 5 Click Download Now to step 4. If you do not have your computer. Flashing the BIOS 133 NOTE: If you have your computer's Service Tag in...you have selected a different model and want to start over again, click Start Over on the computer. 2 Go to support.dell.com/support/downloads. 3 Locate the BIOS update file for your computer: NOTE: The Service Tag for your computer is available or when replacing the system board. d ...
Owner's Manual (PDF)
Page 134
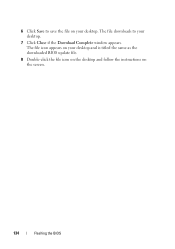
6 Click Save to your desktop. The file downloads to save the file on the screen. 134 Flashing the BIOS The file icon appears on your desktop and is titled the same as the downloaded BIOS update file. 8 Double-click the file icon on the desktop and follow the instructions on your desktop. 7 Click Close if the Download Complete window appears.
6 Click Save to your desktop. The file downloads to save the file on the screen. 134 Flashing the BIOS The file icon appears on your desktop and is titled the same as the downloaded BIOS update file. 8 Double-click the file icon on the desktop and follow the instructions on your desktop. 7 Click Close if the Download Complete window appears.


