
User's Guide
Page 2
Other trademarks and trade names may be used in this text: Dell and the DELL logo are registered trademarks of Microsoft Corporation. Microsoft and Windows are trademarks of Dell Inc.; is subject to the entities claiming the marks and names of their products. Dell Inc. Reproduction in any proprietary interest in trademarks and trade names other than its own. Trademarks Information in this document is strictly forbidden. Trademarks used in this document to refer to change without the written permission of Dell Inc. disclaims any manner whatsoever without notice.
Other trademarks and trade names may be used in this text: Dell and the DELL logo are registered trademarks of Microsoft Corporation. Microsoft and Windows are trademarks of Dell Inc.; is subject to the entities claiming the marks and names of their products. Dell Inc. Reproduction in any proprietary interest in trademarks and trade names other than its own. Trademarks Information in this document is strictly forbidden. Trademarks used in this document to refer to change without the written permission of Dell Inc. disclaims any manner whatsoever without notice.
User's Guide
Page 3
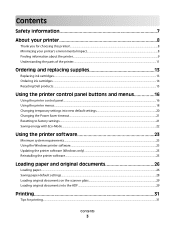
... Ordering and replacing supplies 13 Replacing ink cartridges...13 Ordering ink cartridges...14 Recycling Dell products...15 Using the printer control panel buttons and menus 16 Using the printer control panel...16 Using the printer menus...18 Changing temporary settings into new default settings 20 Changing the Power Saver timeout...21 Resetting to factory...
... Ordering and replacing supplies 13 Replacing ink cartridges...13 Ordering ink cartridges...14 Recycling Dell products...15 Using the printer control panel buttons and menus 16 Using the printer control panel...16 Using the printer menus...18 Changing temporary settings into new default settings 20 Changing the Power Saver timeout...21 Resetting to factory...
User's Guide
Page 4
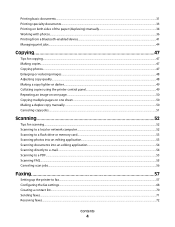
...or reducing images...48 Adjusting copy quality...48 Making a copy lighter or darker...49 Collating copies using the printer control panel...49 Repeating an image on one page...50 Copying multiple pages on one sheet...50 Making a duplex copy manually...50 Canceling copy jobs...51 Scanning 52 Tips for scanning...52 Scanning... application 54 Scanning directly to e-mail...54 Scanning to a PDF...55 Scanning FAQ...55 Canceling scan jobs...56 Faxing 57 Setting up the printer to fax...57 Configuring the fax settings...68 Creating a contact list...70 Sending faxes...71 Receiving faxes...72 Contents 4
...or reducing images...48 Adjusting copy quality...48 Making a copy lighter or darker...49 Collating copies using the printer control panel...49 Repeating an image on one page...50 Copying multiple pages on one sheet...50 Making a duplex copy manually...50 Canceling copy jobs...51 Scanning 52 Tips for scanning...52 Scanning... application 54 Scanning directly to e-mail...54 Scanning to a PDF...55 Scanning FAQ...55 Canceling scan jobs...56 Faxing 57 Setting up the printer to fax...57 Configuring the fax settings...68 Creating a contact list...70 Sending faxes...71 Receiving faxes...72 Contents 4
User's Guide
Page 5
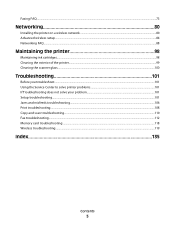
......73 Networking 80 Installing the printer on a wireless network...80 Advanced wireless setup...84 Networking FAQ...88 Maintaining the printer 98 Maintaining ink cartridges...98 Cleaning the exterior of the printer...99 Cleaning the scanner glass...100 Troubleshooting 101 Before you troubleshoot...101 Using the Service Center to solve printer problems 101 If Troubleshooting does not...
......73 Networking 80 Installing the printer on a wireless network...80 Advanced wireless setup...84 Networking FAQ...88 Maintaining the printer 98 Maintaining ink cartridges...98 Cleaning the exterior of the printer...99 Cleaning the scanner glass...100 Troubleshooting 101 Before you troubleshoot...101 Using the Service Center to solve printer problems 101 If Troubleshooting does not...

User's Guide
Page 7
... cord provided with the use the fax feature during a lightning storm. The safety features of such problems. Remove the power cord from the printer before inspecting it. Do not subject the power cord to a properly grounded electrical outlet that is near water or wet locations. Do not ...Connect the power cord to abrasion or stress. Do not set up this product or make any of these things happen, a risk of the printer, unplug the power cord from the wall outlet and disconnect all cables from the electrical outlet before proceeding. Refer service or repairs, other replacement ...
... cord provided with the use the fax feature during a lightning storm. The safety features of such problems. Remove the power cord from the printer before inspecting it. Do not subject the power cord to a properly grounded electrical outlet that is near water or wet locations. Do not ...Connect the power cord to abrasion or stress. Do not set up this product or make any of these things happen, a risk of the printer, unplug the power cord from the wall outlet and disconnect all cables from the electrical outlet before proceeding. Refer service or repairs, other replacement ...
User's Guide
Page 8
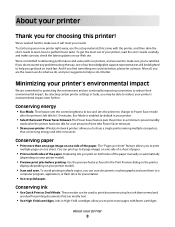
... energy and other resources. Conserving energy • Eco-Mode. Wireless/network printers allow you to perform basic tasks. Duplexing lets you do encounter any problems along the way, one side of the paper. If you print on both sides of the paper. Minimizing your printer's environmental impact We are committed to protecting the environment...
... energy and other resources. Conserving energy • Eco-Mode. Wireless/network printers allow you to perform basic tasks. Duplexing lets you do encounter any problems along the way, one side of the paper. If you print on both sides of the paper. Minimizing your printer's environmental impact We are committed to protecting the environment...
User's Guide
Page 9
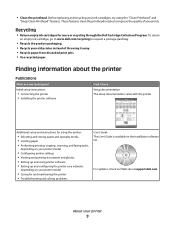
... Clean Printhead" features. Recycling • Return empty ink cartridges for and maintaining the printer • Troubleshooting and solving problems User's Guide The User's Guide is available on your printer model • Caring for reuse or recycling through the Dell Cartridge Collection Program. These features clean the printhead nozzles to request a postage-paid bag...
... Clean Printhead" features. Recycling • Return empty ink cartridges for and maintaining the printer • Troubleshooting and solving problems User's Guide The User's Guide is available on your printer model • Caring for reuse or recycling through the Dell Cartridge Collection Program. These features clean the printhead nozzles to request a postage-paid bag...

User's Guide
Page 10
...located in your country or region. technicians • Supplies and accessories for your printer • Replacement cartridges Dell Printer Supplies Web site-dell.com/supplies You can be available in the printer Program folder or on the desktop, depending on your computer. Support telephone numbers... and hours of operation for experienced users or your printer are you purchased your Dell computer and printer • Readme files-Last-minute technical changes, or advanced at the same time, then documentation and ...
...located in your country or region. technicians • Supplies and accessories for your printer • Replacement cartridges Dell Printer Supplies Web site-dell.com/supplies You can be available in the printer Program folder or on the desktop, depending on your computer. Support telephone numbers... and hours of operation for experienced users or your printer are you purchased your Dell computer and printer • Readme files-Last-minute technical changes, or advanced at the same time, then documentation and ...
User's Guide
Page 11
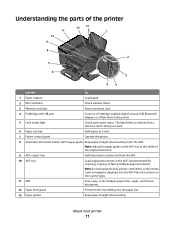
... feeding it into the ADF. The light blinks to the width of the printer 12 13 11 1 10 9 8 2 7 6 3 54 Use the To 1 Paper support Load paper. 2 Wi-Fi indicator Check wireless status. 3 Memory card slots Insert a memory card. 4 PictBridge and USB... port Connect a PictBridge-enabled digital camera, USB Bluetooth adapter, or a flash drive to the printer. 5 Card reader light Check card reader status. Recommended for scanning, ...
... feeding it into the ADF. The light blinks to the width of the printer 12 13 11 1 10 9 8 2 7 6 3 54 Use the To 1 Paper support Load paper. 2 Wi-Fi indicator Check wireless status. 3 Memory card slots Insert a memory card. 4 PictBridge and USB... port Connect a PictBridge-enabled digital camera, USB Bluetooth adapter, or a flash drive to the printer. 5 Card reader light Check card reader status. Recommended for scanning, ...
User's Guide
Page 12
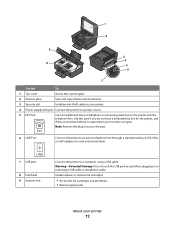
... cable on your country or region. LINE 7 USB port 8 Printhead 9 Scanner unit Connect the printer to send and receive faxes. Note: Remove the plug to access the port. 6 LINE Port Connect the printer to an active telephone line (through a standard wall jack, DSL filter, or VoIP adapter) to...Potential Damage: Do not touch the USB port except when plugging in your printer. 4 Power supply with port Connect the printer to a power source. 5 EXT Port EXT Connect additional devices (telephone or answering machine) to the printer and the telephone line. Use this port if you do not have a ...
... cable on your country or region. LINE 7 USB port 8 Printhead 9 Scanner unit Connect the printer to send and receive faxes. Note: Remove the plug to access the port. 6 LINE Port Connect the printer to an active telephone line (through a standard wall jack, DSL filter, or VoIP adapter) to...Potential Damage: Do not touch the USB port except when plugging in your printer. 4 Power supply with port Connect the printer to a power source. 5 EXT Port EXT Connect additional devices (telephone or answering machine) to the printer and the telephone line. Use this port if you do not have a ...
User's Guide
Page 13
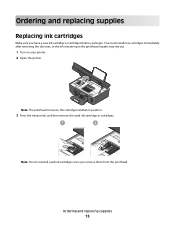
Note: The printhead moves to the cartridge installation position. 3 Press the release tab, and then remove the used ink cartridge or cartridges. 1 2 Note: Do not reinstall used ink cartridges once you begin. Ordering and replacing supplies 13 You must install new cartridges immediately after removing the old ones, or the ink remaining in the printhead nozzles may dry out. 1 Turn on your printer. 2 Open the printer. Ordering and replacing supplies Replacing ink cartridges Make sure you have a new ink cartridge or cartridges before you remove them from the printhead.
Note: The printhead moves to the cartridge installation position. 3 Press the release tab, and then remove the used ink cartridge or cartridges. 1 2 Note: Do not reinstall used ink cartridges once you begin. Ordering and replacing supplies 13 You must install new cartridges immediately after removing the old ones, or the ink remaining in the printhead nozzles may dry out. 1 Turn on your printer. 2 Open the printer. Ordering and replacing supplies Replacing ink cartridges Make sure you have a new ink cartridge or cartridges before you remove them from the printhead.
User's Guide
Page 14
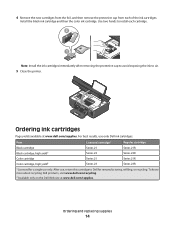
...cartridge, high yield2 Series 23 Series 23R 1 Licensed for remanufacturing, refilling, or recycling. After use, return this cartridge to air. 5 Close the printer. 4 Remove the new cartridges from the foil, and then remove the protective cap from each cartridge. 2 1 Note: Install the ink cartridges ...immediately after removing the protective cap to avoid exposing the ink to Dell for a single use only Dell ink cartridges. Ordering and replacing supplies 14 Use two hands to install each of the ink cartridges. Install the black ...
...cartridge, high yield2 Series 23 Series 23R 1 Licensed for remanufacturing, refilling, or recycling. After use, return this cartridge to air. 5 Close the printer. 4 Remove the new cartridges from the foil, and then remove the protective cap from each cartridge. 2 1 Note: Install the ink cartridges ...immediately after removing the protective cap to avoid exposing the ink to Dell for a single use only Dell ink cartridges. Ordering and replacing supplies 14 Use two hands to install each of the ink cartridges. Install the black ...
User's Guide
Page 15
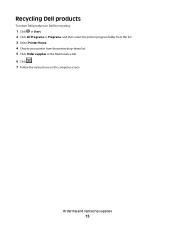
Ordering and replacing supplies 15 Recycling Dell products To return Dell products to Dell for recycling: 1 Click or Start. 2 Click All Programs or Programs, and then select the printer program folder from the list. 3 Select Printer Home. 4 Choose your printer from the printer drop-down list. 5 Click Order supplies in the Maintenance tab. 6 Click . 7 Follow the instructions on the computer screen.
Ordering and replacing supplies 15 Recycling Dell products To return Dell products to Dell for recycling: 1 Click or Start. 2 Click All Programs or Programs, and then select the printer program folder from the list. 3 Select Printer Home. 4 Choose your printer from the printer drop-down list. 5 Click Order supplies in the Maintenance tab. 6 Click . 7 Follow the instructions on the computer screen.
User's Guide
Page 16
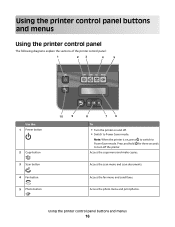
... make copies. Access the fax menu and send faxes. Using the printer control panel buttons and menus 16 Using the printer control panel buttons and menus Using the printer control panel The following diagrams explain the sections of the printer control panel: 1 23 4 5 Use the: 1 Power button ...Copy button 3 Scan button 4 Fax button 5 Photo button 10 9 8 7 6 To • Turn the printer on , press to switch to Power Saver mode. Note: When the printer is on and off the printer. Access the scan menu and scan documents. Press and hold for three seconds to turn off . •...
... make copies. Access the fax menu and send faxes. Using the printer control panel buttons and menus 16 Using the printer control panel buttons and menus Using the printer control panel The following diagrams explain the sections of the printer control panel: 1 23 4 5 Use the: 1 Power button ...Copy button 3 Scan button 4 Fax button 5 Photo button 10 9 8 7 6 To • Turn the printer on , press to switch to Power Saver mode. Note: When the printer is on and off the printer. Access the scan menu and scan documents. Press and hold for three seconds to turn off . •...

User's Guide
Page 17
...are off when this button is turned off in a fax number to a higher one. 10 Setup button Access the setup menu and change printer settings. Press and hold for 3 seconds to feed or eject paper from the printer. 9 Back button • Return to the previous screen. • Exit ...from a saved list of numbers. 2 Redial/Pause In Fax mode: • Insert a three-second pause in Power Saver mode. • Printer status • Messages • Menus 7 Arrow buttons Choose a menu or submenu item that appears on the display. 8 Select button • Select menu options....
...are off when this button is turned off in a fax number to a higher one. 10 Setup button Access the setup menu and change printer settings. Press and hold for 3 seconds to feed or eject paper from the printer. 9 Back button • Return to the previous screen. • Exit ...from a saved list of numbers. 2 Redial/Pause In Fax mode: • Insert a three-second pause in Power Saver mode. • Printer status • Messages • Menus 7 Arrow buttons Choose a menu or submenu item that appears on the display. 8 Select button • Select menu options....

User's Guide
Page 18
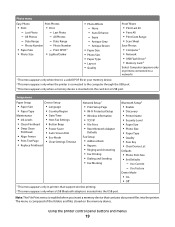
... list. • Type numbers to enter or edit the date and time shown on which mode is inserted into the PictBridge port. Using the printer menus Copy menu Scan menu Fax menu PictBridge menu1 Copies Quality Lighter/Darker Resize Original Size Photo Reprint Collate Pages per Sheet Copies per Sheet... Quality - File Type - Quality - Original Size • USB Flash Drive - Original Size • Memory Card - Original Size Fax to • Computer - Quality - Quality - Using the printer control panel buttons and menus 18 File Type - Application - File Type -
... list. • Type numbers to enter or edit the date and time shown on which mode is inserted into the PictBridge port. Using the printer menus Copy menu Scan menu Fax menu PictBridge menu1 Copies Quality Lighter/Darker Resize Original Size Photo Reprint Collate Pages per Sheet Copies per Sheet... Quality - File Type - Quality - Original Size • USB Flash Drive - Original Size • Memory Card - Original Size Fax to • Computer - Quality - Quality - Using the printer control panel buttons and menus 18 File Type - Application - File Type -
User's Guide
Page 19
...Network • USB Flash Drive 3 • Memory Card 3 Select Computer (appears only in printers connected to a network) 1 This menu appears only when there is a valid DPOF file in printers that support wireless printing. 2 This menu appears only when a USB Bluetooth adapter is enabled when you insert a... Screen Dim • Eco-Mode • Clear Settings Timeout Network Setup1 • Print Setup Page • Wi-Fi Protected Setup • Wireless Information • TCP/IP • File Print • Reset Network Adapter Defaults Fax Setup • Address Book • Reports • ...
...Network • USB Flash Drive 3 • Memory Card 3 Select Computer (appears only in printers connected to a network) 1 This menu appears only when there is a valid DPOF file in printers that support wireless printing. 2 This menu appears only when a USB Bluetooth adapter is enabled when you insert a... Screen Dim • Eco-Mode • Clear Settings Timeout Network Setup1 • Print Setup Page • Wi-Fi Protected Setup • Wireless Information • TCP/IP • File Print • Reset Network Adapter Defaults Fax Setup • Address Book • Reports • ...
User's Guide
Page 20
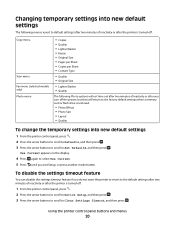
... to Defaults, and then press . 3 Press the arrow buttons to scroll to Clear Settings Timeout, and then press . Using the printer control panel buttons and menus 20 Changing temporary settings into new default settings The following menus revert to default settings after two minutes of ...inactivity or after the printer is turned off: Copy menu Scan menu Fax menu (selected models only) Photo menu • Copies • Quality • Lighter/Darker ...
... to Defaults, and then press . 3 Press the arrow buttons to scroll to Clear Settings Timeout, and then press . Using the printer control panel buttons and menus 20 Changing temporary settings into new default settings The following menus revert to default settings after two minutes of ...inactivity or after the printer is turned off: Copy menu Scan menu Fax menu (selected models only) Photo menu • Copies • Quality • Lighter/Darker ...
User's Guide
Page 21
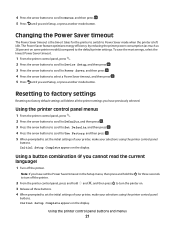
...settings will delete all three buttons. 4 When prompted to turn the printer on some printer models) compared to set the initial settings of your printer, make your selections using the printer control panel buttons. Using the printer control panel buttons and menus 21 4 Press the arrow buttons to.... Changing the Power Saver timeout The Power Saver timeout is left idle. Note: If you have previously selected. Using the printer control panel menus 1 From the printer control panel, press . 2 Press the arrow buttons to scroll to Defaults, and then press . 3 Press the arrow...
...settings will delete all three buttons. 4 When prompted to turn the printer on some printer models) compared to set the initial settings of your printer, make your selections using the printer control panel buttons. Using the printer control panel buttons and menus 21 4 Press the arrow buttons to.... Changing the Power Saver timeout The Power Saver timeout is left idle. Note: If you have previously selected. Using the printer control panel menus 1 From the printer control panel, press . 2 Press the arrow buttons to scroll to Defaults, and then press . 3 Press the arrow...
User's Guide
Page 22
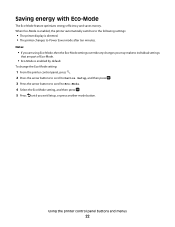
To change the Eco-Mode setting: 1 From the printer control panel, press . 2 Press the arrow buttons to scroll to Device Setup, and then press . 3 Press the arrow buttons to scroll to Eco-Mode. 4 Select ...-Mode The Eco-Mode feature optimizes energy efficiency and saves money. Using the printer control panel buttons and menus 22 When Eco-Mode is enabled, the printer automatically switches to the following settings: • The printer display is dimmed. • The printer changes to individual settings that are using Eco-Mode, then the Eco...
To change the Eco-Mode setting: 1 From the printer control panel, press . 2 Press the arrow buttons to scroll to Device Setup, and then press . 3 Press the arrow buttons to scroll to Eco-Mode. 4 Select ...-Mode The Eco-Mode feature optimizes energy efficiency and saves money. Using the printer control panel buttons and menus 22 When Eco-Mode is enabled, the printer automatically switches to the following settings: • The printer display is dimmed. • The printer changes to individual settings that are using Eco-Mode, then the Eco...