
User's Guide
Page 7
... has protruding ribs as furniture and walls. Do not pinch the power cord between objects such as part of such problems. Remove the power cord from the printer before inspecting it. Safety information Connect the power cord to a properly grounded electrical outlet that is near water or wet... locations. Use only the power supply and power cord provided with this product or a 26 AWG...
... has protruding ribs as furniture and walls. Do not pinch the power cord between objects such as part of such problems. Remove the power cord from the printer before inspecting it. Safety information Connect the power cord to a properly grounded electrical outlet that is near water or wet... locations. Use only the power supply and power cord provided with this product or a 26 AWG...
User's Guide
Page 65
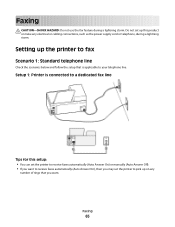
... connected to a dedicated fax line Tips for this product or make any number of rings that you may set the printer to your telephone line. Do not set the printer to receive faxes automatically (Auto Answer On) or manually (Auto Answer Off). • If you want to receive faxes... automatically (Auto Answer On), then you want. Setup 1: Printer is applicable to pick up this setup: • You can set up on any electrical or cabling connections, such as the power supply cord or telephone, during a lightning storm. Faxing 65
... connected to a dedicated fax line Tips for this product or make any number of rings that you may set the printer to your telephone line. Do not set the printer to receive faxes automatically (Auto Answer On) or manually (Auto Answer Off). • If you want to receive faxes... automatically (Auto Answer On), then you want. Setup 1: Printer is applicable to pick up this setup: • You can set up on any electrical or cabling connections, such as the power supply cord or telephone, during a lightning storm. Faxing 65
User's Guide
Page 115
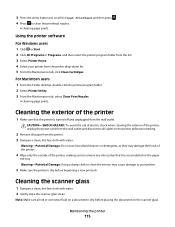
... page prints. CAUTION-SHOCK HAZARD: To avoid the risk of electric shock when cleaning the exterior of the printer, unplug the power cord from the wall outlet and disconnect all cables to your printer from the printer drop-down list. 5 From the Maintenance tab, click Clean Cartridges. Cleaning the scanner glass 1 Dampen a clean, lint-free...
... page prints. CAUTION-SHOCK HAZARD: To avoid the risk of electric shock when cleaning the exterior of the printer, unplug the power cord from the wall outlet and disconnect all cables to your printer from the printer drop-down list. 5 From the Maintenance tab, click Clean Cartridges. Cleaning the scanner glass 1 Dampen a clean, lint-free...
User's Guide
Page 116
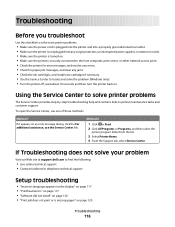
... Center link. Troubleshooting Before you troubleshoot Use this checklist to solve most printer problems: • Make sure the power cord is plugged into the printer and into a properly grounded electrical outlet. • Make sure the printer is not plugged into any jams. • Check the ink cartridges,... and install new cartridges if necessary. • Use the Service Center to printer maintenance tasks and customer support. If Troubleshooting does not solve your problem Visit our Web site at support.dell.com to find the following: • Live online technical support • Contact...
... Center link. Troubleshooting Before you troubleshoot Use this checklist to solve most printer problems: • Make sure the power cord is plugged into the printer and into a properly grounded electrical outlet. • Make sure the printer is not plugged into any jams. • Check the ink cartridges,... and install new cartridges if necessary. • Use the Service Center to printer maintenance tasks and customer support. If Troubleshooting does not solve your problem Visit our Web site at support.dell.com to find the following: • Live online technical support • Contact...
User's Guide
Page 120
... CARTRIDGES ARE INSERTED CORRECTLY 1 Turn the printer on, and then open the printer. 2 Make sure the cartridges are inserted correctly. RECONNECT THE PRINTER POWER SUPPLY 1 Turn off the printer, and then unplug the power cord from the wall outlet. 2 Gently remove the power supply from the printer, and then reinsert it. 3 Plug the power cord into the matching color slot of...
... CARTRIDGES ARE INSERTED CORRECTLY 1 Turn the printer on, and then open the printer. 2 Make sure the cartridges are inserted correctly. RECONNECT THE PRINTER POWER SUPPLY 1 Turn off the printer, and then unplug the power cord from the wall outlet. 2 Gently remove the power supply from the printer, and then reinsert it. 3 Plug the power cord into the matching color slot of...
User's Guide
Page 121
...make sure the printhead is damaged, then use a new one. 2 Firmly plug the square end of the USB cable into the back of the printer. 3 Firmly plug the rectangular end of the USB cable into the wall outlet, and then turn on the computer. A cleaning page prints. 6 ... AND ALIGN THE PRINTHEAD 1 Reinstall the ink cartridges. RECONNECT THE PRINTER POWER SUPPLY 1 Turn off the printer, and then unplug the power cord from the wall outlet. 2 Gently remove the power supply from the printer, and then reinsert it. 3 Plug the power cord into the USB port of the computer. Contact technical support if ...
...make sure the printhead is damaged, then use a new one. 2 Firmly plug the square end of the USB cable into the back of the printer. 3 Firmly plug the rectangular end of the USB cable into the wall outlet, and then turn on the computer. A cleaning page prints. 6 ... AND ALIGN THE PRINTHEAD 1 Reinstall the ink cartridges. RECONNECT THE PRINTER POWER SUPPLY 1 Turn off the printer, and then unplug the power cord from the wall outlet. 2 Gently remove the power supply from the printer, and then reinsert it. 3 Plug the power cord into the USB port of the computer. Contact technical support if ...
User's Guide
Page 122
... for any obvious damage. Troubleshooting 122 RECONNECT THE PRINTER POWER SUPPLY 1 Turn off the printer, and then unplug the power cord from the wall outlet. 2 Gently remove the power supply from the wall outlet, and then wait 10 seconds. 2 Insert the power cord into the wall outlet, and then turn on... In the Start Search or Run box, type devmgmt.msc. If the printer will not come out of Power Saver mode, then reset the power: 1 Unplug the power cord from the printer, and then reinsert it. 3 Plug the power cord into the USB port of the computer. Cannot delete documents from the print...
... for any obvious damage. Troubleshooting 122 RECONNECT THE PRINTER POWER SUPPLY 1 Turn off the printer, and then unplug the power cord from the wall outlet. 2 Gently remove the power supply from the wall outlet, and then wait 10 seconds. 2 Insert the power cord into the wall outlet, and then turn on... In the Start Search or Run box, type devmgmt.msc. If the printer will not come out of Power Saver mode, then reset the power: 1 Unplug the power cord from the printer, and then reinsert it. 3 Plug the power cord into the USB port of the computer. Cannot delete documents from the print...

User's Guide
Page 127
... Computer slows down when printing These are possible solutions. Try one or more of the following: SET YOUR PRINTER AS THE DEFAULT PRINTER REMOVE AND REINSTALL THE PRINTER SOFTWARE Scanner unit does not close " on page 127 • "Poor copy or scanned image quality" on page 128 • "Partial copies or scans of... the following: IF YOU ARE USING A USB CONNECTION, THEN TRY A DIFFERENT USB CABLE IF YOU ARE ON A NETWORK, THEN RESET THE POWER OF THE ACCESS POINT (ROUTER) 1 Unplug the power cord from the access point. 2 Wait ten seconds, and then insert the...
... Computer slows down when printing These are possible solutions. Try one or more of the following: SET YOUR PRINTER AS THE DEFAULT PRINTER REMOVE AND REINSTALL THE PRINTER SOFTWARE Scanner unit does not close " on page 127 • "Poor copy or scanned image quality" on page 128 • "Partial copies or scans of... the following: IF YOU ARE USING A USB CONNECTION, THEN TRY A DIFFERENT USB CABLE IF YOU ARE ON A NETWORK, THEN RESET THE POWER OF THE ACCESS POINT (ROUTER) 1 Unplug the power cord from the access point. 2 Wait ten seconds, and then insert the...
User's Guide
Page 142
..., and then restart the computer. 3 Insert the CD and then run the installer again. RECONNECT THE POWER SUPPLY 1 Turn off the printer. 2 Unplug the power cord from the power outlet. 3 Remove the power supply from the port, then the port is lit. The numbers should either match exactly or be clicked... ARE USING THE CORRECT CD FOR YOUR PRINTER MODEL Compare the printer model on the CD to see "Installing the printer software" in . 4 Plug the power cord back into the power outlet. 5 Turn on the printer, and then resume the installation on the printer, then you can successfully use other USB...
..., and then restart the computer. 3 Insert the CD and then run the installer again. RECONNECT THE POWER SUPPLY 1 Turn off the printer. 2 Unplug the power cord from the power outlet. 3 Remove the power supply from the port, then the port is lit. The numbers should either match exactly or be clicked... ARE USING THE CORRECT CD FOR YOUR PRINTER MODEL Compare the printer model on the CD to see "Installing the printer software" in . 4 Plug the power cord back into the power outlet. 5 Turn on the printer, and then resume the installation on the printer, then you can successfully use other USB...


