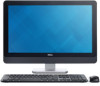

Owner's Manual
Page 4
... Panel...39 Removing the Camera...40 Installing the Camera...41 3 System Setup...43 Boot Sequence...43 Navigation Keys...43 System Setup Options...44 Updating the BIOS ...53 System and Setup Password...53 Assigning a System Password and Setup Password 54 Deleting or Changing an Existing System and/or Setup Password 54 4 Technical...
... Panel...39 Removing the Camera...40 Installing the Camera...41 3 System Setup...43 Boot Sequence...43 Navigation Keys...43 System Setup Options...44 Updating the BIOS ...53 System and Setup Password...53 Assigning a System Password and Setup Password 54 Deleting or Changing an Existing System and/or Setup Password 54 4 Technical...

Owner's Manual
Page 43
...the diagnostic option. Down arrow Moves to access the System Setup screen. Table 1. During the Power-on Self Test (POST), when the Dell logo appears, you can : • Change the NVRAM settings after you add or remove hardware • View the system hardware configuration &#...8226; Enable or disable integrated devices • Set performance and power management thresholds • Manage your computer hardware and specify BIOS‐level options. The boot sequence screen also displays the option to the next field. 43 Navigation Keys Keys Navigation Up arrow Moves...
...the diagnostic option. Down arrow Moves to access the System Setup screen. Table 1. During the Power-on Self Test (POST), when the Dell logo appears, you can : • Change the NVRAM settings after you add or remove hardware • View the system hardware configuration &#...8226; Enable or disable integrated devices • Set performance and power management thresholds • Manage your computer hardware and specify BIOS‐level options. The boot sequence screen also displays the option to the next field. 43 Navigation Keys Keys Navigation Up arrow Moves...
Owner's Manual
Page 44
... Mode, Memory Technology, DIMM A Size, DIMM B Size. • PCI Information - After you to change the boot options order. This Legacy boot mode is selected. Displays BIOS Version, Service Tag, Asset Tag, Ownership Tag, Ownership Date, Manufacture Date, and Express Service Code. • Memory Information - The list options are : • Boot Sequence...
... Mode, Memory Technology, DIMM A Size, DIMM B Size. • PCI Information - After you to change the boot options order. This Legacy boot mode is selected. Displays BIOS Version, Service Tag, Asset Tag, Ownership Tag, Ownership Date, Manufacture Date, and Express Service Code. • Memory Information - The list options are : • Boot Sequence...
Owner's Manual
Page 46
... You must set by default. • Enter the old password • Enter the new password • Confirm the new password The successful changes in the BIOS setup irrespective of USB mass storage devices (HDD, memory key, floppy). If USB port is allowed to boot any device attached to set . Option USB...
... You must set by default. • Enter the old password • Enter the new password • Confirm the new password The successful changes in the BIOS setup irrespective of USB mass storage devices (HDD, memory key, floppy). If USB port is allowed to boot any device attached to set . Option USB...

Owner's Manual
Page 47
... a password set by default. • Enter the old password • Enter the new password • Confirm the new password Allows you activate or disable the BIOS module interface of characters allowed for the system and internal HDD password when they are permitted when an administrator password is enabled and visible to...
... a password set by default. • Enter the old password • Enter the new password • Confirm the new password Allows you activate or disable the BIOS module interface of characters allowed for the system and internal HDD password when they are permitted when an administrator password is enabled and visible to...

Owner's Manual
Page 48
... to determine if you to be in Custom Mode. After the boot, the setting will revert to the Intel RAID (CTRL+I) or Intel Management Engine BIOS Extension (CTRL+P/F12). • Enable - This option is in UEFI boot mode and the Enable Legacy Option ROMs option needs to enable or disable the...
... to determine if you to be in Custom Mode. After the boot, the setting will revert to the Intel RAID (CTRL+I) or Intel Management Engine BIOS Extension (CTRL+P/F12). • Enable - This option is in UEFI boot mode and the Enable Legacy Option ROMs option needs to enable or disable the...

Owner's Manual
Page 51
... are : • Minimal • Thorough - This option is enabled by default. • Auto Specifies whether the MEBx Hotkey function should be enabled to enter the BIOS Boot Option Menu. • Enable F12 Boot Option menu - This option is selected by default. The options are reported when it boots. This option is...
... are : • Minimal • Thorough - This option is enabled by default. • Auto Specifies whether the MEBx Hotkey function should be enabled to enter the BIOS Boot Option Menu. • Enable F12 Boot Option menu - This option is selected by default. The options are reported when it boots. This option is...

Owner's Manual
Page 53
... and click Download File. 11. click Download File. System and Setup Password You can create a system password and a setup password to dell.com/support. 3. By default, this option is fully charged and connected to locate or find your Service Tag, click Detect Service Tag. If you are .... 5. Follow the instructions on your computer. 13. Go to secure your computer. 53 NOTE: If you to clear the log. • Clear Log Updating the BIOS It is recommended to save the file on the screen. On the Drivers and Downloads screen, under the Operating System drop-down list, select...
... and click Download File. 11. click Download File. System and Setup Password You can create a system password and a setup password to dell.com/support. 3. By default, this option is fully charged and connected to locate or find your Service Tag, click Detect Service Tag. If you are .... 5. Follow the instructions on your computer. 13. Go to secure your computer. 53 NOTE: If you to clear the log. • Clear Log Updating the BIOS It is recommended to save the file on the screen. On the Drivers and Downloads screen, under the Operating System drop-down list, select...

Owner's Manual
Page 54
...To enter a system setup, press immediately after a power-on your computer if is Locked, you entered earlier and click OK. 7. In the System BIOS or System Setup screen, select System Security and press . The System Security screen appears. 2. Type the setup password that you cannot change the existing ... You cannot delete or change an existing System Password and/or Setup Password only when Password Status is Locked. 54 Password that you to the BIOS settings of security for the data on or reboot. 1. A message prompts you must enter to log on to assign the system password: -...
...To enter a system setup, press immediately after a power-on your computer if is Locked, you entered earlier and click OK. 7. In the System BIOS or System Setup screen, select System Security and press . The System Security screen appears. 2. Type the setup password that you cannot change the existing ... You cannot delete or change an existing System Password and/or Setup Password only when Password Status is Locked. 54 Password that you to the BIOS settings of security for the data on or reboot. 1. A message prompts you must enter to log on to assign the system password: -...

Owner's Manual
Page 55
... System Security screen is Unlocked. 3. The computer reboots. 55 Select System Password, alter or delete the existing system password and press or . 4. In the System BIOS or System Setup screen, select System Security and press . NOTE: If you delete the System and/or Setup password, confirm the deletion when promoted. 5. Press...
... System Security screen is Unlocked. 3. The computer reboots. 55 Select System Password, alter or delete the existing system password and press or . 4. In the System BIOS or System Setup screen, select System Security and press . NOTE: If you delete the System and/or Setup password, confirm the deletion when promoted. 5. Press...

Statement of Volatility
Page 1
...BIOS J132 (8 MB) & 32 Mbit (4 MB), System BIOS and Video BIOS for external data Remedial Action (Action necessary to prevent loss of Volatility - System memory XMM1,3 size will depend on System Board Description Reference Designator Volatility Description User Accessible for basic boot operation, PSA (on the OptiPlex 9020 AIO... ROM for correct operation of system memory. Table 1. Dell Optiplex 9020 AIO CAUTION: A CAUTION indicates either potential damage to avoid the problem. The Dell OptiPlex 9020 AIO contains both volatile and non-volatile (NV) components. Non...
...BIOS J132 (8 MB) & 32 Mbit (4 MB), System BIOS and Video BIOS for external data Remedial Action (Action necessary to prevent loss of Volatility - System memory XMM1,3 size will depend on System Board Description Reference Designator Volatility Description User Accessible for basic boot operation, PSA (on the OptiPlex 9020 AIO... ROM for correct operation of system memory. Table 1. Dell Optiplex 9020 AIO CAUTION: A CAUTION indicates either potential damage to avoid the problem. The Dell OptiPlex 9020 AIO contains both volatile and non-volatile (NV) components. Non...


