Owner's Manual
Page 6
... 74 No sound from speakers 74 No sound from headphones 75 Video and Monitor Problems 76 If the screen is blank 76 If the screen is difficult to read 77 3 Troubleshooting Tools 79 Power Lights 79 Beep Codes 80 System Messages 82 Dell Diagnostics 84 When to Use the Dell Diagnostics 84... Starting the Dell Diagnostics From...
... 74 No sound from speakers 74 No sound from headphones 75 Video and Monitor Problems 76 If the screen is blank 76 If the screen is difficult to read 77 3 Troubleshooting Tools 79 Power Lights 79 Beep Codes 80 System Messages 82 Dell Diagnostics 84 When to Use the Dell Diagnostics 84... Starting the Dell Diagnostics From...
Owner's Manual
Page 16
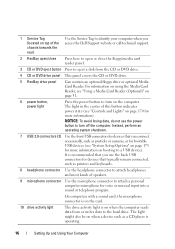
... headphones and most kinds of speakers. 9 microphone connector Use the microphone connector to attach a personal computer microphone for voice or musical input into a sound or telephony program. The light in the center of the chassis towards the rear) Use the Service Tag to identify your computer when you use... the power button to the hard drive. It is recommended that you access the Dell Support website or call technical support. 2 FlexBay open/close Press here to open or close the floppy/media card reader panel. 3 CD or...
... headphones and most kinds of speakers. 9 microphone connector Use the microphone connector to attach a personal computer microphone for voice or musical input into a sound or telephony program. The light in the center of the chassis towards the rear) Use the Service Tag to identify your computer when you use... the power button to the hard drive. It is recommended that you access the Dell Support website or call technical support. 2 FlexBay open/close Press here to open or close the floppy/media card reader panel. 3 CD or...
Owner's Manual
Page 20
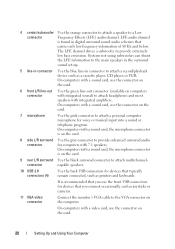
...player, CD player, or VCR. connector capable speakers. 10 USB 2.0 connectors (4) Use the back USB connectors for voice or musical input into a sound or telephony program. On computers with a video card, use the connector on the card. 6 front L/R line-out connector Use the green line-...on the card. 8 side L/R surround Use the gray connector to a Low connector Frequency Effects (LFE) audio channel. On computers with a sound card, the microphone connector is recommended that you use the connector on the card. 7 microphone Use the pink connector to the VGA connector on ...
...player, CD player, or VCR. connector capable speakers. 10 USB 2.0 connectors (4) Use the back USB connectors for voice or musical input into a sound or telephony program. On computers with a video card, use the connector on the card. 6 front L/R line-out connector Use the green line-...on the card. 8 side L/R surround Use the gray connector to a Low connector Frequency Effects (LFE) audio channel. On computers with a sound card, the microphone connector is recommended that you use the connector on the card. 7 microphone Use the pink connector to the VGA connector on ...
Owner's Manual
Page 27
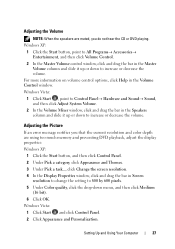
.... For more information on volume control options, click Help in the Speakers column and slide it up or down to Control Panel→ Hardware and Sound→ Sound, and then click Adjust System Volume. 2 In the Volume Mixer window, click and drag the bar in the Volume Control window. Windows Vista: 1 Click...
.... For more information on volume control options, click Help in the Speakers column and slide it up or down to Control Panel→ Hardware and Sound→ Sound, and then click Adjust System Volume. 2 In the Volume Mixer window, click and drag the bar in the Volume Control window. Windows Vista: 1 Click...
Owner's Manual
Page 57
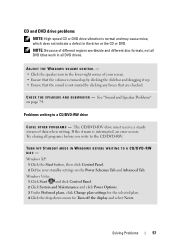
... Control Panel. 2 Define your screen. • Ensure that the volume is turned up by clicking the slidebar and dragging it up. • Ensure that the sound is not muted by clicking any boxes that are checked. TURN OFF STANDBY MODE IN WINDOWS BEFORE WRITING TO A CD/DVD-RW DISC - See...
... Control Panel. 2 Define your screen. • Ensure that the volume is turned up by clicking the slidebar and dragging it up. • Ensure that the sound is not muted by clicking any boxes that are checked. TURN OFF STANDBY MODE IN WINDOWS BEFORE WRITING TO A CD/DVD-RW DISC - See...
Owner's Manual
Page 60
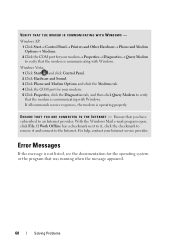
... for your modem→ Properties→ Diagnostics→ Query Modem to an Internet provider. Windows Vista: 1 Click Start and click Control Panel. 2 Click Hardware and Sound. 3 Click Phone and Modem Options and click the Modems tab. 4 Click the COM port for the operating system or the program that you have subscribed...
... for your modem→ Properties→ Diagnostics→ Query Modem to an Internet provider. Windows Vista: 1 Click Start and click Control Panel. 2 Click Hardware and Sound. 3 Click Phone and Modem Options and click the Modems tab. 4 Click the COM port for the operating system or the program that you have subscribed...
Owner's Manual
Page 69
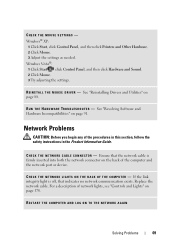
... click Printers and Other Hardware. 2 Click Mouse. 3 Adjust the settings as needed. Windows Vista®: 1 Click Start , click Control Panel, and then click Hardware and Sound. 2 Click Mouse. 3 Try adjusting the settings. Replace the network cable. Ensure that the network cable is off, that indicates no network communication exists. CHECK THE...
... click Printers and Other Hardware. 2 Click Mouse. 3 Adjust the settings as needed. Windows Vista®: 1 Click Start , click Control Panel, and then click Hardware and Sound. 2 Click Mouse. 3 Try adjusting the settings. Replace the network cable. Ensure that the network cable is off, that indicates no network communication exists. CHECK THE...
Owner's Manual
Page 72
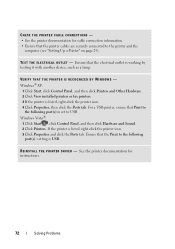
... printer documentation for instructions. 72 Solving Problems If the printer is USB. Windows Vista®: 1 Click Start , click Control Panel, and then click Hardware and Sound. 2 Click Printers. Ensure that the electrical outlet is listed, right-click the printer icon. 4 Click Properties, then click the Ports tab. Windows® XP: 1 Click...
... printer documentation for instructions. 72 Solving Problems If the printer is USB. Windows Vista®: 1 Click Start , click Control Panel, and then click Hardware and Sound. 2 Click Printers. Ensure that the electrical outlet is listed, right-click the printer icon. 4 Click Properties, then click the Ports tab. Windows® XP: 1 Click...
Owner's Manual
Page 73
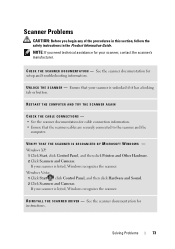
..., contact the scanner's manufacturer. VERIFY THAT THE SCANNER IS RECOGNIZED BY MICROSOFT WINDOWS - Windows Vista: 1 Click Start , click Control Panel, and then click Hardware and Sound. 2 Click Scanners and Cameras. Ensure that the scanner cables are securely connected to the scanner and the computer. If your scanner is listed, Windows recognizes...
..., contact the scanner's manufacturer. VERIFY THAT THE SCANNER IS RECOGNIZED BY MICROSOFT WINDOWS - Windows Vista: 1 Click Start , click Control Panel, and then click Hardware and Sound. 2 Click Scanners and Cameras. Ensure that the scanner cables are securely connected to the scanner and the computer. If your scanner is listed, Windows recognizes...
Owner's Manual
Page 74
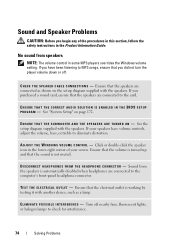
...C E - Turn off . E N S U R E T H A T T H E S U B W O O F E R A N D T H E S P E A K E R S A R E T U R N E D O N - E L I M I N A T E P O S S I B L E I S C O N N E C T H E A D P H O N E S F R O M T H E H E A D P H O N E C O N N E C T O R - No sound from the speakers is not muted. If your screen. If you did not turn the player volume down or off nearby fans, fluorescent lights, or...diagram supplied with the speakers. Ensure that the volume is turned up and that the sound is automatically disabled when headphones are connected to the computer's front-panel headphone connector. ...
...C E - Turn off . E N S U R E T H A T T H E S U B W O O F E R A N D T H E S P E A K E R S A R E T U R N E D O N - E L I M I N A T E P O S S I B L E I S C O N N E C T H E A D P H O N E S F R O M T H E H E A D P H O N E C O N N E C T O R - No sound from the speakers is not muted. If your screen. If you did not turn the player volume down or off nearby fans, fluorescent lights, or...diagram supplied with the speakers. Ensure that the volume is turned up and that the sound is automatically disabled when headphones are connected to the computer's front-panel headphone connector. ...
Owner's Manual
Page 75
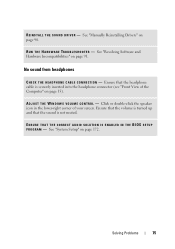
...right corner of the Computer" on page 90. See "Resolving Software and Hardware Incompatibilities" on page 172. Ensure that the sound is securely inserted into the headphone connector (see "Front View of your screen. See "System Setup" on page 91. R ...U N T H E H A R D W A R E TR O U B L E S H O O T E R - Solving Problems 75 No sound from headphones C H E C K T H E H E A D P H O N E C A B L E C O N N E C T I N D O W S V O L U M E C O N T R O L - A D J ...
...right corner of the Computer" on page 90. See "Resolving Software and Hardware Incompatibilities" on page 172. Ensure that the sound is securely inserted into the headphone connector (see "Front View of your screen. See "System Setup" on page 91. R ...U N T H E H A R D W A R E TR O U B L E S H O O T E R - Solving Problems 75 No sound from headphones C H E C K T H E H E A D P H O N E C A B L E C O N N E C T I N D O W S V O L U M E C O N T R O L - A D J ...

Owner's Manual
Page 121
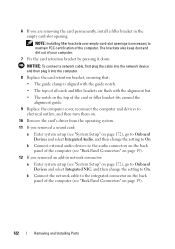
..." on page 103). 3 Remove the support bracket (see "Removing the Support Bracket" on page 104). 4 Lift the card retention bracket. 5 If you installed a sound card: a Enter system setup (see "System Setup" on page 172), go to Onboard Devices and select Integrated Audio, and then change the setting to Off...adapter: a Enter system setup (see "Back Panel Connectors" on page 19). 15 If you installed an add-in network adapter and want to the sound card's connectors. 14 If you are replacing a card that is already installed in the computer, remove the card. Do not connect external audio devices ...
..." on page 103). 3 Remove the support bracket (see "Removing the Support Bracket" on page 104). 4 Lift the card retention bracket. 5 If you installed a sound card: a Enter system setup (see "System Setup" on page 172), go to Onboard Devices and select Integrated Audio, and then change the setting to Off...adapter: a Enter system setup (see "Back Panel Connectors" on page 19). 15 If you installed an add-in network adapter and want to the sound card's connectors. 14 If you are replacing a card that is already installed in the computer, remove the card. Do not connect external audio devices ...
Owner's Manual
Page 122
... the computer and devices to electrical outlets, and then turn them on. 10 Remove the card's driver from the operating system. 11 If you removed a sound card: a Enter system setup (see "Back Panel Connectors" on page 19). 122 Removing and Installing Parts NOTICE: To connect a network cable, first plug the cable...
... the computer and devices to electrical outlets, and then turn them on. 10 Remove the card's driver from the operating system. 11 If you removed a sound card: a Enter system setup (see "Back Panel Connectors" on page 19). 122 Removing and Installing Parts NOTICE: To connect a network cable, first plug the cable...
Owner's Manual
Page 193
DVI - ECP - Examples include video, modem, and sound cards. ExpressCards support both the PCI Express and USB 2.0 standard. Use the Express Service Code when contacting Dell for digital transmission between a computer and a digital video display. extended display mode - Also referred to transfer ...interface for testing the accuracy of the computer. A display setting that can damage integrated circuits found in and out of your Dell™ computer. Glossary 193 enhanced integrated device electronics - A connector on the system board (in some computers, expanding the...
DVI - ECP - Examples include video, modem, and sound cards. ExpressCards support both the PCI Express and USB 2.0 standard. Use the Express Service Code when contacting Dell for digital transmission between a computer and a digital video display. extended display mode - Also referred to transfer ...interface for testing the accuracy of the computer. A display setting that can damage integrated circuits found in and out of your Dell™ computer. Glossary 193 enhanced integrated device electronics - A connector on the system board (in some computers, expanding the...
Owner's Manual
Page 205
Index A audio. See sound B battery problems, 55 replacing, 144 beep codes, 80 Bezel, 123 bezel removing, 123 replacing, 124 BIOS, 172 boot sequence about, 175 changing, 175 option settings, ... inside, 106 crashes, 62-64 inside view, 106 restore to previous state, 92-93 stops responding, 62-63 conflicts software and hardware incompatibilities, 91 contacting Dell, 188 copying CDs general information, 28 helpful tips, 30 how to, 28 Index 205
Index A audio. See sound B battery problems, 55 replacing, 144 beep codes, 80 Bezel, 123 bezel removing, 123 replacing, 124 BIOS, 172 boot sequence about, 175 changing, 175 option settings, ... inside, 106 crashes, 62-64 inside view, 106 restore to previous state, 92-93 stops responding, 62-63 conflicts software and hardware incompatibilities, 91 contacting Dell, 188 copying CDs general information, 28 helpful tips, 30 how to, 28 Index 205

Owner's Manual
Page 209
...scanner problems, 73 serial ATA, 126 Service Tag, 12, 16 settings system setup, 172 Setup Diagram, 11 software conflicts, 91 problems, 63-65 sound problems, 74 volume, 74 speaker problems, 74 volume, 74 Index 209 drives, 56 DVD drive, 57 e-mail, 58 error messages, 60 general, 62... compatibility, 64 restore to previous state, 92-93 scanner, 73 screen is blank, 76 screen is hard to read, 77 software, 63-65 sound and speakers, 74 technical support policy, 180 troubleshooting tips, 55 volume adjusting, 74 Product Information Guide, 11 Program Compatibility Wizard, 64 R regulatory information...
...scanner problems, 73 serial ATA, 126 Service Tag, 12, 16 settings system setup, 172 Setup Diagram, 11 software conflicts, 91 problems, 63-65 sound problems, 74 volume, 74 speaker problems, 74 volume, 74 Index 209 drives, 56 DVD drive, 57 e-mail, 58 error messages, 60 general, 62... compatibility, 64 restore to previous state, 92-93 scanner, 73 screen is blank, 76 screen is hard to read, 77 software, 63-65 sound and speakers, 74 technical support policy, 180 troubleshooting tips, 55 volume adjusting, 74 Product Information Guide, 11 Program Compatibility Wizard, 64 R regulatory information...


