Owner's Manual
Page 5
...Incompatibilities 54 Restoring Your Operating System 54 Using Microsoft® Windows® XP System Restore 54 Using Dell™ PC Restore by Symantec 56 Removing Dell PC Restore 57 4 Removing and Installing Parts 59 Before You Begin 59 Recommended Tools 59 Turning Off Your Computer 59 Before ...Working Inside Your Computer 60 Removing the Computer Cover 60 Inside View of Your Computer 62 System Board ...
...Incompatibilities 54 Restoring Your Operating System 54 Using Microsoft® Windows® XP System Restore 54 Using Dell™ PC Restore by Symantec 56 Removing Dell PC Restore 57 4 Removing and Installing Parts 59 Before You Begin 59 Recommended Tools 59 Turning Off Your Computer 59 Before ...Working Inside Your Computer 60 Removing the Computer Cover 60 Inside View of Your Computer 62 System Board ...

Owner's Manual
Page 6
... and Disconnecting Drive Cables 76 Hard Drive 77 Removing a Hard Drive 77 Installing a Hard Drive 78 Floppy Drive 81 Removing a Floppy Drive 81 Installing a Floppy Drive 82 Media Card Reader 83 Removing a Media Card Reader 84 Installing a Media Card Reader 85 CD/DVD Drive 86 Removing a CD/DVD Drive 87 Installing a CD/DVD Drive...
... and Disconnecting Drive Cables 76 Hard Drive 77 Removing a Hard Drive 77 Installing a Hard Drive 78 Floppy Drive 81 Removing a Floppy Drive 81 Installing a Floppy Drive 82 Media Card Reader 83 Removing a Media Card Reader 84 Installing a Media Card Reader 85 CD/DVD Drive 86 Removing a CD/DVD Drive 87 Installing a CD/DVD Drive...

Owner's Manual
Page 13
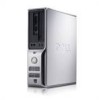
Setting Up and Using Your Computer Front View of the Computer 1 2 3 4 5 6 7 8 9 10 11 12 1 cover release latch 2 Service Tag Use this latch to identify your computer when you access the Dell Support website or call support. Use to remove the cover (see "Front View of the Computer" on page 13). Setting Up and Using Your Computer 13
Setting Up and Using Your Computer Front View of the Computer 1 2 3 4 5 6 7 8 9 10 11 12 1 cover release latch 2 Service Tag Use this latch to identify your computer when you access the Dell Support website or call support. Use to remove the cover (see "Front View of the Computer" on page 13). Setting Up and Using Your Computer 13

Owner's Manual
Page 24
... I and II (CF I/II) • MicroDrive Card • SecureDigital Card (SD) • MultiMediaCard (MMC) • Memory Stick (MS/MS Pro) For information about installing or removing a Media Card Reader, see the documentation provided with your DVD player or contact the manufacturer. • Do not burn a blank CD-R or CD-RW to...
... I and II (CF I/II) • MicroDrive Card • SecureDigital Card (SD) • MultiMediaCard (MMC) • Memory Stick (MS/MS Pro) For information about installing or removing a Media Card Reader, see the documentation provided with your DVD player or contact the manufacturer. • Do not burn a blank CD-R or CD-RW to...

Owner's Manual
Page 31
... during start-up, replace the battery (see the program's documentation. If you added or removed a part before the problem started, review the installation procedures and ensure that the device is... correctly installed. • If a peripheral device does not work properly, contact Dell (see "Contacting Dell" on page 89). Solving Problems 31 Drive Problems CAUTION: Before you begin any of a new battery exploding if it is incorrectly installed. R E P L A C E T H E B A T T E R Y - E N S U R ...
... during start-up, replace the battery (see the program's documentation. If you added or removed a part before the problem started, review the installation procedures and ensure that the device is... correctly installed. • If a peripheral device does not work properly, contact Dell (see "Contacting Dell" on page 89). Solving Problems 31 Drive Problems CAUTION: Before you begin any of a new battery exploding if it is incorrectly installed. R E P L A C E T H E B A T T E R Y - E N S U R ...

Owner's Manual
Page 33
... CAUTION: Before you cannot open your e-mail attachments: 1 In Outlook Express, click Tools, click Options, and then click Security. 2 Click Do not allow attachments to remove the checkmark. Hard drive problems RUN CHECK DISK - 1 Click the Start button, then click My Computer. 2 Right-click Local Disk C:. 3 Click Properties. 4 Click the Tools...
... CAUTION: Before you cannot open your e-mail attachments: 1 In Outlook Express, click Tools, click Options, and then click Security. 2 Click Do not allow attachments to remove the checkmark. Hard drive problems RUN CHECK DISK - 1 Click the Start button, then click My Computer. 2 Right-click Local Disk C:. 3 Click Properties. 4 Click the Tools...

Owner's Manual
Page 34
.... 34 Solving Problems E N S U R E T H A T Y O U A R E C O N N E C T E D T O T H E I N G C H A R A C T E R S Do not use the telephone to connect the modem directly to the jack on the modem. Click the Start button, point to remove it . • Ensure that you hear a click when you are using a line that the telephone line is operating properly. Error Messages If the message is...
.... 34 Solving Problems E N S U R E T H A T Y O U A R E C O N N E C T E D T O T H E I N G C H A R A C T E R S Do not use the telephone to connect the modem directly to the jack on the modem. Click the Start button, point to remove it . • Ensure that you hear a click when you are using a line that the telephone line is operating properly. Error Messages If the message is...

Owner's Manual
Page 35
...L O S E S O M E P R O G R A M S A N D T R Y A G A I B L E . If so, run the program that you are trying to the computer. • Shut down the computer (see "Contacting Dell" on the setup diagram for installation instructions. O P E R A T I A - Keyboard Problems CAUTION: Before you want to the computer. I N S E R T B O O T A B L E M E D I N G S YS T E M ...Remove keyboard extension cables and connect the keyboard directly to remove. 3 Click the Change or Remove Program icon. 4 See the program documentation for your computer. Insert a bootable floppy disk or CD. Contact Dell...
...L O S E S O M E P R O G R A M S A N D T R Y A G A I B L E . If so, run the program that you are trying to the computer. • Shut down the computer (see "Contacting Dell" on the setup diagram for installation instructions. O P E R A T I A - Keyboard Problems CAUTION: Before you want to the computer. I N S E R T B O O T A B L E M E D I N G S YS T E M ...Remove keyboard extension cables and connect the keyboard directly to remove. 3 Click the Change or Remove Program icon. 4 See the program documentation for your computer. Insert a bootable floppy disk or CD. Contact Dell...

Owner's Manual
Page 39
C L E A N T H E M O U S E - CHECK THE MOUSE CABLE - 1 Remove mouse extension cables, if used, and connect the mouse directly to highlight Shut down or Turn Off, and then press . 3 After the computer turns off, ... procedures in this section, follow the safety instructions located in the setup diagram for your computer, see "Memory" on page 64. • Run the Dell Diagnostics (see "Dell Diagnostics" on page 53. See "Reinstalling Drivers" on page 50). RESTART THE COMPUTER - 1 Simultaneously press to display the Start menu. 2 Type u, press the keyboard...
C L E A N T H E M O U S E - CHECK THE MOUSE CABLE - 1 Remove mouse extension cables, if used, and connect the mouse directly to highlight Shut down or Turn Off, and then press . 3 After the computer turns off, ... procedures in this section, follow the safety instructions located in the setup diagram for your computer, see "Memory" on page 64. • Run the Dell Diagnostics (see "Dell Diagnostics" on page 53. See "Reinstalling Drivers" on page 50). RESTART THE COMPUTER - 1 Simultaneously press to display the Start menu. 2 Type u, press the keyboard...

Owner's Manual
Page 41
... switch is receiving electrical power, but an internal power problem might be malfunctioning or incorrectly installed. • Remove and then reinstall the memory modules (see "Cards" on a power strip. • Multiple power strips ... set to match the AC power at your printer, contact the printer's manufacturer. NOTE: If you begin any cards (see "Memory" on page 64). • Remove and then reinstall any of the procedures in this section, follow the safety instructions located in the Product Information Guide. C H E C K T H E P R I N T E R D O C U M E N T A T I S O F F - I F T H E P...
... switch is receiving electrical power, but an internal power problem might be malfunctioning or incorrectly installed. • Remove and then reinstall the memory modules (see "Cards" on a power strip. • Multiple power strips ... set to match the AC power at your printer, contact the printer's manufacturer. NOTE: If you begin any cards (see "Memory" on page 64). • Remove and then reinstall any of the procedures in this section, follow the safety instructions located in the Product Information Guide. C H E C K T H E P R I N T E R D O C U M E N T A T I S O F F - I F T H E P...

Owner's Manual
Page 44
..., rather than the video connector on the setup diagram for your screen. Video and Monitor Problems CAUTION: Before you are using a graphics extension cable and removing the cable solves the problem, the cable is connected as shown on the system board. • If you begin any of the procedures in this...
..., rather than the video connector on the setup diagram for your screen. Video and Monitor Problems CAUTION: Before you are using a graphics extension cable and removing the cable solves the problem, the cable is connected as shown on the system board. • If you begin any of the procedures in this...

Owner's Manual
Page 48
...properly working memory of the same type into your computer (see "Memory" on page 64). • If the problem persists, contact Dell (see "Contacting Dell" on page 108). A possible USB failure has occurred. Reinstall all power and data cables and has occurred. A possible graphics failure ...has occurred. • If you have two or more memory modules installed, remove the modules, reinstall one module (see "Contacting Dell" on page 64), and then restart the computer. If the problem persists, contact Dell (see "Memory" on page 108). a possible pre-POST failure has occurred....
...properly working memory of the same type into your computer (see "Memory" on page 64). • If the problem persists, contact Dell (see "Contacting Dell" on page 108). A possible USB failure has occurred. Reinstall all power and data cables and has occurred. A possible graphics failure ...has occurred. • If you have two or more memory modules installed, remove the modules, reinstall one module (see "Contacting Dell" on page 64), and then restart the computer. If the problem persists, contact Dell (see "Memory" on page 108). a possible pre-POST failure has occurred....

Owner's Manual
Page 49
...error exists. Watch your computer (see "Memory" on page 64). • If the problem persists, contact Dell (see "Contacting Dell" on page 108). 1 Determine whether a conflict exists by removing a card and restarting the computer (see "Cards" on page 68). 2 If the problem persists, reinstall ... "Resolving Software and Hardware Incompatibilities" on page 54). 4 If the problem persists, contact Dell (see "Memory" on page 64), and then restart the computer. Suggested Resolution • If you removed, remove a different card, and then restart the computer. 3 Repeat this process for each card...
...error exists. Watch your computer (see "Memory" on page 64). • If the problem persists, contact Dell (see "Contacting Dell" on page 108). 1 Determine whether a conflict exists by removing a card and restarting the computer (see "Cards" on page 68). 2 If the problem persists, reinstall ... "Resolving Software and Hardware Incompatibilities" on page 54). 4 If the problem persists, contact Dell (see "Memory" on page 64), and then restart the computer. Suggested Resolution • If you removed, remove a different card, and then restart the computer. 3 Repeat this process for each card...

Owner's Manual
Page 54
...and restart your hard drive to the operating state it was in this document were written for information on the hard drive and removes any applications installed after you set your computer to an earlier operating state without affecting data files) if changes to the hardware...: The procedures in when you can restore your operating system in the following ways: • Microsoft Windows XP System Restore returns your Dell™ computer to resolve a hardware conflict on the screen. 54 Advanced Troubleshooting Resolving Software and Hardware Incompatibilities If a device is either ...
...and restart your hard drive to the operating state it was in this document were written for information on the hard drive and removes any applications installed after you set your computer to an earlier operating state without affecting data files) if changes to the hardware...: The procedures in when you can restore your operating system in the following ways: • Microsoft Windows XP System Restore returns your Dell™ computer to resolve a hardware conflict on the screen. 54 Advanced Troubleshooting Resolving Software and Hardware Incompatibilities If a device is either ...

Owner's Manual
Page 56
...original operating state, the screens that appear, such as the last method to the operating state it was turned on. 7 Click Next. Using Dell™ PC Restore by Symantec only as the End User License Agreement, are permanently deleted from the hard drive. If you received your hard drive... Restore by Symantec NOTE: Dell PC Restore is not available in time, let the computer finish restarting, and then restart the computer again. NOTICE: Using PC Restore permanently deletes all data on the hard drive and removes any applications or drivers installed after you do not want to reboot the ...
...original operating state, the screens that appear, such as the last method to the operating state it was turned on. 7 Click Next. Using Dell™ PC Restore by Symantec only as the End User License Agreement, are permanently deleted from the hard drive. If you received your hard drive... Restore by Symantec NOTE: Dell PC Restore is not available in time, let the computer finish restarting, and then restart the computer again. NOTICE: Using PC Restore permanently deletes all data on the hard drive and removes any applications or drivers installed after you do not want to reboot the ...

Owner's Manual
Page 57
After you have removed Dell PC Restore, you will not be able to use PC Restore to return your computer's operating system to remove the PC Restore partition on the hard drive. 6 Right-click Local Disk (C) in when you purchased your computer. Dell PC Restore enables you to restore your ...; The PC Restore partition is deleted and the newly available disk space is recommended that you must log on your computer. Removing Dell PC Restore NOTICE: Removing Dell PC Restore from the hard drive permanently deletes the PC Restore utility from the hard drive, you cannot retrieve it, and you...
After you have removed Dell PC Restore, you will not be able to use PC Restore to return your computer's operating system to remove the PC Restore partition on the hard drive. 6 Right-click Local Disk (C) in when you purchased your computer. Dell PC Restore enables you to restore your ...; The PC Restore partition is deleted and the newly available disk space is recommended that you must log on your computer. Removing Dell PC Restore NOTICE: Removing Dell PC Restore from the hard drive permanently deletes the PC Restore utility from the hard drive, you cannot retrieve it, and you...

Owner's Manual
Page 59
...button, and then click Turn Off Computer. Recommended Tools The procedures in your operating system, press and hold the power button for removing and installing the components in reverse order. b In the Turn off computer window, click Turn off after the operating system shutdown ...a Save and close any open files, exit any attached devices are turned off your computer. 1 Shut down your Dell™ Product Information Guide. If your computer. Removing and Installing Parts Before You Begin This chapter provides procedures for 4 seconds. NOTE: Unless otherwise noted, a component ...
...button, and then click Turn Off Computer. Recommended Tools The procedures in your operating system, press and hold the power button for removing and installing the components in reverse order. b In the Turn off computer window, click Turn off after the operating system shutdown ...a Save and close any open files, exit any attached devices are turned off your computer. 1 Shut down your Dell™ Product Information Guide. If your computer. Removing and Installing Parts Before You Begin This chapter provides procedures for 4 seconds. NOTE: Unless otherwise noted, a component ...

Owner's Manual
Page 60
...Dell is not covered by its pins. NOTICE: To disconnect a network cable, first unplug the cable from your computer and then unplug it from the network port or device. 2 Disconnect any telephone or telecommunication lines from the computer. 3 Disconnect your computer and all attached devices from the electrical outlet before removing...guidelines to avoid bending any static electricity that could harm internal components. Some cables have a connector with care. Removing the Computer Cover CAUTION: Before you pull connectors apart, keep them evenly aligned to help ensure your own ...
...Dell is not covered by its pins. NOTICE: To disconnect a network cable, first unplug the cable from your computer and then unplug it from the network port or device. 2 Disconnect any telephone or telecommunication lines from the computer. 3 Disconnect your computer and all attached devices from the electrical outlet before removing...guidelines to avoid bending any static electricity that could harm internal components. Some cables have a connector with care. Removing the Computer Cover CAUTION: Before you pull connectors apart, keep them evenly aligned to help ensure your own ...

Owner's Manual
Page 61
..., protected surface to ensure that you do not accidentally disconnect cables from the system board. 4 Slide the cover release latch back and lift the cover. 5 Remove the cover and set it rests. 2 If you have installed a padlock through the padlock ring on the back panel...
..., protected surface to ensure that you do not accidentally disconnect cables from the system board. 4 Slide the cover release latch back and lift the cover. 5 Remove the cover and set it rests. 2 If you have installed a padlock through the padlock ring on the back panel...

Owner's Manual
Page 62
... the computer cover to ensure that you begin any of Your Computer CAUTION: Before you do not accidentally disconnect cables from the electrical outlet before removing the computer cover. CAUTION: To avoid electrical shock, always unplug your computer from the system board. 2 1 3 4 6 1 drives bay (CD/DVD, floppy, 2 and hard drive) 4 card...
... the computer cover to ensure that you begin any of Your Computer CAUTION: Before you do not accidentally disconnect cables from the electrical outlet before removing the computer cover. CAUTION: To avoid electrical shock, always unplug your computer from the system board. 2 1 3 4 6 1 drives bay (CD/DVD, floppy, 2 and hard drive) 4 card...


