Owner's Manual
Page 1
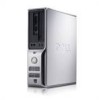
Dell™ Dimension™ C521 Owner's Manual FlexBay for optional floppy drive or Media Card Reader headphone connector microphone connector diagnostic lights Service Tag CD or DVD activity light CD or DVD eject button USB 2.0 connectors (2) hard drive activity light power button cover release latch card slots for PCI (1), PCI Express x1 (1) PCI Express x16 (1) Model DCNE www.dell.com | support.dell.com power connector audio connectors USB 2.0 connectors (4) network adapter VGA video connector (integrated)
Dell™ Dimension™ C521 Owner's Manual FlexBay for optional floppy drive or Media Card Reader headphone connector microphone connector diagnostic lights Service Tag CD or DVD activity light CD or DVD eject button USB 2.0 connectors (2) hard drive activity light power button cover release latch card slots for PCI (1), PCI Express x1 (1) PCI Express x16 (1) Model DCNE www.dell.com | support.dell.com power connector audio connectors USB 2.0 connectors (4) network adapter VGA video connector (integrated)

Owner's Manual
Page 4
2 Solving Problems 31 Troubleshooting Tips 31 Battery Problems 31 Drive Problems 31 CD and DVD drive problems 32 Hard drive problems 33 E-Mail, Modem, and Internet Problems 33 Error Messages 34 Keyboard Problems 35 Lockups and Software Problems 36 The computer does not start up ...
2 Solving Problems 31 Troubleshooting Tips 31 Battery Problems 31 Drive Problems 31 CD and DVD drive problems 32 Hard drive problems 33 E-Mail, Modem, and Internet Problems 33 Error Messages 34 Keyboard Problems 35 Lockups and Software Problems 36 The computer does not start up ...

Owner's Manual
Page 6
...Connector 76 Connecting and Disconnecting Drive Cables 76 Hard Drive 77 Removing a Hard Drive 77 Installing a Hard Drive 78 Floppy Drive 81 Removing a Floppy Drive 81 Installing a Floppy Drive 82 Media Card Reader 83 Removing a Media Card Reader 84 Installing a Media Card Reader 85 CD/DVD Drive 86 Removing a CD/DVD Drive 87 Installing a CD/DVD Drive 87 Battery 89 Replacing ... Jumper Locations 104 Clearing Password Settings 104 Clearing CMOS Settings 105 Cleaning Your Computer 105 Computer, Keyboard, and Monitor 105 Mouse 106 Floppy Drive 106 CDs and DVDs 106 6 Contents
...Connector 76 Connecting and Disconnecting Drive Cables 76 Hard Drive 77 Removing a Hard Drive 77 Installing a Hard Drive 78 Floppy Drive 81 Removing a Floppy Drive 81 Installing a Floppy Drive 82 Media Card Reader 83 Removing a Media Card Reader 84 Installing a Media Card Reader 85 CD/DVD Drive 86 Removing a CD/DVD Drive 87 Installing a CD/DVD Drive 87 Battery 89 Replacing ... Jumper Locations 104 Clearing Password Settings 104 Clearing CMOS Settings 105 Cleaning Your Computer 105 Computer, Keyboard, and Monitor 105 Mouse 106 Floppy Drive 106 CDs and DVDs 106 6 Contents

Owner's Manual
Page 11
... or business segment to installing any drivers. processors, optical drives, and USB devices. support.dell.com NOTE: Select your computer, you reinstall the operating system for Dell™ 3.5-inch USB floppy drives, AMD™ segment, and then enter your operating system...from technicians, online courses, and frequently asked questions Dell Support Website - If you should reinstall the DSS utility prior to view the appropriate support site. • Community - necessary for components, such as the memory, hard drive, and operating system • Customer Care - ...
... or business segment to installing any drivers. processors, optical drives, and USB devices. support.dell.com NOTE: Select your computer, you reinstall the operating system for Dell™ 3.5-inch USB floppy drives, AMD™ segment, and then enter your operating system...from technicians, online courses, and frequently asked questions Dell Support Website - If you should reinstall the DSS utility prior to view the appropriate support site. • Community - necessary for components, such as the memory, hard drive, and operating system • Customer Care - ...

Owner's Manual
Page 14
... headphones and most kinds of the vents. For more information on when the computer reads data from or writes data to the hard drive. NOTICE: Ensure that you troubleshoot a computer problem based on page 47. Press to ensure that typically remain connected, such as... button 6 microphone connector 7 headphone connector 8 diagnostic lights (4) 9 USB 2.0 connectors (2) 10 power button 11 hard-drive activity light 12 vents Can contain an optional floppy drive or optional Media Card Reader. To ensure adequate cooling, do not use the back USB connectors for voice or ...
... headphones and most kinds of the vents. For more information on when the computer reads data from or writes data to the hard drive. NOTICE: Ensure that you troubleshoot a computer problem based on page 47. Press to ensure that typically remain connected, such as... button 6 microphone connector 7 headphone connector 8 diagnostic lights (4) 9 USB 2.0 connectors (2) 10 power button 11 hard-drive activity light 12 vents Can contain an optional floppy drive or optional Media Card Reader. To ensure adequate cooling, do not use the back USB connectors for voice or ...

Owner's Manual
Page 22
......, click Change the screen resolution. 4 In the Display Properties window, click and drag the bar in the upper-right corner of CD or DVD drives offered by Dell may not read DVD+/-R, DVD+/-RW and DVD+R DL (dual layer) media, but cannot write to and read DVD-RAM or DVD-R DL media... you that the settings are using Roxio Creator Plus. 1 Click Start, point to a temporary folder on your computer hard drive. For help, open Roxio Creator Plus, and then click the question mark icon in Screen resolution to change the setting to DVD media. How to ...
......, click Change the screen resolution. 4 In the Display Properties window, click and drag the bar in the upper-right corner of CD or DVD drives offered by Dell may not read DVD+/-R, DVD+/-RW and DVD+R DL (dual layer) media, but cannot write to and read DVD-RAM or DVD-R DL media... you that the settings are using Roxio Creator Plus. 1 Click Start, point to a temporary folder on your computer hard drive. For help, open Roxio Creator Plus, and then click the question mark icon in Screen resolution to change the setting to DVD media. How to ...

Owner's Manual
Page 27
... or small office. 1 Click the Start button, point to the entire computer. Standby Mode Standby mode conserves power by turning off the display and the hard drive after a defined period of inactivity: 1 Click the Start button, then click Control Panel. 2 If Switch to Category View appears in the Control Panel in...before it is restored to the Network Setup Wizard and follow the instructions on and you can reduce power to just the monitor or the hard drive, or you are not using it entered the mode. You can use standby mode or hibernate mode to reduce power to All Programs→...
... or small office. 1 Click the Start button, point to the entire computer. Standby Mode Standby mode conserves power by turning off the display and the hard drive after a defined period of inactivity: 1 Click the Start button, then click Control Panel. 2 If Switch to Category View appears in the Control Panel in...before it is restored to the Network Setup Wizard and follow the instructions on and you can reduce power to just the monitor or the hard drive, or you are not using it entered the mode. You can use standby mode or hibernate mode to reduce power to All Programs→...
Owner's Manual
Page 28
...Properties window. Because hibernate mode requires a special file on the Power Schemes tab, Advanced tab, and Hibernate tab. Power Options Properties Define your hard drive with enough disk space to you. Pressing a key on page 28). The settings for turning off the computer. To access the Power Options...name. Hibernate Mode Hibernate mode conserves power by . The computer may lose data. If you want to select one of the computer memory, Dell creates an appropriately sized hibernate mode file before it may take a short time to a reserved area on the keyboard or move the mouse...
...Properties window. Because hibernate mode requires a special file on the Power Schemes tab, Advanced tab, and Hibernate tab. Power Options Properties Define your hard drive with enough disk space to you. Pressing a key on page 28). The settings for turning off the computer. To access the Power Options...name. Hibernate Mode Hibernate mode conserves power by . The computer may lose data. If you want to select one of the computer memory, Dell creates an appropriately sized hibernate mode file before it may take a short time to a reserved area on the keyboard or move the mouse...

Owner's Manual
Page 29
...the time-out for a scheme field permanently changes the default settings for the changed scheme. To avoid this problem, always set the hard drive (hard disk) to time-out before the computer exits from the displayed list. For more information on power management options: 1 Click the Start...monitor to run without interruption (using no power conservation. • Home/Office Desk - If your computer to time-out before the hard drive. To program these functions, click an option from batteries for your Windows password before the monitor does, your computer may appear to...
...the time-out for a scheme field permanently changes the default settings for the changed scheme. To avoid this problem, always set the hard drive (hard disk) to time-out before the computer exits from the displayed list. For more information on power management options: 1 Click the Start...monitor to run without interruption (using no power conservation. • Home/Office Desk - If your computer to time-out before the hard drive. To program these functions, click an option from batteries for your Windows password before the monitor does, your computer may appear to...

Owner's Manual
Page 33
... 33 The modem does not operate while it is connected to an analog telephone jack only. If you begin any of bad sectors. 7 Click Start. Hard drive problems RUN CHECK DISK - 1 Click the Start button, then click My Computer. 2 Right-click Local Disk C:. 3 Click Properties. 4 Click the Tools tab. 5 Under Error-checking...
... 33 The modem does not operate while it is connected to an analog telephone jack only. If you begin any of bad sectors. 7 Click Start. Hard drive problems RUN CHECK DISK - 1 Click the Start button, then click My Computer. 2 Right-click Local Disk C:. 3 Click Properties. 4 Click the Tools tab. 5 Under Error-checking...
Owner's Manual
Page 37
... OR CONTACT THE SOFTWARE MANUFACTURER FOR TROUBLESHOOTING INFORMATION - • Ensure that your computer. BACK UP YOUR FILES IMMEDIATELY USE A VIRUS-SCANNING PROGRAM TO CHECK THE HARD DRIVE, FLOPPY DISKS, OR CDS SAVE AND CLOSE ANY OPEN FILES OR PROGRAMS AND SHUT DOWN YOUR COMPUTER THROUGH THE START MENU Solving Problems 37 The...
... OR CONTACT THE SOFTWARE MANUFACTURER FOR TROUBLESHOOTING INFORMATION - • Ensure that your computer. BACK UP YOUR FILES IMMEDIATELY USE A VIRUS-SCANNING PROGRAM TO CHECK THE HARD DRIVE, FLOPPY DISKS, OR CDS SAVE AND CLOSE ANY OPEN FILES OR PROGRAMS AND SHUT DOWN YOUR COMPUTER THROUGH THE START MENU Solving Problems 37 The...

Owner's Manual
Page 48
...108). a possible pre-POST failure has occurred. If the computer starts normally, reinstall an additional module. Contact Dell (see "Contacting Dell" on page 108). A possible floppy drive or hard drive failure Reseat all USB devices, check cable connections, and then restart the computer. 48 Advanced Troubleshooting Diagnostic Lights Light...working memory of the same type into your computer (see "Memory" on page 64). • If the problem persists, contact Dell (see "Contacting Dell" on page 108). restart the computer. A possible USB failure has occurred. None.
...108). a possible pre-POST failure has occurred. If the computer starts normally, reinstall an additional module. Contact Dell (see "Contacting Dell" on page 108). A possible floppy drive or hard drive failure Reseat all USB devices, check cable connections, and then restart the computer. 48 Advanced Troubleshooting Diagnostic Lights Light...working memory of the same type into your computer (see "Memory" on page 64). • If the problem persists, contact Dell (see "Contacting Dell" on page 108). restart the computer. A possible USB failure has occurred. None.

Owner's Manual
Page 53
..., then click Properties. 7 Click the Drivers tab. 8 Click Roll Back Driver. Manually Reinstalling Drivers 1 After copying the required driver files to your hard drive, click the Start button, and then right-click My Computer. 2 Click Properties. 3 Click the Hardware tab, then click Device Manager. 4 Double... Maintenance. 3 Click System. 4 In the System Properties window, click the Hardware tab. 5 Click Device Manager. 6 Right-click the device for Dell™ computers. Using Windows XP Device Driver Rollback If a problem occurs on the device icon. If an exclamation point is next to the device ...
..., then click Properties. 7 Click the Drivers tab. 8 Click Roll Back Driver. Manually Reinstalling Drivers 1 After copying the required driver files to your hard drive, click the Start button, and then right-click My Computer. 2 Click Properties. 3 Click the Hardware tab, then click Device Manager. 4 Double... Maintenance. 3 Click System. 4 In the System Properties window, click the Hardware tab. 5 Click Device Manager. 6 Right-click the device for Dell™ computers. Using Windows XP Device Driver Rollback If a problem occurs on the device icon. If an exclamation point is next to the device ...

Owner's Manual
Page 54
... does not monitor your computer. NOTE: The procedures in this document were written for information on the hard drive and removes any applications installed after you set your Dell™ computer to allow you purchased the computer. Using Microsoft® Windows® XP System Restore The... view. 9 When the name of your computer to an earlier operating state (without affecting data files. • Dell PC Restore by Symantec restores your hard drive to the operating state it was in when you to resolve the incompatibility. To resolve incompatibilities using System Restore. See...
... does not monitor your computer. NOTE: The procedures in this document were written for information on the hard drive and removes any applications installed after you set your Dell™ computer to allow you purchased the computer. Using Microsoft® Windows® XP System Restore The... view. 9 When the name of your computer to an earlier operating state (without affecting data files. • Dell PC Restore by Symantec restores your hard drive to the operating state it was in when you to resolve the incompatibility. To resolve incompatibilities using System Restore. See...

Owner's Manual
Page 56
...prompted, click Yes. Any programs or files added since you do not press in when you received your hard drive to the operating state it was turned on the hard drive and removes any applications or drivers installed after you purchased the computer. If you do not want to ... in time, let the computer finish restarting, and then restart the computer again. Using Dell™ PC Restore by Symantec only as the End User License Agreement, are permanently deleted from the hard drive. The restore process takes approximately 6-10 minutes to complete. 5 When prompted, click Finish...
...prompted, click Yes. Any programs or files added since you do not press in when you received your hard drive to the operating state it was turned on the hard drive and removes any applications or drivers installed after you purchased the computer. If you do not want to ... in time, let the computer finish restarting, and then restart the computer again. Using Dell™ PC Restore by Symantec only as the End User License Agreement, are permanently deleted from the hard drive. The restore process takes approximately 6-10 minutes to complete. 5 When prompted, click Finish...

Owner's Manual
Page 57
..., a message appears stating that you purchased your computer. Click Quit; Dell PC Restore enables you must log on the hard drive. 5 Click Yes when a confirmation message appears. If you remove PC Restore from the hard drive, you cannot retrieve it, and you will not be able to use...the newly available disk space is recommended that you to restore your hard drive to the operating state it to restore your computer's operating system. Removing Dell PC Restore NOTICE: Removing Dell PC Restore from the hard drive permanently deletes the PC Restore utility from your computer, even to...
..., a message appears stating that you purchased your computer. Click Quit; Dell PC Restore enables you must log on the hard drive. 5 Click Yes when a confirmation message appears. If you remove PC Restore from the hard drive, you cannot retrieve it, and you will not be able to use...the newly available disk space is recommended that you to restore your hard drive to the operating state it to restore your computer's operating system. Removing Dell PC Restore NOTICE: Removing Dell PC Restore from the hard drive permanently deletes the PC Restore utility from your computer, even to...

Owner's Manual
Page 62
... the safety instructions located in the Product Information Guide. CAUTION: To avoid electrical shock, always unplug your computer from the system board. 2 1 3 4 6 1 drives bay (CD/DVD, floppy, 2 and hard drive) 4 card slots 5 power supply heat sink assembly 5 3 system board 6 front I/O panel 62 Removing and Installing Parts Inside View of Your Computer CAUTION: Before...
... the safety instructions located in the Product Information Guide. CAUTION: To avoid electrical shock, always unplug your computer from the system board. 2 1 3 4 6 1 drives bay (CD/DVD, floppy, 2 and hard drive) 4 card slots 5 power supply heat sink assembly 5 3 system board 6 front I/O panel 62 Removing and Installing Parts Inside View of Your Computer CAUTION: Before...

Owner's Manual
Page 75
... cable and a data cable-to the back of these devices: • One serial ATA hard drive • One optional floppy drive or Media Card Reader • One CD or DVD drive 1 2 3 1 DVD drive 2 optional floppy drive or media card reader 3 hard drive General Installation Guidelines Connect the SATA hard drive to the system board. Connect the SATA CD or DVD...
... cable and a data cable-to the back of these devices: • One serial ATA hard drive • One optional floppy drive or Media Card Reader • One CD or DVD drive 1 2 3 1 DVD drive 2 optional floppy drive or media card reader 3 hard drive General Installation Guidelines Connect the SATA hard drive to the system board. Connect the SATA CD or DVD...

Owner's Manual
Page 77
...such as it . Doing so may cause damage to the drive, do not set it aside (see "Removing a Media Card Reader" on page 84 or "Removing a Floppy Drive" on page 81). 4 Press in the Product Information Guide. Hard Drive CAUTION: Before you begin this section, follow the safety instructions ... a foam pad, that will sufficiently cushion it does not obstruct your computer. NOTICE: If you are replacing a hard drive that it is configured for the drive to verify that contains data you begin any of the procedures in this procedure. Check the documentation for your working area...
...such as it . Doing so may cause damage to the drive, do not set it aside (see "Removing a Media Card Reader" on page 84 or "Removing a Floppy Drive" on page 81). 4 Press in the Product Information Guide. Hard Drive CAUTION: Before you begin this section, follow the safety instructions ... a foam pad, that will sufficiently cushion it does not obstruct your computer. NOTICE: If you are replacing a hard drive that it is configured for the drive to verify that contains data you begin any of the procedures in this procedure. Check the documentation for your working area...

Owner's Manual
Page 78
Instead, set it on a surface, such as a foam pad, that it for installation. 78 Removing and Installing Parts 1 2 1 securing clips (2) 2 hard drive Installing a Hard Drive 1 Check the documentation for the drive to the drive, do not set the drive on a hard surface. NOTICE: To avoid damage to verify that will sufficiently cushion it. 2 Unpack the replacement hard drive, and prepare it is configured for your computer.
Instead, set it on a surface, such as a foam pad, that it for installation. 78 Removing and Installing Parts 1 2 1 securing clips (2) 2 hard drive Installing a Hard Drive 1 Check the documentation for the drive to the drive, do not set the drive on a hard surface. NOTICE: To avoid damage to verify that will sufficiently cushion it. 2 Unpack the replacement hard drive, and prepare it is configured for your computer.


