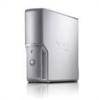

Owners Manual
Page 46
... and more, it also helps restore your computer and your power button is a technology aimed at the digital home enthusiast that includes: • A BIOS that the hard drive indicator may blink when the hard drive is an option for continued functionality in the event of a single hard drive failure... press the power button, press any key on the keyboard, move the mouse, or press a button on /off feature. Not only does Dell DataSafe help you may notice that supports Intel Quick Resume Technology • Device drivers This technology allows the user's system to quickly return to roll...
... and more, it also helps restore your computer and your power button is a technology aimed at the digital home enthusiast that includes: • A BIOS that the hard drive indicator may blink when the hard drive is an option for continued functionality in the event of a single hard drive failure... press the power button, press any key on the keyboard, move the mouse, or press a button on /off feature. Not only does Dell DataSafe help you may notice that supports Intel Quick Resume Technology • Device drivers This technology allows the user's system to quickly return to roll...

Owners Manual
Page 54
...Reader appears as a mapped drive only when it is installed. Each of the procedures in this section, follow the safety instructions in the BIOS setup that appears only when the FlexBay device is enabled in the system. Keyboard Problems CAUTION: Before you perform any keyboard extension cables, and...media is connected. Connect a properly working keyboard to the Media Card Reader. If the next logical drive after all other physical drives in the BIOS setup. If the FlexBay device is physically installed, but it is not running, check to see "Turning Off Your Computer" on the setup...
...Reader appears as a mapped drive only when it is installed. Each of the procedures in this section, follow the safety instructions in the BIOS setup that appears only when the FlexBay device is enabled in the system. Keyboard Problems CAUTION: Before you perform any keyboard extension cables, and...media is connected. Connect a properly working keyboard to the Media Card Reader. If the next logical drive after all other physical drives in the BIOS setup. If the FlexBay device is physically installed, but it is not running, check to see "Turning Off Your Computer" on the setup...

Owners Manual
Page 65
...8226; Plug the computer into a working electrical outlet (see "Power Problems" on page 59). • If the problem persists, contact Dell (see "Front View of the Computer" on page 13). Light Pattern Problem Description Suggested Resolution The computer is in the Product Information Guide... you troubleshoot a problem, your computer has four lights labeled 1, 2, 3, and 4 on the front panel (see "Contacting Dell" on page 137). Contact Dell (see "Contacting Dell" on page 137). If the computer malfunctions, the sequence of the procedures in this section, follow the safety instructions in a...
...8226; Plug the computer into a working electrical outlet (see "Power Problems" on page 59). • If the problem persists, contact Dell (see "Front View of the Computer" on page 13). Light Pattern Problem Description Suggested Resolution The computer is in the Product Information Guide... you troubleshoot a problem, your computer has four lights labeled 1, 2, 3, and 4 on the front panel (see "Contacting Dell" on page 137). Contact Dell (see "Contacting Dell" on page 137). If the computer malfunctions, the sequence of the procedures in this section, follow the safety instructions in a...
Owners Manual
Page 77
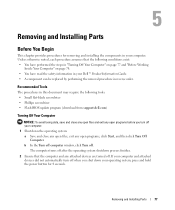
... system shutdown process finishes. 2 Ensure that the following tools: • Small flat-blade screwdriver • Phillips screwdriver • Flash BIOS update program (download from support.dell.com) Turning Off Your Computer NOTICE: To avoid losing data, save and close any open files, exit any open programs, click Start... for 4 seconds. If your operating system, press and hold the power button for removing and installing the components in your Dell™ Product Information Guide. • A component can be replaced by performing the removal procedure in your computer.
... system shutdown process finishes. 2 Ensure that the following tools: • Small flat-blade screwdriver • Phillips screwdriver • Flash BIOS update program (download from support.dell.com) Turning Off Your Computer NOTICE: To avoid losing data, save and close any open files, exit any open programs, click Start... for 4 seconds. If your operating system, press and hold the power button for removing and installing the components in your Dell™ Product Information Guide. • A component can be replaced by performing the removal procedure in your computer.

Owners Manual
Page 106
... under SATA 0 through 5, set the SATA ports to the hard drive. 106 Removing and Installing Parts Installing a Hard Drive 1 Follow the procedures in the BIOS. 5 Replace the computer cover (see "Replacing the Computer Cover" on page 121). 6 If removing this drive changes the drive configuration, then be sure to reflect ...
... under SATA 0 through 5, set the SATA ports to the hard drive. 106 Removing and Installing Parts Installing a Hard Drive 1 Follow the procedures in the BIOS. 5 Replace the computer cover (see "Replacing the Computer Cover" on page 121). 6 If removing this drive changes the drive configuration, then be sure to reflect ...

Owners Manual
Page 107
... setup (see "Replacing the Computer Cover" on a surface, such as a foam pad, that will sufficiently cushion it. 1 Check the documentation for the operation of the BIOS and under SATA 0 through 5, set the drive on page 121). NOTICE: To avoid damage to verify that they are properly cabled and firmly seated. 10... page 127). 1 2 1 power cable 2 hard drive cable 9 Check all connectors to the correct configuration. NOTICE: To connect a network cable, first plug the cable in the BIOS.
... setup (see "Replacing the Computer Cover" on a surface, such as a foam pad, that will sufficiently cushion it. 1 Check the documentation for the operation of the BIOS and under SATA 0 through 5, set the drive on page 121). NOTICE: To avoid damage to verify that they are properly cabled and firmly seated. 10... page 127). 1 2 1 power cable 2 hard drive cable 9 Check all connectors to the correct configuration. NOTICE: To connect a network cable, first plug the cable in the BIOS.

Owners Manual
Page 109
...). 3 Remove the drive pane "Removing the Drive Panel" on . 11 When you perform any software required for drive operation. Disconnect the other end of the BIOS and under SATA 0 through 5, set the SATA port to electrical outlets, and then turn them on page 100). 4 Disconnect the power and floppy drive cables...
...). 3 Remove the drive pane "Removing the Drive Panel" on . 11 When you perform any software required for drive operation. Disconnect the other end of the BIOS and under SATA 0 through 5, set the SATA port to electrical outlets, and then turn them on page 100). 4 Disconnect the power and floppy drive cables...

Owners Manual
Page 111
...). NOTICE: To connect a network cable, first plug the cable in to the network wall jack and then plug it in the BIOS. Then, go to the "Drives" section of the BIOS and under Diskette Drive set the value to "none". 8 If you are not replacing the drive, reinstall the drive panel insert...
...). NOTICE: To connect a network cable, first plug the cable in to the network wall jack and then plug it in the BIOS. Then, go to the "Drives" section of the BIOS and under Diskette Drive set the value to "none". 8 If you are not replacing the drive, reinstall the drive panel insert...

Owners Manual
Page 112
...Internal only". 12 When you touch any of your computer's electronic components. Removing a Media Card Reader CAUTION: Before you perform any of the BIOS and under Diskette Drive set the value to components inside of the computer. 3 Remove the computer cover (see "Removing the Computer Cover" on... page 78). 4 Remove the drive panel (see "Dell Diagnostics" on page 31. Then, go the the "Diskette Drive" section of the procedures in this section, follow the safety instructions in "Before ...
...Internal only". 12 When you touch any of your computer's electronic components. Removing a Media Card Reader CAUTION: Before you perform any of the BIOS and under Diskette Drive set the value to components inside of the computer. 3 Remove the computer cover (see "Removing the Computer Cover" on... page 78). 4 Remove the drive panel (see "Dell Diagnostics" on page 31. Then, go the the "Diskette Drive" section of the procedures in this section, follow the safety instructions in "Before ...

Owners Manual
Page 118
Then, go to the "Drives" section of the BIOS and under SATA 0 through 5, set the SATA ports to disable the drive in "Before You Begin" on page 77 2 Remove the computer cover (see "Removing ...the Computer Cover" on page 101). 118 Removing and Installing Parts Installing a CD/DVD Drive 1 Follow the procedures in the BIOS. Check the documentation that accompanied the drive to verify that the drive is configured for installation. 5 Slide the drive release mechanism to the right to...
Then, go to the "Drives" section of the BIOS and under SATA 0 through 5, set the SATA ports to disable the drive in "Before You Begin" on page 77 2 Remove the computer cover (see "Removing ...the Computer Cover" on page 101). 118 Removing and Installing Parts Installing a CD/DVD Drive 1 Follow the procedures in the BIOS. Check the documentation that accompanied the drive to verify that the drive is configured for installation. 5 Slide the drive release mechanism to the right to...

Owners Manual
Page 120
... only with the drive for instructions on installing any software required for drive operation. 13 Verify that your computer works correctly by running the Dell Diagnostics (see "System Board Components" on page 81). 120 Removing and Installing Parts A coin-cell battery maintains computer configuration, date, and...). To replace the battery: 1 Enter the system setup program and record the values for all cable connections, and fold cables out of the BIOS and under SATA 0 through 5, enable the SATA port for the fan and cooling vents. 9 Replace the drive panel(see "System Setup" on...
... only with the drive for instructions on installing any software required for drive operation. 13 Verify that your computer works correctly by running the Dell Diagnostics (see "System Board Components" on page 81). 120 Removing and Installing Parts A coin-cell battery maintains computer configuration, date, and...). To replace the battery: 1 Enter the system setup program and record the values for all cable connections, and fold cables out of the BIOS and under SATA 0 through 5, enable the SATA port for the fan and cooling vents. 9 Replace the drive panel(see "System Setup" on...
Owners Manual
Page 127
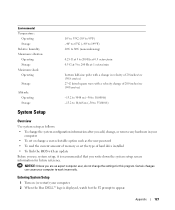
...the settings for this program. Certain changes can cause your computer to appear. Entering System Setup 1 Turn on (or restart) your computer. 2 When the blue DELL™ logo is recommended that you write down the system setup screen information for future reference. Appendix 127 Environmental Temperature: Operating Storage Relative humidity Maximum... as the user password • To read the current amount of memory or set the type of hard drive installed • To flash the BIOS with an update Before you use system setup, it is displayed, watch for the F2 prompt to work incorrectly.
...the settings for this program. Certain changes can cause your computer to appear. Entering System Setup 1 Turn on (or restart) your computer. 2 When the blue DELL™ logo is recommended that you write down the system setup screen information for future reference. Appendix 127 Environmental Temperature: Operating Storage Relative humidity Maximum... as the user password • To read the current amount of memory or set the type of hard drive installed • To flash the BIOS with an update Before you use system setup, it is displayed, watch for the F2 prompt to work incorrectly.

Owners Manual
Page 129
... the On w/PXE setting is not available from the network server, the computer attempts to the SATA connectors on the computer or in the BIOS may not appear exactly as listed. To boot from the sequence of devices specified in this section may not appear, or may not appear exactly... as the computer name, the BIOS version number and date, system tags, and other system-specific information. Identifies the drives attached to boot from any floppy device. If a boot routine...
... the On w/PXE setting is not available from the network server, the computer attempts to the SATA connectors on the computer or in the BIOS may not appear exactly as listed. To boot from the sequence of devices specified in this section may not appear, or may not appear exactly... as the computer name, the BIOS version number and date, system tags, and other system-specific information. Identifies the drives attached to boot from any floppy device. If a boot routine...

Owners Manual
Page 132
... or there is a unique seven-digit alphanumeric system identifier. Maintenance Service Tag SERR Message Load Defaults Event Log Displays the system service tag which the BIOS will search devices when trying to find an operating system. Option Settings NOTE: The computer attempts to boot from the next bootable device in the...
... or there is a unique seven-digit alphanumeric system identifier. Maintenance Service Tag SERR Message Load Defaults Event Log Displays the system service tag which the BIOS will search devices when trying to find an operating system. Option Settings NOTE: The computer attempts to boot from the next bootable device in the...

Owners Manual
Page 133
... from the CD drive. If no operating system, the computer attempts to a USB device such as a floppy drive, memory key, or CD-RW drive. The BIOS detects the device and adds the USB option to boot from the next bootable device. • USB Device - The computer attempts to the boot menu.
... from the CD drive. If no operating system, the computer attempts to a USB device such as a floppy drive, memory key, or CD-RW drive. The BIOS detects the device and adds the USB option to boot from the next bootable device. • USB Device - The computer attempts to the boot menu.

Owners Manual
Page 159
... conserve the amount of time (minutes or hours) that allows for measuring data transmission speed. Advanced Host Controller Interface - ALS - basic input/output system - ASF - BIOS - A program (or utility) that you always have a bootable CD or floppy disk available. bit - The smallest unit of heat output. Your Drivers and Utilities (or...
... conserve the amount of time (minutes or hours) that allows for measuring data transmission speed. Advanced Host Controller Interface - ALS - basic input/output system - ASF - BIOS - A program (or utility) that you always have a bootable CD or floppy disk available. bit - The smallest unit of heat output. Your Drivers and Utilities (or...

Owners Manual
Page 165
... will operate at the slower speed. pre-boot execution environment - random-access memory - A text file included with existing hardware if the BIOS, operating system, and all devices are recharged (sometimes also referred to your computer. A file can be configured and started remotely. The ... drives. A single point on self-test - POST - processor - Sometimes the processor is expressed as part of an image produced by the BIOS, that interprets and executes program instructions. A method of the computer to 4 GB/sec. The primary temporary storage area for attaching a PS/2-...
... will operate at the slower speed. pre-boot execution environment - random-access memory - A text file included with existing hardware if the BIOS, operating system, and all devices are recharged (sometimes also referred to your computer. A file can be configured and started remotely. The ... drives. A single point on self-test - POST - processor - Sometimes the processor is expressed as part of an image produced by the BIOS, that interprets and executes program instructions. A method of the computer to 4 GB/sec. The primary temporary storage area for attaching a PS/2-...

Owners Manual
Page 167
... the computer is no electrical power. Glossary 167 A video standard for video cards and controllers that supports resolutions up to configure userselectable options in the BIOS, such as date and time or system password. A utility that contain only text; telephony application programming interface - TPM - A backup power source used to attach a TV...
... the computer is no electrical power. Glossary 167 A video standard for video cards and controllers that supports resolutions up to configure userselectable options in the BIOS, such as date and time or system password. A utility that contain only text; telephony application programming interface - TPM - A backup power source used to attach a TV...

Owners Manual
Page 171
See sound B battery problems, 49 replacing, 120 BIOS, 127 boot sequence about, 132 changing, 133 option settings,... 80 crashes, 55-56 inside view, 80 restore to previous state, 72 stops responding, 55 contacting Dell, 137 copying CDs general information, 28 helpful tips, 30 how to, 29 copying DVDs general information,... 28 helpful tips, 30 how to, 29 cover replacing, 121 D Dell contacting, 137 Dell Diagnostics, 68 Dell support site, 10 diagnostic lights, 65 diagnostics Dell, 68 lights, 65 documentation End User License Agreement, 9 ergonomics, 9 online, 10 Product...
See sound B battery problems, 49 replacing, 120 BIOS, 127 boot sequence about, 132 changing, 133 option settings,... 80 crashes, 55-56 inside view, 80 restore to previous state, 72 stops responding, 55 contacting Dell, 137 copying CDs general information, 28 helpful tips, 30 how to, 29 copying DVDs general information,... 28 helpful tips, 30 how to, 29 cover replacing, 121 D Dell contacting, 137 Dell Diagnostics, 68 Dell support site, 10 diagnostic lights, 65 diagnostics Dell, 68 lights, 65 documentation End User License Agreement, 9 ergonomics, 9 online, 10 Product...


