
User Manual
Page 2
...printer 7 Thank you for choosing this printer!...7 Minimizing your printer's environmental impact 7 Finding information about the printer...8 Understanding the parts of the printer 10 Ordering and replacing supplies 12 Ordering ink cartridges...12 Replacing ink cartridges...13 Recycling Dell products...14 Using the printer... the printer software 24 Minimum system requirements...24 Using the Windows printer software...24 Using the Macintosh printer software...26 Finding and installing optional software 27 Downloading PCL and PS drivers (Windows only 27 Reinstalling the printer software......
...printer 7 Thank you for choosing this printer!...7 Minimizing your printer's environmental impact 7 Finding information about the printer...8 Understanding the parts of the printer 10 Ordering and replacing supplies 12 Ordering ink cartridges...12 Replacing ink cartridges...13 Recycling Dell products...14 Using the printer... the printer software 24 Minimum system requirements...24 Using the Windows printer software...24 Using the Macintosh printer software...26 Finding and installing optional software 27 Downloading PCL and PS drivers (Windows only 27 Reinstalling the printer software......
User Manual
Page 9
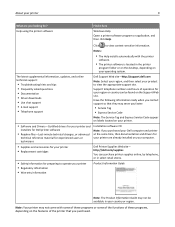
... for experienced users or technicians Installation software CD Note: If you purchased your Dell computer and printer at the same time, then documentation and drivers for your printer are you purchased. Help using the printer software Find it here Windows Help Open a printer software program or application, and then click Help. Support telephone numbers and hours...
... for experienced users or technicians Installation software CD Note: If you purchased your Dell computer and printer at the same time, then documentation and drivers for your printer are you purchased. Help using the printer software Find it here Windows Help Open a printer software program or application, and then click Help. Support telephone numbers and hours...
User Manual
Page 19
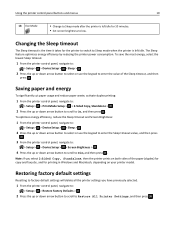
...and Screen Brightness: 1 From the printer control panel, navigate to: > Setup > > Device Setup > > Sleep > 2 Press the up or down arrow button to select or use the keypad to enter the value of the paper (duplex) for copy and fax jobs, and for printing in Windows and Macintosh, depending on both sides... of the Sleep timeout, and then press . Using the printer control panel buttons and menus 19 18 Eco‑Mode • Change to Sleep mode after the...
...and Screen Brightness: 1 From the printer control panel, navigate to: > Setup > > Device Setup > > Sleep > 2 Press the up or down arrow button to select or use the keypad to enter the value of the paper (duplex) for copy and fax jobs, and for printing in Windows and Macintosh, depending on both sides... of the Sleep timeout, and then press . Using the printer control panel buttons and menus 19 18 Eco‑Mode • Change to Sleep mode after the...
User Manual
Page 22
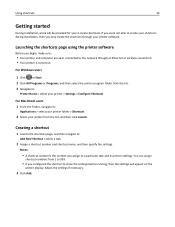
...If you were not able to create your printer from 1 to 999. • If you configured the shortcut to show the settings before running, then the settings will be provided for you assign to the network through your printer software. For Windows users 1 Click or Start. 2 Click... All Programs or Programs, and then select the printer program folder from the list. 3 Navigate to: Printer Home > select your printer > Settings > Configure Shortcuts For Macintosh users 1 From ...
...If you were not able to create your printer from 1 to 999. • If you configured the shortcut to show the settings before running, then the settings will be provided for you assign to the network through your printer software. For Windows users 1 Click or Start. 2 Click... All Programs or Programs, and then select the printer program folder from the list. 3 Navigate to: Printer Home > select your printer > Settings > Configure Shortcuts For Macintosh users 1 From ...

User Manual
Page 24
...dell.com. You may have chosen to 500MB of various software programs and what they can help you set up to install some additional programs. The following table provides an overview of free disk space. Using the Windows printer software Software installed during printer... installation When you do. Using the printer software 24 Using the printer software Minimum system requirements The printer software requires up the printer using the installation software CD, all the necessary ...
...dell.com. You may have chosen to 500MB of various software programs and what they can help you set up to install some additional programs. The following table provides an overview of free disk space. Using the Windows printer software Software installed during printer... installation When you do. Using the printer software 24 Using the printer software Minimum system requirements The printer software requires up the printer using the installation software CD, all the necessary ...
User Manual
Page 27
... view compatible drivers. Finding and installing optional software For Windows users 1 Click or Start. 2 Click All Programs or Programs, and then select the printer program folder from our Web site. Downloading PCL and PS drivers (Windows only) Universal Print Drivers (PCL 5 emulation, PCL XL... emulation, and PS emulation) can be downloaded from the list. 3 Navigate to: Printer Home > select your printer > Support > Online support 4 From the Web site, select your printer and then download the driver...
... view compatible drivers. Finding and installing optional software For Windows users 1 Click or Start. 2 Click All Programs or Programs, and then select the printer program folder from our Web site. Downloading PCL and PS drivers (Windows only) Universal Print Drivers (PCL 5 emulation, PCL XL... emulation, and PS emulation) can be downloaded from the list. 3 Navigate to: Printer Home > select your printer > Support > Online support 4 From the Web site, select your printer and then download the driver...

User Manual
Page 28
... install option, and then select all packages listed. 1 Close all open applications. 2 Insert the installation software CD. Using the Internet Updated printer software may be available at http://support.dell.com. For Windows users 1 Close all open software programs. 2 Insert the installation software CD. c Press Enter, or click OK. 3 Click Install, and then...
... install option, and then select all packages listed. 1 Close all open applications. 2 Insert the installation software CD. Using the Internet Updated printer software may be available at http://support.dell.com. For Windows users 1 Close all open software programs. 2 Insert the installation software CD. c Press Enter, or click OK. 3 Click Install, and then...
User Manual
Page 40
... the pages should print. 7 Click Print. Printing basic documents Printing a document For Windows users 1 With a document open , choose File > Page Setup. 2 From the Page Setup dialog, set (collated) or to close any printer software dialogs. 5 Click OK or Print. Collating printed copies When printing multiple copies ...of a document, you can choose to print each sheet as a set the printer, paper size, and orientation. 3 Click OK. 4 From the menu bar, choose File > Print. 5 From the Printer pop‑up menu, choose your print job. • Select a higher print quality for...
... the pages should print. 7 Click Print. Printing basic documents Printing a document For Windows users 1 With a document open , choose File > Page Setup. 2 From the Page Setup dialog, set (collated) or to close any printer software dialogs. 5 Click OK or Print. Collating printed copies When printing multiple copies ...of a document, you can choose to print each sheet as a set the printer, paper size, and orientation. 3 Click OK. 4 From the menu bar, choose File > Print. 5 From the Printer pop‑up menu, choose your print job. • Select a higher print quality for...
User Manual
Page 41
... OK to print, and then select Collated. 7 Click Print. Changing the print order of pages For Windows users 1 With a document open , choose File > Page Setup. 2 From the Page Setup dialog, set the printer, paper size, and orientation. 3 Click OK. 4 From the menu bar, choose File > Print.... copies that you are printing multiple copies. • To prevent smudging when printing photos, remove each photo as it exits the printer, and then let it dry before stacking. For Windows users 1 With a document open, click File > Print. 2 Click Properties, Preferences, Options, or Setup. 3 Navigate to:...
... OK to print, and then select Collated. 7 Click Print. Changing the print order of pages For Windows users 1 With a document open , choose File > Page Setup. 2 From the Page Setup dialog, set the printer, paper size, and orientation. 3 Click OK. 4 From the menu bar, choose File > Print.... copies that you are printing multiple copies. • To prevent smudging when printing photos, remove each photo as it exits the printer, and then let it dry before stacking. For Windows users 1 With a document open, click File > Print. 2 Click Properties, Preferences, Options, or Setup. 3 Navigate to:...
User Manual
Page 42
...Windows users 1 With a document open, click File > Print. 2 Click Properties, Preferences, Options, or Setup. 3 Navigate to: Layout tab > Page Layouts area > select Multiple pages per Sheet pop‑up menu, choose the number of page images to print on each side. 5 Adjust other settings as needed. 6 Click OK to close any printer...per side (N‑Up) 4 Select the number of page images to print on each page. Printing 42 5 Click OK to close any printer software dialogs. 6 Click OK or Print. For Macintosh users 1 With a document open , choose File > Page Setup. 2 From the Page Setup dialog...
...Windows users 1 With a document open, click File > Print. 2 Click Properties, Preferences, Options, or Setup. 3 Navigate to: Layout tab > Page Layouts area > select Multiple pages per Sheet pop‑up menu, choose the number of page images to print on each side. 5 Adjust other settings as needed. 6 Click OK to close any printer...per side (N‑Up) 4 Select the number of page images to print on each page. Printing 42 5 Click OK to close any printer software dialogs. 6 Click OK or Print. For Macintosh users 1 With a document open , choose File > Page Setup. 2 From the Page Setup dialog...

User Manual
Page 43
... flash drive contains document files that are stored on the display. 2 If document files are supported by the printer. For more information, see "Supported file types" on envelopes For Windows users 1 With a document open, click File > Print. 2 Click Properties, Preferences, Options, or Setup... Print. Printing 43 8 Adjust other settings as needed . 9 Click Print. When the printer detects the memory device, Storage Device Detected appears on the memory device, then the printer automatically switches to select your printing options, and then press , if necessary. Printing specialty ...
... flash drive contains document files that are stored on the display. 2 If document files are supported by the printer. For more information, see "Supported file types" on envelopes For Windows users 1 With a document open, click File > Print. 2 Click Properties, Preferences, Options, or Setup... Print. Printing 43 8 Adjust other settings as needed . 9 Click Print. When the printer detects the memory device, Storage Device Detected appears on the memory device, then the printer automatically switches to select your printing options, and then press , if necessary. Printing specialty ...
User Manual
Page 44
...sure the same orientation is also selected in a paper jam. For Windows users 1 With a document open , choose File > Page Setup. 2 From the "Format for " pop‑up menu, choose your printer. 3 From the Paper Size pop‑up menu, choose your printer. 7 Click Print. For Macintosh users 1 With a document open...to create a custom size, and then click OK. 5 Navigate to: Paper type list > select the created custom type 6 Click OK to close any printer software dialogs. 7 Click OK or Print. If no size matches the envelope size, then set a custom size. 4 Select an orientation, and then click ...
...sure the same orientation is also selected in a paper jam. For Windows users 1 With a document open , choose File > Page Setup. 2 From the "Format for " pop‑up menu, choose your printer. 3 From the Paper Size pop‑up menu, choose your printer. 7 Click Print. For Macintosh users 1 With a document open...to create a custom size, and then click OK. 5 Navigate to: Paper type list > select the created custom type 6 Click OK to close any printer software dialogs. 7 Click OK or Print. If no size matches the envelope size, then set a custom size. 4 Select an orientation, and then click ...
User Manual
Page 45
...on custom‑size paper For Windows users 1 With a document open , choose File > Page Setup. 2 From the "Format for" pop‑up menu, choose your printer. 3 From the Paper Size pop‑up menu, choose Manage Custom Sizes. 4 Adjust the settings as needed to close any printer software dialogs. 6 Click OK ...Close, and then click OK to create a custom size, and then click OK. 5 Click OK. 6 From the menu bar, choose File > Print. 7 From the printer pop‑up menu, choose your paper size. If no paper size matches the label sheet size, then set a custom size. 4 Select an orientation, and...
...on custom‑size paper For Windows users 1 With a document open , choose File > Page Setup. 2 From the "Format for" pop‑up menu, choose your printer. 3 From the Paper Size pop‑up menu, choose Manage Custom Sizes. 4 Adjust the settings as needed to close any printer software dialogs. 6 Click OK ...Close, and then click OK to create a custom size, and then click OK. 5 Click OK. 6 From the menu bar, choose File > Print. 7 From the printer pop‑up menu, choose your paper size. If no paper size matches the label sheet size, then set a custom size. 4 Select an orientation, and...
User Manual
Page 48
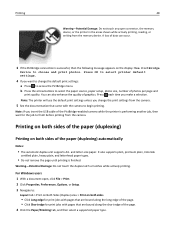
...the camera. Warning-Potential Damage: Do not touch the duplex latch or latches while actively printing. For Windows users 1 With a document open connector, the memory device, or the printer in the areas shown while actively printing, reading, or writing from the camera. 5 See the ...of the paper (duplexing) automatically Notes: • The automatic duplex unit supports A4‑ and letter‑size paper. Press OK to select printer default settings. 4 If you make a selection. It also supports plain, premium plain, ColorLok certified plain, heavy plain, and letterhead paper types...
...the camera. Warning-Potential Damage: Do not touch the duplex latch or latches while actively printing. For Windows users 1 With a document open connector, the memory device, or the printer in the areas shown while actively printing, reading, or writing from the camera. 5 See the ...of the paper (duplexing) automatically Notes: • The automatic duplex unit supports A4‑ and letter‑size paper. Press OK to select printer default settings. 4 If you make a selection. It also supports plain, premium plain, ColorLok certified plain, heavy plain, and letterhead paper types...

User Manual
Page 50
..., or if the normal drying time does not allow the ink to the dry time setting you want, and then press . Using the printer software For Windows users 1 Click File > Print. 2 Click Properties, Preferences, Options, or Setup. 3 Navigate to: Layout tab > Print on the print... quality selected for your prints. Printing 50 Setting the duplex printing dry time Using the control panel 1 From the printer control panel, navigate to: > Setup > > Print Mode Setup ...
..., or if the normal drying time does not allow the ink to the dry time setting you want, and then press . Using the printer software For Windows users 1 Click File > Print. 2 Click Properties, Preferences, Options, or Setup. 3 Navigate to: Layout tab > Print on the print... quality selected for your prints. Printing 50 Setting the duplex printing dry time Using the control panel 1 From the printer control panel, navigate to: > Setup > > Print Mode Setup ...
User Manual
Page 51
... menu, navigate to: System Preferences > Print & Fax > the print queue for your printer is connected (USB, Ethernet, wireless). Note: Printers connected to your computer. Creating a print queue For Windows users 1 From the Printer Tasks area, click Add a Printer. 2 Follow the instructions on how the printer is connected to the computer to be able to rename the...
... menu, navigate to: System Preferences > Print & Fax > the print queue for your printer is connected (USB, Ethernet, wireless). Note: Printers connected to your computer. Creating a print queue For Windows users 1 From the Printer Tasks area, click Add a Printer. 2 Follow the instructions on how the printer is connected to the computer to be able to rename the...
User Manual
Page 52
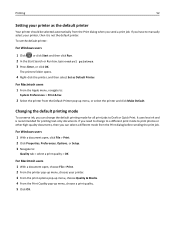
... a print quality > OK For Macintosh users 1 With a document open, choose File > Print. 2 From the printer pop‑up menu, choose your printer as Default Printer. To set the default printer: For Windows users 1 Click , or click Start and then click Run. 2 In the Start Search or Run box, type ...control printers. 3 Press Enter, or click OK. Printing 52 Setting your printer. 3 From the print options pop-up ...
... a print quality > OK For Macintosh users 1 With a document open, choose File > Print. 2 From the printer pop‑up menu, choose your printer as Default Printer. To set the default printer: For Windows users 1 Click , or click Start and then click Run. 2 In the Start Search or Run box, type ...control printers. 3 Press Enter, or click OK. Printing 52 Setting your printer. 3 From the print options pop-up ...
User Manual
Page 53
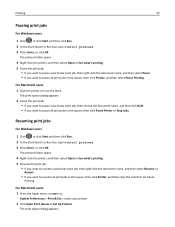
Resuming print jobs For Windows users 1 Click , or click Start and then click Run. 2 In the Start Search or Run box, type control printers. 3 Press Enter, or click OK. The printers folder opens. 4 Right‑click the printer, and then select Open or See what 's printing. 5 Pause the print job: • ... From the Apple menu, navigate to pause all print jobs in the queue, then click Pause Printer or Stop Jobs. For Macintosh users 1 Click the printer icon on the Dock. Printing 53 Pausing print jobs For Windows users 1 Click , or click Start and then click Run. 2 In the Start Search or...
Resuming print jobs For Windows users 1 Click , or click Start and then click Run. 2 In the Start Search or Run box, type control printers. 3 Press Enter, or click OK. The printers folder opens. 4 Right‑click the printer, and then select Open or See what 's printing. 5 Pause the print job: • ... From the Apple menu, navigate to pause all print jobs in the queue, then click Pause Printer or Stop Jobs. For Macintosh users 1 Click the printer icon on the Dock. Printing 53 Pausing print jobs For Windows users 1 Click , or click Start and then click Run. 2 In the Start Search or...
User Manual
Page 54
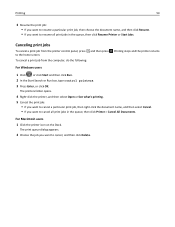
...in the queue, then click Printer > Cancel All Documents. Printing stops and the printer returns to resume all print jobs in the queue, then click Resume Printer or Start Jobs. Canceling print jobs To cancel a print job from the computer, do the following: For Windows users 1 Click , or click... Start and then click Run. 2 In the Start Search or Run box, type control printers. 3 Press Enter, or click OK. The printers folder opens. 4 Right‑click the printer, and then select Open or See what's printing. ...
...in the queue, then click Printer > Cancel All Documents. Printing stops and the printer returns to resume all print jobs in the queue, then click Resume Printer or Start Jobs. Canceling print jobs To cancel a print job from the computer, do the following: For Windows users 1 Click , or click... Start and then click Run. 2 In the Start Search or Run box, type control printers. 3 Press Enter, or click OK. The printers folder opens. 4 Right‑click the printer, and then select Open or See what's printing. ...
User Manual
Page 63
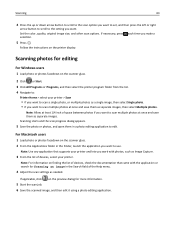
... of devices, select your printer. Scanning photos for editing For Windows users 1 Load photo or photos facedown on the scanner glass. 2 Click or Start. 3 Click All Programs or Programs, and then select the printer program folder from the list. 4 Navigate to: Printer Home > select your printer and lets you make ... you want to edit. Note: Allow at least 1/4 inch of space between photos if you want . Note: For information on the printer display. Set the color, quality, original image size, and other scan options. If necessary, press each time you work with the application...
... of devices, select your printer. Scanning photos for editing For Windows users 1 Load photo or photos facedown on the scanner glass. 2 Click or Start. 3 Click All Programs or Programs, and then select the printer program folder from the list. 4 Navigate to: Printer Home > select your printer and lets you make ... you want to edit. Note: Allow at least 1/4 inch of space between photos if you want . Note: For information on the printer display. Set the color, quality, original image size, and other scan options. If necessary, press each time you work with the application...


