User Manual
Page 22
... Determining the Status of Supplies 613 Conserving Supplies 613 Ordering Supplies 614 Storing Print Media 614 Storing Consumables 615 Replacing the Toner Cartridges 615 Removing the Toner Cartridge 616 Installing a Toner Cartridge 617 Replacing the Print Head Device (PHD) Unit 619 Removing the PHD Unit 619 Installing a PHD Unit 622 Replacing the Retard Roller 627 20 Contents
... Determining the Status of Supplies 613 Conserving Supplies 613 Ordering Supplies 614 Storing Print Media 614 Storing Consumables 615 Replacing the Toner Cartridges 615 Removing the Toner Cartridge 616 Installing a Toner Cartridge 617 Replacing the Print Head Device (PHD) Unit 619 Removing the PHD Unit 619 Installing a PHD Unit 622 Replacing the Retard Roller 627 20 Contents
User Manual
Page 698
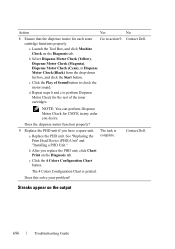
...the drop-down list box, and click the Start button. Does the dispense motor function properly? 9 Replace the PHD unit if you desire. The task is printed. Contact Dell. c Click the Play of Sound button to perform Dispense Motor Check for the rest of the toner cartridges. c...\section31.fm Action Yes No 8 Ensure that the dispense motor for CMYK in any order you have a spare unit. a Launch the Tool Box, and click Machine Check on the Diagnosis tab. "Installing a PHD Unit." Does this solve your problem? FOR PROOF ONLY 696 Troubleshooting Guide d Repeat steps ...
...the drop-down list box, and click the Start button. Does the dispense motor function properly? 9 Replace the PHD unit if you desire. The task is printed. Contact Dell. c Click the Play of Sound button to perform Dispense Motor Check for the rest of the toner cartridges. c...\section31.fm Action Yes No 8 Ensure that the dispense motor for CMYK in any order you have a spare unit. a Launch the Tool Box, and click Machine Check on the Diagnosis tab. "Installing a PHD Unit." Does this solve your problem? FOR PROOF ONLY 696 Troubleshooting Guide d Repeat steps ...


