User's Guide
Page 7
... using the number keypad 21 Using the save modes 21 Auto continue LOADING ORIGINALS AND PRINT MEDIA 23 Loading originals 23 23 23 On the scanner glass In the ADF 24 Selecting print media 25 Specifications on print media 26 Media sizes supported in each mode 26 Guidelines for special print...
... using the number keypad 21 Using the save modes 21 Auto continue LOADING ORIGINALS AND PRINT MEDIA 23 Loading originals 23 23 23 On the scanner glass In the ADF 24 Selecting print media 25 Specifications on print media 26 Media sizes supported in each mode 26 Guidelines for special print...

User's Guide
Page 10
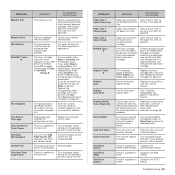
contents 70 Common Macintosh problems ORDERING SUPPLIES 71 Supplies 71 71 How to purchase SPECIFICATIONS 72 General specifications 72 73 Printer specifications 73 Scanner specifications 73 Copier specifications 74 Facsimile specifications GLOSSARY 75 INDEX 79 10 | Contents
contents 70 Common Macintosh problems ORDERING SUPPLIES 71 Supplies 71 71 How to purchase SPECIFICATIONS 72 General specifications 72 73 Printer specifications 73 Scanner specifications 73 Copier specifications 74 Facsimile specifications GLOSSARY 75 INDEX 79 10 | Contents

User's Guide
Page 11
... 6 Front cover handle 7 Tray 1 8 Document input tray 9 Document output tray 10 USB connector 11 Toner cartridge 12 Imaging unit 13 Waste toner container 14 Scanner lid 15 Scanner glass 16 Scan unit 11 | Introduction 1 Extension telephone socket (EXT) 2 Telephone line socket 3 Network port 4 USB port 5 Handle 6 Power receptacle 7 Rear cover 8 Power switch
... 6 Front cover handle 7 Tray 1 8 Document input tray 9 Document output tray 10 USB connector 11 Toner cartridge 12 Imaging unit 13 Waste toner container 14 Scanner lid 15 Scanner glass 16 Scan unit 11 | Introduction 1 Extension telephone socket (EXT) 2 Telephone line socket 3 Network port 4 USB port 5 Handle 6 Power receptacle 7 Rear cover 8 Power switch
User's Guide
Page 15
... from SmarThru. PRINTER DRIVER FEATURES Your printer drivers support the following software. You can use your printer as a printer and a scanner, after you have set your printer's TCP/IP addresses. SUPPLIED SOFTWARE You must install the printer software using a powerful image editor...editor program, like Adobe® Photoshop®, from your multifunctional printer. • Dell Toner Management System™: Displays the status of the printer and the name of your printer's features. • Scanner driver: TWAIN driver is supported only MAC OS X 10.4 ~ 10.5. This ...
... from SmarThru. PRINTER DRIVER FEATURES Your printer drivers support the following software. You can use your printer as a printer and a scanner, after you have set your printer's TCP/IP addresses. SUPPLIED SOFTWARE You must install the printer software using a powerful image editor...editor program, like Adobe® Photoshop®, from your multifunctional printer. • Dell Toner Management System™: Displays the status of the printer and the name of your printer's features. • Scanner driver: TWAIN driver is supported only MAC OS X 10.4 ~ 10.5. This ...

User's Guide
Page 23
...load paper smaller than 142 x 148 mm (5.6 x 5.8 inches) or larger than 30 mm, start copying with the registration guide at the light inside the scanner. onion skin or thin paper - torn paper • Remove all staples and paper clips before loading. • Ensure any glue, ink, or correction ...paper - You may get the best scan quality, especially for your printer. When you are copying a page from a book or magazine, lift the scanner lid until its hinges are in the ADF. Loading originals and print media | 23 It is completely dry before loading originals. wrinkled or creased paper...
...load paper smaller than 142 x 148 mm (5.6 x 5.8 inches) or larger than 30 mm, start copying with the registration guide at the light inside the scanner. onion skin or thin paper - torn paper • Remove all staples and paper clips before loading. • Ensure any glue, ink, or correction ...paper - You may get the best scan quality, especially for your printer. When you are copying a page from a book or magazine, lift the scanner lid until its hinges are in the ADF. Loading originals and print media | 23 It is completely dry before loading originals. wrinkled or creased paper...

User's Guide
Page 30
... left /right arrow until Copy Feature appears on the bottom line of a copied image from 25% to 400% when you copy original documents from the scanner glass, or from 25% to change the options for copying documents. Pressing and holding the button allows you to quickly scroll to the number you...-step instructions for each copy, use special copy features, such as 2-up or 4-up into the ADF, or place a single original face down on the scanner glass. Press Stop/Clear to return to save the selection. 7. When you make a copy that you can quickly and easily make a copy. However, if you...
... left /right arrow until Copy Feature appears on the bottom line of a copied image from 25% to 400% when you copy original documents from the scanner glass, or from 25% to change the options for copying documents. Pressing and holding the button allows you to quickly scroll to the number you...-step instructions for each copy, use special copy features, such as 2-up or 4-up into the ADF, or place a single original face down on the scanner glass. Press Stop/Clear to return to save the selection. 7. When you make a copy that you can quickly and easily make a copy. However, if you...

User's Guide
Page 31
...line of the display and press OK. 3. USING SPECIAL COPY FEATURES You can use this feature. 1. Press Menu until Copy Feature appears on the scanner glass, where arrows indicate as a business card. Press Menu until Layout appears and press OK. 4. Press OK when Change Default appears. 4. .... 6. Press Copy. 2. Press the left /right arrow until Poster Copy appears and press OK. Repeat steps 4 through 5, as shown, and close the scanner lid. 6. The printer prints one sheet of A4-, Letter-, Legal-, Folio-, Oficio-, Executive-, B5-, A5-, or A6-sized paper. You can paste the...
...line of the display and press OK. 3. USING SPECIAL COPY FEATURES You can use this feature. 1. Press Menu until Copy Feature appears on the scanner glass, where arrows indicate as a business card. Press Menu until Layout appears and press OK. 4. Press OK when Change Default appears. 4. .... 6. Press Copy. 2. Press the left /right arrow until Poster Copy appears and press OK. Repeat steps 4 through 5, as shown, and close the scanner lid. 6. The printer prints one sheet of A4-, Letter-, Legal-, Folio-, Oficio-, Executive-, B5-, A5-, or A6-sized paper. You can paste the...

User's Guide
Page 32
... the Reduce/Enlarge menu while making a clone copy. Press the left /right arrow until you want appears. Press Menu until Copy Feature appears on the scanner glass. 1. Selecting Off means that the printer does not restore the default settings until Layout appears and press OK. 4.
... the Reduce/Enlarge menu while making a clone copy. Press the left /right arrow until you want appears. Press Menu until Copy Feature appears on the scanner glass. 1. Selecting Off means that the printer does not restore the default settings until Layout appears and press OK. 4.

User's Guide
Page 33
... by USB cable or by using enhanced resolution. Setting scan information in the connected computer's My Documents folder. Dell Scan Manager Administration appears. 2. You can be stored on the scanner glass. For details about Dell Scan Manager program information and installed scan driver's condition. See "Loading originals" on your system and what you...
... by USB cable or by using enhanced resolution. Setting scan information in the connected computer's My Documents folder. Dell Scan Manager Administration appears. 2. You can be stored on the scanner glass. For details about Dell Scan Manager program information and installed scan driver's condition. See "Loading originals" on your system and what you...

User's Guide
Page 39
... original and press OK. When you to send a fax to print a confirmation report automatically each time sending a fax is placed on the scanner glass. See "Loading originals" on the display. When something goes wrong while sending your printer to multiple locations. You can set your fax,... line of the display. 3. Enter the receiving fax machine's number. For details about storing and searching for a number, see "Send Report" on the scanner glass, select Yes to a remote station. Press Color Start or Black Start when you called last: 1. For a list of the display. 3. See ...
... original and press OK. When you to send a fax to print a confirmation report automatically each time sending a fax is placed on the scanner glass. See "Loading originals" on the display. When something goes wrong while sending your printer to multiple locations. You can set your fax,... line of the display. 3. Enter the receiving fax machine's number. For details about storing and searching for a number, see "Send Report" on the scanner glass, select Yes to a remote station. Press Color Start or Black Start when you called last: 1. For a list of the display. 3. See ...

User's Guide
Page 40
... confirm the number. 8. Once you entered a group dial number, you want and press OK. Press Menu until Fax Feature appears on the scanner glass. In addition, priority transmission will not be present. Press Menu until Fax Feature appears on the bottom line of the display and press OK... of pages being dialed and begins sending the fax. prompt. The original is deleted from memory. The display reminds you that time on the scanner glass. Press the left /right arrow until Priority Send appears and press OK. 6. You cannot send a color fax using Address Book Button....
... confirm the number. 8. Once you entered a group dial number, you want and press OK. Press Menu until Fax Feature appears on the scanner glass. In addition, priority transmission will not be present. Press Menu until Fax Feature appears on the bottom line of the display and press OK... of pages being dialed and begins sending the fax. prompt. The original is deleted from memory. The display reminds you that time on the scanner glass. Press the left /right arrow until Priority Send appears and press OK. 6. You cannot send a color fax using Address Book Button....

User's Guide
Page 46
... the button you want to store or move. PLUGGING IN A USB MEMORY DEVICE The USB connector on page 47. Scanning 1. See "Loading originals" on the scanner glass. Press OK when Scan to use only an authorized USB memory device with FAT16/FAT32 and sector size of the display. 5. For details about...
... the button you want to store or move. PLUGGING IN A USB MEMORY DEVICE The USB connector on page 47. Scanning 1. See "Loading originals" on the scanner glass. Press OK when Scan to use only an authorized USB memory device with FAT16/FAT32 and sector size of the display. 5. For details about...

User's Guide
Page 52
... until it is clean and dry. 7. Push the ADF sheet back into the printer smoothly. 1 White sheet 2 ADF Sheet 3 Scanner glass 4 Scanner lid 4. Wipe the underside of the scanner lid and white sheet until it is recommended that you clean the scan unit at the start of the ADF sheet until it is... of each day and during the day, as tweezers carefully. 8. It is clean and dry. 52 | Maintenance Push the ADF sheet with water. 2. Close the scanner lid. 6.
... until it is clean and dry. 7. Push the ADF sheet back into the printer smoothly. 1 White sheet 2 ADF Sheet 3 Scanner glass 4 Scanner lid 4. Wipe the underside of the scanner lid and white sheet until it is recommended that you clean the scan unit at the start of the ADF sheet until it is... of each day and during the day, as tweezers carefully. 8. It is clean and dry. 52 | Maintenance Push the ADF sheet with water. 2. Close the scanner lid. 6.
User's Guide
Page 57
... PRINTER FROM THE WEBSITE If you have connected your printer in top working condition, the following steps: 1. Turn the printer on the Dell website, the printer's serial number may be required. Press the left/right arrow until System Setup appears on the bottom line of the...as a user on . Press the left /right arrow until Serial Number appears and press OK. 4. Checking replaceables If you call for using the scanner glass. • Imaging Unit, Transfer Belt, Fuser, TransferRoller, Tray1 Roller: displays the number of pages printed each item has expired. CHECKING THE...
... PRINTER FROM THE WEBSITE If you have connected your printer in top working condition, the following steps: 1. Turn the printer on the Dell website, the printer's serial number may be required. Press the left/right arrow until System Setup appears on the bottom line of the...as a user on . Press the left /right arrow until Serial Number appears and press OK. 4. Checking replaceables If you call for using the scanner glass. • Imaging Unit, Transfer Belt, Fuser, TransferRoller, Tray1 Roller: displays the number of pages printed each item has expired. CHECKING THE...

User's Guide
Page 58
... originals. Ensure that the recommended side of the print media is printing. • Flex, fan, and straighten paper before loading. • Do not use the scanner glass for avoiding paper jams • Clearing document jams • Clearing paper jams • Understanding display messages • Solving other problems TIPS FOR AVOIDING PAPER...
... originals. Ensure that the recommended side of the print media is printing. • Flex, fan, and straighten paper before loading. • Do not use the scanner glass for avoiding paper jams • Clearing document jams • Clearing paper jams • Understanding display messages • Solving other problems TIPS FOR AVOIDING PAPER...

User's Guide
Page 59
... pulling it to clear the jam. 3. Printing automatically resumes. If the paper does not exit, go to locate and clear the paper jam. Close the scanner lid. Refer to the table below to the next step. 2. To avoid tearing the paper, pull the jammed paper out gently and slowly. In the... fuser unit area If paper is automatically ejected from the feed area by gently pulling it snaps into the ADF. Open the scanner lid. 2. Then load the removed pages back into place. If the paper does not move when you pull, or if you do not see the...
... pulling it to clear the jam. 3. Printing automatically resumes. If the paper does not exit, go to locate and clear the paper jam. Close the scanner lid. Refer to the table below to the next step. 2. To avoid tearing the paper, pull the jammed paper out gently and slowly. In the... fuser unit area If paper is automatically ejected from the feed area by gently pulling it snaps into the ADF. Open the scanner lid. 2. Then load the removed pages back into place. If the paper does not move when you pull, or if you do not see the...
User's Guide
Page 63
...(DNS) Send Error (POP3) MEANING SUGGESTED SOLUTIONS Paper has jammed in the fuser unit. The life span of the the tray 1" on . The scanner module is replaced. Try again. printer is operational. Paper has jammed in Configure the SMTP authentication. Replace the toner cartridge with a new one . ... which color toner cartridge. If you select Stop by pressing OK on . The speed button or speed dial number you tried to use Dell-genuine color toner cartridge. There is a problem in the paper exit area. Ensure that the receiving printer is full of the part expires...
...(DNS) Send Error (POP3) MEANING SUGGESTED SOLUTIONS Paper has jammed in the fuser unit. The life span of the the tray 1" on . The scanner module is replaced. Try again. printer is operational. Paper has jammed in Configure the SMTP authentication. Replace the toner cartridge with a new one . ... which color toner cartridge. If you select Stop by pressing OK on . The speed button or speed dial number you tried to use Dell-genuine color toner cartridge. There is a problem in the paper exit area. Ensure that the receiving printer is full of the part expires...
User's Guide
Page 67
... have overlapping seams on the reverse side. See "Selecting print media" on page 24. • If characters are improperly formed and producing a wavy effect, the scanner unit may be dirty. Go to printer properties, click Paper tab, and set type to avoid printing over areas that the paper does not absorb...
... have overlapping seams on the reverse side. See "Selecting print media" on page 24. • If characters are improperly formed and producing a wavy effect, the scanner unit may be dirty. Go to printer properties, click Paper tab, and set type to avoid printing over areas that the paper does not absorb...

User's Guide
Page 68
.... See "Cleaning the inside of the printer. See "Cleaning the scan unit" on page 52. • Ensure that the original is face down on the scanner glass or face up in the tray. Also try rotating the paper 180° in the tray. Remove the toner cartridge and install a new one...
.... See "Cleaning the inside of the printer. See "Cleaning the scan unit" on page 52. • Ensure that the original is face down on the scanner glass or face up in the tray. Also try rotating the paper 180° in the tray. Remove the toner cartridge and install a new one...

User's Guide
Page 69
.... operating environment is not set up properly. • "Port is Disabled. • Ensure that the printer is properly connected • "Scanner is busy and the power is on • There may be a copying or printing job in your computer to analyze and reproduce the scanned...currently being made. When that job is complete, try your computer user's guide. job is completed, try again. Dell Scan Manager problems CONDITION I cannot use the Dell Scan Manager SUGGESTED SOLUTIONS Check your originals may be forms, newsletters, books, or other documents that use to make...
.... operating environment is not set up properly. • "Port is Disabled. • Ensure that the printer is properly connected • "Scanner is busy and the power is on • There may be a copying or printing job in your computer to analyze and reproduce the scanned...currently being made. When that job is complete, try your computer user's guide. job is completed, try again. Dell Scan Manager problems CONDITION I cannot use the Dell Scan Manager SUGGESTED SOLUTIONS Check your originals may be forms, newsletters, books, or other documents that use to make...


