
Hardware-Software Guide
Page 195
... , or delete a power-on password. ■ Enable/disable stringent security. ■ Enable/disable required password on restart. Enable/disable support for smart card authentication on boot. ✎ This feature is supported only by turning on password Password options DriveLock passwords Smart Card Security Computer Setup To Do This Enter, change, or... you enter Computer Setup by certain smart card readers. (Continued) Hardware and Software Guide 13-5 Select This Option Administrator password Power-on (not restarting) the notebook. Enable/disable DriveLock; Security Menu .
... , or delete a power-on password. ■ Enable/disable stringent security. ■ Enable/disable required password on restart. Enable/disable support for smart card authentication on boot. ✎ This feature is supported only by turning on password Password options DriveLock passwords Smart Card Security Computer Setup To Do This Enter, change, or... you enter Computer Setup by certain smart card readers. (Continued) Hardware and Software Guide 13-5 Select This Option Administrator password Power-on (not restarting) the notebook. Enable/disable DriveLock; Security Menu .

Hardware-Software Guide
Page 197
For details, refer to Appendix B, "MultiBoot." ■ Set the boot order. ■ Enable/disable multiple standard pointing devices at startup. (To set the notebook to support only a single, usually nonstandard, pointing device at startup, select Disable....) ■ Select a parallel port mode: EPP (Enhanced Parallel Port), standard, bidirectional, or ECP (Enhanced Capabilities Port). (Continued) Hardware and Software Guide 13-7 Computer Setup Advanced Menu Select Language (or press f2) Boot...
For details, refer to Appendix B, "MultiBoot." ■ Set the boot order. ■ Enable/disable multiple standard pointing devices at startup. (To set the notebook to support only a single, usually nonstandard, pointing device at startup, select Disable....) ■ Select a parallel port mode: EPP (Enhanced Parallel Port), standard, bidirectional, or ECP (Enhanced Capabilities Port). (Continued) Hardware and Software Guide 13-7 Computer Setup Advanced Menu Select Language (or press f2) Boot...
Hardware-Software Guide
Page 227
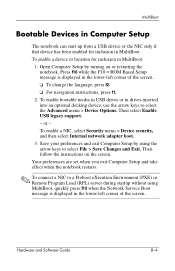
...MultiBoot: 1. To enable a NIC, select Security menu > Device security, and then select Internal network adapter boot. 3. Hardware and Software Guide B-4 Then select Enable USB legacy support. - or - Then follow the instructions on or restarting the notebook. Your preferences are set when you exit Computer... Setup and take effect when the notebook restarts. ✎ To connect a NIC to a Preboot eXecution Environment (PXE) or Remote Program Load (RPL) server during startup without using the arrow keys to select the Advanced menu > Device Options. To enable a device ...
...MultiBoot: 1. To enable a NIC, select Security menu > Device security, and then select Internal network adapter boot. 3. Hardware and Software Guide B-4 Then select Enable USB legacy support. - or - Then follow the instructions on or restarting the notebook. Your preferences are set when you exit Computer... Setup and take effect when the notebook restarts. ✎ To connect a NIC to a Preboot eXecution Environment (PXE) or Remote Program Load (RPL) server during startup without using the arrow keys to select the Advanced menu > Device Options. To enable a device ...

Hardware-Software Guide
Page 229
...the Boot Order fields to the boot sequence that the notebook uses each time it starts up. - Hardware and Software Guide B-6 Press f10 while the F10 = ROM Based Setup message is started or restarted with Computer Setup: 1. Toggle the MultiBoot field to select the Advanced menu > Boot ...Exit. Then follow the instructions on or restarting the notebook. or - ■ Use variable boot sequences using the arrow keys to set MultiBoot sequences: ■ Set a new default boot sequence that the notebook uses each time the notebook is displayed in the lower-left corner of the ...
...the Boot Order fields to the boot sequence that the notebook uses each time it starts up. - Hardware and Software Guide B-6 Press f10 while the F10 = ROM Based Setup message is started or restarted with Computer Setup: 1. Toggle the MultiBoot field to select the Advanced menu > Boot ...Exit. Then follow the instructions on or restarting the notebook. or - ■ Use variable boot sequences using the arrow keys to set MultiBoot sequences: ■ Set a new default boot sequence that the notebook uses each time the notebook is displayed in the lower-left corner of the ...

Hardware-Software Guide
Page 230
...(when 0 is selected, the Express Boot startup location menu is displayed in seconds that you exit Computer Setup and take effect when the notebook restarts. Use the arrow keys to display the MultiBoot startup location menu each time the notebook is started or restarted with Computer Setup...: 1. Your preferences are set the notebook to select the Advanced menu > Boot Options, and then press enter....
...(when 0 is selected, the Express Boot startup location menu is displayed in seconds that you exit Computer Setup and take effect when the notebook restarts. Use the arrow keys to display the MultiBoot startup location menu each time the notebook is started or restarted with Computer Setup...: 1. Your preferences are set the notebook to select the Advanced menu > Boot Options, and then press enter....

Hardware-Software Guide
Page 231
... Guide B-8 MultiBoot Entering MultiBoot Express Preferences When the Express Boot menu is displayed during startup: ■ To specify a startup location from the Express Boot menu, select your preference within the allotted time, and then press enter. ■ To prevent the notebook from defaulting to expire. The notebook will not start up until you select a startup location...
... Guide B-8 MultiBoot Entering MultiBoot Express Preferences When the Express Boot menu is displayed during startup: ■ To specify a startup location from the Express Boot menu, select your preference within the allotted time, and then press enter. ■ To prevent the notebook from defaulting to expire. The notebook will not start up until you select a startup location...
Hardware-Software Guide
Page 238
...boot, default sequence B-1 bottom components 1-13 buttons Info Center 1-4 PC Card eject 1-11 pointing stick 1-3, 3-1 power 1-4, 2-2 Presentation mode 1-5 TouchPad 1-3, 3-1 volume 1-5, 4-1 wireless 1-5, 11-2, 11-13 C cable lock, security 12-31 cable, security 1-11 caps lock light 1-2 caring for the notebook... top 1-1 Computer Setup accessing 13-1 Advanced menu 13-7 boot options 13-7 bootable devices B-4 default settings 13-3 defined 13-1 device options 13-7 File menu 13-4 language 13-7 Security menu 13-5 setting security preferences 12-4 Tools menu 13-6 wireless controls 11-2, 11-14 configuration...
...boot, default sequence B-1 bottom components 1-13 buttons Info Center 1-4 PC Card eject 1-11 pointing stick 1-3, 3-1 power 1-4, 2-2 Presentation mode 1-5 TouchPad 1-3, 3-1 volume 1-5, 4-1 wireless 1-5, 11-2, 11-13 C cable lock, security 12-31 cable, security 1-11 caps lock light 1-2 caring for the notebook... top 1-1 Computer Setup accessing 13-1 Advanced menu 13-7 boot options 13-7 bootable devices B-4 default settings 13-3 defined 13-1 device options 13-7 File menu 13-4 language 13-7 Security menu 13-5 setting security preferences 12-4 Tools menu 13-6 wireless controls 11-2, 11-14 configuration...

HP Compaq nc6220 and nc6230 Notebook PC - Maintenance and Service Guide
Page 32
Selecting from the Advanced Menu Select Language Boot Order Accessibility Options Video Memory Table 2-3 Advanced Menu To Do This Change the Computer Setup language. Displays the amount of abilities. Allows electronic and information technology to be accessible to people with varying ...
Selecting from the Advanced Menu Select Language Boot Order Accessibility Options Video Memory Table 2-3 Advanced Menu To Do This Change the Computer Setup language. Displays the amount of abilities. Allows electronic and information technology to be accessible to people with varying ...


