User Guide
Page 2
... the instructions, may cause harmful interference to radio communications. Carefully check the power cord for breakage, cuts, exposed wire and other areas) NOTICE This equipment has been tested and found to comply with the limits for a Class B digital device, pursuant to check the AC Adaptor for any sign of different types. • Never mix old batteries with new...
... the instructions, may cause harmful interference to radio communications. Carefully check the power cord for breakage, cuts, exposed wire and other areas) NOTICE This equipment has been tested and found to comply with the limits for a Class B digital device, pursuant to check the AC Adaptor for any sign of different types. • Never mix old batteries with new...
User Guide
Page 3
...itself to ensure that the product is operated incorrectly while ignoring this symbol are specifically prohibited. (The example at left indicates that the power plug must be performed. Those symbols along with a line through the instructions contained in this indication. WARNING This ...are used in this manual. • Please keep all information for which there is the likelihood of occurrence of physical damage only if the product is operated incorrectly while ignoring this user's guide and on your selection of the CASIO electronic musical instrument. • Before using the...
...itself to ensure that the product is operated incorrectly while ignoring this symbol are specifically prohibited. (The example at left indicates that the power plug must be performed. Those symbols along with a line through the instructions contained in this indication. WARNING This ...are used in this manual. • Please keep all information for which there is the likelihood of occurrence of physical damage only if the product is operated incorrectly while ignoring this user's guide and on your selection of the CASIO electronic musical instrument. • Before using the...
User Guide
Page 5
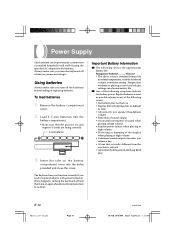
... 6.5J/PPC • Never mix old batteries with new ones. • Never mix batteries of different types. • Do not charge the batteries. • Make sure the positive (+) and negative (-) ends of the batteries are using the AC adaptor for power, unplug it from the wall outlet. 3. Contact your original retailer or an authorized CASIO Service Provider. Particular care concerning this precaution...
... 6.5J/PPC • Never mix old batteries with new ones. • Never mix batteries of different types. • Do not charge the batteries. • Make sure the positive (+) and negative (-) ends of the batteries are using the AC adaptor for power, unplug it from the wall outlet. 3. Contact your original retailer or an authorized CASIO Service Provider. Particular care concerning this precaution...

User Guide
Page 8
...; Abnormally low speaker/headphone volume • Distortion of sound output • Occasional interruption of sound when playing at high volume • Sudden power failure when playing at high volume • Flickering or dimming of the display when playing at high volume • Continued sound output even after you release a key • A tone that is totally different from the one that is selected • Abnormal rhythm pattern and Song Bank play E-6 MA150_e_01-07...
...; Abnormally low speaker/headphone volume • Distortion of sound output • Occasional interruption of sound when playing at high volume • Sudden power failure when playing at high volume • Flickering or dimming of the display when playing at high volume • Continued sound output even after you release a key • A tone that is totally different from the one that is selected • Abnormal rhythm pattern and Song Bank play E-6 MA150_e_01-07...
User Guide
Page 9
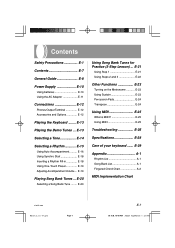
... Adjusting Accompaniment Volume ... E-29 Appendix A-1 Rhythm List A-1 Song Bank List A-1 Fingered Chord Chart A-2 MIDI Implementation Chart 274B-E-009A MA150_e_01-07.p65 Page 7 E-7 03.10.8, 10:45 AM Adobe PageMaker 6.5J/PPC E-19 Playing Song Bank Tunes ... Contents Safety Precautions E-1 Contents E-7 General Guide E-8 Power Supply E-10 Using batteries E-10 Using the AC Adaptor E-11 Connections E-12 Phones/Output Terminal E-12 Accessories and Options E-12 Playing the Keyboard ........ E-21 Using Step 1 E-21 Using Steps 2 and 3 E-22 Other Functions E-23 Turning...
... Adjusting Accompaniment Volume ... E-29 Appendix A-1 Rhythm List A-1 Song Bank List A-1 Fingered Chord Chart A-2 MIDI Implementation Chart 274B-E-009A MA150_e_01-07.p65 Page 7 E-7 03.10.8, 10:45 AM Adobe PageMaker 6.5J/PPC E-19 Playing Song Bank Tunes ... Contents Safety Precautions E-1 Contents E-7 General Guide E-8 Power Supply E-10 Using batteries E-10 Using the AC Adaptor E-11 Connections E-12 Phones/Output Terminal E-12 Accessories and Options E-12 Playing the Keyboard ........ E-21 Using Step 1 E-21 Using Steps 2 and 3 E-22 Other Functions E-23 Turning...
User Guide
Page 12
... or playing at very loud volume settings can be powered by batteries. Always make sure you release a key • A tone that is totally different from a standard household wall outlet (using it. Using batteries Always make sure you turn the keyboard off whenever you load or replace batteries with the keyboard volume at high volume • Continued sound output even after you turn on again should return functions back to read • Abnormally low speaker/headphone volume •...
... or playing at very loud volume settings can be powered by batteries. Always make sure you release a key • A tone that is totally different from a standard household wall outlet (using it. Using batteries Always make sure you turn the keyboard off whenever you load or replace batteries with the keyboard volume at high volume • Continued sound output even after you turn on again should return functions back to read • Abnormally low speaker/headphone volume •...
User Guide
Page 13
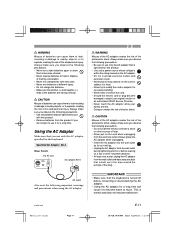
... your original retailer or an authorized CASIO Service Provider. • Never touch the AC adaptor while your hands are wet. Always make sure you use only the AC adaptor that you observe the following precautions. • Use only batteries that is turned off before leaving on the cord when unplugging from the electrical outlet. WARNING Misuse of batteries can cause them to leak...
... your original retailer or an authorized CASIO Service Provider. • Never touch the AC adaptor while your hands are wet. Always make sure you use only the AC adaptor that you observe the following precautions. • Use only batteries that is turned off before leaving on the cord when unplugging from the electrical outlet. WARNING Misuse of batteries can cause them to leak...
User Guide
Page 14
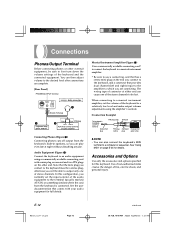
... Equipment (Figure 2) Connect the keyboard to an audio equipment using the amplifier's controls. [Connection Example] To keyboard's PHONES/ OUTPUT terminal PIN plug (red) Stereo mini plug PIN plug (white) PIN jack INPUT 1 INPUT 2 Standard Keyboard or plug guitar amp ❚ NOTE • You can cause one of the keyboard to a relatively low level and make output volume adjustments using a commercially available connecting cord with your audio equipment for full details. The wrong type of connector at...
... Equipment (Figure 2) Connect the keyboard to an audio equipment using the amplifier's controls. [Connection Example] To keyboard's PHONES/ OUTPUT terminal PIN plug (red) Stereo mini plug PIN plug (white) PIN jack INPUT 1 INPUT 2 Standard Keyboard or plug guitar amp ❚ NOTE • You can cause one of the keyboard to a relatively low level and make output volume adjustments using a commercially available connecting cord with your audio equipment for full details. The wrong type of connector at...
User Guide
Page 15
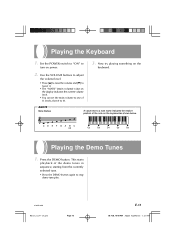
Set the POWER switch to "ON" to a note name indicates the relative position of the note on the display indicates the current volume level. • You can set the main volume to one of the demo tunes in sequence, starting from 0 to 10. ❚ NOTE Note Names A value next to turn on the keyboard. 2. Use the VOLUME buttons to adjust the volume level. • Press [̆] to raise the volume and [̄] to...
Set the POWER switch to "ON" to a note name indicates the relative position of the note on the display indicates the current volume level. • You can set the main volume to one of the demo tunes in sequence, starting from 0 to 10. ❚ NOTE Note Names A value next to turn on the keyboard. 2. Use the VOLUME buttons to adjust the volume level. • Press [̆] to raise the volume and [̄] to...
User Guide
Page 16
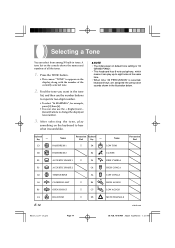
... the display, along with the number of all the tones. 1. Find the tone you want in the tone list, and then use the number buttons to input its two-digit number. • To select "06 MARIMBA", for example, press [0] then [6]. • You can play something on the keyboard to appear on the console shows the names and numbers of the currently selected tone. 2. Keyboard Key - Name C3 BASS DRUM 1 Percussion Keyboard Pad Key...
... the display, along with the number of all the tones. 1. Find the tone you want in the tone list, and then use the number buttons to input its two-digit number. • To select "06 MARIMBA", for example, press [0] then [6]. • You can play something on the keyboard to appear on the console shows the names and numbers of the currently selected tone. 2. Keyboard Key - Name C3 BASS DRUM 1 Percussion Keyboard Pad Key...
User Guide
Page 17
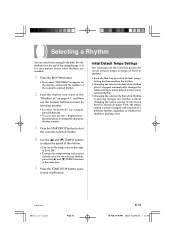
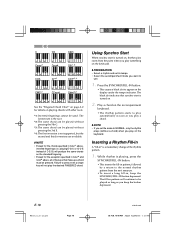
... rhythm. • Changing the selected rhythm while rhythm play . If One-Touch Preset is playing changes the rhythm without changing the tempo setting. Selecting a Rhythm You can select from among 30 rhythms. See the rhythm list at the same time. 5. Use the [̆] and [̄] TEMPO buttons to adjust the speed of whether the rhythm is always changed with the number of 40 to 240. • To return the tempo setting to change the displayed rhythm number. 3. Press the START/STOP button...
... rhythm. • Changing the selected rhythm while rhythm play . If One-Touch Preset is playing changes the rhythm without changing the tempo setting. Selecting a Rhythm You can select from among 30 rhythms. See the rhythm list at the same time. 5. Use the [̆] and [̄] TEMPO buttons to adjust the speed of whether the rhythm is always changed with the number of 40 to 240. • To return the tempo setting to change the displayed rhythm number. 3. Press the START/STOP button...
User Guide
Page 18
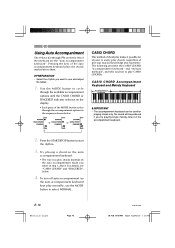
... playing a chord on the auto accompaniment keyboard. • The way you play normally), use the MODE button to use and adjust the tempo. 1. The following describes the CASIO CHORD "accompaniment keyboard" and "melody keyboard", and tells you try playing single melody notes on the far left of the MODE button cycles through the accompaniment options in step 1, above them. ❚ PREPARATION • Select the rhythm you select in the sequence shown below . 4. No sound will...
... playing a chord on the auto accompaniment keyboard. • The way you play normally), use the MODE button to use and adjust the tempo. 1. The following describes the CASIO CHORD "accompaniment keyboard" and "melody keyboard", and tells you try playing single melody notes on the far left of the MODE button cycles through the accompaniment options in step 1, above them. ❚ PREPARATION • Select the rhythm you select in the sequence shown below . 4. No sound will...
User Guide
Page 20
Play a chord on the accompaniment keyboard. • The rhythm pattern starts to play automatically as soon as you play a chord. ❚ NOTE • If you set its tempo. • Select the accompaniment mode you play the desired FINGERED chord. The lowest note is the root. *2: The same chord can be played without pressing the 5th G. *3: The same chord can be played as long as the standard fingering. • Except for the exception...
Play a chord on the accompaniment keyboard. • The rhythm pattern starts to play automatically as soon as you play a chord. ❚ NOTE • If you set its tempo. • Select the accompaniment mode you play the desired FINGERED chord. The lowest note is the root. *2: The same chord can be played without pressing the 5th G. *3: The same chord can be played as long as the standard fingering. • Except for the exception...
User Guide
Page 21
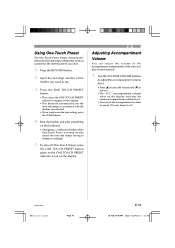
Start the rhythm and play on the keyboard. 1. Use the ACCOMP VOLUME buttons to adjust the accompaniment volume level. • Press [̆] to raise the volume and [̄] to lower it. • The "ACC." (accompaniment volume) value on also causes the tone and tempo setting to change accordingly. 5. Input the two-digit number of the rhythm you play something on the keyboard. • Changing to a different rhythm while One-Touch Preset is not on the display. • This keyboard automatically...
Start the rhythm and play on the keyboard. 1. Use the ACCOMP VOLUME buttons to adjust the accompaniment volume level. • Press [̆] to raise the volume and [̄] to lower it. • The "ACC." (accompaniment volume) value on also causes the tone and tempo setting to change accordingly. 5. Input the two-digit number of the rhythm you play something on the keyboard. • Changing to a different rhythm while One-Touch Preset is not on the display. • This keyboard automatically...
User Guide
Page 22
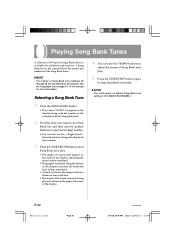
... the tempo indicator flashes in time with the number of the currently selected Song Bank tune. 2. Find the tune you want in the Song Bank list, and then use the number buttons to input its two-digit number. • You can use the + (higher) and - (lower) buttons to stop Song Bank tune play . • The image of a music staff appears in the center of the display, indicating the notes as they are played. • The graphic keyboard along with beat...
... the tempo indicator flashes in time with the number of the currently selected Song Bank tune. 2. Find the tune you want in the Song Bank list, and then use the number buttons to input its two-digit number. • You can use the + (higher) and - (lower) buttons to stop Song Bank tune play . • The image of a music staff appears in the center of the display, indicating the notes as they are played. • The graphic keyboard along with beat...
User Guide
Page 24
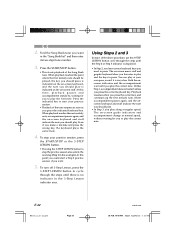
... the accompaniment wait until you make a mistake and press the wrong key, the keyboard plays the correct note. 4. At this point you could start your practice session. • Playback of the tune resumes as soon as you to play is no indicator in the "Song Bank list" and then enter its two-digit tune number. 3. At this time, playback pauses and accompaniment stands by, waiting for you to start a Step 2 practice...
... the accompaniment wait until you make a mistake and press the wrong key, the keyboard plays the correct note. 4. At this point you could start your practice session. • Playback of the tune resumes as soon as you to play is no indicator in the "Song Bank list" and then enter its two-digit tune number. 3. At this time, playback pauses and accompaniment stands by, waiting for you to start a Step 2 practice...
User Guide
Page 25
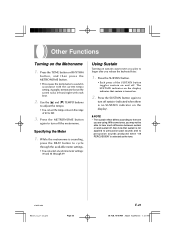
... available meter settings. • You can set the tempo value in accordance with each beat. 2. Use the [̆] and [̄] TEMPO buttons to adjust the tempo. • You can select one of the SUSTAIN button toggles sustain on sustain causes notes you play to 240. 3. Using Sustain Turning on and off . A graphic metronome bar on the Metronome 1. Press the TONE button or RHYTHM button, and then press the METRONOME button. • This causes the metronome to sound in...
... available meter settings. • You can set the tempo value in accordance with each beat. 2. Use the [̆] and [̄] TEMPO buttons to adjust the tempo. • You can select one of the SUSTAIN button toggles sustain on sustain causes notes you play to 240. 3. Using Sustain Turning on and off . A graphic metronome bar on the Metronome 1. Press the TONE button or RHYTHM button, and then press the METRONOME button. • This causes the metronome to sound in...
User Guide
Page 27
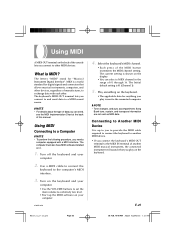
... display. • You can send, see the MIDI Implementation Chart at the back of this manual. The current setting is shown on the back of the MIDI button increments the MIDI channel setting. E-25 MA150_e_23-25.p65 Page 25 03.10.8, 10:45 AM Adobe PageMaker 6.5J/PPC What is 01 (Channel 1). 5. Use a MIDI cable to connect the keyboard to the connected computer. ❚ NOTE • Tone changes, and auto accompaniment, Song Bank tune, sustain, and transpose...
... display. • You can send, see the MIDI Implementation Chart at the back of this manual. The current setting is shown on the back of the MIDI button increments the MIDI channel setting. E-25 MA150_e_23-25.p65 Page 25 03.10.8, 10:45 AM Adobe PageMaker 6.5J/PPC What is 01 (Channel 1). 5. Use a MIDI cable to connect the keyboard to the connected computer. ❚ NOTE • Tone changes, and auto accompaniment, Song Bank tune, sustain, and transpose...
User Guide
Page 28
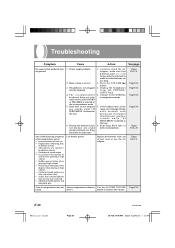
... NORMAL accompaniment mode. 5. Stop Song Bank tune or demo tune playback. Only keyboard keys in the range of the display when playing at high volume • Flickering or dimming of C3 through D5 (the ones marked with a set of a Song Bank tune or demo tune. 1. T h e a c c o m p a n i m e n t keyboard does not play Low battery power Replace the batteries with percussion instrument illustrations) produce sounds while "49 PERCUSSION" is totally different from the PHONES/ OUTPUT jack. 4. set to read • Abnormally low speaker/ headphone volume...
... NORMAL accompaniment mode. 5. Stop Song Bank tune or demo tune playback. Only keyboard keys in the range of the display when playing at high volume • Flickering or dimming of C3 through D5 (the ones marked with a set of a Song Bank tune or demo tune. 1. T h e a c c o m p a n i m e n t keyboard does not play Low battery power Replace the batteries with percussion instrument illustrations) produce sounds while "49 PERCUSSION" is totally different from the PHONES/ OUTPUT jack. 4. set to read • Abnormally low speaker/ headphone volume...
User Guide
Page 30
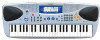
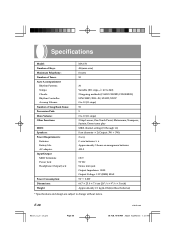
Specifications Model: Number of Keys: Maximum Polyphony: Number of Tones: Auto Accompaniment Rhythm Patterns: Tempo: Chords: Rhythm Controller: Accomp Volume: Number of Song Bank Tunes: Percussion Pads: Main Volume: Other Functions: MIDI: Speakers: Power Requirements: Batteries: Battery life: AC adaptor: Input/Output MIDI Terminals: Power Jack: Headphone/Output Jack: Power Consumption: Dimensions: Weight: MA-150 49 (mini-size) 8 notes 50 30 Variable (201 steps, = 40 to 240) 2 fingering methods (CASIO CHORD, FINGERED) SYNCHRO/FILL-IN, START/STOP 0 to 10 (11 steps) 50 5 0 to change without ...
Specifications Model: Number of Keys: Maximum Polyphony: Number of Tones: Auto Accompaniment Rhythm Patterns: Tempo: Chords: Rhythm Controller: Accomp Volume: Number of Song Bank Tunes: Percussion Pads: Main Volume: Other Functions: MIDI: Speakers: Power Requirements: Batteries: Battery life: AC adaptor: Input/Output MIDI Terminals: Power Jack: Headphone/Output Jack: Power Consumption: Dimensions: Weight: MA-150 49 (mini-size) 8 notes 50 30 Variable (201 steps, = 40 to 240) 2 fingering methods (CASIO CHORD, FINGERED) SYNCHRO/FILL-IN, START/STOP 0 to 10 (11 steps) 50 5 0 to change without ...


