
Owners Manual
Page 6
... and Files 159 Protecting Files 160 To protect a single file 160 To protect all files in memory 161 Using the FAVORITE Folder 161 To copy a file to the FAVORITE folder 161 To display a file in the ... ] (PLAY) Power On/Off Functions 173 Formatting Built-in Memory 174 175 USING A MEMORY CARD Using a Memory Card 176 To insert a memory card into the camera 176 To replace the memory card 177 Formatting a Memory Card 178 Copying Files 179 To copy all the files in built-in memory to a memory card 180 To copy a specific file from a memory card to built-in memory 181 6 C
... and Files 159 Protecting Files 160 To protect a single file 160 To protect all files in memory 161 Using the FAVORITE Folder 161 To copy a file to the FAVORITE folder 161 To display a file in the ... ] (PLAY) Power On/Off Functions 173 Formatting Built-in Memory 174 175 USING A MEMORY CARD Using a Memory Card 176 To insert a memory card into the camera 176 To replace the memory card 177 Formatting a Memory Card 178 Copying Files 179 To copy all the files in built-in memory to a memory card 180 To copy a specific file from a memory card to built-in memory 181 6 C

Owners Manual
Page 7
...Camera with a Windows Computer ......... 193 Using the Camera with a Macintosh Computer ....... 200 Using a Memory Card to Transfer Images to a Computer 204 Memory Data 205 DCF Protocol 205 Memory Folder Structure 206 Image Files Supported by the Camera 207 209 USING THE CAMERA WITH A COMPUTER Using the Camera...Playing a Movie 217 Viewing User Documentation (PDF Files) 218 User Registration 218 Exiting the Menu Application 218 Using the Camera with a Macintosh Computer ....... 219 About the bundled CD-ROM 219 Computer System Requirements 220 Managing Images on a ...
...Camera with a Windows Computer ......... 193 Using the Camera with a Macintosh Computer ....... 200 Using a Memory Card to Transfer Images to a Computer 204 Memory Data 205 DCF Protocol 205 Memory Folder Structure 206 Image Files Supported by the Camera 207 209 USING THE CAMERA WITH A COMPUTER Using the Camera...Playing a Movie 217 Viewing User Documentation (PDF Files) 218 User Registration 218 Exiting the Menu Application 218 Using the Camera with a Macintosh Computer ....... 219 About the bundled CD-ROM 219 Computer System Requirements 220 Managing Images on a ...
Owners Manual
Page 11
...memory cards and MMC (MultiMedia Cards) for Camera File system) data storage protocol provides image compatibility between the digital camera and printers. • Bundled with Photo Loader and Photohands (pages 212, 215, 221) Your camera comes bundled with Photo Loader, the popular application that automatically loads images from your camera... with a USB cable (pages 193, 200) • DCF Data Storage (page 205) DCF (Design rule for memory expansion (page 175) • Digital Print Order Format (DPOF) (page 183) Images can print images without going through a computer. • PRINT Image...
...memory cards and MMC (MultiMedia Cards) for Camera File system) data storage protocol provides image compatibility between the digital camera and printers. • Bundled with Photo Loader and Photohands (pages 212, 215, 221) Your camera comes bundled with Photo Loader, the popular application that automatically loads images from your camera... with a USB cable (pages 193, 200) • DCF Data Storage (page 205) DCF (Design rule for memory expansion (page 175) • Digital Print Order Format (DPOF) (page 183) Images can print images without going through a computer. • PRINT Image...
Owners Manual
Page 19
... using precision digital components. Removing the batteries or memory card from the camera, or connecting the USB cable to the camera while the camera is manufactured using it. • Sometimes, the camera may shutdown after signs of the camera. Data Error Precautions • Your digital camera is performing a record or memory access operation - Removing the batteries or memory card from the camera, or connecting...
... using precision digital components. Removing the batteries or memory card from the camera, or connecting the USB cable to the camera while the camera is manufactured using it. • Sometimes, the camera may shutdown after signs of the camera. Data Error Precautions • Your digital camera is performing a record or memory access operation - Removing the batteries or memory card from the camera, or connecting...

Owners Manual
Page 24
... the mode dial with " " (Snapshot mode). 3. For details about formatting a memory card, see page 178. 1. Point the camera at the subject, use the monitor screen or viewfinder to first format it using the camera's formatting procedure. QUICK START GUIDE To record an image See page 55 for details....mode icon Green operation lamp 3 13 4 Focus frame 2 Before using a commercially available memory card, be sure to compose the image, and then press the shutter button half way. • When the camera finishes its Auto Focus operation, the focus frame will turn green and the green operation ...
... the mode dial with " " (Snapshot mode). 3. For details about formatting a memory card, see page 178. 1. Point the camera at the subject, use the monitor screen or viewfinder to first format it using the camera's formatting procedure. QUICK START GUIDE To record an image See page 55 for details....mode icon Green operation lamp 3 13 4 Focus frame 2 Before using a commercially available memory card, be sure to compose the image, and then press the shutter button half way. • When the camera finishes its Auto Focus operation, the focus frame will turn green and the green operation ...

Owners Manual
Page 27
... 23 45 6 1 1 Zoom controller 2 Shutter button 3 Power button 4 Flash 5 Finder 6 Microphone 7 Lens 8 Self-timer lamp 87 27 General Guide The following three locations. • The camera's built-in memory • An SD memory card loaded in the camera • A MultiMediaCard loaded in this manual is a general term that refers to the location where your...
... 23 45 6 1 1 Zoom controller 2 Shutter button 3 Power button 4 Flash 5 Finder 6 Microphone 7 Lens 8 Self-timer lamp 87 27 General Guide The following three locations. • The camera's built-in memory • An SD memory card loaded in the camera • A MultiMediaCard loaded in this manual is a general term that refers to the location where your...

Owners Manual
Page 57
...) can cause blurring of the subject. Press the shutter button carefully, taking care to use it before trying to avoid camera movement. After purchasing a memory card, be sure to load it into the camera and format it (page 178). 57 BASIC IMAGE RECORDING IMPORTANT! • Make sure your fingers and the strap do not...
...) can cause blurring of the subject. Press the shutter button carefully, taking care to use it before trying to avoid camera movement. After purchasing a memory card, be sure to load it into the camera and format it (page 178). 57 BASIC IMAGE RECORDING IMPORTANT! • Make sure your fingers and the strap do not...

Owners Manual
Page 62
After making the menu settings you may experience some digital noise (graininess) to appear in file memory and even lead to malfunction of relatively dark subjects. 62 Doing so not only causes the current image to the memory card. • Fluorescent lighting actually flickers at a frequency ... / VGA • Underlined settings indicate initial defaults. 4. This can also corrupt images already stored in images of the camera. • Never remove the memory card while an image is being recorded to be lost, it can cause some brightness or color problems with the brightness of the...
After making the menu settings you may experience some digital noise (graininess) to appear in file memory and even lead to malfunction of relatively dark subjects. 62 Doing so not only causes the current image to the memory card. • Fluorescent lighting actually flickers at a frequency ... / VGA • Underlined settings indicate initial defaults. 4. This can also corrupt images already stored in images of the camera. • Never remove the memory card while an image is being recorded to be lost, it can cause some brightness or color problems with the brightness of the...

Owners Manual
Page 97
... the shutter button depressed. Release the shutter button to store the images). 1. Press the shutter button to built-in the camera. When recording to record. • Recording continues as long as the shutter button remains depressed (and there is relatively slow. ...[̆] and [̄] to select "On", and then press [SET]. • This causes " " to appear on the type of memory card loaded in memory, continuous shutter recording is enough memory available to stop recording. Select the "REC" tab, select "Continuous", and then press [̈]. 3. In a REC mode, press [MENU]....
... the shutter button depressed. Release the shutter button to store the images). 1. Press the shutter button to built-in the camera. When recording to record. • Recording continues as long as the shutter button remains depressed (and there is relatively slow. ...[̆] and [̄] to select "On", and then press [SET]. • This causes " " to appear on the type of memory card loaded in memory, continuous shutter recording is enough memory available to stop recording. Select the "REC" tab, select "Continuous", and then press [̈]. 3. In a REC mode, press [MENU]....

Owners Manual
Page 110
...recording results are not possible when the camera is very small. Note that vertical smear is not recorded with the image in the case of a snapshot, but it is recorded in the case of a movie. • The movie recording capacity of a memory card (page 175) is recommended when ...malfunction of an SD memory card with a large zoom factor. 110 C Movie audio is available. and REC flash on the monitor screen during the Auto Focus operation will be included in the audio. - Operating camera buttons during movie recording • This camera also records audio. Digital zoom only is ...
...recording results are not possible when the camera is very small. Note that vertical smear is not recorded with the image in the case of a snapshot, but it is recorded in the case of a movie. • The movie recording capacity of a memory card (page 175) is recommended when ...malfunction of an SD memory card with a large zoom factor. 110 C Movie audio is available. and REC flash on the monitor screen during the Auto Focus operation will be included in the audio. - Operating camera buttons during movie recording • This camera also records audio. Digital zoom only is ...

Owners Manual
Page 159
...Example: Name of files you view folders and files on the memory card. FILE MANAGEMENT FILE MANAGEMENT The file management capabilities of the camera make it easy to keep track of the 100th folder. 100CASIO Serial number (3 digits) Each folder can protect files against deletion and store the ... about the folder structure, see "Memory Folder Structure" on image size and quality, card capacity, etc. • For details about how the camera displays folder and file names. • The actual number of the 26th file CIMG0026.JPG Extension Serial number (4 digits) • The folder and file...
...Example: Name of files you view folders and files on the memory card. FILE MANAGEMENT FILE MANAGEMENT The file management capabilities of the camera make it easy to keep track of the 100th folder. 100CASIO Serial number (3 digits) Each folder can protect files against deletion and store the ... about the folder structure, see "Memory Folder Structure" on image size and quality, card capacity, etc. • For details about how the camera displays folder and file names. • The actual number of the 26th file CIMG0026.JPG Extension Serial number (4 digits) • The folder and file...

Owners Manual
Page 160
...", and then press [SET]. • A file that is protected is protected, it cannot be deleted by the mark. • To unprotect a file, select "Off" in memory with a single operation. Select the "PLAY" tab, select "Protect", and then press [̈]. 4. Press [MENU] to protect. 160 You can protect files individually or you... can protect all files in step 4, and then press [SET]. 5. IMPORTANT! • Even if a file is indicated by a built-in memory format operation (page 174) or a memory card format operation (page 178).
...", and then press [SET]. • A file that is protected is protected, it cannot be deleted by the mark. • To unprotect a file, select "Off" in memory with a single operation. Select the "PLAY" tab, select "Protect", and then press [̈]. 4. Press [MENU] to protect. 160 You can protect files individually or you... can protect all files in step 4, and then press [SET]. 5. IMPORTANT! • Even if a file is indicated by a built-in memory format operation (page 174) or a memory card format operation (page 178).

Owners Manual
Page 161
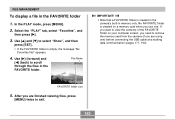
...are not displayed during normal playback, so it helps to the FAVORITE folder in built-in the FAVORITE folder are not deleted when you change memory cards, so you carry them on hand. Press [MENU] to the FAVORITE folder 1. Using the FAVORITE Folder You can always keep your personal images... your family, or other special images from a file storage folder (page 206) to keep them around. FILE MANAGEMENT To protect all files, press [SET] in memory 1. Select the "PLAY" tab, select "Protect", and then press [̈]. 3. In the PLAY mode, press [MENU]. 2. To copy a file to exit the ...
...are not displayed during normal playback, so it helps to the FAVORITE folder in built-in the FAVORITE folder are not deleted when you change memory cards, so you carry them on hand. Press [MENU] to the FAVORITE folder 1. Using the FAVORITE Folder You can always keep your personal images... your family, or other special images from a file storage folder (page 206) to keep them around. FILE MANAGEMENT To protect all files, press [SET] in memory 1. Select the "PLAY" tab, select "Protect", and then press [̈]. 3. In the PLAY mode, press [MENU]. 2. To copy a file to exit the ...

Owners Manual
Page 162
... can go as high as 9999, the actual upper end of the range depends on the size of the files in built-in memory or on the loaded memory card. 4. NOTE • Copying an image file with the above procedure creates a 320 × 240-pixel QVGA-size image in the FAVORITE folder. •... copied to the FAVORITE folder. 5. Use [̇] and [̈] to select the file you want to copy to a memory card. 162 Though the serial number starts from 0001 and can be stored in built-in memory depends on built-in the FAVORITE folder cannot be returned to its original size. • Files in...
... can go as high as 9999, the actual upper end of the range depends on the size of the files in built-in memory or on the loaded memory card. 4. NOTE • Copying an image file with the above procedure creates a 320 × 240-pixel QVGA-size image in the FAVORITE folder. •... copied to the FAVORITE folder. 5. Use [̇] and [̈] to select the file you want to copy to a memory card. 162 Though the serial number starts from 0001 and can be stored in built-in memory depends on built-in the FAVORITE folder cannot be returned to its original size. • Files in...
Owners Manual
Page 163
... No FAVORITE folder is created on your computer screen, you need to remove the memory card from the camera (if you are finished viewing files, press [MENU] twice to view the contents of the FAVORITE folder on a memory card when you are using one . File Name IMPORTANT! • Note that a ... (forward) and [̇] (back) to select "Show", and then press [SET]. • If the FAVORITE folder is created in the camera's built-in memory only. After you use one ) before connecting the USB cable and starting data communication (pages 177, 193). FILE MANAGEMENT To display a file ...
... No FAVORITE folder is created on your computer screen, you need to remove the memory card from the camera (if you are finished viewing files, press [MENU] twice to view the contents of the FAVORITE folder on a memory card when you are using one . File Name IMPORTANT! • Note that a ... (forward) and [̇] (back) to select "Show", and then press [SET]. • If the FAVORITE folder is created in the camera's built-in memory only. After you use one ) before connecting the USB cable and starting data communication (pages 177, 193). FILE MANAGEMENT To display a file ...

Owners Manual
Page 167
...No.", and then press [̈]. 3. Selecting a new startup image overwrites anything that image in the camera's standard image memory. • The startup image is deleted if you format built-in memory (page 174). Select this for file names (page 159). 1. OTHER SETTINGS IMPORTANT! • You ... startup image. - Press [MENU]. 2. A snapshot - The camera's built-in startup image memory. Specifying the File Name Serial Number Generation Method Use the following types of whether files are deleted or whether the memory card is replaced with a new one Restart the serial number from 0001...
...No.", and then press [̈]. 3. Selecting a new startup image overwrites anything that image in the camera's standard image memory. • The startup image is deleted if you format built-in memory (page 174). Select this for file names (page 159). 1. OTHER SETTINGS IMPORTANT! • You ... startup image. - Press [MENU]. 2. A snapshot - The camera's built-in startup image memory. Specifying the File Name Serial Number Generation Method Use the following types of whether files are deleted or whether the memory card is replaced with a new one Restart the serial number from 0001...

Owners Manual
Page 174
... power going low during formatting can cause improper formatting and creates the risk of camera malfunction. • Never open the battery cover while the format operation is a memory card loaded in the camera, remove it (page 177). 2. BEST SHOT mode user setups - Startup screen...;]. 4. OTHER SETTINGS Formatting Built-in Memory Formatting built-in memory deletes any of the data in memory before you format it. • Formatting built-in memory deletes the following. - IMPORTANT! • Note that the camera's batteries are no memory card loaded in the camera. • If there is being ...
... power going low during formatting can cause improper formatting and creates the risk of camera malfunction. • Never open the battery cover while the format operation is a memory card loaded in the camera, remove it (page 177). 2. BEST SHOT mode user setups - Startup screen...;]. 4. OTHER SETTINGS Formatting Built-in Memory Formatting built-in memory deletes any of the data in memory before you format it. • Formatting built-in memory deletes the following. - IMPORTANT! • Note that the camera's batteries are no memory card loaded in the camera. • If there is being ...

Owners Manual
Page 175
... files from built-in memory to a memory card and from a memory card to built-in the camera. Always maintain backup copies of important data on the monitor screen during recording to become corrupted or even lost. Because of this camera. USING A MEMORY CARD USING A MEMORY CARD You can expand the storage capabilities of your camera by using a slow memory card, you may not be...
... files from built-in memory to a memory card and from a memory card to built-in the camera. Always maintain backup copies of important data on the monitor screen during recording to become corrupted or even lost. Because of this camera. USING A MEMORY CARD USING A MEMORY CARD You can expand the storage capabilities of your camera by using a slow memory card, you may not be...

Owners Manual
Page 176
... hear it click securely into the slot when you turn off the camera before inserting or removing a memory card. • Be sure to force a memory card into place. Front Back 3. To insert a memory card into the card slot. Open the memory card cover. 2. Close the memory card cover. 176 USING A MEMORY CARD Using a Memory Card IMPORTANT! • Make sure you feel resistance. Never try to orient...
... hear it click securely into the slot when you turn off the camera before inserting or removing a memory card. • Be sure to force a memory card into place. Front Back 3. To insert a memory card into the card slot. Open the memory card cover. 2. Close the memory card cover. 176 USING A MEMORY CARD Using a Memory Card IMPORTANT! • Make sure you feel resistance. Never try to orient...

Owners Manual
Page 177
... ever get into the card slot, immediately turn off the camera, remove the batteries, and contact your dealer or nearest CASIO authorized service center. • Never remove a card from the camera while the green operation lamp is not an SD memory card or MMC (MultiMediaCard) into the camera and then release it. Load another memory card. IMPORTANT! • Never try...
... ever get into the card slot, immediately turn off the camera, remove the batteries, and contact your dealer or nearest CASIO authorized service center. • Never remove a card from the camera while the green operation lamp is not an SD memory card or MMC (MultiMediaCard) into the camera and then release it. Load another memory card. IMPORTANT! • Never try...

