
Owners Manual
Page 1
E Digital Camera User's Guide Thank you for purchasing this CASIO product. • Before using it, be sure to read the precautions contained in this User's Guide. • Keep the User's Guide in a safe place for future reference. • For the most up-to-date information about this product, visit the official EXILIM Website at http://www.exilim.com/
E Digital Camera User's Guide Thank you for purchasing this CASIO product. • Before using it, be sure to read the precautions contained in this User's Guide. • Keep the User's Guide in a safe place for future reference. • For the most up-to-date information about this product, visit the official EXILIM Website at http://www.exilim.com/

Owners Manual
Page 2
If anything is missing, contact your camera, check to country or geographic area. Power cord Strap USB cable AV cable CD-ROM Basic Reference 2 Unpacking As you unpack your original retailer. Digital camera Rechargeable lithium ion battery (NP-40) Charger unit (BC-31L) To attach the strap to the camera Attach strap here. * The shape of the power cord plug varies according to make sure that all items shown below are included.
If anything is missing, contact your camera, check to country or geographic area. Power cord Strap USB cable AV cable CD-ROM Basic Reference 2 Unpacking As you unpack your original retailer. Digital camera Rechargeable lithium ion battery (NP-40) Charger unit (BC-31L) To attach the strap to the camera Attach strap here. * The shape of the power cord plug varies according to make sure that all items shown below are included.

Owners Manual
Page 3
... liable for any damages or lost profits suffered by you notice anything that the camera is due to the characteristics of pixels may not light or may differ somewhat from the screens and configuration of CASIO COMPUTER CO., LTD. shall not be held liable for your final image, shoot...• Note that some very small number of the liquid crystal panel, and does not indicate malfunction. shall not be held liable for CASIO. • CASIO COMPUTER CO., LTD. Take test shots Before shooting your own personal use, any damages, lost profits caused by third parties arising out of...
... liable for any damages or lost profits suffered by you notice anything that the camera is due to the characteristics of pixels may not light or may differ somewhat from the screens and configuration of CASIO COMPUTER CO., LTD. shall not be held liable for your final image, shoot...• Note that some very small number of the liquid crystal panel, and does not indicate malfunction. shall not be held liable for CASIO. • CASIO COMPUTER CO., LTD. Take test shots Before shooting your own personal use, any damages, lost profits caused by third parties arising out of...

Owners Manual
Page 4
Contents Unpacking 2 Read this first 3 General Guide 9 Monitor Screen Contents 11 ❚❙ Quick Start Basics 14 What is a digital camera 14 What you can do with your CASIO camera 15 First, charge the battery prior to use 16 ❚ To charge the battery 16 ❚ To load the battery 17 ...Configuring Basic Settings the First Time You Turn On the Camera 19 Preparing a Memory Card 20 ❚ Supported Memory Cards 20 ...
Contents Unpacking 2 Read this first 3 General Guide 9 Monitor Screen Contents 11 ❚❙ Quick Start Basics 14 What is a digital camera 14 What you can do with your CASIO camera 15 First, charge the battery prior to use 16 ❚ To charge the battery 16 ❚ To load the battery 17 ...Configuring Basic Settings the First Time You Turn On the Camera 19 Preparing a Memory Card 20 ❚ Supported Memory Cards 20 ...

Owners Manual
Page 5
... . . 70 Shooting with High Speed Anti Shake High Speed Anti Shake) . . 71 Digitally Correcting for Overexposure and Underexposure High Speed Lighting) . . 72 Configuring the Camera to Help You Better Time Your Shots Lag Correction) . . 73 Isolating Moving Subjects Multi-...Changing the Continuous Shutter Mode CS) . . . 96 ❚ Configuring the Continuous Shutter Image Save Method Save CS Images) . . . 96 ❚ Turning Digital Zoom On or Off Digital Zoom) . . . 96 ❚ Assigning Functions to the [4] and [6] Keys L/R Key) . . . 97 ❚ Shooting with Quick Shutter Quick ...
... . . 70 Shooting with High Speed Anti Shake High Speed Anti Shake) . . 71 Digitally Correcting for Overexposure and Underexposure High Speed Lighting) . . 72 Configuring the Camera to Help You Better Time Your Shots Lag Correction) . . 73 Isolating Moving Subjects Multi-...Changing the Continuous Shutter Mode CS) . . . 96 ❚ Configuring the Continuous Shutter Image Save Method Save CS Images) . . . 96 ❚ Turning Digital Zoom On or Off Digital Zoom) . . . 96 ❚ Assigning Functions to the [4] and [6] Keys L/R Key) . . . 97 ❚ Shooting with Quick Shutter Quick ...
Owners Manual
Page 6
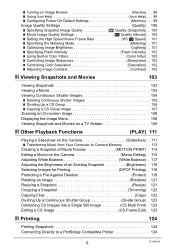
... Screen 109 ❚❙ Other Playback Functions (PLAY) 111 Playing a Slideshow on the Camera Slideshow) . .111 ❚ Transferring Music from Your Computer to Camera Memory 113 Creating a Snapshot of Movie Frames MOTION PRINT) . 114 Editing a Movie on the Camera Movie Editing) . 115 Adjusting White Balance White Balance) . 117 Adjusting the Brightness of an...
... Screen 109 ❚❙ Other Playback Functions (PLAY) 111 Playing a Slideshow on the Camera Slideshow) . .111 ❚ Transferring Music from Your Computer to Camera Memory 113 Creating a Snapshot of Movie Frames MOTION PRINT) . 114 Editing a Movie on the Camera Movie Editing) . 115 Adjusting White Balance White Balance) . 117 Adjusting the Brightness of an...

Owners Manual
Page 7
...;❙ Other Settings (Set Up) 152 Adjusting Monitor Screen Brightness Screen) . 152 Turning off Eye-Fi Card Communication Eye-Fi) . 152 Configuring Camera Sound Settings Sounds) . 153 Specifying the File Name Serial Number Generation Rule . . . . . (File No.) . 153 Configuring World Time... Settings World Time) . 154 Time Stamping Snapshots Timestamp) . 155 Setting the Camera's Clock Adjust) . 155 Specifying the Date Style Date Style) . 156 Specifying the Display Language Language) . 156 Configuring Sleep State Settings Sleep) ....
...;❙ Other Settings (Set Up) 152 Adjusting Monitor Screen Brightness Screen) . 152 Turning off Eye-Fi Card Communication Eye-Fi) . 152 Configuring Camera Sound Settings Sounds) . 153 Specifying the File Name Serial Number Generation Rule . . . . . (File No.) . 153 Configuring World Time... Settings World Time) . 154 Time Stamping Snapshots Timestamp) . 155 Setting the Camera's Clock Adjust) . 155 Specifying the Date Style Date Style) . 156 Specifying the Display Language Language) . 156 Configuring Sleep State Settings Sleep) ....

Owners Manual
Page 8
...; Appendix 163 Precautions during Use 163 Power Supply 170 ❚ Charging 170 ❚ To replace the battery 171 ❚ Battery Precautions 171 ❚ Using the Camera in another Country 172 Using a Memory Card 172 ❚ To replace the memory card 172 Computer System Requirements for Bundled Software 174 Reset Initial Default...
...; Appendix 163 Precautions during Use 163 Power Supply 170 ❚ Charging 170 ❚ To replace the battery 171 ❚ Battery Precautions 171 ❚ Using the Camera in another Country 172 Using a Memory Card 172 ❚ To replace the memory card 172 Computer System Requirements for Bundled Software 174 Reset Initial Default...

Owners Manual
Page 9
General Guide The numbers in parentheses indicate the pages where each item is explained. . Camera Front 1 2345 Back 9 6 bkbl bm bn 6 bo bp bq 8 7 cm clckbt bs br 1Zoom controller (pages 25, 46, 108) 2Shutter button (page 25) 3Flash (page ...
General Guide The numbers in parentheses indicate the pages where each item is explained. . Camera Front 1 2345 Back 9 6 bkbl bm bn 6 bo bp bq 8 7 cm clckbt bs br 1Zoom controller (pages 25, 46, 108) 2Shutter button (page 25) 3Flash (page ...

Owners Manual
Page 11
...) ckBattery level indicator (page 18) clHistogram (page 161) cmAnti Shake (page 92) cnFace Detection (page 94) NOTE • The semi-transparent gray frame on the camera. . They do not represent screens that actually appear on the monitor screen indicates the area that can appear on the monitor screen in this section... capacity (pages 52, 79) 8Number of all the indicators and figures that is not correct, the setting will turn orange when you informed of the camera's status. • The sample screens in various modes.
...) ckBattery level indicator (page 18) clHistogram (page 161) cmAnti Shake (page 92) cnFace Detection (page 94) NOTE • The semi-transparent gray frame on the camera. . They do not represent screens that actually appear on the monitor screen indicates the area that can appear on the monitor screen in this section... capacity (pages 52, 79) 8Number of all the indicators and figures that is not correct, the setting will turn orange when you informed of the camera's status. • The sample screens in various modes.

Owners Manual
Page 14
Store images on a memory card, so you can use the images you record in a variety of times. Attach images to e-mail. 14 Quick Start Basics A digital camera stores images on your computer. Print images. Quick Start Basics What is a digital camera? Record Delete Play You can record and delete them a countless number of different ways.
Store images on a memory card, so you can use the images you record in a variety of times. Attach images to e-mail. 14 Quick Start Basics A digital camera stores images on your computer. Print images. Quick Start Basics What is a digital camera? Record Delete Play You can record and delete them a countless number of different ways.

Owners Manual
Page 15
... human eye, in high-quality HD. (1280x720 pixels 30 fps) 1280x720 pixels See page 60 for more information. What you can do with your CASIO camera Your CASIO camera is packed with the shutter button. HD Movie Recording You can shoot up to 30 continuous highresolution images at the amazing speed of 40 images... you can record movies in slow motion. This makes it possible to clearly view phenomena that are almost never too late with a powerful selection of digital images easier, including the following three main functions. See page 60 for more information.
... human eye, in high-quality HD. (1280x720 pixels 30 fps) 1280x720 pixels See page 60 for more information. What you can do with your CASIO camera Your CASIO camera is packed with the shutter button. HD Movie Recording You can shoot up to 30 continuous highresolution images at the amazing speed of 40 images... you can record movies in slow motion. This makes it possible to clearly view phenomena that are almost never too late with a powerful selection of digital images easier, including the following three main functions. See page 60 for more information.

Owners Manual
Page 16
... the battery 1. The [CHARGE] lamp will go out when charging is not charged. terminals of the battery with those of a newly purchased camera is complete. Unplug the power cord from the power outlet and then remove the battery from the charger. [CHARGE] lamp Lamp Status Lit Red...minutes are required to abnormally high or low ambient temperature (page 170) 16 Quick Start Basics Never try to a full charge. • Your camera requires a special CASIO rechargeable lithium ion battery (NP-40) for power. Perform the steps under "To charge the battery" to bring the battery to use . ...
... the battery 1. The [CHARGE] lamp will go out when charging is not charged. terminals of the battery with those of a newly purchased camera is complete. Unplug the power cord from the power outlet and then remove the battery from the charger. [CHARGE] lamp Lamp Status Lit Red...minutes are required to abnormally high or low ambient temperature (page 170) 16 Quick Start Basics Never try to a full charge. • Your camera requires a special CASIO rechargeable lithium ion battery (NP-40) for power. Perform the steps under "To charge the battery" to bring the battery to use . ...

Owners Manual
Page 17
... before charging it. • A battery discharges slightly even when it in the camera. Open the battery cover. Because of this happens, plug the charger into the camera. With the EXILIM logo on current battery capacity and charging conditions. Slide the battery cover release in ...the direction 1 indicated by arrow 2. 2 2. Stopper Battery contacts EXILIM logo Front Back 17 Quick Start Basics Never use...
... before charging it. • A battery discharges slightly even when it in the camera. Open the battery cover. Because of this happens, plug the charger into the camera. With the EXILIM logo on current battery capacity and charging conditions. Slide the battery cover release in ...the direction 1 indicated by arrow 2. 2 2. Stopper Battery contacts EXILIM logo Front Back 17 Quick Start Basics Never use...

Owners Manual
Page 18
...Remaining Battery Power As battery power is dead will appear the next time you switch between the REC mode and PLAY mode. • Leaving the camera for "Continuous AF" (page 95). • Avoid unnecessary optical zoom operations. 18 Quick Start Basics Charge the battery immediately. • The ...level shown by the battery indicator may change when you turn off the camera (pages 157, 157). • Select "Off" for about battery life and memory capacity. Recording is not possible when is low. Charge the...
...Remaining Battery Power As battery power is dead will appear the next time you switch between the REC mode and PLAY mode. • Leaving the camera for "Continuous AF" (page 95). • Avoid unnecessary optical zoom operations. 18 Quick Start Basics Charge the battery immediately. • The ...level shown by the battery indicator may change when you turn off the camera (pages 157, 157). • Select "Off" for about battery life and memory capacity. Recording is not possible when is low. Charge the...

Owners Manual
Page 19
...and [6] to select "Apply" and then press [SET]. 19 Quick Start Basics Set the date and the time. Use [8] and [2] to turn on the camera. [ON/OFF] 2. To switch between 12-hour and 24-hour format, press [BS]. 5. Use [4] and [6] to change the display language from Japanese in...to select the setting you want and then [BS] press [SET]. 3. Configuring Basic Settings the First Time You Turn On the Camera The first time you load a battery into the camera, a screen appears for the Japanese market. 1. Failure to be included with images. IMPORTANT! • A screen for language ...
...and [6] to select "Apply" and then press [SET]. 19 Quick Start Basics Set the date and the time. Use [8] and [2] to turn on the camera. [ON/OFF] 2. To switch between 12-hour and 24-hour format, press [BS]. 5. Use [4] and [6] to change the display language from Japanese in...to select the setting you want and then [BS] press [SET]. 3. Configuring Basic Settings the First Time You Turn On the Camera The first time you load a battery into the camera, a screen appears for the Japanese market. 1. Failure to be included with images. IMPORTANT! • A screen for language ...

Owners Manual
Page 20
...; Each country controls its local time offset and the use of memory card. • Use only SD cards that frames are compliant with this camera. 20 Quick Start Basics SDHC Memory Card Use one of the above procedure, refer to the following pages for the first time can make a mistake...Ultra High Speed Type SD memory card used to be used with the SD Card Association specification. . Note, however that can result in memory that CASIO makes no memory card is loaded, images are saved to built-in memory. • For information about how to change. • Removing the battery...
...; Each country controls its local time offset and the use of memory card. • Use only SD cards that frames are compliant with this camera. 20 Quick Start Basics SDHC Memory Card Use one of the above procedure, refer to the following pages for the first time can make a mistake...Ultra High Speed Type SD memory card used to be used with the SD Card Association specification. . Note, however that can result in memory that CASIO makes no memory card is loaded, images are saved to built-in memory. • For information about how to change. • Removing the battery...

Owners Manual
Page 21
... Press [ON/OFF] to replace the memory card, see page 172. Close the battery cover. • For information about how to turn off the camera and then open the battery cover as indicated by arrow 1 and then open the battery cover. Positioning the memory card so its front is facing... upwards (towards the monitor screen side of the camera), slide it click securely into the card slot, immediately turn off the camera, remove the battery, and contact your retailer or nearest CASIO authorized service center. 21 Quick Start Basics To load a memory card 1.
... Press [ON/OFF] to replace the memory card, see page 172. Close the battery cover. • For information about how to turn off the camera and then open the battery cover as indicated by arrow 1 and then open the battery cover. Positioning the memory card so its front is facing... upwards (towards the monitor screen side of the camera), slide it click securely into the card slot, immediately turn off the camera, remove the battery, and contact your retailer or nearest CASIO authorized service center. 21 Quick Start Basics To load a memory card 1.

Owners Manual
Page 22
To format (initialize) a new memory card You need to format a memory card. Formatting a memory card on a computer can result in the camera can slow down or if you do not need to format a new memory card before formatting the card. 22 Quick Start Basics Do this before ...using it in non-conformity with the SD format, causing problems with compatibility, operation, etc. • Before formatting a new Eye-Fi card to use the camera to format a memory card again. In the case of an SD or SDHC memory card, formatting on a computer and then using it for the first...
To format (initialize) a new memory card You need to format a memory card. Formatting a memory card on a computer can result in the camera can slow down or if you do not need to format a new memory card before formatting the card. 22 Quick Start Basics Do this before ...using it in non-conformity with the SD format, causing problems with compatibility, operation, etc. • Before formatting a new Eye-Fi card to use the camera to format a memory card again. In the case of an SD or SDHC memory card, formatting on a computer and then using it for the first...

Owners Manual
Page 23
...that nothing is restricting or coming into contact with your hand so it extends. You also can configure the camera to turn off the camera Press [ON/OFF] (Power). • You can configure the camera so power does not turn off when you are entering the REC mode, the lens will extend from... Auto Power Off (pages 157, 157) will turn power on when you press [r] (REC) or [p] (PLAY). The back lamp will light (green) momentarily and the camera will turn off power automatically if you do not perform any operation for a preset amount of time. [ON/OFF] (Power) Back lamp [p] (PLAY) [r] (REC) ...
...that nothing is restricting or coming into contact with your hand so it extends. You also can configure the camera to turn off the camera Press [ON/OFF] (Power). • You can configure the camera so power does not turn off when you are entering the REC mode, the lens will extend from... Auto Power Off (pages 157, 157) will turn power on when you press [r] (REC) or [p] (PLAY). The back lamp will light (green) momentarily and the camera will turn off power automatically if you do not perform any operation for a preset amount of time. [ON/OFF] (Power) Back lamp [p] (PLAY) [r] (REC) ...


