Users Manual - English
Page 4
... on a circuit different from that the products Product Name: Model Number: Product Options: Brother Laser Printer HL-4000CN HL-4000CN ALL complies with the limits for help. Only) Responsible Party: Brother International Corporation 100 Somerset Corporate Boulevard Bridgewater, NJ 08807-0911, USA TEL: (908) 704-1700.... If this device must accept any interference received, including interference that interference will not occur in order to comply with Part 15 of the following two conditions: (1) This device may not cause harmful interference, and (2) this equipment does cause ...
... on a circuit different from that the products Product Name: Model Number: Product Options: Brother Laser Printer HL-4000CN HL-4000CN ALL complies with the limits for help. Only) Responsible Party: Brother International Corporation 100 Somerset Corporate Boulevard Bridgewater, NJ 08807-0911, USA TEL: (908) 704-1700.... If this device must accept any interference received, including interference that interference will not occur in order to comply with Part 15 of the following two conditions: (1) This device may not cause harmful interference, and (2) this equipment does cause ...

Users Manual - English
Page 8
Radiation Power Wave Length Laser Class 10 mW 770 nm-808 nm Class IIIb (Accordance with 21 CFR Part 1040.10) Class 3B (Accordance with IEC60825) viii Caution: Use of controls, adjustments or the performance of procedures other than ...Bruksanvisning specificerats, kan användaren utsättas för osynlig laserstrålning, som överskrider gränsen för laserklass 1. Varning - Internal laser radiation Max. The Scanner Unit should not be opened under any circumstances. CLASS 1LASER PRODUCT APPAREIL Å LASER DE CLASSE 1 LASER KLASSE 1 PRODUKT This...
Radiation Power Wave Length Laser Class 10 mW 770 nm-808 nm Class IIIb (Accordance with 21 CFR Part 1040.10) Class 3B (Accordance with IEC60825) viii Caution: Use of controls, adjustments or the performance of procedures other than ...Bruksanvisning specificerats, kan användaren utsättas för osynlig laserstrålning, som överskrider gränsen för laserklass 1. Varning - Internal laser radiation Max. The Scanner Unit should not be opened under any circumstances. CLASS 1LASER PRODUCT APPAREIL Å LASER DE CLASSE 1 LASER KLASSE 1 PRODUKT This...
Users Manual - English
Page 12
... the Printer Driver ...2-1 2.1.2 Upgrading the Printer Driver ...2-1 2.2 Installing the Printer Driver (Macintosh 2-3 2.2.1 Installing the Printer Driver ...2-3 2.2.2 Upgrading the Printer Driver ...2-3 CHAPTER 3 BASIC PRINTER OPERATION 3-1 3.1 Printer Part Names and Functions 3-1 Front View ...3-1 Rear View ...3-2 Internal View...3-3 3.2 Turning the Printer On and Off 3-4 3.2.1 Turn the Printer On...3-4 3.2.2 Turn the Printer Off ...3-5 xii
... the Printer Driver ...2-1 2.1.2 Upgrading the Printer Driver ...2-1 2.2 Installing the Printer Driver (Macintosh 2-3 2.2.1 Installing the Printer Driver ...2-3 2.2.2 Upgrading the Printer Driver ...2-3 CHAPTER 3 BASIC PRINTER OPERATION 3-1 3.1 Printer Part Names and Functions 3-1 Front View ...3-1 Rear View ...3-2 Internal View...3-3 3.2 Turning the Printer On and Off 3-4 3.2.1 Turn the Printer On...3-4 3.2.2 Turn the Printer Off ...3-5 xii

Users Manual - English
Page 18
Example:Click [OK] in the [Properties] dialog box. This may also emphasize a part name or important information to press 2 keys or control panel buttons at the same time. Enter "0.0.0.0" Indicates a control panel button. Indicates that you need to ...
Example:Click [OK] in the [Properties] dialog box. This may also emphasize a part name or important information to press 2 keys or control panel buttons at the same time. Enter "0.0.0.0" Indicates a control panel button. Indicates that you need to ...
Users Manual - English
Page 23
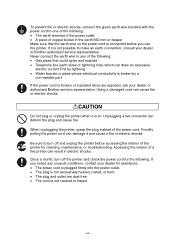
...and unplug the printer before you notice any of the power cord. Never connect the earth wire to any unusual conditions, contact your dealer or Brother authorized service representative. CAUTION Do not plug or unplug the printer when it is not excessively heated, rusted, or bent. • The plug... can draw an excessive electric current if hit by lightning • Water faucets or pipes whose electrical conductivity is broken by a non-metallic part If the power cord is broken or insulated wires are dust free. • The cord is connected before accessing the interior of the printer...
...and unplug the printer before you notice any of the power cord. Never connect the earth wire to any unusual conditions, contact your dealer or Brother authorized service representative. CAUTION Do not plug or unplug the printer when it is not excessively heated, rusted, or bent. • The plug... can draw an excessive electric current if hit by lightning • Water faucets or pipes whose electrical conductivity is broken by a non-metallic part If the power cord is broken or insulated wires are dust free. • The cord is connected before accessing the interior of the printer...
Users Manual - English
Page 24
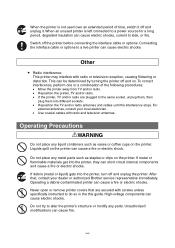
... instructed to do so in the this guide. Do not place any metal parts such as vases or coffee cups on . For external antennas, consult your dealer or authorized Brother service representative immediately. Do not try to alter the printer's structure or modify... long period, degraded insulation can cause fire. Operating a debris-contaminated printer can short circuit internal components and cause a fire or electric shocks. Operating Precautions WARNING Do not place any parts. If metal or flammable materials get into the printer, turn off the printer before connecting ...
... instructed to do so in the this guide. Do not place any metal parts such as vases or coffee cups on . For external antennas, consult your dealer or authorized Brother service representative immediately. Do not try to alter the printer's structure or modify... long period, degraded insulation can cause fire. Operating a debris-contaminated printer can short circuit internal components and cause a fire or electric shocks. Operating Precautions WARNING Do not place any parts. If metal or flammable materials get into the printer, turn off the printer before connecting ...

Users Manual - English
Page 43
...are never obstructed. Use the meter as cards and envelopes manually. Use button A to open the upper part of the front cover. Open to dissipate. Allows internal heat to clear paper jams, replace the print head cartridge, or transfer roll cartridge. The printer's power... switch. The shaded part of the illustration above. Lift to refill the paper tray. 3-1 Printed documents are as follows: Front View 5 6 7 4 8 3 9...
...are never obstructed. Use the meter as cards and envelopes manually. Use button A to open the upper part of the front cover. Open to dissipate. Allows internal heat to clear paper jams, replace the print head cartridge, or transfer roll cartridge. The printer's power... switch. The shaded part of the illustration above. Lift to refill the paper tray. 3-1 Printed documents are as follows: Front View 5 6 7 4 8 3 9...
Users Manual - English
Page 98
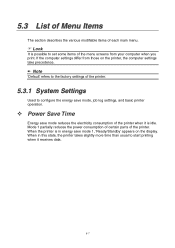
... Time Energy save mode reduces the electricity consumption of the menu screens from those on the display. Mode 1 partially reduces the power consumption of certain parts of each main menu. When the printer is possible to configure the energy save mode 1, 'Ready/Standby' appears on the printer, the computer settings take...
... Time Energy save mode reduces the electricity consumption of the menu screens from those on the display. Mode 1 partially reduces the power consumption of certain parts of each main menu. When the printer is possible to configure the energy save mode 1, 'Ready/Standby' appears on the printer, the computer settings take...
Users Manual - English
Page 151
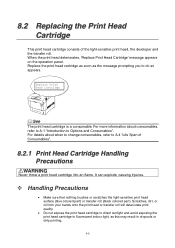
Handling Precautions • Make sure that nothing touches or scratches the light-sensitive print head surface (blue colored part) or transfer roll (black colored part). It can explode, causing injuries. See The print head cartridge is a consumable. When the print head deteriorates, 'Replace Print Head Cartridge' message appears on the ...
Handling Precautions • Make sure that nothing touches or scratches the light-sensitive print head surface (blue colored part) or transfer roll (black colored part). It can explode, causing injuries. See The print head cartridge is a consumable. When the print head deteriorates, 'Replace Print Head Cartridge' message appears on the ...
Users Manual - English
Page 153
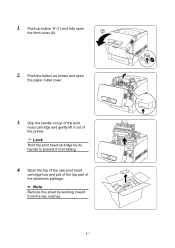
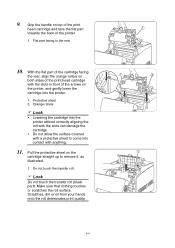
Look Hold the print head cartridge by working inward from falling. 4. Push the button as shown and open the front cover (2). 2. Push up button 'A' (1) and fully open the paper outlet cover. 3. Grip the handle on top of the aluminum package. ✏ Note Remove the sheet by its 1 handle to prevent it out of the printer. Open the top of the new print head cartridge box and pull of the top part of the print head cartridge and gently lift it from the two notches. 8-7 1.
Look Hold the print head cartridge by working inward from falling. 4. Push the button as shown and open the front cover (2). 2. Push up button 'A' (1) and fully open the paper outlet cover. 3. Grip the handle on top of the aluminum package. ✏ Note Remove the sheet by its 1 handle to prevent it out of the printer. Open the top of the new print head cartridge box and pull of the top part of the print head cartridge and gently lift it from the two notches. 8-7 1.
Users Manual - English
Page 155
..., dirt or oil from your hands onto the roll deteriorates print quality. 8-9 Make sure that nothing touches or scratches the roll surface. With the flat part of the cartridge facing the rear, align the orange rollers on both sides of the print head cartridge with a protective sheet to the rear 10... the cartridge into contact with the slots can damage the cartridge. 9. Grip the handle on top of the print head cartridge and face the flat part towards the back of the arrows on the cartridge straight up to remove it, as illustrated. 1. Do not touch the transfer roll Look Do not...
..., dirt or oil from your hands onto the roll deteriorates print quality. 8-9 Make sure that nothing touches or scratches the roll surface. With the flat part of the cartridge facing the rear, align the orange rollers on both sides of the print head cartridge with a protective sheet to the rear 10... the cartridge into contact with the slots can damage the cartridge. 9. Grip the handle on top of the print head cartridge and face the flat part towards the back of the arrows on the cartridge straight up to remove it, as illustrated. 1. Do not touch the transfer roll Look Do not...
Service Manual
Page 2
... States and other countries. Windows is a trademark of Microsoft Corporation. No part of Seiko Epson Corporation. and other countries, and True Type is a registered trademark of Hewlett Packard Company. Epson is a registered trademark of International Business Machines Corporation. Trademarks: The brother logo is a registered trademark and FX-80 and FX-850 are trademarks...
... States and other countries. Windows is a trademark of Microsoft Corporation. No part of Seiko Epson Corporation. and other countries, and True Type is a registered trademark of Hewlett Packard Company. Epson is a registered trademark of International Business Machines Corporation. Trademarks: The brother logo is a registered trademark and FX-80 and FX-850 are trademarks...

Service Manual
Page 3
... V : TROUBLESHOOTING Description of the mechanical system, the electrical system and the electrical circuits and their timing information. This manual consists of the mechanical system parts. CHAPTER IV : ASSEMBLY / DISASSEMBLY Procedures for replacement of the following chapters: CHAPTER I : SPECIFICATIONS Specifications, etc. PREFACE This service manual contains basic ... to change due to as "this printer, based on the control panel, troubleshooting image failure, etc. This service manual covers the HL-4000CN color laser printer. A thorough understanding of the printer.
... V : TROUBLESHOOTING Description of the mechanical system, the electrical system and the electrical circuits and their timing information. This manual consists of the mechanical system parts. CHAPTER IV : ASSEMBLY / DISASSEMBLY Procedures for replacement of the following chapters: CHAPTER I : SPECIFICATIONS Specifications, etc. PREFACE This service manual contains basic ... to change due to as "this printer, based on the control panel, troubleshooting image failure, etc. This service manual covers the HL-4000CN color laser printer. A thorough understanding of the printer.

Service Manual
Page 11
.... Laitteen kaytt8minen muulla kuin t8ss8 k8yttOohjeessa mainitulla tavalla saattaa altistaa k8ytt8j8n turvallisuusluokan 1 ylitt8v8Ile nakym8ttOm8Ile lasers8teilylle. Internal laser radiation Max. Radiation Power Wave Length Laser Class 10 mW 770 nm-808 nm Class I l lb (Accordance with 21 CFR Part 1040.10) Class 3B (Accordance with IEC60825) AVOID EXPOSURE TO BEAM. ADVARSEL ADVARSEL USYNLIG...
.... Laitteen kaytt8minen muulla kuin t8ss8 k8yttOohjeessa mainitulla tavalla saattaa altistaa k8ytt8j8n turvallisuusluokan 1 ylitt8v8Ile nakym8ttOm8Ile lasers8teilylle. Internal laser radiation Max. Radiation Power Wave Length Laser Class 10 mW 770 nm-808 nm Class I l lb (Accordance with 21 CFR Part 1040.10) Class 3B (Accordance with IEC60825) AVOID EXPOSURE TO BEAM. ADVARSEL ADVARSEL USYNLIG...
Service Manual
Page 13
... otherwise specified. A WARNING Power is supplied to the power switch /inlet (LVPS ASSY) even while the printer is running. A\WARNING Do not touch live parts ifnot required absolutely. Drive them OFF and plug off. If the power supply should be kept connected for measurement of voltage or other driving units ...
... otherwise specified. A WARNING Power is supplied to the power switch /inlet (LVPS ASSY) even while the printer is running. A\WARNING Do not touch live parts ifnot required absolutely. Drive them OFF and plug off. If the power supply should be kept connected for measurement of voltage or other driving units ...

Service Manual
Page 15
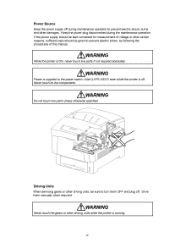
Warning/Caution Labels Warning labels and caution labels are attached to this laser printer to avoid personal injuries. Peel all tapes off the printer. Ar 0 0 m oo =Op N vi CAUTION Extreme care must be taken to prevent accidents check those labels for their peeling or stain when servicing the printer. < Caution label for evidence of any damages. Remove protection parts (2 pieces) from the paper tray. Check visually the printer for high-temperature units > Unpacking the Printer /WARNING The printer must be carried horizontally with two or more persons.
Warning/Caution Labels Warning labels and caution labels are attached to this laser printer to avoid personal injuries. Peel all tapes off the printer. Ar 0 0 m oo =Op N vi CAUTION Extreme care must be taken to prevent accidents check those labels for their peeling or stain when servicing the printer. < Caution label for evidence of any damages. Remove protection parts (2 pieces) from the paper tray. Check visually the printer for high-temperature units > Unpacking the Printer /WARNING The printer must be carried horizontally with two or more persons.
Service Manual
Page 17
Parts mounting and removal Parts and covers may catch fire. 8. Specified tool Follow instructions if a tool is in operation. 3. Do not put...machine, submit an application for irregular use in vapor a lot or continuously. • The solvents are inflammable liquids. Do not pullout a part cable forcibly but gradually. 6. Drive Never inspect or lubricate drive components such as gears when the machine is specified. 7. When lifting the... to avoid possible injuries to receive an electric shock. 2. Service call procedures 1. Avoid dangerous work . Heavy parts The machine weighs 35.3 kg.
Parts mounting and removal Parts and covers may catch fire. 8. Specified tool Follow instructions if a tool is in operation. 3. Do not put...machine, submit an application for irregular use in vapor a lot or continuously. • The solvents are inflammable liquids. Do not pullout a part cable forcibly but gradually. 6. Drive Never inspect or lubricate drive components such as gears when the machine is specified. 7. When lifting the... to avoid possible injuries to receive an electric shock. 2. Service call procedures 1. Avoid dangerous work . Heavy parts The machine weighs 35.3 kg.

Service Manual
Page 18
...the machine or on page II-1. Disassembling Before removing parts for disassembling, check the normal mounting status in mind: 1. After replacing the following notes in advance. 3. Be sure to disturb the customer's daily work. HL-4000CN weighs 35.3 kg. Mounting and adjustment Do not ...start up the machine immediately after finishing part mountings and adjustments. Place the drop cloth on ) well and do maintenance work systematically. 2....
...the machine or on page II-1. Disassembling Before removing parts for disassembling, check the normal mounting status in mind: 1. After replacing the following notes in advance. 3. Be sure to disturb the customer's daily work. HL-4000CN weighs 35.3 kg. Mounting and adjustment Do not ...start up the machine immediately after finishing part mountings and adjustments. Place the drop cloth on ) well and do maintenance work systematically. 2....
Service Manual
Page 20
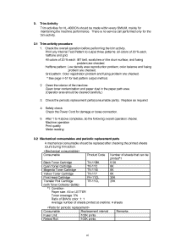
Print any Internal Test Pattern to output three patterns: all colors of 20 % each : IBT... that can be made within every SM/UM, mainly for maintaining the machine performance. Check the periodic replacement parts(consumable parts). Replacement interval Fuser Unit 100K prints Retard Roll 100K prints Remarks xi Check the overall operation before performing the...: Color registration problem and fusing problem are checked. * See page V-51 for HL-4000CN should be cleaned carefully.) 3. Replace as required. 4. Consumable Product Code Number of the machine. Safety check.
Print any Internal Test Pattern to output three patterns: all colors of 20 % each : IBT... that can be made within every SM/UM, mainly for maintaining the machine performance. Check the periodic replacement parts(consumable parts). Replacement interval Fuser Unit 100K prints Retard Roll 100K prints Remarks xi Check the overall operation before performing the...: Color registration problem and fusing problem are checked. * See page V-51 for HL-4000CN should be cleaned carefully.) 3. Replace as required. 4. Consumable Product Code Number of the machine. Safety check.
Service Manual
Page 46
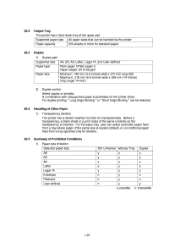
... mm (14 inches) long (Legal 14-inch) 2) Duplex control Select duplex or simplex. 20.2 Output Tray The printer has a face-down tray at the upper part.
... mm (14 inches) long (Legal 14-inch) 2) Duplex control Select duplex or simplex. 20.2 Output Tray The printer has a face-down tray at the upper part.


