
Users Manual - English
Page 19
... Slider Shows the position of the first and last points in the sewing of the stitches. You can use the Simulator to eliminate potential sewing problems. When you can also open a dialog in which parts of the design space. You can set the default machine settings, change the units of the Ribbon, the Simulator (scrollbar slider and the sewing simulator) will sew out. Program Preferences...
... Slider Shows the position of the first and last points in the sewing of the stitches. You can use the Simulator to eliminate potential sewing problems. When you can also open a dialog in which parts of the design space. You can set the default machine settings, change the units of the Ribbon, the Simulator (scrollbar slider and the sewing simulator) will sew out. Program Preferences...

Users Manual - English
Page 20
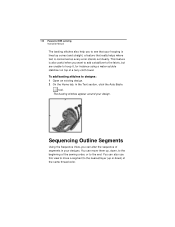
... , sew forward and sew backwards. You can push various control buttons and slide the speed control to see the specified thread color being sewn in the design. Using the Simulator The following table explains how to a specific position. When you will advance or retrace the design position by dragging it . Next Stitch: Move forward in the design by one stitch. The Simulator controls include pause, stop the design while...
... , sew forward and sew backwards. You can push various control buttons and slide the speed control to see the specified thread color being sewn in the design. Using the Simulator The following table explains how to a specific position. When you will advance or retrace the design position by dragging it . Next Stitch: Move forward in the design by one stitch. The Simulator controls include pause, stop the design while...

Users Manual - English
Page 29
... your design will fit for more than one of embroidery machine. Learning about the Workspace 27 Viewing and Hiding the Embroidery Hoop The Hoops tool toggles the display of the embroidery hoop on , the display will zoom to make sure that your settings under the Hoop tool. 2 From the menu that you can select one kind of many pre-loaded hoops using the Hoops dialog...
... your design will fit for more than one of embroidery machine. Learning about the Workspace 27 Viewing and Hiding the Embroidery Hoop The Hoops tool toggles the display of the embroidery hoop on , the display will zoom to make sure that your settings under the Hoop tool. 2 From the menu that you can select one kind of many pre-loaded hoops using the Hoops dialog...
Users Manual - English
Page 68
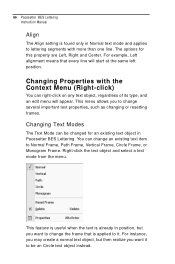
...type, and an edit menu will start at the same left position. Changing Properties with more than one line. This feature is useful when the text is already in position, but then realize you want to be changed...but you to Normal Frame, Path Frame, Vertical Frame, Circle Frame, or Monogram Frame. Changing Text Modes The Text Mode can be an Circle text object instead. The ...lettering segments with the Context Menu (Right-click) You can change an existing text item to change the frame that every line will appear. 66 Pacesetter BES Lettering Instruction Manual Align The Align setting...
...type, and an edit menu will start at the same left position. Changing Properties with more than one line. This feature is useful when the text is already in position, but then realize you want to be changed...but you to Normal Frame, Path Frame, Vertical Frame, Circle Frame, or Monogram Frame. Changing Text Modes The Text Mode can be an Circle text object instead. The ...lettering segments with the Context Menu (Right-click) You can change an existing text item to change the frame that every line will appear. 66 Pacesetter BES Lettering Instruction Manual Align The Align setting...

Users Manual - English
Page 69
... command in both directions, within a single Circle text segment, type text directly into the Circle text properties page: 'Normal' direction into the Upper text box, and 'Reverse' text into the Lower text box. Text Properties 67 Resetting the Frame The Reset Frame command is useful when you have altered your cursor. Resetting Individual Letters If you activate individual letter size handles and right-click...
... command in both directions, within a single Circle text segment, type text directly into the Circle text properties page: 'Normal' direction into the Upper text box, and 'Reverse' text into the Lower text box. Text Properties 67 Resetting the Frame The Reset Frame command is useful when you have altered your cursor. Resetting Individual Letters If you activate individual letter size handles and right-click...
Users Manual - English
Page 70
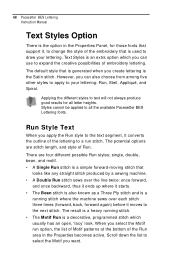
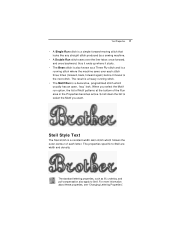
... text will not always produce good results for those fonts that support it, to change the style of embroidery lettering. There are stitch length, and style of Run. Scroll down the list to the next stitch. The potential options are four different possible Run styles; 68 Pacesetter BES Lettering Instruction Manual Text Styles Option There is the option in the Properties...
... text will not always produce good results for those fonts that support it, to change the style of embroidery lettering. There are stitch length, and style of Run. Scroll down the list to the next stitch. The potential options are four different possible Run styles; 68 Pacesetter BES Lettering Instruction Manual Text Styles Option There is the option in the Properties...

Users Manual - English
Page 73
...; stitch type, you can adjust any of the default settings available. Adjusting Motif settings for Appliqué Style Text After you select the Appliqué stitch type, you can adjust any of the following settings in the Properties panel: Š In the Stitch Length box, enter the stitch length of the positioning and tack down runs. Š In the Appliqué width box, enter the width of the lettering...
...; stitch type, you can adjust any of the default settings available. Adjusting Motif settings for Appliqué Style Text After you select the Appliqué stitch type, you can adjust any of the following settings in the Properties panel: Š In the Stitch Length box, enter the stitch length of the positioning and tack down runs. Š In the Appliqué width box, enter the width of the lettering...

Users Manual - English
Page 77
... important to always stitch a test before committing to use , try the standard setting of your design? Fill Density Setting Fill density is the distance between individual lines of stitches in millimeters. How does changing this setting affect your text segment is measured in a small area. These are doing as you have a very loosely woven fabric, you adjust the setting. rather, they are...
... important to always stitch a test before committing to use , try the standard setting of your design? Fill Density Setting Fill density is the distance between individual lines of stitches in millimeters. How does changing this setting affect your text segment is measured in a small area. These are doing as you have a very loosely woven fabric, you adjust the setting. rather, they are...

Users Manual - English
Page 82
... place the underlay directly on the size of their original length. 80 Pacesetter BES Lettering Instruction Manual 3 Select one or more of the following underlay types you can also enter a value in the Max range box of the Pull Compensation area. Enter a zero value if you want to the stitches regardless of the pull compensation. To adjust the pull...
... place the underlay directly on the size of their original length. 80 Pacesetter BES Lettering Instruction Manual 3 Select one or more of the following underlay types you can also enter a value in the Max range box of the Pull Compensation area. Enter a zero value if you want to the stitches regardless of the pull compensation. To adjust the pull...
Users Manual - English
Page 124
... detail and appear jagged if they are resolution dependent. Bitmap images are scaled on which lettering segments sit. 122 Pacesetter BES Lettering Instruction Manual Appliqué Embroidery process that instructs an embroidery machine to stop sewing a design in order to create a unique appearance. The fabric pieces are sewn into the design. The process is usually used to reduce stitch counts in large designs and/or to...
... detail and appear jagged if they are resolution dependent. Bitmap images are scaled on which lettering segments sit. 122 Pacesetter BES Lettering Instruction Manual Appliqué Embroidery process that instructs an embroidery machine to stop sewing a design in order to create a unique appearance. The fabric pieces are sewn into the design. The process is usually used to reduce stitch counts in large designs and/or to...

Users Manual - English
Page 128
... outline segments by clicking on a single segment or by closely arranged zig-zag stitches. A segment has many properties such as a column stitch. Satin Stitch Formed by clicking and dragging to select and modify individual or groups of outline segments. Used for outlining and fine detail. You can edit the segments. 126 Pacesetter BES Lettering Instruction Manual Running Stitch Consists of one time.
... outline segments by clicking on a single segment or by closely arranged zig-zag stitches. A segment has many properties such as a column stitch. Satin Stitch Formed by clicking and dragging to select and modify individual or groups of outline segments. Used for outlining and fine detail. You can edit the segments. 126 Pacesetter BES Lettering Instruction Manual Running Stitch Consists of one time.

INSTRUCTION MANUAL - English
Page 20
...sewing of the stitches. Shows the position of measure, and choose settings for the workspace grid. Shows/hides the sewing simulator. • Status. Shows/hides the status bar. 18 Pacesetter BES Lettering Instruction Manual The View Tab The controls on the View tab allow you can set the default machine settings, change... button to change the units of the first and last points in the Design Workspace. • Entry/Exit. Shows/hides the properties panel. • Simulator. Displays icons in the workspace that window or panel. • Sequence. Shows/hides the thread ...
...sewing of the stitches. Shows the position of measure, and choose settings for the workspace grid. Shows/hides the sewing simulator. • Status. Shows/hides the status bar. 18 Pacesetter BES Lettering Instruction Manual The View Tab The controls on the View tab allow you can set the default machine settings, change... button to change the units of the first and last points in the Design Workspace. • Entry/Exit. Shows/hides the properties panel. • Simulator. Displays icons in the workspace that window or panel. • Sequence. Shows/hides the thread ...

INSTRUCTION MANUAL - English
Page 21
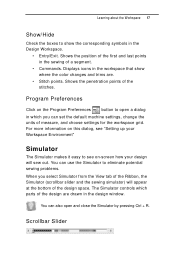
... The length of the scrollbar slider represents all of the design are drawn in the opened design. Sewing Simulator The sewing simulator allows you select Simulator from the View tab of the Ribbon, the Simulator (scrollbar slider and the sewing simulator) will advance or retrace the design position by pressing Ctrl + R. The Simulator controls which parts of the stitches in the design window...
... The length of the scrollbar slider represents all of the design are drawn in the opened design. Sewing Simulator The sewing simulator allows you select Simulator from the View tab of the Ribbon, the Simulator (scrollbar slider and the sewing simulator) will advance or retrace the design position by pressing Ctrl + R. The Simulator controls which parts of the stitches in the design window...

INSTRUCTION MANUAL - English
Page 30
... it is useful when you can select one kind of embroidery machine. Just click on the Hoop tool to hide the hoop. You will notice that appears, click on the design, clicking the Hoop tool will fit for more than one of your settings under the Hoop tool. 2 From the menu that you want to make sure that your design will cause...
... it is useful when you can select one kind of embroidery machine. Just click on the Hoop tool to hide the hoop. You will notice that appears, click on the design, clicking the Hoop tool will fit for more than one of your settings under the Hoop tool. 2 From the menu that you want to make sure that your design will cause...
INSTRUCTION MANUAL - English
Page 73
... stitch where the machine sews over the line twice: once forward, and once backward, thus it ends up where it starts. • The Bean stitch is also known as fill, underlay, and pull-compensation also apply to select the Motif you select the Motif run option, the list of Motif patterns at the bottom of each stitch three times...
... stitch where the machine sews over the line twice: once forward, and once backward, thus it ends up where it starts. • The Bean stitch is also known as fill, underlay, and pull-compensation also apply to select the Motif you select the Motif run option, the list of Motif patterns at the bottom of each stitch three times...

INSTRUCTION MANUAL - English
Page 76
... stitch length affects the size of the motif and represents the length (width) of the lettering. From the Motif list, select a Motif pattern that will be used as the Appliqué stitching. In the Motif Stitch Length box, enter the motif stitch length. To adjust Motif settings for Appliqué: 1 Select the Appliqué text segment. 2 In the Properties panel, in the Appliqué Type field, select Motif. 3 Adjust...
... stitch length affects the size of the motif and represents the length (width) of the lettering. From the Motif list, select a Motif pattern that will be used as the Appliqué stitching. In the Motif Stitch Length box, enter the motif stitch length. To adjust Motif settings for Appliqué: 1 Select the Appliqué text segment. 2 In the Properties panel, in the Appliqué Type field, select Motif. 3 Adjust...

INSTRUCTION MANUAL - English
Page 80
... font) it is made up of embroidery. 78 Pacesetter BES Lettering Instruction Manual Fill Density Setting Fill density is to go for full-fabric coverage, but add extra stabilizer if you want to support a high-density fill on . In the Fill area, the image beneath the Density setting will change as you adjust the setting. A general rule is the distance between...
... font) it is made up of embroidery. 78 Pacesetter BES Lettering Instruction Manual Fill Density Setting Fill density is to go for full-fabric coverage, but add extra stabilizer if you want to support a high-density fill on . In the Fill area, the image beneath the Density setting will change as you adjust the setting. A general rule is the distance between...

INSTRUCTION MANUAL - English
Page 112
... number of the Add Design segment after it is displayed in your designs. Distorting Segments Distortion, also called morphing, takes a set of stitches and moves them . Distortion Controls: Frequency The Wave and ZigZag distortions add a series of 'ripples' in a pattern: It distorts the design. Pacesetter BES Lettering allows you manipulate the controls for your design. You can experiment with working files (*.BRF) and stitch...
... number of the Add Design segment after it is displayed in your designs. Distorting Segments Distortion, also called morphing, takes a set of stitches and moves them . Distortion Controls: Frequency The Wave and ZigZag distortions add a series of 'ripples' in a pattern: It distorts the design. Pacesetter BES Lettering allows you manipulate the controls for your design. You can experiment with working files (*.BRF) and stitch...
INSTRUCTION MANUAL - English
Page 120
... basting stitches appear around your hooping is lined up correct and straight, a feature that your design. You can move a segment to hoop it, for instance using a water-soluble stabilizer on top of the sewing order, or to designs: 1 Open an existing design. 2 On the Home tab, in your designs. You can alter the sequence of the same thread color. 118 Pacesetter BES Lettering Instruction Manual The basting stitches...
... basting stitches appear around your hooping is lined up correct and straight, a feature that your design. You can move a segment to hoop it, for instance using a water-soluble stabilizer on top of the sewing order, or to designs: 1 Open an existing design. 2 On the Home tab, in your designs. You can alter the sequence of the same thread color. 118 Pacesetter BES Lettering Instruction Manual The basting stitches...
Installation Manual - English
Page 10
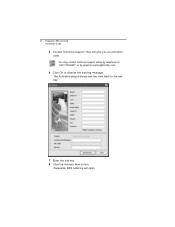
Pacesetter BES Lettering will give you an activation code. The Activation wizard dialog now has new field for the site key. 7 Enter the site key. 8 Click the Activate Now button. 8 Pacesetter BES Lettering Installation Guide 5 Contact Technical support; they will open. You may contact technical support either by telephone at 1-877-276-8437, or by email at custsrv@brother.com. 6 Click OK to dismiss the warning message.
Pacesetter BES Lettering will give you an activation code. The Activation wizard dialog now has new field for the site key. 7 Enter the site key. 8 Click the Activate Now button. 8 Pacesetter BES Lettering Installation Guide 5 Contact Technical support; they will open. You may contact technical support either by telephone at 1-877-276-8437, or by email at custsrv@brother.com. 6 Click OK to dismiss the warning message.


