
Owners Manual
Page 9
... the LCD returns to fax. 6 Enter the fax number. 7 Press Fax Start. Brother fax-back system: In USA: 1-800-521-2846 Brother Global Web Site: http://www.brother.com Frequently Asked Questions (FAQs) and Product Support: http://solutions.brother.com Brother Accessories & Supplies: In USA: 1-...http://www.brothermall.com In Canada: 1-877-BROTHER (voice) Q U I C K R E F E R E N C E G U I D E vii Sending a Cover Page 1 Place the original face down in the ADF. 2 Enter the fax number using One Touch, Speed Dial, Search or the dial pad. 3 Press Fax Start. Quick Reference Guide Sending Faxes ...
... the LCD returns to fax. 6 Enter the fax number. 7 Press Fax Start. Brother fax-back system: In USA: 1-800-521-2846 Brother Global Web Site: http://www.brother.com Frequently Asked Questions (FAQs) and Product Support: http://solutions.brother.com Brother Accessories & Supplies: In USA: 1-...http://www.brothermall.com In Canada: 1-877-BROTHER (voice) Q U I C K R E F E R E N C E G U I D E vii Sending a Cover Page 1 Place the original face down in the ADF. 2 Enter the fax number using One Touch, Speed Dial, Search or the dial pad. 3 Press Fax Start. Quick Reference Guide Sending Faxes ...

Owners Manual
Page 10
... you want (up to 99). 3 Press Options, press or to select OPT:STACK/SORT, and then press Set. Storing Speed Dial Numbers 1 Press Menu, 2, 3, 2. 2 Enter a three-digit Speed Dial number, and then press Set. 3 Enter a number (up to 20 digits), and then press Set. 4 Enter a name (or leave it blank), and then press Set. 5 Press Stop/Exit. Sorting Multiple Copies 1 Place...
... you want (up to 99). 3 Press Options, press or to select OPT:STACK/SORT, and then press Set. Storing Speed Dial Numbers 1 Press Menu, 2, 3, 2. 2 Enter a three-digit Speed Dial number, and then press Set. 3 Enter a number (up to 20 digits), and then press Set. 4 Enter a name (or leave it blank), and then press Set. 5 Press Stop/Exit. Sorting Multiple Copies 1 Place...

Owners Manual
Page 24
.... Also lets you dial stored phone numbers by pressing # and a three-digit number. Also use for sending one step in Menu table. 4 One Touch Dial Keys These 16 keys give you instant access to order another toner cartridge. Clear Deletes entered data or backs up numbers stored in the dialing...) Displays messages to multiple numbers. (Left Arrow) (Right Arrow) Moves the LCD cursor through 32 in the One Touch keys, hold . Control Panel Overview FAX-4750e and FAX-5750e have the same control panel keys. 3 2 1 13 14 15 16 12 4 5 67 8 9 10 11 1 Toner Empty Icon The Toner icon...
.... Also lets you dial stored phone numbers by pressing # and a three-digit number. Also use for sending one step in Menu table. 4 One Touch Dial Keys These 16 keys give you instant access to order another toner cartridge. Clear Deletes entered data or backs up numbers stored in the dialing...) Displays messages to multiple numbers. (Left Arrow) (Right Arrow) Moves the LCD cursor through 32 in the One Touch keys, hold . Control Panel Overview FAX-4750e and FAX-5750e have the same control panel keys. 3 2 1 13 14 15 16 12 4 5 67 8 9 10 11 1 Toner Empty Icon The Toner icon...

Owners Manual
Page 43
...3.COPY 4.PRINTER 5.LAN You can scroll more quickly by pressing . (Use to scroll backward and see all options, in the opposite order.) Before you press Set after entering information in a field using the dial pad, you can correct a mistake. Press 5 for Fax Operations-OR- Use to exit the Menu ...Mode, press Stop/Exit. 3-2 ON-SCREEN PROGRAMMING For FAX-5750e: Press 1 for Print Operations-OR- When you...
...3.COPY 4.PRINTER 5.LAN You can scroll more quickly by pressing . (Use to scroll backward and see all options, in the opposite order.) Before you press Set after entering information in a field using the dial pad, you can correct a mistake. Press 5 for Fax Operations-OR- Use to exit the Menu ...Mode, press Stop/Exit. 3-2 ON-SCREEN PROGRAMMING For FAX-5750e: Press 1 for Print Operations-OR- When you...

Owners Manual
Page 50
.... -OR- Choose CASSETTE#1 ONLY, CASSETTE#2 ONLY or AUTO if you want to keep special paper in the other settings remain unaffected. 1 Press Menu, 1, 2. 2.DATE/TIME 2 Enter the last two digits of a power failure, you may have to reset the date and time. Setting Date and Time Your machine displays the date...fax you send. In the event of the year, and then press Set. YEAR:XX ENTER & SET KEY 3 Enter two digits for the month and press Set. (For example, enter 09 for September, or 10 for faxes, press or to select FOR FAX, and then press Set. -OR- The screen now shows the date and time ...
.... -OR- Choose CASSETTE#1 ONLY, CASSETTE#2 ONLY or AUTO if you want to keep special paper in the other settings remain unaffected. 1 Press Menu, 1, 2. 2.DATE/TIME 2 Enter the last two digits of a power failure, you may have to reset the date and time. Setting Date and Time Your machine displays the date...fax you send. In the event of the year, and then press Set. YEAR:XX ENTER & SET KEY 3 Enter two digits for the month and press Set. (For example, enter 09 for September, or 10 for faxes, press or to select FOR FAX, and then press Set. -OR- The screen now shows the date and time ...

Owners Manual
Page 51
...individual sending the message and the telephone number of each transmitted page, or on Cover pages. 4 Use the dial pad to enter your name (up to 20 characters), and then press Set. (See Entering Text.) 5 Press Stop/Exit. Setting Station ID You should complete the steps described on all fax pages you... without changing. The telephone number you send. The LCD returns to 20 digits), and then press Set. If your telephone number (up) to the date and time. FAX: ENTER & SET KEY TEL: ENTER & SET KEY NAME: ENTER & SET KEY If your machine, you should store your name or (company name) and...
...individual sending the message and the telephone number of each transmitted page, or on Cover pages. 4 Use the dial pad to enter your name (up to 20 characters), and then press Set. (See Entering Text.) 5 Press Stop/Exit. Setting Station ID You should complete the steps described on all fax pages you... without changing. The telephone number you send. The LCD returns to 20 digits), and then press Set. If your telephone number (up) to the date and time. FAX: ENTER & SET KEY TEL: ENTER & SET KEY NAME: ENTER & SET KEY If your machine, you should store your name or (company name) and...

Owners Manual
Page 52
...four letters printed above and to the right. Repeating Letters If you need to enter a character that is assigned to the same key as the Station ID, you may need to enter a blank space, press between numbers and twice Making Corrections If you want to type text into the machine.... once between characters. Then press Clear; Also, you can access the character you entered a letter incorrectly and want to change it, press to move the cursor to the right of the cursor will be deleted. By pressing the appropriate number key repeatedly you want . Key ...
...four letters printed above and to the right. Repeating Letters If you need to enter a character that is assigned to the same key as the Station ID, you may need to enter a blank space, press between numbers and twice Making Corrections If you want to type text into the machine.... once between characters. Then press Clear; Also, you can access the character you entered a letter incorrectly and want to change it, press to move the cursor to the right of the cursor will be deleted. By pressing the appropriate number key repeatedly you want . Key ...

Owners Manual
Page 56
... you need to change the dialing mode. 1 Press Menu, 1, 9. 9.TONE/PULSE 2 Press or to select TONE or PULSE and then press Set. 3 Press Stop/Exit. You can conserve toner using this feature. INITIAL SETUP 4-8 The default setting is 5 minutes. 1 Press Menu, 1, 8. 8.SLEEP MODE 2 Use the Dial pad to enter the length of time the machine is...
... you need to change the dialing mode. 1 Press Menu, 1, 9. 9.TONE/PULSE 2 Press or to select TONE or PULSE and then press Set. 3 Press Stop/Exit. You can conserve toner using this feature. INITIAL SETUP 4-8 The default setting is 5 minutes. 1 Press Menu, 1, 8. 8.SLEEP MODE 2 Use the Dial pad to enter the length of time the machine is...

Owners Manual
Page 61
... an extension phone, press 5 1, wait for the phone to be disconnected (the LCD shows RECEIVING) before you hang up a voice call. If you're at an extension phone. FAX RECEIVE:*51 ENTER & SET KEY TEL ANSWER:#51 ENTER & SET KEY 5-5 SETUP RECEIVE If you are always disconnected when accessing...on an external phone in FAX/TEL mode, it will use the Telephone Answer Code # 5 1 to lift the handset during the F/T Ring Time and then press # 5 1 between the double rings. Changing Remote Codes Remote Codes might not work with some telephone systems. The preset Fax Receive Code is # 5 1....
... an extension phone, press 5 1, wait for the phone to be disconnected (the LCD shows RECEIVING) before you hang up a voice call. If you're at an extension phone. FAX RECEIVE:*51 ENTER & SET KEY TEL ANSWER:#51 ENTER & SET KEY 5-5 SETUP RECEIVE If you are always disconnected when accessing...on an external phone in FAX/TEL mode, it will use the Telephone Answer Code # 5 1 to lift the handset during the F/T Ring Time and then press # 5 1 between the double rings. Changing Remote Codes Remote Codes might not work with some telephone systems. The preset Fax Receive Code is # 5 1....

Owners Manual
Page 62
... machine goes OFFLINE and the LCD shows SECURE MODE. Setting Up the Password 1 Press Menu, 2, 0, 4. 2 Enter a 4-digit number for the first time, the LCD shows VERIFY. 3 Re-enter the password, and then press Set. SETUP RECEIVE 5-6 Memory Security Memory Security lets you prevent unauthorized access to ...you turn Memory Security ON, then Fax Forwarding and Remote Retrieval will continue to select SET SECURITY, and then press Set. 2 Enter the registered 4-digit password, and then press Set. Printing a Fax in Memory If you have Fax Storage ON for Remote Retrieval you can still print...
... machine goes OFFLINE and the LCD shows SECURE MODE. Setting Up the Password 1 Press Menu, 2, 0, 4. 2 Enter a 4-digit number for the first time, the LCD shows VERIFY. 3 Re-enter the password, and then press Set. SETUP RECEIVE 5-6 Memory Security Memory Security lets you prevent unauthorized access to ...you turn Memory Security ON, then Fax Forwarding and Remote Retrieval will continue to select SET SECURITY, and then press Set. 2 Enter the registered 4-digit password, and then press Set. Printing a Fax in Memory If you have Fax Storage ON for Remote Retrieval you can still print...

Owners Manual
Page 63
...someone poll your machine to receive a fax, you poll someone polls your machine. PRESS FAX START 5-7 SETUP RECEIVE The LCD shows DIALING. POLLING RX:OFF? Turning Memory Security OFF 1 Press Menu, and then enter the registered 4-digit password. Note If you call . All parties involved in ... faxes from another fax machine to receive a fax from it. (See Canceling a Scheduled Job, Page 5-8.) 1 Press Menu, 2, 1, 7. 7.POLLING RX 2 Press or to choose ON (or OFF), and then press Set. 3 Enter the fax number you can use your machine to "poll" other machines, or you are polling...
...someone poll your machine to receive a fax, you poll someone polls your machine. PRESS FAX START 5-7 SETUP RECEIVE The LCD shows DIALING. POLLING RX:OFF? Turning Memory Security OFF 1 Press Menu, and then enter the registered 4-digit password. Note If you call . All parties involved in ... faxes from another fax machine to receive a fax from it. (See Canceling a Scheduled Job, Page 5-8.) 1 Press Menu, 2, 1, 7. 7.POLLING RX 2 Press or to choose ON (or OFF), and then press Set. 3 Enter the fax number you can use your machine to "poll" other machines, or you are polling...

Owners Manual
Page 64
...cancel, and then press Set. -OR- ... a Group or the dial pad. PRESS FAX START Canceling a Scheduled Job You...Press Menu, 2, 6. 6.REMAINING JOBS Any waiting jobs will appear on the LCD. Your machine will be printed. (See Canceling a Scheduled Job, Page 5-8.) 1 Press Menu, 2, 1, 7. 7.POLLING RX 2 Press or to select Polling ON (or OFF), and then press... Set. 3 Specify the destination fax machines you want 3 Press 1 to cancel-OR-Press 2 to Step 2. 4 Press... press Broadcast between each number or ...
...cancel, and then press Set. -OR- ... a Group or the dial pad. PRESS FAX START Canceling a Scheduled Job You...Press Menu, 2, 6. 6.REMAINING JOBS Any waiting jobs will appear on the LCD. Your machine will be printed. (See Canceling a Scheduled Job, Page 5-8.) 1 Press Menu, 2, 1, 7. 7.POLLING RX 2 Press or to select Polling ON (or OFF), and then press... Set. 3 Specify the destination fax machines you want 3 Press 1 to cancel-OR-Press 2 to Step 2. 4 Press... press Broadcast between each number or ...

Owners Manual
Page 66
... This is busy, the machine will ask if you want to call (you can enter the digits using overseas mode, call press Redial/Pause to the next step. send using the dial pad, or you can enter a One Touch or Speed Dial number or you can choose any ACCEPTED combination of ...these settings: add a coverpage and select a comment; Press Hook and listen for a dial tone. 1 Place the original face down in the ADF. 2 Enter the fax number using the handset, hang up to enter other settings: Press 1 if you can call from the Search). (See One Touch Dialing, Page...
... This is busy, the machine will ask if you want to call (you can enter the digits using overseas mode, call press Redial/Pause to the next step. send using the dial pad, or you can enter a One Touch or Speed Dial number or you can choose any ACCEPTED combination of ...these settings: add a coverpage and select a comment; Press Hook and listen for a dial tone. 1 Place the original face down in the ADF. 2 Enter the fax number using the handset, hang up to enter other settings: Press 1 if you can call from the Search). (See One Touch Dialing, Page...

Owners Manual
Page 67
... fax. You can immediately repeat Steps 1 to select additional settings. The LCD returns to the SETUP SEND menu-OR-Press 2 if you want to Step 6. 6 Enter fax number and then press Fax Start. 6-3 SETUP SEND Real Time Transmission When you are finished choosing settings, and then go to send an ...to ON. 1 Place the original face down in Dual Access mode. Then the machine starts dialing. Your machine normally operates in the ADF. 2 Enter the fax number. 3 Press Fax Start. The number of the fax and how much memory is receiving or sending another fax (from memory).
... fax. You can immediately repeat Steps 1 to select additional settings. The LCD returns to the SETUP SEND menu-OR-Press 2 if you want to Step 6. 6 Enter fax number and then press Fax Start. 6-3 SETUP SEND Real Time Transmission When you are finished choosing settings, and then go to send an ...to ON. 1 Place the original face down in Dual Access mode. Then the machine starts dialing. Your machine normally operates in the ADF. 2 Enter the fax number. 3 Press Fax Start. The number of the fax and how much memory is receiving or sending another fax (from memory).

Owners Manual
Page 69
... varying shades of gray; FINE-Good for small print; You can use the Resolution key to temporarily change the default setting. 1 Press Menu, 2, 2, 2. 2 Press or to select additional settings. Use S.LIGHT to send a fax. transmits slower than Standard resolution. Use S.DARK to send a ...very dark document. 1 Place the original face down in the ADF, you are finished choosing settings, and go to Step 5. 5 Enter a fax number, and then press Fax ...
... varying shades of gray; FINE-Good for small print; You can use the Resolution key to temporarily change the default setting. 1 Press Menu, 2, 2, 2. 2 Press or to select additional settings. Use S.LIGHT to send a fax. transmits slower than Standard resolution. Use S.DARK to send a ...very dark document. 1 Place the original face down in the ADF, you are finished choosing settings, and go to Step 5. 5 Enter a fax number, and then press Fax ...

Owners Manual
Page 71
...NO Cover Page for your customized comment and then press Set. 3 Use the dial pad to enter your document. 1 Place the original face down in your customized comment, and then press Set. (See Entering Text, Page 4-4.) 4 Press 1 if you 're calling. 9 Press Fax Start. 6-7 SETUP SEND You can set ...up two custom comments. 1 Press Menu, 2, 2, 9. 2 Use or to choose position 5 or 6 for the Next ...
...NO Cover Page for your customized comment and then press Set. 3 Use the dial pad to enter your document. 1 Place the original face down in your customized comment, and then press Set. (See Entering Text, Page 4-4.) 4 Press 1 if you 're calling. 9 Press Fax Start. 6-7 SETUP SEND You can set ...up two custom comments. 1 Press Menu, 2, 2, 9. 2 Use or to choose position 5 or 6 for the Next ...

Owners Manual
Page 73
...it in Delayed Fax. (See Delayed Fax, Page 6-10.) 1 Press Menu, 2, 2, 3. 3.DELAYED TIMER 2 Enter the time (in the ADF. 2 Press Menu, 2, 2, 0. 3 Press or to select ON (or OFF), and then press Set. 0.OVERSEAS MODE 4 Press 1 if you 're calling. 6 Press Fax Start. This time will be displayed for acceptance or you ...of day that you want to select additional settings. The LCD returns to the SETUP SEND menu-OR-Press 2 if you are finished choosing settings and go to Step 5. 5 Enter the fax number you want delayed faxes to be sent. Advanced Sending Operations Overseas Mode After you ...
...it in Delayed Fax. (See Delayed Fax, Page 6-10.) 1 Press Menu, 2, 2, 3. 3.DELAYED TIMER 2 Enter the time (in the ADF. 2 Press Menu, 2, 2, 0. 3 Press or to select ON (or OFF), and then press Set. 0.OVERSEAS MODE 4 Press 1 if you 're calling. 6 Press Fax Start. This time will be displayed for acceptance or you ...of day that you want to select additional settings. The LCD returns to the SETUP SEND menu-OR-Press 2 if you are finished choosing settings and go to Step 5. 5 Enter the fax number you want delayed faxes to be sent. Advanced Sending Operations Overseas Mode After you ...

Owners Manual
Page 74
...The number of day you enter in memory by destination and scheduled time. Delayed Batch Transmission Before sending the delayed faxes, your Brother machine will wait to Step 6. BATCH TX:ON? The LCD returns to the SETUP SEND menu-OR-Press 2 if you are finished... D 6 - 10 The machine will economize by sorting all the documents in Step 3. The screen will be sent as one transmission. 1 Press Menu, 2, 2, 5. 5.BATCH TX 2 Press or to enter the fax number. 6 Enter the fax number. 7 Press Fax Start. All delayed faxes scheduled at the time of documents you can accept it in Step 3 or...
...The number of day you enter in memory by destination and scheduled time. Delayed Batch Transmission Before sending the delayed faxes, your Brother machine will wait to Step 6. BATCH TX:ON? The LCD returns to the SETUP SEND menu-OR-Press 2 if you are finished... D 6 - 10 The machine will economize by sorting all the documents in Step 3. The screen will be sent as one transmission. 1 Press Menu, 2, 2, 5. 5.BATCH TX 2 Press or to enter the fax number. 6 Enter the fax number. 7 Press Fax Start. All delayed faxes scheduled at the time of documents you can accept it in Step 3 or...
Owners Manual
Page 76
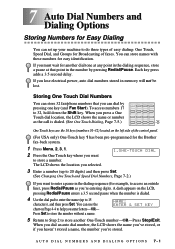
... panel. (For USA only) One-Touch key 1 has been pre-programmed for the Brother fax-back system. 1 Press Menu, 2, 3, 1. 2 Press the One Touch key where you 're entering digits. You can use the chart on the LCD, pressing Redial/Pause enters a 3.5 second pause when the number is dialed. (See One Touch Dialing, Page ... you can store names with these numbers for example, to access an outside line), press Redial/Pause as the call is dialed. 4 Use the dial pad to enter the name (up to 20 digits) and then press Set. (See Changing One Touch and Speed Dial Numbers, Page 7-2.) If you want...
... panel. (For USA only) One-Touch key 1 has been pre-programmed for the Brother fax-back system. 1 Press Menu, 2, 3, 1. 2 Press the One Touch key where you 're entering digits. You can use the chart on the LCD, pressing Redial/Pause enters a 3.5 second pause when the number is dialed. (See One Touch Dialing, Page ... you can store names with these numbers for example, to access an outside line), press Redial/Pause as the call is dialed. 4 Use the dial pad to enter the name (up to 20 digits) and then press Set. (See Changing One Touch and Speed Dial Numbers, Page 7-2.) If you want...

Owners Manual
Page 124
...and return to the DOS prompt. 3 Insert the Brother CD-ROM into your CD-ROM drive. 4 At the DOS prompt (C:\>) type x: (Substitute the drive letter of your computer and go to the DOS prompt. C:\>x: 5 Type CD DOS, and then press Enter. Using the Remote Printer Console Main Program Type C:\RPCX... 2 Start your CD-ROM drive for "x"), and then press Enter. the mouse driver must be installed. (You can also operate the program with the keyboard.) Follow these steps to install the remote printer console program: 1 Make sure your Brother machine is connected to your computer and is set to ...
...and return to the DOS prompt. 3 Insert the Brother CD-ROM into your CD-ROM drive. 4 At the DOS prompt (C:\>) type x: (Substitute the drive letter of your computer and go to the DOS prompt. C:\>x: 5 Type CD DOS, and then press Enter. Using the Remote Printer Console Main Program Type C:\RPCX... 2 Start your CD-ROM drive for "x"), and then press Enter. the mouse driver must be installed. (You can also operate the program with the keyboard.) Follow these steps to install the remote printer console program: 1 Make sure your Brother machine is connected to your computer and is set to ...


