User Manual
Page 2
... 14 General Settings 15 Wiring Diagram 16 Trouble shooting 16 Specifications 17 Accessory 18 DVD Parental control function 18 NOTE: 1. Do not use the car audio a long time, otherwise the battery may run out. 7. To avoid short circuit, please do not use sharp objects push, rub, Stroke the screen. Do not...
... 14 General Settings 15 Wiring Diagram 16 Trouble shooting 16 Specifications 17 Accessory 18 DVD Parental control function 18 NOTE: 1. Do not use the car audio a long time, otherwise the battery may run out. 7. To avoid short circuit, please do not use sharp objects push, rub, Stroke the screen. Do not...
User Manual
Page 3
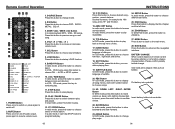
... Warning: You can switch to achieve speed forward / backward function. 8. Dual (front and rear) USB Insert USB removable device so as to read audio/video files. This could cause malfunctions. 16. When there is power on / off TFT LCD display. 6. (VOL/SEL) Volume adjustment mode Repeat .... 10. Number Button 4 / In radio mode, press this button to hear radio preset; Dual (front and rear) AUX To input external audio. GPS Insert map card to read navigation map data. 04 In disc playback mode, press this button to select station upward / backward. Warning:...
... Warning: You can switch to achieve speed forward / backward function. 8. Dual (front and rear) USB Insert USB removable device so as to read audio/video files. This could cause malfunctions. 16. When there is power on / off TFT LCD display. 6. (VOL/SEL) Volume adjustment mode Repeat .... 10. Number Button 4 / In radio mode, press this button to hear radio preset; Dual (front and rear) AUX To input external audio. GPS Insert map card to read navigation map data. 04 In disc playback mode, press this button to select station upward / backward. Warning:...
User Manual
Page 4
... . One hand press stopper, then pull out battery. 20. choice. 22. SLOW Button In audio mode, press this button to slow backward and slow forward. 23. MUTE Button Press once to turn off audio output, press again to choose POP、ROCK、 METAL、EQ off . 2. EQ Button...In DVD/VCD mode, press this key to choose desired song、 section、preset stations. AUDIO Button In DVD mode, press this button to randomly play angle. 06 Put battery into controller. In audio mode, press this button to play . 05 INSTRUCTIONS 14. 0-10+ Button Press this button ...
... . One hand press stopper, then pull out battery. 20. choice. 22. SLOW Button In audio mode, press this button to slow backward and slow forward. 23. MUTE Button Press once to turn off audio output, press again to choose POP、ROCK、 METAL、EQ off . 2. EQ Button...In DVD/VCD mode, press this key to choose desired song、 section、preset stations. AUDIO Button In DVD mode, press this button to randomly play angle. 06 Put battery into controller. In audio mode, press this button to play . 05 INSTRUCTIONS 14. 0-10+ Button Press this button ...
User Manual
Page 5
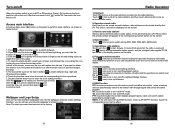
Touch in the main interface to enter into the wallpaper and boot screen settings interface, you can hide the location of the icon to the left and sliding screen to toggle the main menu page. 4. Wallpaper and Logo Setup Click on the main interface [wallpaper] icon into the radio interface. Enter/exit Touch [Radio] icon in different interface style to switch between day, night and off-screen three modes. 6. Press and hold to the left and right drag, you can icon and then drag to the trash. 5. Search/Save radio stations Short touch the [ ] button, browse 1-6 sets of...
Touch in the main interface to enter into the wallpaper and boot screen settings interface, you can hide the location of the icon to the left and sliding screen to toggle the main menu page. 4. Wallpaper and Logo Setup Click on the main interface [wallpaper] icon into the radio interface. Enter/exit Touch [Radio] icon in different interface style to switch between day, night and off-screen three modes. 6. Press and hold to the left and right drag, you can icon and then drag to the trash. 5. Search/Save radio stations Short touch the [ ] button, browse 1-6 sets of...
User Manual
Page 6
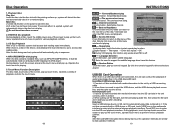
... the external storage playback interface; Insert a SD card recorded with media information to perform various playback controls. During playback, touch the top center area of audio/video/image files in sequence. 4. MP3/JPEG/MPEG4 disk playing When the disk contains readable files, such as to read out, system shall automatically play...
... the external storage playback interface; Insert a SD card recorded with media information to perform various playback controls. During playback, touch the top center area of audio/video/image files in sequence. 4. MP3/JPEG/MPEG4 disk playing When the disk contains readable files, such as to read out, system shall automatically play...
User Manual
Page 7
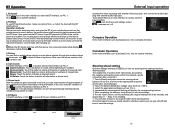
... PIC 3 11 Previous song next song PLAY/PAUSE PIC 4 External input operation Connect the video input plug with external video input jack, and connect the audio input plug with the BT when it shall display . 3. After input the phone number, click to access call . 4. Delete: Touch the button to ..., select your mobile phone and use BT hand-free function, make a call records interface as PIC 1: Touch icon to match password with external audio input jack. When the BT device matches with the BT mobile phone. Pair/link To use the mobile phone to search device, the mobile phone...
... PIC 3 11 Previous song next song PLAY/PAUSE PIC 4 External input operation Connect the video input plug with external video input jack, and connect the audio input plug with the BT when it shall display . 3. After input the phone number, click to access call . 4. Delete: Touch the button to ..., select your mobile phone and use BT hand-free function, make a call records interface as PIC 1: Touch icon to match password with external audio input jack. When the BT device matches with the BT mobile phone. Pair/link To use the mobile phone to search device, the mobile phone...
User Manual
Page 8
.... abnormal navigation. In the set interface click [VIDEO] icon, into sound effect default interface. Click [CALIBRATION] icon on /off that . Audio setting In the set interface click [AUDIO] icon, into the Audio set interface click [SET COMM] icon, Click into the video set to enter the time zone settings otherwise the procedure many...
.... abnormal navigation. In the set interface click [VIDEO] icon, into sound effect default interface. Click [CALIBRATION] icon on /off that . Audio setting In the set interface click [AUDIO] icon, into the Audio set interface click [SET COMM] icon, Click into the video set to enter the time zone settings otherwise the procedure many...
User Manual
Page 9
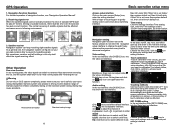
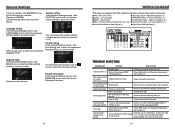
Car Set setting In the General Settings screen, click [Car Setting] icon to enter the agreement setting interface, as shown below: Regional radio In the General Settings screen, click [RADIO] icon to enter the Radio setting interface, as shown below : You can choose the system settings interface has the feature is turned on Cannot watch image during driving Park the car in a safe place, put the car stall It's not allowed to confirm the save Poor performance Weak signal of radio station Cannot load disk There is a disk inside Disc is scratched Put wrong side of disc into the ...
Car Set setting In the General Settings screen, click [Car Setting] icon to enter the agreement setting interface, as shown below: Regional radio In the General Settings screen, click [RADIO] icon to enter the Radio setting interface, as shown below : You can choose the system settings interface has the feature is turned on Cannot watch image during driving Park the car in a safe place, put the car stall It's not allowed to confirm the save Poor performance Weak signal of radio station Cannot load disk There is a disk inside Disc is scratched Put wrong side of disc into the ...

User Manual
Page 10
To change the default grade, you need to choose the DVD grade as default. 17 18 INSTRUCTIONS SPECIFICATIONS Power supply Power range Max Current Consumption Ground system Power Output FM tuner US frequency range European frequency range Signal / Noise ratio Stereo separation Search station volt AM tuner US frequency range European frequency range Limit noise sensitivity DVD player S / N Ratio Frequency response DC 12V 10.8-16.0V DC 15A Negative ground 85 WattsX4 Channels 87.5-107.9MHz 87.5-108MHz 55dB 30dB 20-30dBuv 530-1710KHz 522-1620KHz 32dB 70dB 20Hz-20KHz ACCESSORY Accessory Wire ...
To change the default grade, you need to choose the DVD grade as default. 17 18 INSTRUCTIONS SPECIFICATIONS Power supply Power range Max Current Consumption Ground system Power Output FM tuner US frequency range European frequency range Signal / Noise ratio Stereo separation Search station volt AM tuner US frequency range European frequency range Limit noise sensitivity DVD player S / N Ratio Frequency response DC 12V 10.8-16.0V DC 15A Negative ground 85 WattsX4 Channels 87.5-107.9MHz 87.5-108MHz 55dB 30dB 20-30dBuv 530-1710KHz 522-1620KHz 32dB 70dB 20Hz-20KHz ACCESSORY Accessory Wire ...