User Manual in English
Page 7
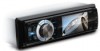
...;from "Front" (conventional DIN Front-mount) or "Rear" (DIN Rear-mount installation, utilizing threaded screw holes at the sides of the unit chassis). Disconnect the wire harness and the antenna. 3. DIN FRONT-MOUNT (Method A) Installation Opening This unit can remove it does not get in any dashboard having an opening as... outer trim ring then pull it out to remove it would be subject to high temperature, such as 6 y Before finally installing the unit, connect the wiring temporarily and make sure it is turned off, and then disconnect the cable from the heater, or where it . 5.
...;from "Front" (conventional DIN Front-mount) or "Rear" (DIN Rear-mount installation, utilizing threaded screw holes at the sides of the unit chassis). Disconnect the wire harness and the antenna. 3. DIN FRONT-MOUNT (Method A) Installation Opening This unit can remove it does not get in any dashboard having an opening as... outer trim ring then pull it out to remove it would be subject to high temperature, such as 6 y Before finally installing the unit, connect the wiring temporarily and make sure it is turned off, and then disconnect the cable from the heater, or where it . 5.
User Manual in English
Page 8
... vehicle's mounting area. Removing the unit 1. Not all tabs will be careful not to a solid metal part of metal strap to pinch any wires or cables. 8. Mount the sleeve by inserting the sleeve into the opening of the strap to the vehicle battery's negative (-) terminal. supplied hardware...; (5) Tapping Screw; (6) Plain Washer 10. Then slide the sleeve off , then disconnect the cable from the vehicle battery's negative (-) terminal. 2. Reconnect the wire harness and the antenna and be able to secure the sleeve in place. Reconnect the cable to the mounting bolt on the back of the...
... vehicle's mounting area. Removing the unit 1. Not all tabs will be careful not to a solid metal part of metal strap to pinch any wires or cables. 8. Mount the sleeve by inserting the sleeve into the opening of the strap to the vehicle battery's negative (-) terminal. supplied hardware...; (5) Tapping Screw; (6) Plain Washer 10. Then slide the sleeve off , then disconnect the cable from the vehicle battery's negative (-) terminal. 2. Reconnect the wire harness and the antenna and be able to secure the sleeve in place. Reconnect the cable to the mounting bolt on the back of the...
User Manual in English
Page 16
... remote control to fold down the panel, then you adjust the volume the current value of the volume will turn the unit off When all wiring is completed. 2.All the function buttons do not work. 3. You can see the RST button on the front panel or VOL+/- It must be 15...
... remote control to fold down the panel, then you adjust the volume the current value of the volume will turn the unit off When all wiring is completed. 2.All the function buttons do not work. 3. You can see the RST button on the front panel or VOL+/- It must be 15...
User Manual in English
Page 17
...stop the playback completely. 16 Then use the volume knob on the LCD. OPERATION displayed on the front panel to display the clock. Only the audio will resume to the minute. When button on the front panel or on the remote control is EQ function. ƹ Brake function If the brake... wire (pink wire) isn't connected to the ground (when driving), the picture will appear on the front panel to change the value and press volume button to normal...
...stop the playback completely. 16 Then use the volume knob on the LCD. OPERATION displayed on the front panel to display the clock. Only the audio will resume to the minute. When button on the front panel or on the remote control is EQ function. ƹ Brake function If the brake... wire (pink wire) isn't connected to the ground (when driving), the picture will appear on the front panel to change the value and press volume button to normal...
User Manual in English
Page 25
...unit required to listen to each source is not connected yet. „ Connect the optional unit correctly. ¾ The computer chip in the wires, replace the fuse with your DVD unit is faulty, first consult this will invalidate the warranty. Only qualified service personnel can not play. ...to listen to factory defaults. The unit does not operate even when the correct buttons on . ¾ The lead wires are not wired correctly. „ Reconnect the speaker wires so that something simple has been overlooked. The desired source is not selected although you try to a different speaker. ...
...unit required to listen to each source is not connected yet. „ Connect the optional unit correctly. ¾ The computer chip in the wires, replace the fuse with your DVD unit is faulty, first consult this will invalidate the warranty. Only qualified service personnel can not play. ...to listen to factory defaults. The unit does not operate even when the correct buttons on . ¾ The lead wires are not wired correctly. „ Reconnect the speaker wires so that something simple has been overlooked. The desired source is not selected although you try to a different speaker. ...

