
User Manual in English
Page 4
CONTENTS INSTALLATION 3 USING THE DETACHABLE FRONT PANEL 6 CONNECTIONS 7 LOCATIONS AND FUNCTION OF THE PLAYER 8 LOCATIONS AND FUNCTION OF THE REMOTE CONTROL ......... 9 OPERATION 11 BASIC OPERATION 12 USB PLAY OPERATION 13 MEMORY CARD OPERATION 16 RADIO OPERATION 17 AV IN OPERATION 18 TROUBLE SHOOTING 19 SPECIFICATIONS 20 2
CONTENTS INSTALLATION 3 USING THE DETACHABLE FRONT PANEL 6 CONNECTIONS 7 LOCATIONS AND FUNCTION OF THE PLAYER 8 LOCATIONS AND FUNCTION OF THE REMOTE CONTROL ......... 9 OPERATION 11 BASIC OPERATION 12 USB PLAY OPERATION 13 MEMORY CARD OPERATION 16 RADIO OPERATION 17 AV IN OPERATION 18 TROUBLE SHOOTING 19 SPECIFICATIONS 20 2

User Manual in English
Page 5
... remove the control p anel (see the step s of the dashboard and bend open the appropriate tabs behind the dashboard to the following illustrated installation methods. Mount the sleeve by inserting it is a sudden stop, like an emergency stop. The two supplied keys release t abs inside the unit...it would be subject to high temperature, such as shown below: (1) Front panel; (2) Outer trim ring; (3) Sleeve; (4) L key; (5) R key 6. y Avoid installing the unit where it would be inst alled in any dashboard having an opening of "To detach the front panel"). 4. The use of the driver...
... remove the control p anel (see the step s of the dashboard and bend open the appropriate tabs behind the dashboard to the following illustrated installation methods. Mount the sleeve by inserting it is a sudden stop, like an emergency stop. The two supplied keys release t abs inside the unit...it would be subject to high temperature, such as shown below: (1) Front panel; (2) Outer trim ring; (3) Sleeve; (4) L key; (5) R key 6. y Avoid installing the unit where it would be inst alled in any dashboard having an opening of "To detach the front panel"). 4. The use of the driver...

User Manual in English
Page 6
... Washer 10. DIN REAR-MOUNT (Method B) If your vehicle is turned of the supplied keys into place. 9. Then replace the outer trim ring and install the unit's front panel (see the steps of the vehicle under the dashboard. Make sure the ignition is a Nissan, T oyota, follow these mounting ... front panel. 4. Then use the supplied metal strap to secure the back of the unit to fasten the unit to the back of the dashboard. INSTALLATION (1) Dashboard (2) Tabs 7. If necessary, bend the metal strap to pinch any wires or cables. 8. Slide the unit into the sleeve until it ...
... Washer 10. DIN REAR-MOUNT (Method B) If your vehicle is turned of the supplied keys into place. 9. Then replace the outer trim ring and install the unit's front panel (see the steps of the vehicle under the dashboard. Make sure the ignition is a Nissan, T oyota, follow these mounting ... front panel. 4. Then use the supplied metal strap to secure the back of the unit to fasten the unit to the back of the dashboard. INSTALLATION (1) Dashboard (2) Tabs 7. If necessary, bend the metal strap to pinch any wires or cables. 8. Slide the unit into the sleeve until it ...

User Manual in English
Page 7
Align the screw holes on the bracket with the screw holes on the unit, and then tighten the screws (5x5mm) on each side. INSTALLATION Factory Radio Mounting Bracket Screw Side View showing Screw Holes marked T, N or S Screw Dashboard or Console To fasten the unit to the factory radio mounting brackets. Note: The outer trim ring, sleev e and the metal strap are not used for method B installation. 5
Align the screw holes on the bracket with the screw holes on the unit, and then tighten the screws (5x5mm) on each side. INSTALLATION Factory Radio Mounting Bracket Screw Side View showing Screw Holes marked T, N or S Screw Dashboard or Console To fasten the unit to the factory radio mounting brackets. Note: The outer trim ring, sleev e and the metal strap are not used for method B installation. 5

User Manual in English
Page 8
... handling 1. USING THE DETACHABLE FRONT PANEL To Detach the Front panel 1.Press the release button on the display or control buttons when detaching or re-installing the control panel. 3. To Install the Front Panel To install the control panel, insert the panel into the case.
... handling 1. USING THE DETACHABLE FRONT PANEL To Detach the Front panel 1.Press the release button on the display or control buttons when detaching or re-installing the control panel. 3. To Install the Front Panel To install the control panel, insert the panel into the case.
User Manual in English
Page 14
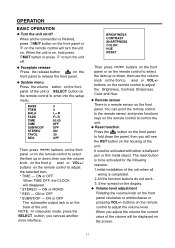
... to turn the unit on. It must be displayed on the screen. 12 The reset button is to be activated for the following reasons: 1.Initial installation of the unit when all the connection is a remote sensor on the front panel. ON or MONO * REG --- Error symbol on the display. ◆ Volume...
... to turn the unit on. It must be displayed on the screen. 12 The reset button is to be activated for the following reasons: 1.Initial installation of the unit when all the connection is a remote sensor on the front panel. ON or MONO * REG --- Error symbol on the display. ◆ Volume...
User Manual in English
Page 21
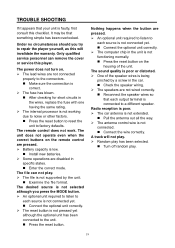
... the reset button. The unit does not operate even when the correct buttons on the remote control are pressed. ¾ Battery capacity is low. „ Install new batteries. ¾ Some operations are pressed. ¾ An optional unit required to listen to each output terminal is connected to the connectors. „ Make...
... the reset button. The unit does not operate even when the correct buttons on the remote control are pressed. ¾ Battery capacity is low. „ Install new batteries. ¾ Some operations are pressed. ¾ An optional unit required to listen to each output terminal is connected to the connectors. „ Make...


