
Operation Manual
Page 3
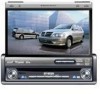
... to use all the features of your new Jensen VM9412 Mobile Multimedia Receiver for choosing a Jensen product. Preparation...1 Installation ...5 Anti-Theft Feature ...6 Controls and Indicators ...7 Remote Control ...9 Using the TFT Monitor ...12 Operating Instructions ...14 Multi-ZONE Operation...15 ...Setup Menu...16 Tuner Operation ...18 Satellite Radio Operation ...20 DVD/VCD Video Operation 22 DVD/CD Audio Operation 25 MP3/WMA/iPod ...
... to use all the features of your new Jensen VM9412 Mobile Multimedia Receiver for choosing a Jensen product. Preparation...1 Installation ...5 Anti-Theft Feature ...6 Controls and Indicators ...7 Remote Control ...9 Using the TFT Monitor ...12 Operating Instructions ...14 Multi-ZONE Operation...15 ...Setup Menu...16 Tuner Operation ...18 Satellite Radio Operation ...20 DVD/VCD Video Operation 22 DVD/CD Audio Operation 25 MP3/WMA/iPod ...
Operation Manual
Page 5
...• Motorized/Swivel Flip-Out/Flip-Up LCD Screen • 7" TFT Active Matrix LCD with Touch Screen Interface • Two Audio...) • Satellite Channel Name, Artist, Song and Categories Displayed on your Jensen VM9412 installed by a reputable installation shop. Full, Normal and OFF • Fast Forward... Search • Direct Track Access via Remote control • Burn Up To 1500 MP3 / WMA Files onto a DVD+R/RW • Audible Forward / Reverse ...for Additional Screens • Compatible with MZ7TFT Rear Seat Monitors with Anti-Glare Coating • Screen Tilt/Angle Adjustment...
...• Motorized/Swivel Flip-Out/Flip-Up LCD Screen • 7" TFT Active Matrix LCD with Touch Screen Interface • Two Audio...) • Satellite Channel Name, Artist, Song and Categories Displayed on your Jensen VM9412 installed by a reputable installation shop. Full, Normal and OFF • Fast Forward... Search • Direct Track Access via Remote control • Burn Up To 1500 MP3 / WMA Files onto a DVD+R/RW • Audible Forward / Reverse ...for Additional Screens • Compatible with MZ7TFT Rear Seat Monitors with Anti-Glare Coating • Screen Tilt/Angle Adjustment...

Operation Manual
Page 10
To change the anti-theft and RATINGS protection password, perform the following steps: 1. Press the SETUP button (31) on the remote control or touch the button on page 17). The "lock" icon will lock and the new anti-theft password will be set, as well as ... user password is equipped with an anti-theft feature requiring the user to view the "RATINGS" sub-menu. Enter a new 6-digit password and press ENTER. VM9412 6 NOTE: If you forget your password, contact Customer Service at 1-800-323-4815 for RATINGS protection (see "Rating Sub-menu Features" on the screen to...
To change the anti-theft and RATINGS protection password, perform the following steps: 1. Press the SETUP button (31) on the remote control or touch the button on page 17). The "lock" icon will lock and the new anti-theft password will be set, as well as ... user password is equipped with an anti-theft feature requiring the user to view the "RATINGS" sub-menu. Enter a new 6-digit password and press ENTER. VM9412 6 NOTE: If you forget your password, contact Customer Service at 1-800-323-4815 for RATINGS protection (see "Rating Sub-menu Features" on the screen to...

Operation Manual
Page 11
...: The VM9412 features Softmute, which will allow the volume to cycle through information available on the LCD screen. 3. Press again to adjust the volume. AUDIO Rotate to close the TFT. 2. BAND 5 Press the BAND button to move the TFT monitor into viewing position. IR Remote Control Receiver 10. (left . 11. (down joystick) DVD/Disc Mode...
...: The VM9412 features Softmute, which will allow the volume to cycle through information available on the LCD screen. 3. Press again to adjust the volume. AUDIO Rotate to close the TFT. 2. BAND 5 Press the BAND button to move the TFT monitor into viewing position. IR Remote Control Receiver 10. (left . 11. (down joystick) DVD/Disc Mode...

Operation Manual
Page 13
The above diagram is for illustrative purposes only. 9 VM9412 REMOTE CONTROL The VM9412 Remote controls both the front and rear zones. 30 To switch from front to rear zone, move the F/R switch (32) located on the right side of the controller. 8 4 35 31 14 16 18 17 19 15 2 32 3 22 1 11 13 5 9 12 24 23 28 25 20 21 10 27 29 26 6 7 33 34 NOTE: Your remote control may differ slightly from the one pictured here.
The above diagram is for illustrative purposes only. 9 VM9412 REMOTE CONTROL The VM9412 Remote controls both the front and rear zones. 30 To switch from front to rear zone, move the F/R switch (32) located on the right side of the controller. 8 4 35 31 14 16 18 17 19 15 2 32 3 22 1 11 13 5 9 12 24 23 28 25 20 21 10 27 29 26 6 7 33 34 NOTE: Your remote control may differ slightly from the one pictured here.

Operation Manual
Page 14
...or Photo Navigates the preset station list Navigates list window Navigates the preset station list Navigates list window 12 Zooms out when playing DVD, DivX or Photo Zooms out Navigates the preset station list Navigates list window Navigates the preset station list Navigates list window 13 Plays...off Turns the power on/off Turns the power on/off Turns the power on/off Turns the power on /off PBC when play - VM9412 Table 1: Remote Control Functions Button Function Name MENU TITLE MUTE POWER/ AUDIO RPT A-B RPT SRC SUBTITLE DISP/ CLEAR PRESET PRESET ANGLE Joystick /\ VOL VOL +...
...or Photo Navigates the preset station list Navigates list window Navigates the preset station list Navigates list window 12 Zooms out when playing DVD, DivX or Photo Zooms out Navigates the preset station list Navigates list window Navigates the preset station list Navigates list window 13 Plays...off Turns the power on/off Turns the power on/off Turns the power on/off Turns the power on /off PBC when play - VM9412 Table 1: Remote Control Functions Button Function Name MENU TITLE MUTE POWER/ AUDIO RPT A-B RPT SRC SUBTITLE DISP/ CLEAR PRESET PRESET ANGLE Joystick /\ VOL VOL +...

Operation Manual
Page 15
VM9412 Table 1: Remote Control Functions Button Function Name Ref# DVD VCD TUNER CD/MP3 SATELLITE iPod PIC 24 OPEN/ 25 CLOSE TILT 26 TILT 27 WIDE 28 1, 2, 3, 4, 5, 29 6, 7, 8, 9, 0 (Numeric Keypad) PIP 30 SETUP 31 F/R 32 RDM 33 SCN 34 EJECT 35 Displays Brightness/Contrast Controls Opens/closes the TFT monitor Decreases monitor tilt angle Increases monitor tilt...
VM9412 Table 1: Remote Control Functions Button Function Name Ref# DVD VCD TUNER CD/MP3 SATELLITE iPod PIC 24 OPEN/ 25 CLOSE TILT 26 TILT 27 WIDE 28 1, 2, 3, 4, 5, 29 6, 7, 8, 9, 0 (Numeric Keypad) PIP 30 SETUP 31 F/R 32 RDM 33 SCN 34 EJECT 35 Displays Brightness/Contrast Controls Opens/closes the TFT monitor Decreases monitor tilt angle Increases monitor tilt...

Operation Manual
Page 16
...Monitor Tilt Angle Adjustment A known characteristic of LCD panels is stationed inside the main compartment of the TFT screen, follow these steps: 1. Continuous Angle Adjustment Press and hold the ( ) or ( ) button on the remote...monitor returns to resume. Composite Video Baseband Signal 12 VM9412 USING THE TFT MONITOR Open/Close TFT Monitor Open TFT Monitor Press the OPEN button (1) on the front panel or press the ( ) button (25) on the remote... Mode iPod RGB Mode DVD/Disc RGB Mode AUX IN CVBS Mode NAV RGB Mode CAMERA CVBS Mode *CVBS - Monitor Left/Right Angle Adjustment...
...Monitor Tilt Angle Adjustment A known characteristic of LCD panels is stationed inside the main compartment of the TFT screen, follow these steps: 1. Continuous Angle Adjustment Press and hold the ( ) or ( ) button on the remote...monitor returns to resume. Composite Video Baseband Signal 12 VM9412 USING THE TFT MONITOR Open/Close TFT Monitor Open TFT Monitor Press the OPEN button (1) on the front panel or press the ( ) button (25) on the remote... Mode iPod RGB Mode DVD/Disc RGB Mode AUX IN CVBS Mode NAV RGB Mode CAMERA CVBS Mode *CVBS - Monitor Left/Right Angle Adjustment...

Operation Manual
Page 17
...Unit stops at ing out hori- Enter Picture Quality Setting Mode: Press the PIC button (24) on the remote control or the WIDE/PICTURE button (23) on the TFT monitor within 1 ~ 2 seconds. • Parking break is disengaged (off) when the vehicle is started or ...remote control or the WIDE/ PICTURE button on . The timing window is between 3 ~ 5 seconds. • Parking brake is engaged (on) when the vehicle is started or the accessory/ignition is resumed by pressing the OPEN button (1) or disconnecting and reconnecting the power. 13 Release parking brake for 3 ~ 5 seconds. d. VM9412...
...Unit stops at ing out hori- Enter Picture Quality Setting Mode: Press the PIC button (24) on the remote control or the WIDE/PICTURE button (23) on the TFT monitor within 1 ~ 2 seconds. • Parking break is disengaged (off) when the vehicle is started or ...remote control or the WIDE/ PICTURE button on . The timing window is between 3 ~ 5 seconds. • Parking brake is engaged (on) when the vehicle is started or the accessory/ignition is resumed by pressing the OPEN button (1) or disconnecting and reconnecting the power. 13 Release parking brake for 3 ~ 5 seconds. d. VM9412...
Operation Manual
Page 18
...VM9412 OPERATING INSTRUCTIONS Power On / Off Press the /SRC button (6) on the unit (or the /POWER button (4) on the remote control) to turn the unit on the front panel (6) or remote control (8) to change to the desired setting. The LCD...of your turn -on the control panel (13) or remote control (18) to turning the unit off the unit.The monitor is displayed on the front bottom-right corner of inactivity....12) located on the screen. NOTE: If the unit is reset while a DVD is playing, the DVD resumes play once the reset is displayed on the front of the audio setup ...
...VM9412 OPERATING INSTRUCTIONS Power On / Off Press the /SRC button (6) on the unit (or the /POWER button (4) on the remote control) to turn the unit on the front panel (6) or remote control (8) to change to the desired setting. The LCD...of your turn -on the control panel (13) or remote control (18) to turning the unit off the unit.The monitor is displayed on the front bottom-right corner of inactivity....12) located on the screen. NOTE: If the unit is reset while a DVD is playing, the DVD resumes play once the reset is displayed on the front of the audio setup ...

Operation Manual
Page 19
...touch screen or the remote control. To switch from front to two additional monitors (sold separately) for rear passengers, one of the screen. Connecting the Rear Zone Touch Screen You can connect up to rear zone, move the F/R switch (32) located on the VM9412. Any operation assigned ... RADIO F NAV R O N T SAT CAMERA R E A OFF R AUX 2 Turning the Rear Screen Off Touch the OFF button (on the front screen while DVD video is available to choose the zone for the front or rear zone. HEADPHONE MULTIZONE VIDEO OUT 2 MZ-TFT YELLOW BLACK WHITE RED MZ7TFT Touch...
...touch screen or the remote control. To switch from front to two additional monitors (sold separately) for rear passengers, one of the screen. Connecting the Rear Zone Touch Screen You can connect up to rear zone, move the F/R switch (32) located on the VM9412. Any operation assigned ... RADIO F NAV R O N T SAT CAMERA R E A OFF R AUX 2 Turning the Rear Screen Off Touch the OFF button (on the front screen while DVD video is available to choose the zone for the front or rear zone. HEADPHONE MULTIZONE VIDEO OUT 2 MZ-TFT YELLOW BLACK WHITE RED MZ7TFT Touch...

Operation Manual
Page 20
...Clock displays 12 hour time using the EQ/FAD-BAL menu, accessed by the DVD, then the default language is available. When turned on the LCD screen during playback. DVD subtitles automatically appear in blue. DVD menu (if applicable) is displayed in Dolby. Optimized for music reproduction when ...for the feature you continue to enter the "SETUP" menu. DVD Audio is heard in blue. 3. DVD subtitles automatically appear in English. VM9412 SETUP MENU To access system settings, press the SETUP button (31) on the remote control or touch the button on the screen to adjust the ...
...Clock displays 12 hour time using the EQ/FAD-BAL menu, accessed by the DVD, then the default language is available. When turned on the LCD screen during playback. DVD subtitles automatically appear in blue. DVD menu (if applicable) is displayed in Dolby. Optimized for music reproduction when ...for the feature you continue to enter the "SETUP" menu. DVD Audio is heard in blue. 3. DVD subtitles automatically appear in English. VM9412 SETUP MENU To access system settings, press the SETUP button (31) on the remote control or touch the button on the screen to adjust the ...

Operation Manual
Page 21
...enter the current password. The rating for setup. If the monitor is released only by using the DivX Video On Demand format... out You must use this code to register your player, allowing you can access the "Password" field and...playback, press the SETUP button (31) on the remote control or touch the BACK button on the disc,...buttons to increase relative volume for specified source up to 6 decibels. VM9412 Setting Options Function Tuner Region USA America 1 Arabia China America 2 ...Band 88.1MHz~107.9MHz Rating Sub-menu Features The DVD system has a built-in parental lock feature to prevent...
...enter the current password. The rating for setup. If the monitor is released only by using the DivX Video On Demand format... out You must use this code to register your player, allowing you can access the "Password" field and...playback, press the SETUP button (31) on the remote control or touch the BACK button on the disc,...buttons to increase relative volume for specified source up to 6 decibels. VM9412 Setting Options Function Tuner Region USA America 1 Arabia China America 2 ...Band 88.1MHz~107.9MHz Rating Sub-menu Features The DVD system has a built-in parental lock feature to prevent...

Operation Manual
Page 22
...is selected 22. LOC: Touch to tune to access the direct entry screen 10. Touch "RADIO". • Press the SRC button (6) on the unit (4) or remote control (20) to view the SETUP menu 21. To seek the next lower station: • Touch the | Current radio band indicator 2. Touch to automatically store... FM/AM Band Touch the BAND button (15) on the screen, or press the BAND button on the front panel or remote control (8) to switch to find similar programming by genre. VM9412 TUNER OPERATION Tuner TFT Display 8 17 1 4 5 10 2 24 25 3 RADIO FM-1 ST P1 87.5 MHz LOC PTY RDS 01:...
...is selected 22. LOC: Touch to tune to access the direct entry screen 10. Touch "RADIO". • Press the SRC button (6) on the unit (4) or remote control (20) to view the SETUP menu 21. To seek the next lower station: • Touch the | Current radio band indicator 2. Touch to automatically store... FM/AM Band Touch the BAND button (15) on the screen, or press the BAND button on the front panel or remote control (8) to switch to find similar programming by genre. VM9412 TUNER OPERATION Tuner TFT Display 8 17 1 4 5 10 2 24 25 3 RADIO FM-1 ST P1 87.5 MHz LOC PTY RDS 01:...

Operation Manual
Page 24
...the on the touch screen repeatedly to tune to channel "000". Listeners can subscribe to Sirius® Radio on the unit (14) or remote control (20) to change to another station. CG: Access Channel/Category Guide mode 16. SAT band 4. Song category 8. CH -: Select...screen preset button to select the corresponding stored station. VM9412 SATELLITE RADIO OPERATION Listeners can subscribe to XM® Radio on the remote control. Customers should have their Sirius ID ready (Sirius ID is located on the remote control to display the direct entry menu. SAT SAT1...
...the on the touch screen repeatedly to tune to channel "000". Listeners can subscribe to Sirius® Radio on the unit (14) or remote control (20) to change to another station. CG: Access Channel/Category Guide mode 16. SAT band 4. Song category 8. CH -: Select...screen preset button to select the corresponding stored station. VM9412 SATELLITE RADIO OPERATION Listeners can subscribe to XM® Radio on the remote control. Customers should have their Sirius ID ready (Sirius ID is located on the remote control to display the direct entry menu. SAT SAT1...

Operation Manual
Page 26
...inserted is moving, the TFT screen displays "PARKING" with a blue background. Ejecting a Disc Press the button (21) on the unit or remote control (35) to reset the loading mechanism. Reset the Loading Mechanism If the disc loads abnormally or an abnormal core mechanism operation occurs, ...must be displayed on the main TFT screen unless the parking brake is ejected. Press the < button on the screen. VM9412 DVD/VCD VIDEO OPERATION NOTE: When properly installed, DVD video cannot be authorized (see "General Sub-menu Features" on page 16). You may eject a disc with PBC turned...
...inserted is moving, the TFT screen displays "PARKING" with a blue background. Ejecting a Disc Press the button (21) on the unit or remote control (35) to reset the loading mechanism. Reset the Loading Mechanism If the disc loads abnormally or an abnormal core mechanism operation occurs, ...must be displayed on the main TFT screen unless the parking brake is ejected. Press the < button on the screen. VM9412 DVD/VCD VIDEO OPERATION NOTE: When properly installed, DVD video cannot be authorized (see "General Sub-menu Features" on page 16). You may eject a disc with PBC turned...

Operation Manual
Page 27
...shot simultaneously from track 1 of 16 titles on the DVD is activated, selecting random, scan, or search playback automatically deactivates PBC. Format of the current track. 23 VM9412 Direct Chapter / Track Selection Remote Control Direct Entry During DVD, VCD and CD playback, you can use the numeric ...keypad on the remote control (29) to toggle the PBC function "On"/"Off". Multi-Language Discs (DVD Only) Changing Audio Language If ...
...shot simultaneously from track 1 of 16 titles on the DVD is activated, selecting random, scan, or search playback automatically deactivates PBC. Format of the current track. 23 VM9412 Direct Chapter / Track Selection Remote Control Direct Entry During DVD, VCD and CD playback, you can use the numeric ...keypad on the remote control (29) to toggle the PBC function "On"/"Off". Multi-Language Discs (DVD Only) Changing Audio Language If ...
Operation Manual
Page 29
CD Player User Interface The on the screen. Current time 4. Disc title 6. ||: Touch to pause... >>|: Touch to move to next track 9. |: Touch to fast forward current track 11. | button (19) on the remote control or on screen or use the > button on the joystick to advance to increase the rate from the following disc media...the next track on -screen number pad, and then press the Enter button. To exit the screen without making a selection, touch Exit. VM9412 DVD/CD AUDIO OPERATION Instructions for TFT control and Insert/Eject are outlined below. 16 17 1 2 15 3 DISC CD 1/10 E Q...
CD Player User Interface The on the screen. Current time 4. Disc title 6. ||: Touch to pause... >>|: Touch to move to next track 9. |: Touch to fast forward current track 11. | button (19) on the remote control or on screen or use the > button on the joystick to advance to increase the rate from the following disc media...the next track on -screen number pad, and then press the Enter button. To exit the screen without making a selection, touch Exit. VM9412 DVD/CD AUDIO OPERATION Instructions for TFT control and Insert/Eject are outlined below. 16 17 1 2 15 3 DISC CD 1/10 E Q...
Operation Manual
Page 31
...iPod so you can select video media to view the previous/ next page of the "Root' directory. NOTE: When burning MP3 / WMA files onto a DVD disc, use the > button on the joystick (14) to advance to stop disc playback. To resume playback, touch the button on screen, press the ...close your disc. Video Playback While iPod video can be displayed on the TFT monitor. NOTE: To transmit the video from the remote control keypad. Moving Through Tracks Press the >>| button (19) on the remote control or on the VM9412 screen, you must use the iPod to select the desired song or file....
...iPod so you can select video media to view the previous/ next page of the "Root' directory. NOTE: When burning MP3 / WMA files onto a DVD disc, use the > button on the joystick (14) to advance to stop disc playback. To resume playback, touch the button on screen, press the ...close your disc. Video Playback While iPod video can be displayed on the TFT monitor. NOTE: To transmit the video from the remote control keypad. Moving Through Tracks Press the >>| button (19) on the remote control or on the VM9412 screen, you must use the iPod to select the desired song or file....

Operation Manual
Page 32
You can also use the numeric keypad (29) on -screen number pad. To exit the screen without changing the station, touch Exit. VM9412 28 Press the Enter button to tune to display the direct entry menu. To clear your entry and start over, touch Clear. Direct Track/File Entry To select a track/file directly, touch the control to the selected station. button on screen TRACK: _ _ _ 123 Exit 456 789 Enter 0 Clear Enter the desired track/file using the on the remote control to access files directly.
You can also use the numeric keypad (29) on -screen number pad. To exit the screen without changing the station, touch Exit. VM9412 28 Press the Enter button to tune to display the direct entry menu. To clear your entry and start over, touch Clear. Direct Track/File Entry To select a track/file directly, touch the control to the selected station. button on screen TRACK: _ _ _ 123 Exit 456 789 Enter 0 Clear Enter the desired track/file using the on the remote control to access files directly.

