User Guide
Page 9
... the hardware setup procedures that the battery should not be placed in municipal waste. This product has been designed to install optional components into the barebone server. 4. About this guide Audience This user guide is intended for system integrators, and experienced users with the server. Chapter 3: Installation options This chapter describes...
... the hardware setup procedures that the battery should not be placed in municipal waste. This product has been designed to install optional components into the barebone server. 4. About this guide Audience This user guide is intended for system integrators, and experienced users with the server. Chapter 3: Installation options This chapter describes...

User Guide
Page 15
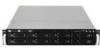
... the LED descriptions. The middle part includes the I/O shield with easily accessible features. 1.4 Front panel features The barebone server displays a simple yet stylish front panel with openings for the rear panel connectors on the motherboard. 3 Expansion...and Gigabit LAN do not appear on the front panel. Refer to section 1.7.1 Front panel LEDs for ASUS ASMB4-iKVM controller card only. ODD dummy cover Location switch Location LED Reset button Message LED LAN1 ...Rear panel features The rear panel includes the expansion slots, system power socket, and rear fans. ASUS RS520-E6/RS8 1-5
... the LED descriptions. The middle part includes the I/O shield with easily accessible features. 1.4 Front panel features The barebone server displays a simple yet stylish front panel with openings for the rear panel connectors on the motherboard. 3 Expansion...and Gigabit LAN do not appear on the front panel. Refer to section 1.7.1 Front panel LEDs for ASUS ASMB4-iKVM controller card only. ODD dummy cover Location switch Location LED Reset button Message LED LAN1 ...Rear panel features The rear panel includes the expansion slots, system power socket, and rear fans. ASUS RS520-E6/RS8 1-5
User Guide
Page 16
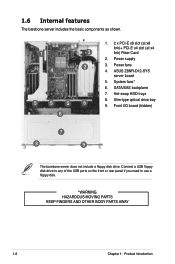
... as shown. 1. 2 x PCI-E x8 slot (at x8 link)+ PCI-E x4 slot (at x4 1 3 link) Riser Card 2. ASUS Z8NR-D12-SYS server board 5. SATA/SAS backplane 7. Slim-type optical drive bay 9. Front I/O board (hidden) 6 7 8 9 The barebone server does not include a floppy disk drive. Hot-swap HDD trays 5 5 5 5 8. Connect a USB floppy disk drive to...
... as shown. 1. 2 x PCI-E x8 slot (at x8 link)+ PCI-E x4 slot (at x4 1 3 link) Riser Card 2. ASUS Z8NR-D12-SYS server board 5. SATA/SAS backplane 7. Slim-type optical drive bay 9. Front I/O board (hidden) 6 7 8 9 The barebone server does not include a floppy disk drive. Hot-swap HDD trays 5 5 5 5 8. Connect a USB floppy disk drive to...
User Guide
Page 41
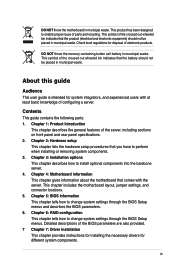
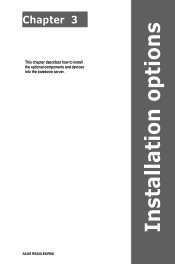
ASUS RS520-E6/RS8 2- Installation options Chapter 3 This chapter describes how to install the optional components and devices into the barebone server.
ASUS RS520-E6/RS8 2- Installation options Chapter 3 This chapter describes how to install the optional components and devices into the barebone server.

User Guide
Page 43
... front. 3. Ensure that it locks in place. 4. Position the rack rail to the side of the server rail to the 2U space on the rack. ASUS RS520-E6/RS8 3-3 Secure the rear end of the chassis with one screw. 5. Select two units of the rail with two rack screws. 9. Then slide the rail... rack. 6. Secure the front end of space (2U) on the rail. Secure the rear end of the rack rails. 5. Repeat steps 5 to 8 to install the barebone server. 2. Attach the rear end of the server rail to the side of the chassis, matching each of the two hooks to determine the length...
... front. 3. Ensure that it locks in place. 4. Position the rack rail to the side of the server rail to the 2U space on the rack. ASUS RS520-E6/RS8 3-3 Secure the rear end of the chassis with one screw. 5. Select two units of the rail with two rack screws. 9. Then slide the rail... rack. 6. Secure the front end of space (2U) on the rail. Secure the rear end of the rack rails. 5. Repeat steps 5 to 8 to install the barebone server. 2. Attach the rear end of the server rail to the side of the chassis, matching each of the two hooks to determine the length...

