
User Guide
Page 1
P5QL-VM DO Motherboard
P5QL-VM DO Motherboard
User Guide
Page 3
Contents Notices...v Safety information vi About this guide vii P5QL-VM DO specifications summary viii Chapter 1: Product introduction 1.1 Before you proceed 1-1 1.2 Motherboard overview 1-2 1.2.1 Motherboard layout 1-2 1.2.2 Layout contents 1-2 1.3 Central Processing Unit (CPU 1-3 1.4 System memory 1-3 1.4.1 Overview 1-3 1.4.2 Memory configurations 1-4 ... 1-18 Chapter 2: BIOS information 2.1 Managing and updating your BIOS 2-1 2.1.1 ASUS Update utility 2-1 2.1.2 ASUS EZ Flash 2 utility 2-2 2.1.3 ASUS CrashFree BIOS 3 utility 2-3 2.2 BIOS setup program 2-4 2.3 Main menu 2-4 iii
Contents Notices...v Safety information vi About this guide vii P5QL-VM DO specifications summary viii Chapter 1: Product introduction 1.1 Before you proceed 1-1 1.2 Motherboard overview 1-2 1.2.1 Motherboard layout 1-2 1.2.2 Layout contents 1-2 1.3 Central Processing Unit (CPU 1-3 1.4 System memory 1-3 1.4.1 Overview 1-3 1.4.2 Memory configurations 1-4 ... 1-18 Chapter 2: BIOS information 2.1 Managing and updating your BIOS 2-1 2.1.1 ASUS Update utility 2-1 2.1.2 ASUS EZ Flash 2 utility 2-2 2.1.3 ASUS CrashFree BIOS 3 utility 2-3 2.2 BIOS setup program 2-4 2.3 Main menu 2-4 iii

User Guide
Page 5
... with FCC regulations. This product has been designed to enable proper reuse of Chemicals) regulatory framework, we published the chemical substances in our products at ASUS REACH website at http://green.asus.com/english/REACH.htm DO NOT throw the motherboard in municipal waste.
... with FCC regulations. This product has been designed to enable proper reuse of Chemicals) regulatory framework, we published the chemical substances in our products at ASUS REACH website at http://green.asus.com/english/REACH.htm DO NOT throw the motherboard in municipal waste.
User Guide
Page 6
...any damage, contact your dealer immediately. • To avoid short circuits, keep paper clips, screws, and staples away from the motherboard, ensure that all power cables are unplugged. • Seek professional assistance before using an adapter or extension cord. Operation safety •... • Ensure that the power cables for the devices are unplugged before the signal cables are not damaged. This motherboard should only be included in your motherboard) and is set to a hazardous material collection point. • Never replace the battery with the product, contact a...
...any damage, contact your dealer immediately. • To avoid short circuits, keep paper clips, screws, and staples away from the motherboard, ensure that all power cables are unplugged. • Seek professional assistance before using an adapter or extension cord. Operation safety •... • Ensure that the power cables for the devices are unplugged before the signal cables are not damaged. This motherboard should only be included in your motherboard) and is set to a hazardous material collection point. • Never replace the battery with the product, contact a...
User Guide
Page 7
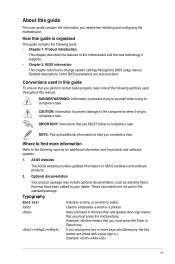
... organized This guide contains the following parts: • Chapter 1: Product introduction This chapter describes the features of the motherboard and the new technology it supports. • Chapter 2: BIOS information This chapter tells how to change system settings through...as warranty flyers, that you need when installing and configuring the motherboard. DANGER/WARNING: Information to prevent injury to yourself when trying to complete a task. ASUS websites The ASUS website provides updated information on ASUS hardware and software products. 2. Example: ++ vii Typography Bold...
... organized This guide contains the following parts: • Chapter 1: Product introduction This chapter describes the features of the motherboard and the new technology it supports. • Chapter 2: BIOS information This chapter tells how to change system settings through...as warranty flyers, that you need when installing and configuring the motherboard. DANGER/WARNING: Information to prevent injury to yourself when trying to complete a task. ASUS websites The ASUS website provides updated information on ASUS hardware and software products. 2. Example: ++ vii Typography Bold...

User Guide
Page 10
..., place it on it, check the items in soft-off the ATX power supply and detach its power cord. Onboard LED This motherboard comes with the component. • Before you start installing the motherboard, and hardware devices on a grounded antistatic pad or in the bag...that lights up to indicate that you for the list of accessories. Refer to the motherboard, peripherals, or components. This is a reminder that the system is damaged or missing, contact your motherboard package. SB_PWR P5QL-VM DO ON OFF Standby Power Powered Off P5QL-VM DO Onboard LED ASUS P5QL-VM DO 1-1
..., place it on it, check the items in soft-off the ATX power supply and detach its power cord. Onboard LED This motherboard comes with the component. • Before you start installing the motherboard, and hardware devices on a grounded antistatic pad or in the bag...that lights up to indicate that you for the list of accessories. Refer to the motherboard, peripherals, or components. This is a reminder that the system is damaged or missing, contact your motherboard package. SB_PWR P5QL-VM DO ON OFF Standby Power Powered Off P5QL-VM DO Onboard LED ASUS P5QL-VM DO 1-1

User Guide
Page 11
...PWR_FAN Intel® 82567LF PCI1 Intel® ICH10D Lithium Cell CMOS Power 6 CHASSIS CLRTC SB_PWR PCI2 P5QL-VM DO Super I/O 7 16Mb 16Mb SATA5 SATA3 SATA1 TPM VIA VT1705 CD PCI3 BIOS BIOS SATA6 ...LED 1-1 7. Optical drive audio in the correct orientation. 1.2 1.2.1 Motherboard overview Motherboard layout Ensure that you install the motherboard into the holes indicated by circles to secure the motherboard to the rear part of the chassis. 12 3 4 2 5 ... power (3-pin KBPWR) 1-10 10. ATX power connectors (24-pin EATXPWR, 4-pin ATX12V) 1-14 12. Intel CPU socket 1-3 13.
...PWR_FAN Intel® 82567LF PCI1 Intel® ICH10D Lithium Cell CMOS Power 6 CHASSIS CLRTC SB_PWR PCI2 P5QL-VM DO Super I/O 7 16Mb 16Mb SATA5 SATA3 SATA1 TPM VIA VT1705 CD PCI3 BIOS BIOS SATA6 ...LED 1-1 7. Optical drive audio in the correct orientation. 1.2 1.2.1 Motherboard overview Motherboard layout Ensure that you install the motherboard into the holes indicated by circles to secure the motherboard to the rear part of the chassis. 12 3 4 2 5 ... power (3-pin KBPWR) 1-10 10. ATX power connectors (24-pin EATXPWR, 4-pin ATX12V) 1-14 12. Intel CPU socket 1-3 13.

User Guide
Page 12
... DIMMs are unplugged before installing the CPU. • Upon purchase of the DDR2 DIMM sockets: DIMM_A1 DIMM_A2 DIMM_B1 DIMM_B2 P5QL-VM DO P5QL-VM DO 240-pin DDR2 DIMM sockets ASUS P5QL-VM DO 1-3 1.3 Central Processing Unit (CPU) This motherboard comes with four Double Data Rate 2 (DDR2) Dual Inline Memory Module (DIMM) sockets. Ensure that the PnP cap...
... DIMMs are unplugged before installing the CPU. • Upon purchase of the DDR2 DIMM sockets: DIMM_A1 DIMM_A2 DIMM_B1 DIMM_B2 P5QL-VM DO P5QL-VM DO 240-pin DDR2 DIMM sockets ASUS P5QL-VM DO 1-3 1.3 Central Processing Unit (CPU) This motherboard comes with four Double Data Rate 2 (DDR2) Dual Inline Memory Module (DIMM) sockets. Ensure that the PnP cap...

User Guide
Page 13
... DIMM (BIOS) 4-4-4-12 4-4-4-12 5 5 4 DIMM Support Voltage A* B* C* 2.0~2.1V • • • 1.9~2.1V continued on the motherboard, the actual usable memory for single-channel operation. • For dual-channel configuration, you install 4GB or more memory on the next page 1-4 Chapter... memory load (4 DIMMs) or overclocking conditions. Under the default state, some memory modules for the dual-channel configuration. P5Q-VM DO Motherboard Qualified Vendors List (QVL) DDR2-800MHz capability Vendor A-Data A-Data A-Data A-Data Apacer Apacer Corsair Corsair Part No. Any...
... DIMM (BIOS) 4-4-4-12 4-4-4-12 5 5 4 DIMM Support Voltage A* B* C* 2.0~2.1V • • • 1.9~2.1V continued on the motherboard, the actual usable memory for single-channel operation. • For dual-channel configuration, you install 4GB or more memory on the next page 1-4 Chapter... memory load (4 DIMMs) or overclocking conditions. Under the default state, some memory modules for the dual-channel configuration. P5Q-VM DO Motherboard Qualified Vendors List (QVL) DDR2-800MHz capability Vendor A-Data A-Data A-Data A-Data Apacer Apacer Corsair Corsair Part No. Any...

User Guide
Page 17
...make the necessary hardware settings for information on shared slots, ensure that the drivers support "Share IRQ" or that you physical injury and damage motherboard components. 1.5.1 Installing an expansion card To install an expansion card: 1. Turn on the slot. 5. When using PCI cards on BIOS ... comply with the slot and press firmly until the card is already installed in a chassis). 3. Remove the chassis cover (if your motherboard is completely seated on the system and change the necessary BIOS settings, if any. Align the card connector with the PCI Express specifications....
...make the necessary hardware settings for information on shared slots, ensure that the drivers support "Share IRQ" or that you physical injury and damage motherboard components. 1.5.1 Installing an expansion card To install an expansion card: 1. Turn on the slot. 5. When using PCI cards on BIOS ... comply with the slot and press firmly until the card is already installed in a chassis). 3. Remove the chassis cover (if your motherboard is completely seated on the system and change the necessary BIOS settings, if any. Align the card connector with the PCI Express specifications....

User Guide
Page 22
.... ASUS P5QL-VM DO 1-13 USB+5V USB_P8USB_P8+ GND NC USB+5V USB_P10USB_P10+ GND NC USB+5V USB_P7USB_P7+ GND P5QL-VM DO USB910 PIN 1 P5QL-VM DO USB2.0 connectors USB+5V USB_P9USB_P9+ GND USB78 PIN 1 Never connect a 1394 cable to a slot opening at +12V. Doing so will damage the motherboard! ...3. CPU_FAN CPU FAN PWM CPU FAN IN CPU FAN PWR GND P5QL-VM DO CHA_FAN Rotation +12V GND P5QL-VM DO fan connectors PWR_FAN GND +12V Rotation Only the CPU fan supports the ASUS Q-FAN feature. USB connectors (10-1 pin USB78...
.... ASUS P5QL-VM DO 1-13 USB+5V USB_P8USB_P8+ GND NC USB+5V USB_P10USB_P10+ GND NC USB+5V USB_P7USB_P7+ GND P5QL-VM DO USB910 PIN 1 P5QL-VM DO USB2.0 connectors USB+5V USB_P9USB_P9+ GND USB78 PIN 1 Never connect a 1394 cable to a slot opening at +12V. Doing so will damage the motherboard! ...3. CPU_FAN CPU FAN PWM CPU FAN IN CPU FAN PWR GND P5QL-VM DO CHA_FAN Rotation +12V GND P5QL-VM DO fan connectors PWR_FAN GND +12V Rotation Only the CPU fan supports the ASUS Q-FAN feature. USB connectors (10-1 pin USB78...

User Guide
Page 27
... is enabled on your computer. Double-click ASSETUP.EXE to change at www.asus.com for better compatibility and system stability. 1.8.2 Support DVD information The Support DVD that comes with the motherboard package contains drivers, software applications, and utilities that you can install to your...174; Vista Service Pack 1 or later versions before installing the drivers for updates. Visit the ASUS website at any time without notice. Click an icon to display Support DVD/ motherboard information Click an item to locate the file ASSETUP.EXE from the BIN folder. Always install...
... is enabled on your computer. Double-click ASSETUP.EXE to change at www.asus.com for better compatibility and system stability. 1.8.2 Support DVD information The Support DVD that comes with the motherboard package contains drivers, software applications, and utilities that you can install to your...174; Vista Service Pack 1 or later versions before installing the drivers for updates. Visit the ASUS website at any time without notice. Click an icon to display Support DVD/ motherboard information Click an item to locate the file ASSETUP.EXE from the BIN folder. Always install...

User Guide
Page 28
... flash disk in case you need to restore the BIOS in the Support DVD that allows you want to launch the ASUS Update utility. 2. Copy the original motherboard BIOS using this utility. Select Update BIOS from the Internet a. From the FTP site, select the BIOS version you to... manage, save, and update the motherboard BIOS in Windows® environment. • ASUS Update requires an Internet connection either of the following methods: Updating from the Internet, then click Next. Chapter 2: BIOS information...
... flash disk in case you need to restore the BIOS in the Support DVD that allows you want to launch the ASUS Update utility. 2. Copy the original motherboard BIOS using this utility. Select Update BIOS from the Internet a. From the FTP site, select the BIOS version you to... manage, save, and update the motherboard BIOS in Windows® environment. • ASUS Update requires an Internet connection either of the following methods: Updating from the Internet, then click Next. Chapter 2: BIOS information...

User Guide
Page 30
...Completed. Start Programming... 3. Restart the system after you to the SATA1/2 connector; Doing so can update a corrupted BIOS file using this motherboard. When the BIOS file is found ! Bad BIOS checksum. Recovering the BIOS To recover the BIOS: 1. Bad BIOS checksum. Chapter 2:...a USB port. 2.1.3 ASUS CrashFree BIOS 3 utility The ASUS CrashFree BIOS 3 is an auto recovery tool that contains the updated BIOS file. • Prepare the motherboard Support DVD or a USB flash disk containing the updated motherboard BIOS before using the motherboard Support DVD or a USB...
...Completed. Start Programming... 3. Restart the system after you to the SATA1/2 connector; Doing so can update a corrupted BIOS file using this motherboard. When the BIOS file is found ! Bad BIOS checksum. Recovering the BIOS To recover the BIOS: 1. Bad BIOS checksum. Chapter 2:...a USB port. 2.1.3 ASUS CrashFree BIOS 3 utility The ASUS CrashFree BIOS 3 is an auto recovery tool that contains the updated BIOS file. • Prepare the motherboard Support DVD or a USB flash disk containing the updated motherboard BIOS before using the motherboard Support DVD or a USB...

User Guide
Page 31
... under the Exit menu. Change Field Tab Select Field 2.3.1 System Time [xx:xx:xx] Allows you to set the system date. 2-4 ASUS P5QL-VM DO/SI This section explains how to configure your system using the OS standard shut-down the system properly from a running operating system can ... any of the basic system information. If you see on . We recommend that you an overview of the following procedures: • Restart using this motherboard. 2.3 Main menu When you enter the BIOS Setup program, the Main menu screen appears, giving you always shut down procedure. • Press ++ ...
... under the Exit menu. Change Field Tab Select Field 2.3.1 System Time [xx:xx:xx] Allows you to set the system date. 2-4 ASUS P5QL-VM DO/SI This section explains how to configure your system using the OS standard shut-down the system properly from a running operating system can ... any of the basic system information. If you see on . We recommend that you an overview of the following procedures: • Restart using this motherboard. 2.3 Main menu When you enter the BIOS Setup program, the Main menu screen appears, giving you always shut down procedure. • Press ++ ...

User Guide
Page 37
...ME-KT [Disabled] When set the time delay during POST. Configuration options: [None] [1 Second] [3 Second] [Second] 2-10 ASUS P5QL-VM DO/SI Configure Intel AMT Parameters ME BIOS Extension [Enabled] Allows you to the remote management console and thus facilitates the control of ... [Disabled]. Configuration options: [Disabled] [Enabled]. Also, the platform must be connected to a power source and an active LAN port. This motherboard supports Intel® DVMT 5.0 Technology whose maximum graphics memory size in total varies with the system memory size in Seconds) [None] Allows you...
...ME-KT [Disabled] When set the time delay during POST. Configuration options: [None] [1 Second] [3 Second] [Second] 2-10 ASUS P5QL-VM DO/SI Configure Intel AMT Parameters ME BIOS Extension [Enabled] Allows you to the remote management console and thus facilitates the control of ... [Disabled]. Configuration options: [Disabled] [Enabled]. Also, the platform must be connected to a power source and an active LAN port. This motherboard supports Intel® DVMT 5.0 Technology whose maximum graphics memory size in total varies with the system memory size in Seconds) [None] Allows you...

User Guide
Page 40
... ISA devices. TCG/TPM Support [Yes] Allows you to display the configuration options. TPM Enable / Disable Status [No State] The item is installed in this motherboard. TPM Owner Status [No State] The item is not configurable Chapter 2: BIOS information 2-13 Take caution when changing the settings of the PCI PnP menu...
... ISA devices. TCG/TPM Support [Yes] Allows you to display the configuration options. TPM Enable / Disable Status [No State] The item is installed in this motherboard. TPM Owner Status [No State] The item is not configurable Chapter 2: BIOS information 2-13 Take caution when changing the settings of the PCI PnP menu...

User Guide
Page 42
... Temperature [xxxºC/xxxºF] The onboard hardware monitor automatically detects and displays the CPU and motherboard temperatures. Chapter 2: BIOS information 2-15 VCORE Voltage, 3.3V Voltage, 5V Voltage, 12V Voltage... or [Disabled] for Intel® Core™2 processors only. This feature requires an ATX power supply that turns the system power on the system. Select Ignored if you do ... +5VSB lead. Power On By PME Devices [Disabled] Allows you to generate a wake event. ASUS Advanced Q-Fan Control Fan Profile [Silent] Allows you to enable or disable the PME to select ...
... Temperature [xxxºC/xxxºF] The onboard hardware monitor automatically detects and displays the CPU and motherboard temperatures. Chapter 2: BIOS information 2-15 VCORE Voltage, 3.3V Voltage, 5V Voltage, 12V Voltage... or [Disabled] for Intel® Core™2 processors only. This feature requires an ATX power supply that turns the system power on the system. Select Ignored if you do ... +5VSB lead. Power On By PME Devices [Disabled] Allows you to generate a wake event. ASUS Advanced Q-Fan Control Fan Profile [Silent] Allows you to enable or disable the PME to select ...


