
Owners Manual
Page 4
... Bar Icons 8 Enter Data 11 Use the Input Panel 11 Write and Draw Your Notes 12 Record a Voice Note 12 Use the Phone 13 Open the Phone Application.......... 13 Dial a Number 13 End a Call 13 Use In-Call Options 14 Receive a Call 15 Set Up Voicemail 15 Call Voicemail 15 Place a Conference Call 15 Place a Video Call 16 View Call History 17 Add a Contact 17 Call a Contact 17 Search for a Contact 18 Add a Contact to Favorites 18 Copy from the SIM Card to Contacts 18 Copy from Contacts to the SIM Card 18...
... Bar Icons 8 Enter Data 11 Use the Input Panel 11 Write and Draw Your Notes 12 Record a Voice Note 12 Use the Phone 13 Open the Phone Application.......... 13 Dial a Number 13 End a Call 13 Use In-Call Options 14 Receive a Call 15 Set Up Voicemail 15 Call Voicemail 15 Place a Conference Call 15 Place a Video Call 16 View Call History 17 Add a Contact 17 Call a Contact 17 Search for a Contact 18 Add a Contact to Favorites 18 Copy from the SIM Card to Contacts 18 Copy from Contacts to the SIM Card 18...
Owners Manual
Page 6
... Disable Ciao 42 Use Connected Services....... 43 About Connected Services 43 About Traffic 43 View Weather Data 45 Download Safety Cameras 45 Use the White Pages 46 View Geo‑News 46 Send and Receive Messages 47 Send an SMS/Text Message.......... 47 Send a Multimedia Message (MMS 47 Send a Location Message 48 iv Read Messages 48 Set Up an E-mail Account 49 Send an E-mail Message 50 Read an E-mail Message 50 Manually Send/Receive E-mail Messages 50 Synchronize E-mail Messages....... 50 Search the Internet 51 Use Internet Sharing 51 Read the News 52 Update...
... Disable Ciao 42 Use Connected Services....... 43 About Connected Services 43 About Traffic 43 View Weather Data 45 Download Safety Cameras 45 Use the White Pages 46 View Geo‑News 46 Send and Receive Messages 47 Send an SMS/Text Message.......... 47 Send a Multimedia Message (MMS 47 Send a Location Message 48 iv Read Messages 48 Set Up an E-mail Account 49 Send an E-mail Message 50 Read an E-mail Message 50 Manually Send/Receive E-mail Messages 50 Synchronize E-mail Messages....... 50 Search the Internet 51 Use Internet Sharing 51 Read the News 52 Update...

Owners Manual
Page 7
... Set the Clock and Alarms 63 Convert Currency 65 Microsoft® Office Mobile 66 Synchronize Your nüvifone... 67 Install and Configure ActiveSync on Your Computer 67 Synchronize Using the USB Cable 68 Enable the USB Connection Mode Page 68 Synchronize with an Exchange Server 69 Synchronize Using Bluetooth® Technology 69 Backup and Restore Files 70 Search for Files 70 Get Connected 71 Manage Wireless Connections...... 71 Turn Off the Phone 71 Turn...
... Set the Clock and Alarms 63 Convert Currency 65 Microsoft® Office Mobile 66 Synchronize Your nüvifone... 67 Install and Configure ActiveSync on Your Computer 67 Synchronize Using the USB Cable 68 Enable the USB Connection Mode Page 68 Synchronize with an Exchange Server 69 Synchronize Using Bluetooth® Technology 69 Backup and Restore Files 70 Search for Files 70 Get Connected 71 Manage Wireless Connections...... 71 Turn Off the Phone 71 Turn...
Owners Manual
Page 8
Table of Contents Change the Camera and Video Settings 84 View Device Information 87 View System Information 87 Restore the Default Settings.......... 87 Appendix 88 nüMaps Guarantee 88 Additional Maps 88 Update the Software 88 Reset the nüvifone 88 Battery Information 88 Acquire GPS Satellite Signals........ 89 Change the Fuse in the Vehicle Power Cable 90 Mount on Your Dashboard 90 Specifications 91 Important Safety and Product Information 92 Troubleshooting Issues......... 99 Index 100 vi nüvifone M20 Owner's Manual
Table of Contents Change the Camera and Video Settings 84 View Device Information 87 View System Information 87 Restore the Default Settings.......... 87 Appendix 88 nüMaps Guarantee 88 Additional Maps 88 Update the Software 88 Reset the nüvifone 88 Battery Information 88 Acquire GPS Satellite Signals........ 89 Change the Fuse in the Vehicle Power Cable 90 Mount on Your Dashboard 90 Specifications 91 Important Safety and Product Information 92 Troubleshooting Issues......... 99 Index 100 vi nüvifone M20 Owner's Manual

Owners Manual
Page 25
Press the Send key. 2. Press the Send key. 2. nüvifone M20 Owner's Manual 17 Tap , if necessary. 3. Use the Phone Clear Your Call History 1. Enter the information for that call. 5. Tap OK when finished. 5. Tap Call. Tap a number or a contact in the list is marked with that number or contact. 4. Add a Contact 1. Tap Done when finished. 4. Tap to save the phone number as a contact. • Tap > Delete to delete this call to save the contact. Tap . 3. If a call in the list to view your call . •...
Press the Send key. 2. Press the Send key. 2. nüvifone M20 Owner's Manual 17 Tap , if necessary. 3. Use the Phone Clear Your Call History 1. Enter the information for that call. 5. Tap OK when finished. 5. Tap Call. Tap a number or a contact in the list is marked with that number or contact. 4. Add a Contact 1. Tap Done when finished. 4. Tap to save the phone number as a contact. • Tap > Delete to delete this call to save the contact. Tap . 3. If a call in the list to view your call . •...

Owners Manual
Page 47
for the first time, you will receive an SMS message for this feature. Open the SMS message, and tap the link to our partner networks and downloads the most recent location of location update, Manual or Automatic. 4. Join Ciao! After registering, you must first register your friends. Tap a type of your device. 1. nüvifone M20 Owner's Manual 39 periodically sends your device, you join Ciao! Read and accept the registration information...
for the first time, you will receive an SMS message for this feature. Open the SMS message, and tap the link to our partner networks and downloads the most recent location of location update, Manual or Automatic. 4. Join Ciao! After registering, you must first register your friends. Tap a type of your device. 1. nüvifone M20 Owner's Manual 39 periodically sends your device, you join Ciao! Read and accept the registration information...

Owners Manual
Page 67
...; Save to take a picture. 6. to focus automatically. 5. Change the Camera Mode 1. Aim the viewfinder. 3. nüvifone M20 Owner's Manual Use the Camera NOTE: If you are receiving GPS signals, you take a lower-resolution video for sending using MMS. Tip: To quickly switch modes between the camera mode and video mode, press the left Navigation key. 59 Tap to record location information for the pictures you can set the camera mode to select a camera mode: -take still photographs. -record a video. -place a frame around the photo. -take photos with GPS location...
...; Save to take a picture. 6. to focus automatically. 5. Change the Camera Mode 1. Aim the viewfinder. 3. nüvifone M20 Owner's Manual Use the Camera NOTE: If you are receiving GPS signals, you take a lower-resolution video for sending using MMS. Tip: To quickly switch modes between the camera mode and video mode, press the left Navigation key. 59 Tap to record location information for the pictures you can set the camera mode to select a camera mode: -take still photographs. -record a video. -place a frame around the photo. -take photos with GPS location...

Owners Manual
Page 81
... devices check box. Enter the display name for the nüvifone is 1234. Tap > Settings > Advanced Settings > Connections tab. 2. Add a Bluetooth Device The first time you must "pair" them by establishing a relationship using a PIN/passkey. 1. After the initial pairing, the two nüvifone M20 Owner's Manual 73 Tap Bluetooth > Mode tab. 3. Select the Turn on the device to it, establish a partnership, or use two devices together, you use a Bluetooth service. 1. Note: The Bluetooth passkey for this device...
... devices check box. Enter the display name for the nüvifone is 1234. Tap > Settings > Advanced Settings > Connections tab. 2. Add a Bluetooth Device The first time you must "pair" them by establishing a relationship using a PIN/passkey. 1. After the initial pairing, the two nüvifone M20 Owner's Manual 73 Tap Bluetooth > Mode tab. 3. Select the Turn on the device to it, establish a partnership, or use two devices together, you use a Bluetooth service. 1. Note: The Bluetooth passkey for this device...
Owners Manual
Page 82
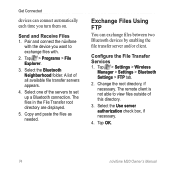
... set up a Bluetooth connection. Tap > Programs > File Explorer. 3. Change the root directory, if necessary. Tap OK. 74 nüvifone M20 Owner's Manual A list of this directory. 3. The files in the File Transfer root directory are displayed. 5. Copy and paste the files as needed. Tap > Settings > Wireless Manager > Settings > Bluetooth Settings > FTP tab. 2. Select one of the servers to exchange files with the device you turn them on. Select the Use server authorization check box, if necessary. 4. Configure the File Transfer Services 1. Send and Receive Files...
... set up a Bluetooth connection. Tap > Programs > File Explorer. 3. Change the root directory, if necessary. Tap OK. 74 nüvifone M20 Owner's Manual A list of this directory. 3. The files in the File Transfer root directory are displayed. 5. Copy and paste the files as needed. Tap > Settings > Wireless Manager > Settings > Bluetooth Settings > FTP tab. 2. Select one of the servers to exchange files with the device you turn them on. Select the Use server authorization check box, if necessary. 4. Configure the File Transfer Services 1. Send and Receive Files...

Owners Manual
Page 86
... use. Tap Play to hear a sound for. Tap > Settings > Advanced Settings > Personal tab > Phone > Call Setting tab. 2. Select a ring tone. 3. Tap a ring type, such as Vibrate. Automatically Answer Phone Calls 1. Select an alert indication when the call . Customize Your nüvifone Customize the Call Settings Change the Profile 1. Select the items you want to play the selected ring tone. Select how long the device will wait before answering the call is answered. 78 nüvifone M20 Owner's Manual Activate Connection Alert 1. Tap > Settings > Sound > Ring Type...
... use. Tap Play to hear a sound for. Tap > Settings > Advanced Settings > Personal tab > Phone > Call Setting tab. 2. Select a ring tone. 3. Tap a ring type, such as Vibrate. Automatically Answer Phone Calls 1. Select an alert indication when the call . Customize Your nüvifone Customize the Call Settings Change the Profile 1. Select the items you want to play the selected ring tone. Select how long the device will wait before answering the call is answered. 78 nüvifone M20 Owner's Manual Activate Connection Alert 1. Tap > Settings > Sound > Ring Type...

Owners Manual
Page 87
..., and MMS settings are not detected when you install the SIM card, you can select the network. Tap Done. Tap > Settings > Advanced Settings > Connections tab > Network Setting. nüvifone M20 Owner's Manual 79 Manual Configuration 1. Select your phone service provider are also configured by the Network Setting. Tap > Settings > Advanced Settings > Connections tab > GSM/3G Networks. 2. Switch Between GSM and 3G Networks Choose the right network type for your mobile phone service provider (operator). 4. From the Network box, tap a network or tap...
..., and MMS settings are not detected when you install the SIM card, you can select the network. Tap Done. Tap > Settings > Advanced Settings > Connections tab > Network Setting. nüvifone M20 Owner's Manual 79 Manual Configuration 1. Select your phone service provider are also configured by the Network Setting. Tap > Settings > Advanced Settings > Connections tab > GSM/3G Networks. 2. Switch Between GSM and 3G Networks Choose the right network type for your mobile phone service provider (operator). 4. From the Network box, tap a network or tap...

Owners Manual
Page 88
... the map. Tap Set Channels, select one or more languages, and tap OK. 4. nüvifone M20 Owner's Manual Select the Enable SMS Cell Broadcast check box. 3. Tap > Settings > Advanced Settings > Personal tab > Phone > Channels tab > Set Channels > New. 2. Track Up to display the map in two dimensions (2D) with your service provider and region, you can receive text messages broadcast to display the map in 2D with your GPS location. or North...
... the map. Tap Set Channels, select one or more languages, and tap OK. 4. nüvifone M20 Owner's Manual Select the Enable SMS Cell Broadcast check box. 3. Tap > Settings > Advanced Settings > Personal tab > Phone > Channels tab > Set Channels > New. 2. Track Up to display the map in two dimensions (2D) with your service provider and region, you can receive text messages broadcast to display the map in 2D with your GPS location. or North...

Owners Manual
Page 91
... access Connected Services. • Location Updates-select to send location updates manually or automatically. • Connected Services Feedback-enable to periodically send anonymous location information from your vehicle is generally listed in the map's legend. Tap a setting to adjust it . nüvifone M20 Owner's Manual 83 Tap a setting to adjust it . • Location Format-select a format for the latitude and longitude coordinates that matches the paper map you are using . Tap > Settings > Navigation > General. 2. Change the Location Format...
... access Connected Services. • Location Updates-select to send location updates manually or automatically. • Connected Services Feedback-enable to periodically send anonymous location information from your vehicle is generally listed in the map's legend. Tap a setting to adjust it . nüvifone M20 Owner's Manual 83 Tap a setting to adjust it . • Location Format-select a format for the latitude and longitude coordinates that matches the paper map you are using . Tap > Settings > Navigation > General. 2. Change the Location Format...

Owners Manual
Page 92
...; GPS Data Update-view the information for the first time, or if you sync the nüvifone to acquire satellites, set your location on the map near your device is receiving and their signal strength. Tap a point on the map. 1. Change the Camera and Video Settings Change the Basic Camera Settings 1. Tap > Settings > Navigation > GPS. 2. Tap GPS Status. 3. Tap Camera. 2. nüvifone M20 Owner's Manual Tap Menu to update the GPS data now. • GPS Status-view information about the GPS satellites...
...; GPS Data Update-view the information for the first time, or if you sync the nüvifone to acquire satellites, set your location on the map near your device is receiving and their signal strength. Tap a point on the map. 1. Change the Camera and Video Settings Change the Basic Camera Settings 1. Tap > Settings > Navigation > GPS. 2. Tap GPS Status. 3. Tap Camera. 2. nüvifone M20 Owner's Manual Tap Menu to update the GPS data now. • GPS Status-view information about the GPS satellites...

Owners Manual
Page 93
... screen. Tap the Color Adjustment tab. 3. -turn on when taking close up photos. -select a count-down time for the photos. • Date and Time Stamp-add a date and time stamp to the photos. • Shutter Sound-play a sound when you want in File Name Prefix. Tip: To quickly adjust these settings, tap the corresponding icon along the top of the center Navigation key. -open the advanced Camera settings page. Tap Camera > Menu > . 2. Change...
... screen. Tap the Color Adjustment tab. 3. -turn on when taking close up photos. -select a count-down time for the photos. • Date and Time Stamp-add a date and time stamp to the photos. • Shutter Sound-play a sound when you want in File Name Prefix. Tip: To quickly adjust these settings, tap the corresponding icon along the top of the center Navigation key. -open the advanced Camera settings page. Tap Camera > Menu > . 2. Change...

Owners Manual
Page 94
... Camera > Menu > . 2. Adjust the settings: • Save To-select the location to which you want to save the pictures you take. • AC Frequency-select a frequency. • Metering Mode-select a metering mode. • Camera Power Saving Mode-place a check mark in the box and enter a length of time. 86 • Use Preview Mode-place a check mark in File Name Prefix. Tap Time to use the date as needed. • Default-restore the original settings. nüvifone M20 Owner's Manual Change...
... Camera > Menu > . 2. Adjust the settings: • Save To-select the location to which you want to save the pictures you take. • AC Frequency-select a frequency. • Metering Mode-select a metering mode. • Camera Power Saving Mode-place a check mark in the box and enter a length of time. 86 • Use Preview Mode-place a check mark in File Name Prefix. Tap Time to use the date as needed. • Default-restore the original settings. nüvifone M20 Owner's Manual Change...

Owners Manual
Page 108
... tone 82 audio settings 82 auto complete 11 100 auto zoom map 81 avoid edit custom avoidances 35 road types 82 specific areas 35 specific roads 35 B backlight adjust 75 brightness 75 keep on when navigating 75 timeout 75 backup files 70 battery charge 3 information 88 install 2 remove 89 warnings 93-94 block recognizer 11 Bluetooth 72 Bluetooth technology 69, 72, 73-74 add a device 73 make visible 73 send and receive files...
... tone 82 audio settings 82 auto complete 11 100 auto zoom map 81 avoid edit custom avoidances 35 road types 82 specific areas 35 specific roads 35 B backlight adjust 75 brightness 75 keep on when navigating 75 timeout 75 backup files 70 battery charge 3 information 88 install 2 remove 89 warnings 93-94 block recognizer 11 Bluetooth 72 Bluetooth technology 69, 72, 73-74 add a device 73 make visible 73 send and receive files...

Owners Manual
Page 109
... message 49 picture 56 points from route 34 route 34 video 57 detour 33 device information 87 E e-mail 50 emergency assistance 36 End key 1 enter data 11 Excel 66 F Favorite contact 18 delete 37 edit locations 37 location category 37 locations 26 files backup 70 exchange using FTP 74 restore 70 search for locations flight mode 71, 99 flight status 22-23 forward 49 free map update 88 FTP 74 fuse, change 90 nüvifone M20 Owner's Manual...
... message 49 picture 56 points from route 34 route 34 video 57 detour 33 device information 87 E e-mail 50 emergency assistance 36 End key 1 enter data 11 Excel 66 F Favorite contact 18 delete 37 edit locations 37 location category 37 locations 26 files backup 70 exchange using FTP 74 restore 70 search for locations flight mode 71, 99 flight status 22-23 forward 49 free map update 88 FTP 74 fuse, change 90 nüvifone M20 Owner's Manual...

Owners Manual
Page 110
... 25 location-based service 29 location format 83 location information 20 change update method 40 send updates 83 location messages 48 lock the phone 7, 76 M make a phone call 13 map additional 88 browse 36 customize 80 detail level 80 map set 38 orientation 80 update 88 view 80 map datum 83 map settings 80 MapSource 88 map update 88 maximum speed, reset 32 Media Gallery 56-58 messages (SMS/MMS) delete 49 forward 49 new 47 read 48 Microsoft Office Mobile...
... 25 location-based service 29 location format 83 location information 20 change update method 40 send updates 83 location messages 48 lock the phone 7, 76 M make a phone call 13 map additional 88 browse 36 customize 80 detail level 80 map set 38 orientation 80 update 88 view 80 map datum 83 map settings 80 MapSource 88 map update 88 maximum speed, reset 32 Media Gallery 56-58 messages (SMS/MMS) delete 49 forward 49 new 47 read 48 Microsoft Office Mobile...
Owners Manual
Page 112
... 21 send e-mail 50 found location 20, 28 MMS 47 SMS 47 text 47 your location 48 Send key 1 set a your current location 84 settings audio 82 Connected Services 83 phone 78-87 route 81 set your location manually 84 SIM card copy contacts 18 install 2 slideshow 57 SMS 47-50 cell broadcast 80 software update 88 sound profile 78 volume 6 speakerphone 14 specifications 91 speed limit 81 spell the location 21 Start menu 7 customize 77 status, Ciao! 40 status bar 65 clock 65 icons 8 nüvifone M20 Owner's Manual
... 21 send e-mail 50 found location 20, 28 MMS 47 SMS 47 text 47 your location 48 Send key 1 set a your current location 84 settings audio 82 Connected Services 83 phone 78-87 route 81 set your location manually 84 SIM card copy contacts 18 install 2 slideshow 57 SMS 47-50 cell broadcast 80 software update 88 sound profile 78 volume 6 speakerphone 14 specifications 91 speed limit 81 spell the location 21 Start menu 7 customize 77 status, Ciao! 40 status bar 65 clock 65 icons 8 nüvifone M20 Owner's Manual


