
Motherboard DIY Troubleshooting Guide
Page 1
® A7M266 266MHz FSB DDR RAM AGP Pro Socket A Motherboard USER'S MANUAL
® A7M266 266MHz FSB DDR RAM AGP Pro Socket A Motherboard USER'S MANUAL
Motherboard DIY Troubleshooting Guide
Page 4
... 30 3.7.4 Audio Modem Riser (AMR) Slot 32 3.8 External Connectors 33 3.9 Starting Up the First Time 45 4. CONTENTS 1. FEATURES 8 2.1 The ASUS A7M266 8 2.1.1 Specifications 8 2.1.2 Specifications - Optional Components 9 2.1.3 Special Features 10 2.1.4 Performance Features 10 2.1.5 Intelligence 11 2.2 Motherboard Components 12 2.2.1 Component Locations 13 3. BIOS SETUP 47 4.1 Managing and Updating Your BIOS 47 4.1.1 Upon First Use of the...
... 30 3.7.4 Audio Modem Riser (AMR) Slot 32 3.8 External Connectors 33 3.9 Starting Up the First Time 45 4. CONTENTS 1. FEATURES 8 2.1 The ASUS A7M266 8 2.1.1 Specifications 8 2.1.2 Specifications - Optional Components 9 2.1.3 Special Features 10 2.1.4 Performance Features 10 2.1.5 Intelligence 11 2.2 Motherboard Components 12 2.2.1 Component Locations 13 3. BIOS SETUP 47 4.1 Managing and Updating Your BIOS 47 4.1.1 Upon First Use of the...

Motherboard DIY Troubleshooting Guide
Page 5
... 92 6.3 YAMAHA XGPlayer 93 7. SOFTWARE SETUP 83 5.1 Install Operating System 83 5.2 Start Windows 83 5.3 A7 Series Motherboard Support CD 83 5.4 Uninstalling Programs 85 6. APPENDIX 97 7.1 Modem Riser 97 7.2 Glossary 99 ASUS A7M266 User's Manual 5 CONTENTS 4.3 Main Menu 54 4.3.1 Primary & Secondary Master/Slave 55 4.3.2 Keyboard Features 58 4.4 Advanced Menu 60 4.4.1 Chip Configuration 63 4.4.2 I/O Device...
... 92 6.3 YAMAHA XGPlayer 93 7. SOFTWARE SETUP 83 5.1 Install Operating System 83 5.2 Start Windows 83 5.3 A7 Series Motherboard Support CD 83 5.4 Uninstalling Programs 85 6. APPENDIX 97 7.1 Modem Riser 97 7.2 Glossary 99 ASUS A7M266 User's Manual 5 CONTENTS 4.3 Main Menu 54 4.3.1 Primary & Secondary Master/Slave 55 4.3.2 Keyboard Features 58 4.4 Advanced Menu 60 4.4.1 Chip Configuration 63 4.4.2 I/O Device...

Motherboard DIY Troubleshooting Guide
Page 7
... setting up the BIOS 5. BIOS SETUP Instructions on setting up the included software 6. Package Contents (1) ASUS Motherboard (1) 40-pin 80-conductor ribbon cable for internal UltraDMA/ 100 / UltraDMA/66 (also compatible with drivers and utilities (1) This Motherboard User's Manual ASUS A7M266 User's Manual 7 INTRODUCTION Manual / Checklist 1. SOFTWARE REFERENCE Reference material for one 5.25" and two...
... setting up the BIOS 5. BIOS SETUP Instructions on setting up the included software 6. Package Contents (1) ASUS Motherboard (1) 40-pin 80-conductor ribbon cable for internal UltraDMA/ 100 / UltraDMA/66 (also compatible with drivers and utilities (1) This Motherboard User's Manual ASUS A7M266 User's Manual 7 INTRODUCTION Manual / Checklist 1. SOFTWARE REFERENCE Reference material for one 5.25" and two...

Motherboard DIY Troubleshooting Guide
Page 8
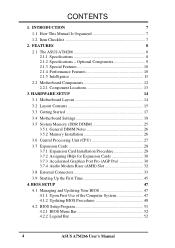
...or reduction. • JumperFree™ Mode: Allows processor settings and easy overclocking of frequency and Vcore voltage all through an optional ASUS PCI-L101 10/100 Fast Ethernet PCI card (see 7. It is enabled. DDR SDRAM is the newest memory standard with the...AGP 2.0 specifications for 5 PCI masters. Easy-to-use DIP switches instead of jumpers are included to 100MB/sec; FEATURES 2.1 The ASUS A7M266 The ASUS A7M266 motherboard is carefully designed for the value-conscious PC user who wants advanced features processed by the fastest processors. 2.1.1 Specifications • AMD ...
...or reduction. • JumperFree™ Mode: Allows processor settings and easy overclocking of frequency and Vcore voltage all through an optional ASUS PCI-L101 10/100 Fast Ethernet PCI card (see 7. It is enabled. DDR SDRAM is the newest memory standard with the...AGP 2.0 specifications for 5 PCI masters. Easy-to-use DIP switches instead of jumpers are included to 100MB/sec; FEATURES 2.1 The ASUS A7M266 The ASUS A7M266 motherboard is carefully designed for the value-conscious PC user who wants advanced features processed by the fastest processors. 2.1.1 Specifications • AMD ...
Motherboard DIY Troubleshooting Guide
Page 9
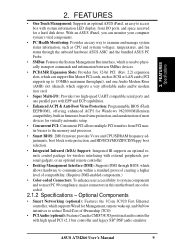
... system status information, such as CPU and systerm voltages, temperatures, and fan status through the onboard hardware ASUS ASIC and the bundled ASUS PC Probe. • SMBus: Features the System Management Bus interface, which is used to physically transport... EEPROM), offering enhanced ACPI for Windows 982000/Millenium compatibility, built-in this motherboard are colorcoded. 2.1.2 Specifications - 2. FEATURES Specifications 2. ASUS A7M266 User's Manual 9 FEATURES • One Touch Management: Supports an optional ASUS iPanel, an easy to reduce Total Cost of Ownership (TCO). •...
... system status information, such as CPU and systerm voltages, temperatures, and fan status through the onboard hardware ASUS ASIC and the bundled ASUS PC Probe. • SMBus: Features the System Management Bus interface, which is used to physically transport... EEPROM), offering enhanced ACPI for Windows 982000/Millenium compatibility, built-in this motherboard are colorcoded. 2.1.2 Specifications - 2. FEATURES Specifications 2. ASUS A7M266 User's Manual 9 FEATURES • One Touch Management: Supports an optional ASUS iPanel, an easy to reduce Total Cost of Ownership (TCO). •...
Motherboard DIY Troubleshooting Guide
Page 10
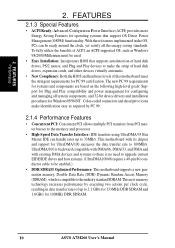
...33 Bus Master IDE can be used. • Easy Installation: Incorporates BIOS that support OS Direct Power Management (OSPM) functionality. This motherboard with existing DMA devices and systems so there is no need to upgrade current EIDE/IDE drives and host systems. (UltraDMA100/66 require... SDRAM Optimized Performance: This motherboard supports a new generation memory, Double Data Rate (DDR) Dynamic Random Access Memory (SDRAM), which is backward compatible with DMA/66, DMA/33, and DMA and with its chipset and support for 100MHz DDR SDRAM. 10 ASUS A7M266 User's Manual Color-coded ...
...33 Bus Master IDE can be used. • Easy Installation: Incorporates BIOS that support OS Direct Power Management (OSPM) functionality. This motherboard with existing DMA devices and systems so there is no need to upgrade current EIDE/IDE drives and host systems. (UltraDMA100/66 require... SDRAM Optimized Performance: This motherboard supports a new generation memory, Double Data Rate (DDR) Dynamic Random Access Memory (SDRAM), which is backward compatible with DMA/66, DMA/33, and DMA and with its chipset and support for 100MHz DDR SDRAM. 10 ASUS A7M266 User's Manual Color-coded ...

Motherboard DIY Troubleshooting Guide
Page 11
... Power Button: Pushing the power button for RPM and failure. ASUS A7M266 User's Manual 11 FEATURES Intelligence 2. A chassis intrusion event is necessary to present enormous user interfaces and run large applications. Voltage specifications are monitored to ensure stable voltage to critical motherboard components. All fans are set for its normal RPM range and...
... Power Button: Pushing the power button for RPM and failure. ASUS A7M266 User's Manual 11 FEATURES Intelligence 2. A chassis intrusion event is necessary to present enormous user interfaces and run large applications. Voltage specifications are monitored to ensure stable voltage to critical motherboard components. All fans are set for its normal RPM range and...

Motherboard DIY Troubleshooting Guide
Page 12
... See opposite page for AMD Athlon/Duron Processors 2 (NOTE: A CPU thermal sensor is integrated on the motherboard, located near the center of the CPU heat source, just below the CPU socket) Chipsets AMD 761 system controller 1 VIA VT82C686B PCIset 8 2Mbit Programmable Flash ... Network Features 3Com 3C920 Fast Ethernet Controller 14 1 LAN (RJ45) Connector Top) 23 Wake-On-LAN Connector 12 Wake-On-Ring Connector 10 Hardware Monitoring ASUS ASIC 9 3 Fan Power and Speed Monitoring Connectors Power ATX Power Supply Connector 18 Special Feature Onboard LED 11 Form Factor ATX 12...
... See opposite page for AMD Athlon/Duron Processors 2 (NOTE: A CPU thermal sensor is integrated on the motherboard, located near the center of the CPU heat source, just below the CPU socket) Chipsets AMD 761 system controller 1 VIA VT82C686B PCIset 8 2Mbit Programmable Flash ... Network Features 3Com 3C920 Fast Ethernet Controller 14 1 LAN (RJ45) Connector Top) 23 Wake-On-LAN Connector 12 Wake-On-Ring Connector 10 Hardware Monitoring ASUS ASIC 9 3 Fan Power and Speed Monitoring Connectors Power ATX Power Supply Connector 18 Special Feature Onboard LED 11 Form Factor ATX 12...

Motherboard DIY Troubleshooting Guide
Page 13
2. FEATURES 2.2.1 Component Locations 12 3 24 23 22 21 20 19 18 17 16 15 14 45 13 12 11 10 9 8 76 ASUS A7M266 User's Manual 13 FEATURES Motherboard Parts 2.
2. FEATURES 2.2.1 Component Locations 12 3 24 23 22 21 20 19 18 17 16 15 14 45 13 12 11 10 9 8 76 ASUS A7M266 User's Manual 13 FEATURES Motherboard Parts 2.

Motherboard DIY Troubleshooting Guide
Page 14
... 3. PRIMARY IDE SECONDARY IDE 2Mbit Flash EEPROM (Programmable BIOS) 30.6cm (12in) Socket A C-Media CMI-8738 PCI Audio 3. HARDWARE SETUP 3.1 Motherboard Layout PS/2 T: Mouse B: Keyboard USB Top: T: USB1 RJ-45 B: USB2 COM1 USBPWR1 01 01 24.5cm (9.64in) CPU_FAN PWR_FAN DSFID DDR ... 4 VID4 VID3 VID2 VID1 PCI Slot 5 MODEM Audio Modem Riser (AMR) WOR PLED DSCKF A7M266 CR2032 3V Lithium Cell CMOS Power VIA VT82C686B ® PCIset CLRTC JTPWR JEN CHA_FAN USBPORT ASUS USBPWR2 CHASSIS ASIC with Hardware IR Monitor AFPANEL IDELED SMB PANEL Grayed components are available only on ...
... 3. PRIMARY IDE SECONDARY IDE 2Mbit Flash EEPROM (Programmable BIOS) 30.6cm (12in) Socket A C-Media CMI-8738 PCI Audio 3. HARDWARE SETUP 3.1 Motherboard Layout PS/2 T: Mouse B: Keyboard USB Top: T: USB1 RJ-45 B: USB2 COM1 USBPWR1 01 01 24.5cm (9.64in) CPU_FAN PWR_FAN DSFID DDR ... 4 VID4 VID3 VID2 VID1 PCI Slot 5 MODEM Audio Modem Riser (AMR) WOR PLED DSCKF A7M266 CR2032 3V Lithium Cell CMOS Power VIA VT82C686B ® PCIset CLRTC JTPWR JEN CHA_FAN USBPORT ASUS USBPWR2 CHASSIS ASIC with Hardware IR Monitor AFPANEL IDELED SMB PANEL Grayed components are available only on ...

Motherboard DIY Troubleshooting Guide
Page 15
H/W SETUP Layout Contents Motherboard Settings 1) JEN p. 19 JumperFree Mode (JumperFree / Jumper Mode) 2) VIO VIO1 p. 20 Clock Generator Voltage Setting (3.30V / 3.56V / 3.45V) +2.5V Voltage Setting (2.7V / 2.9V / 2.8V) 3) LAN_EN p. ... p. 39 Chassis, Power Supply, CPU, Chipset Fan Connectors (3 pins) 16) USBPORT p. 40 USB Header (10-1 pins) 17) SMB p. 40 SMBus Connector (5-1 pins) 18) AFPANEL p. 41 ASUS iPanel Connector (24-1 pins) continued... HARDWARE SETUP 3.2 Layout Contents 3. 3. ASUS A7M266 User's Manual 15
H/W SETUP Layout Contents Motherboard Settings 1) JEN p. 19 JumperFree Mode (JumperFree / Jumper Mode) 2) VIO VIO1 p. 20 Clock Generator Voltage Setting (3.30V / 3.56V / 3.45V) +2.5V Voltage Setting (2.7V / 2.9V / 2.8V) 3) LAN_EN p. ... p. 39 Chassis, Power Supply, CPU, Chipset Fan Connectors (3 pins) 16) USBPORT p. 40 USB Header (10-1 pins) 17) SMB p. 40 SMBus Connector (5-1 pins) 18) AFPANEL p. 41 ASUS iPanel Connector (24-1 pins) continued... HARDWARE SETUP 3.2 Layout Contents 3. 3. ASUS A7M266 User's Manual 15

Motherboard DIY Troubleshooting Guide
Page 17
HARDWARE SETUP 3.3 Getting Started Before using your computer, you must complete the following steps: 1. Install Memory Modules 3. Check Motherboard Settings 2. Connect Ribbon Cables, Panel Wires, and Power Supply 6. H/W SETUP Getting Started ASUS A7M266 User's Manual 17 Install Expansion Cards 5. Install the Central Processing Unit (CPU) 4. Setup the BIOS Software 3. 3.
HARDWARE SETUP 3.3 Getting Started Before using your computer, you must complete the following steps: 1. Install Memory Modules 3. Check Motherboard Settings 2. Connect Ribbon Cables, Panel Wires, and Power Supply 6. H/W SETUP Getting Started ASUS A7M266 User's Manual 17 Install Expansion Cards 5. Install the Central Processing Unit (CPU) 4. Setup the BIOS Software 3. 3.

Motherboard DIY Troubleshooting Guide
Page 18
...the IC chips, leads or connectors, or other components. 4. Place components on a grounded antistatic pad or on the motherboard. To protect them against damage from the system. 5. Ensure that came with the component whenever the components are separated from... that you work on the inside. 2. Unplug your motherboard, peripherals, and/or components. H/W SETUP Motherboard Settings 01 01 A7M266 ® A7M266 Onboard LED ON Standby Power OFF Powered Off 18 ASUS A7M266 User's Manual HARDWARE SETUP 3.4 Motherboard Settings This section explains in suspend or soft-off before...
...the IC chips, leads or connectors, or other components. 4. Place components on a grounded antistatic pad or on the motherboard. To protect them against damage from the system. 5. Ensure that came with the component whenever the components are separated from... that you work on the inside. 2. Unplug your motherboard, peripherals, and/or components. H/W SETUP Motherboard Settings 01 01 A7M266 ® A7M266 Onboard LED ON Standby Power OFF Powered Off 18 ASUS A7M266 User's Manual HARDWARE SETUP 3.4 Motherboard Settings This section explains in suspend or soft-off before...

Motherboard DIY Troubleshooting Guide
Page 19
... Selection 3. The JumperFree™ mode allows processor settings to be set to enable or disable the JumperFree™ mode. H/W SETUP Motherboard Settings 3. DSCKF) The motherboard's onboard functions are adjusted through the BIOS setup (see 4.4 Advanced Menu). Frequency Selection 4. ASUS A7M266 User's Manual 19 Setting JumperFree Jumper Mode JEN [2-3] (default) [1-2] 34 VID4 VID3 VID2 VID1...
... Selection 3. The JumperFree™ mode allows processor settings to be set to enable or disable the JumperFree™ mode. H/W SETUP Motherboard Settings 3. DSCKF) The motherboard's onboard functions are adjusted through the BIOS setup (see 4.4 Advanced Menu). Frequency Selection 4. ASUS A7M266 User's Manual 19 Setting JumperFree Jumper Mode JEN [2-3] (default) [1-2] 34 VID4 VID3 VID2 VID1...

Motherboard DIY Troubleshooting Guide
Page 20
... Settings 2 1 2.7 Volt (default) 2 1 3.30 Volt (default) VIO1 3 2 2.9 Volt VIO 3 2 4 3 2.8 Volt 4 3 3.56 Volt 3.45 Volt WARNING! H/W SETUP Motherboard Settings A7M266 ® A7M266 Lan Setting LAN_EN 12 23 Disable Enable (default) 20 ASUS A7M266 User's Manual It is strongly recommended that you to select the voltage supplied to the clock generator and VIO1 (for better system reliability...
... Settings 2 1 2.7 Volt (default) 2 1 3.30 Volt (default) VIO1 3 2 2.9 Volt VIO 3 2 4 3 2.8 Volt 4 3 3.56 Volt 3.45 Volt WARNING! H/W SETUP Motherboard Settings A7M266 ® A7M266 Lan Setting LAN_EN 12 23 Disable Enable (default) 20 ASUS A7M266 User's Manual It is strongly recommended that you to select the voltage supplied to the clock generator and VIO1 (for better system reliability...

Motherboard DIY Troubleshooting Guide
Page 21
... up from the S1 sleep state (CPU stopped; HARDWARE SETUP 4) USB Device Wake Up (USBPWR1, USBPWR2) Set these jumpers are set this jumper. H/W SETUP Motherboard Settings 01 01 01 01 3. power supply in a low power mode) using this to +5VSB. An ATX power supply that can supply at least 2A...Your computer will not power ON if you set to +5VSB and do not have the appropriate ATX power supply. Setting Disable Enable AUDIO_EN [1-2] [2-3] (default) A7M266 ® AUDIO_EN 12 23 Disable Enable (Default) A7M266 Onboard Audio Setting ASUS A7M266 User's Manual 21 3.
... up from the S1 sleep state (CPU stopped; HARDWARE SETUP 4) USB Device Wake Up (USBPWR1, USBPWR2) Set these jumpers are set this jumper. H/W SETUP Motherboard Settings 01 01 01 01 3. power supply in a low power mode) using this to +5VSB. An ATX power supply that can supply at least 2A...Your computer will not power ON if you set to +5VSB and do not have the appropriate ATX power supply. Setting Disable Enable AUDIO_EN [1-2] [2-3] (default) A7M266 ® AUDIO_EN 12 23 Disable Enable (Default) A7M266 Onboard Audio Setting ASUS A7M266 User's Manual 21 3.

Motherboard DIY Troubleshooting Guide
Page 22
... are not guaranteed to the CPU, SDRAM, and the chipset. It may result in BIOS Setup so you can set to OFF. 3. HARD- H/W SETUP Motherboard Settings 22 ASUS A7M266 User's Manual The CPU External Frequency multiplied by the Frequency Multiple equals the CPU's Internal frequency (the advertised CPU speed). This allows the selection...
... are not guaranteed to the CPU, SDRAM, and the chipset. It may result in BIOS Setup so you can set to OFF. 3. HARD- H/W SETUP Motherboard Settings 22 ASUS A7M266 User's Manual The CPU External Frequency multiplied by the Frequency Multiple equals the CPU's Internal frequency (the advertised CPU speed). This allows the selection...

Motherboard DIY Troubleshooting Guide
Page 23
HARDWARE SETUP Manual CPU Settings NOTE: JumperFree mode must be disabled . H/W SETUP Motherboard Settings ASUS A7M266 User's Manual 23 3. Set the DIP switches by the internal speed of your processor as follows: CPU Athlon Athlon Athlon Athlon Athlon Athlon Athlon Athlon ... 7.0x Duron 650MHz 6.5x 100MHz 100MHz 100MHz [ON] [OFF] [ON] [ON] [ON] [OFF] [ON] [ON] [ON] [OFF] [ON] [ON] For updated processor settings, visit the ASUS web site (see ASUS CONTACT INFORMATION). 3.
HARDWARE SETUP Manual CPU Settings NOTE: JumperFree mode must be disabled . H/W SETUP Motherboard Settings ASUS A7M266 User's Manual 23 3. Set the DIP switches by the internal speed of your processor as follows: CPU Athlon Athlon Athlon Athlon Athlon Athlon Athlon Athlon ... 7.0x Duron 650MHz 6.5x 100MHz 100MHz 100MHz [ON] [OFF] [ON] [ON] [ON] [OFF] [ON] [ON] [ON] [OFF] [ON] [ON] For updated processor settings, visit the ASUS web site (see ASUS CONTACT INFORMATION). 3.

Motherboard DIY Troubleshooting Guide
Page 24
A7M266 ® A7M266 CPU Core Voltage Selection 01 01 1234 VID4 1234 1234 VID3 VID2 VID1 1.85/1.825Volts 1.8/1.775Volts 1.75/1.725Volts VID4 VID3 VID2 VID1 1.7/1.675Volts 1.65/1.625Volts 1.6/1.... VID4 VID3 VID2 VID1 1.10/1.075Volts CPU Default/ JumperFree (Default) 3. It is generated according to use CPU Default as the CPU core voltage. H/W SETUP Motherboard Settings 24 ASUS A7M266 User's Manual For each jumper setting, there are two voltage options, depending on the CPU used. CPU Default means the Vcore is recommended to...
A7M266 ® A7M266 CPU Core Voltage Selection 01 01 1234 VID4 1234 1234 VID3 VID2 VID1 1.85/1.825Volts 1.8/1.775Volts 1.75/1.725Volts VID4 VID3 VID2 VID1 1.7/1.675Volts 1.65/1.625Volts 1.6/1.... VID4 VID3 VID2 VID1 1.10/1.075Volts CPU Default/ JumperFree (Default) 3. It is generated according to use CPU Default as the CPU core voltage. H/W SETUP Motherboard Settings 24 ASUS A7M266 User's Manual For each jumper setting, there are two voltage options, depending on the CPU used. CPU Default means the Vcore is recommended to...


