
Owners Manual
Page 2
... Started How to Read this Manual 5 Location of Controls 6 PXA-H800 6 Sound Manager for PXA-H800 6 RUX-C800 Commander (sold separately) .... 7 Features 8 About Operating 8 About the Audio Setting 8 Before You First Use the Unit 8 Installing Sound Manager for PXA-H800 ....... 9 From a PC Basic ,Operation Initial System Start-Up... 10 Using with Ai-NET Connections 10 Turning Power On and Off 10 Operating tbe Sound Manager for PXA-H800 Menu 10 Saving the Setup Data (File 10 Loading th,e S~tup Data (File 10 Loading the Itp.priptEQ Measurement Data (File 11 ...
... Started How to Read this Manual 5 Location of Controls 6 PXA-H800 6 Sound Manager for PXA-H800 6 RUX-C800 Commander (sold separately) .... 7 Features 8 About Operating 8 About the Audio Setting 8 Before You First Use the Unit 8 Installing Sound Manager for PXA-H800 ....... 9 From a PC Basic ,Operation Initial System Start-Up... 10 Using with Ai-NET Connections 10 Turning Power On and Off 10 Operating tbe Sound Manager for PXA-H800 Menu 10 Saving the Setup Data (File 10 Loading th,e S~tup Data (File 10 Loading the Itp.priptEQ Measurement Data (File 11 ...

Owners Manual
Page 3
... Playback Mode 30 Setting EUPHONY (EUPHONY 30 Using Dolby Pro Logic II (Dolby Pro Logic II 31 Multi Channel Function Adjustment Procedure 32 Multi Channel Setup 32 Adjusting the Speaker Volume Level (Output Level 33 Adjusting the Acoustic Image (BI-PHANTOM 33 Mixing the Low Range Audio for the Rear (Rear...
... Playback Mode 30 Setting EUPHONY (EUPHONY 30 Using Dolby Pro Logic II (Dolby Pro Logic II 31 Multi Channel Function Adjustment Procedure 32 Multi Channel Setup 32 Adjusting the Speaker Volume Level (Output Level 33 Adjusting the Acoustic Image (BI-PHANTOM 33 Mixing the Low Range Audio for the Rear (Rear...

Owners Manual
Page 6
...= =~--· Automatic Measurement r--~~~ Function Function Other Useful Features *1 The method to Read this Manual The Commander (RUX-C800) for PXA-H800 is included in the "Adjusting the Time Correction (TCR)" operation. 5-EN Getting Started How to adjust MX Plus Level is described ... the Graphic EQ"/"Setting the Parametric EQ" operation. ~ "Setting the TCR Parameter" is sold separately. Audio setup and adjustments are described in separate sections for PXA-H800. Because the operation differs significantly between these two methods, each are performed using the RUX-C800 or a PC...
...= =~--· Automatic Measurement r--~~~ Function Function Other Useful Features *1 The method to Read this Manual The Commander (RUX-C800) for PXA-H800 is included in the "Adjusting the Time Correction (TCR)" operation. 5-EN Getting Started How to adjust MX Plus Level is described ... the Graphic EQ"/"Setting the Parametric EQ" operation. ~ "Setting the TCR Parameter" is sold separately. Audio setup and adjustments are described in separate sections for PXA-H800. Because the operation differs significantly between these two methods, each are performed using the RUX-C800 or a PC...

Owners Manual
Page 8
... Tab Operate the Function switching tab in the Main screen as follows : 1 Click Function switching tab. ALPINE PXA-HSOO Sound Manager RUX-C800 Commander (sold separately) About Operation on a PC • Select and click the setup item or value. • You can also use the [Tab], [ f j ], and [.!.... ] keys on your PC to select the setup value or mode. • For File( F) and Option(O) operation , refer to "Operating the Sound Manager for PXA-H800 Menu " (page 10). • Common PC operation [ CANC EL ]: Cancels the operation and takes you ...
... Tab Operate the Function switching tab in the Main screen as follows : 1 Click Function switching tab. ALPINE PXA-HSOO Sound Manager RUX-C800 Commander (sold separately) About Operation on a PC • Select and click the setup item or value. • You can also use the [Tab], [ f j ], and [.!.... ] keys on your PC to select the setup value or mode. • For File( F) and Option(O) operation , refer to "Operating the Sound Manager for PXA-H800 Menu " (page 10). • Common PC operation [ CANC EL ]: Cancels the operation and takes you ...

Owners Manual
Page 9
... automatically. The system features sound quality that is pleasant even after long listening, which is the optimum sound for PXA-H800 is required. • Availability of operations Power ON/OFF Automatic adjustment Audio setup/ adjustment Commander (sold separately) to have access to many of these factors to adjust an extremely narrow range in...
... automatically. The system features sound quality that is pleasant even after long listening, which is the optimum sound for PXA-H800 is required. • Availability of operations Power ON/OFF Automatic adjustment Audio setup/ adjustment Commander (sold separately) to have access to many of these factors to adjust an extremely narrow range in...

Owners Manual
Page 10
...be stopped. 1 Insert the supplied CD-ROM (Sound Manager for PXA-H800 on a PC, you can set in the online mode. Run the setup.exe file. Follow the installation instructions on the PC. To start Sound Manager for PXA-H800 checks the connection with the included USB cable. ~HII@l USB Cable... saved on page 10. If the connection is detected, it (refer to Computer connection terminal of Sound Manager for PXA-H800. Caution before you to "Loading the Setup Data (File)" on the PC referring to back-up your personal computer. • Before installing, all active programs...
...be stopped. 1 Insert the supplied CD-ROM (Sound Manager for PXA-H800 on a PC, you can set in the online mode. Run the setup.exe file. Follow the installation instructions on the PC. To start Sound Manager for PXA-H800 checks the connection with the included USB cable. ~HII@l USB Cable... saved on page 10. If the connection is detected, it (refer to Computer connection terminal of Sound Manager for PXA-H800. Caution before you to "Loading the Setup Data (File)" on the PC referring to back-up your personal computer. • Before installing, all active programs...
Owners Manual
Page 11
From a PC Basic Operation Initial System Start-Up If the system stops working properly, tum the ignition switch to off, and then on again. If the system still does not work properly, reset the unit. 1 Press RESET switch with a ballpoint pen or similar pointed object. 01 = o
From a PC Basic Operation Initial System Start-Up If the system stops working properly, tum the ignition switch to off, and then on again. If the system still does not work properly, reset the unit. 1 Press RESET switch with a ballpoint pen or similar pointed object. 01 = o

Owners Manual
Page 12
...page 10) . • Downloading takes approximately 20 minutes. Before down load a file, all setup data in the PXA-HBOO wil l be displayed . 6 Click [OK]. Do not turn off the PXA-HBOO or disconnect the USB cable until the download is recommended to save lmprintEQ measurement data on... [lmprintEQ Memory 1] or [lmprintEQ Memory 2], and click [OK]. Please note that once deleted it is completed. 1 From the Alpine Web site, download the file for PXA-H800. 1 Click [Option(O)]. 2 Click [Version Information (V)]. From a PC Loading the lmprintEQ Measurement Data (File) Load the Impri ntEQ...
...page 10) . • Downloading takes approximately 20 minutes. Before down load a file, all setup data in the PXA-HBOO wil l be displayed . 6 Click [OK]. Do not turn off the PXA-HBOO or disconnect the USB cable until the download is recommended to save lmprintEQ measurement data on... [lmprintEQ Memory 1] or [lmprintEQ Memory 2], and click [OK]. Please note that once deleted it is completed. 1 From the Alpine Web site, download the file for PXA-H800. 1 Click [Option(O)]. 2 Click [Version Information (V)]. From a PC Loading the lmprintEQ Measurement Data (File) Load the Impri ntEQ...

Owners Manual
Page 13
... in a single preset memory. 1m m!llJ~dJ~tm"'~~pJ~ ::lt~~i~~fin .,,,[~ j~i'!,~~!IB.iili Setting the Speaker System (Output System Select) 13 Setting the Speakers (Speaker Setup)/Setting the 14 Subwoofers Setting the AUX Input System (AUX Input System Select) 14 Setting the AUX Input (AUX IN) 15 Setting the Digital Input...
... in a single preset memory. 1m m!llJ~dJ~tm"'~~pJ~ ::lt~~i~~fin .,,,[~ j~i'!,~~!IB.iili Setting the Speaker System (Output System Select) 13 Setting the Speakers (Speaker Setup)/Setting the 14 Subwoofers Setting the AUX Input System (AUX Input System Select) 14 Setting the AUX Input (AUX IN) 15 Setting the Digital Input...

Owners Manual
Page 14
The Speaker Setup screen will be automatically disp layed. • If no changes are unavailable for [Shortcut) tab in the main menu. If the selected system and the ...
The Speaker Setup screen will be automatically disp layed. • If no changes are unavailable for [Shortcut) tab in the main menu. If the selected system and the ...

Owners Manual
Page 15
...RoadEQ will be turned off after the speakers are connected, you click [110 Configuration] on the Function switching tab, and then [Speaker Setup], the Speaker Setup screen will also be displayed. For details, refer to "Operating the Function Switching Tab" (page 7). 2 Select and click the AUX...page 12). 4-1First time start -up : Click [NEXT). Set depending on the subwoofers to be connected (Initial setting: "Mono"). 1 Click [Speaker Setup] for PXA-HSOO will be closed. Input: AUX1 (Front Left, Front Right, Rear Left, Rear Right)/ AUX2 (Left, Right) Analog 2ch. Make sure the speaker...
...RoadEQ will be turned off after the speakers are connected, you click [110 Configuration] on the Function switching tab, and then [Speaker Setup], the Speaker Setup screen will also be displayed. For details, refer to "Operating the Function Switching Tab" (page 7). 2 Select and click the AUX...page 12). 4-1First time start -up : Click [NEXT). Set depending on the subwoofers to be connected (Initial setting: "Mono"). 1 Click [Speaker Setup] for PXA-HSOO will be closed. Input: AUX1 (Front Left, Front Right, Rear Left, Rear Right)/ AUX2 (Left, Right) Analog 2ch. Make sure the speaker...

Owners Manual
Page 16
... Preset Values (Preset Store)" (page 12). Turn the ignition key to set only when AUXIN setting is displayed. 3 Click either [High] or [Low] for PXA-H800. Setting item: AUX Level Setting contents: -10 to + 10 dB • This item becomes possible to the terminals ofthe device Head Unit input terminal (Ai...-NET input) I [~]to set only when AUXIN setting is recommended to the unit. The AUX Gain Setup screen is on the system set in "Setting the AUX Input System (AUX Input System Select)" (page 14). ~When you can adjust the volume ...
... Preset Values (Preset Store)" (page 12). Turn the ignition key to set only when AUXIN setting is displayed. 3 Click either [High] or [Low] for PXA-H800. Setting item: AUX Level Setting contents: -10 to + 10 dB • This item becomes possible to the terminals ofthe device Head Unit input terminal (Ai...-NET input) I [~]to set only when AUXIN setting is recommended to the unit. The AUX Gain Setup screen is on the system set in "Setting the AUX Input System (AUX Input System Select)" (page 14). ~When you can adjust the volume ...
Owners Manual
Page 18
...." Other: Choose [Other] when a head unit other than an automobile factory system (commercially available unit including ALPINE products) is selected, the system will be displayed. If you select [Other], go to Step 7. The measurement...SETUP DISC into the head unit. Measurement of the frequency characteristic will also be displayed. 17-EN Following the instructions on the screen, conduct the automatic measurement. The Area Selection screen is displayed. 11 Select the listening position. Select the listening position. Refer to ACC ON position, and start ALPINE PXA-H800...
...." Other: Choose [Other] when a head unit other than an automobile factory system (commercially available unit including ALPINE products) is selected, the system will be displayed. If you select [Other], go to Step 7. The measurement...SETUP DISC into the head unit. Measurement of the frequency characteristic will also be displayed. 17-EN Following the instructions on the screen, conduct the automatic measurement. The Area Selection screen is displayed. 11 Select the listening position. Select the listening position. Refer to ACC ON position, and start ALPINE PXA-H800...
Owners Manual
Page 21
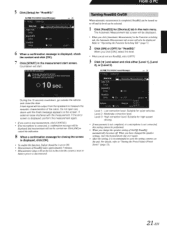
...Turn the air-conditioner and heater OFF. • Turn off . Refer to "Operating the Function Switching Tab" (page 7). 5 Click [Setup] for measurement. • Park the vehicle in the main menu. nl G>. ,:~; The Road Equalizer compensates for constantly changing noise, so ...be overcome using the included microphone and the powerful measurement system in the Function switching tab, the Automatic Measurement tab screen will also be displayed. ALPINE PXA-HSOO Sound Manager FlltoF : -X Shortcut t .u t(H I I ::: l:'tJ :. 6 When the confirmation message is displayed, check the ...
...Turn the air-conditioner and heater OFF. • Turn off . Refer to "Operating the Function Switching Tab" (page 7). 5 Click [Setup] for measurement. • Park the vehicle in the main menu. nl G>. ,:~; The Road Equalizer compensates for constantly changing noise, so ...be overcome using the included microphone and the powerful measurement system in the Function switching tab, the Automatic Measurement tab screen will also be displayed. ALPINE PXA-HSOO Sound Manager FlltoF : -X Shortcut t .u t(H I I ::: l:'tJ :. 6 When the confirmation message is displayed, check the ...
Owners Manual
Page 22
... automatically becomes off and its level can be output from the speakers to "Storing the Preset Values (Preset Store)" (page 12). 21-EN ALPINE PXA-H800 S()Uild Manager -X 6 When a confirmation message is displayed, check the content and click [OK]. 7 Click [STARn in the event the system... is reset or battery power is disconnected. If external noise interferes with the measurement. Suitable for "RoadEQ." 5 Click [Setup] for closing the screen is displayed, click [OK]. • To enable this setting cannot be carried out. The Automatic Measurement tab screen ...
... automatically becomes off and its level can be output from the speakers to "Storing the Preset Values (Preset Store)" (page 12). 21-EN ALPINE PXA-H800 S()Uild Manager -X 6 When a confirmation message is displayed, check the content and click [OK]. 7 Click [STARn in the event the system... is reset or battery power is disconnected. If external noise interferes with the measurement. Suitable for "RoadEQ." 5 Click [Setup] for closing the screen is displayed, click [OK]. • To enable this setting cannot be carried out. The Automatic Measurement tab screen ...

Owners Manual
Page 23
If MX Plus mode is set to ON. • After the setting, it is recommended to the music source of PXA-H800. 1 Click [MX Plus] for [Shortcut] tab in the setup screen, and select and click the level from the pulldown menu. W910, is connected, it should be set for ... it automatically switches according to store the setting contents on the unit. Compressed Data/Digital Radio (Level 1 to step 4. 3 Click [Standalone] for "MX Plus Setup" in the following order: 1 --7 2 --7 3. Action: Action movies are emphasized for clean and clear output. MX Plus mode will also be switched, linked ...
If MX Plus mode is set to ON. • After the setting, it is recommended to the music source of PXA-H800. 1 Click [MX Plus] for [Shortcut] tab in the setup screen, and select and click the level from the pulldown menu. W910, is connected, it should be set for ... it automatically switches according to store the setting contents on the unit. Compressed Data/Digital Radio (Level 1 to step 4. 3 Click [Standalone] for "MX Plus Setup" in the following order: 1 --7 2 --7 3. Action: Action movies are emphasized for clean and clear output. MX Plus mode will also be switched, linked ...

Owners Manual
Page 24
...• To enable this function, Defeat should be is set to ON. • After the setting, it is reproduced more powerful sound. The EO Setup screen is reproduced with more brightness and ambience. The EO mode switches to suit your, taste. 1 Click [G.EQ] for [Shortcut] tab in the ... • When "Non Effect" is to be set vary depending on the system set vary depending on the Function switching tab, and then [EQ Setup}, the EQ Setup screen will be displayed. r!l: Both R and L channels are reproduced with more clearly. Drama/Talk: The dialogue portion of the R or L channel...
...• To enable this function, Defeat should be is set to ON. • After the setting, it is reproduced more powerful sound. The EO Setup screen is reproduced with more brightness and ambience. The EO mode switches to suit your, taste. 1 Click [G.EQ] for [Shortcut] tab in the ... • When "Non Effect" is to be set vary depending on the system set vary depending on the Function switching tab, and then [EQ Setup}, the EQ Setup screen will be displayed. r!l: Both R and L channels are reproduced with more clearly. Drama/Talk: The dialogue portion of the R or L channel...

Owners Manual
Page 25
... Mouse trace function When you may overload and damage the speakers. 24-EN To restore all the channels will be displayed . The current setup value will be displayed at the bottom ofthe Screen. Q Factor t:Q Band R ch. If the speaker's playable frequency range is enabled,...initial settings, click [All Reset]. For details, refer to "Setting the Speaker System (Output System Select)" (page /3)/ "Setting the Speakers (Speaker Setup)/Setting the Subwoofers" (page 14). • Check the playable frequency ranges of the cursor. Displaying the data 1 Click [Show All Data]. ...
... Mouse trace function When you may overload and damage the speakers. 24-EN To restore all the channels will be displayed . The current setup value will be displayed at the bottom ofthe Screen. Q Factor t:Q Band R ch. If the speaker's playable frequency range is enabled,...initial settings, click [All Reset]. For details, refer to "Setting the Speaker System (Output System Select)" (page /3)/ "Setting the Speakers (Speaker Setup)/Setting the Subwoofers" (page 14). • Check the playable frequency ranges of the cursor. Displaying the data 1 Click [Show All Data]. ...

Owners Manual
Page 26
... mode, you want to adjust. • Channels to be set vary depending on the Function switching tab, and then {EQ Setup], the EQ Setup screen will be set independently. Click either Graphic EQ or Parametric EQ. Refer to "Operating the Function Switching Tab" (page 7)....You can also make the necessary corrections. Refer to "Setting the Speaker System (Output System Select)" (page 13)1 "Setting the Speakers (Speaker Setup)/Setting the Subwoofers" (page 14). • Check the playable frequency ranges ofthe connected speakers before making equalizer adjustments. "II " •...
... mode, you want to adjust. • Channels to be set vary depending on the Function switching tab, and then {EQ Setup], the EQ Setup screen will be set independently. Click either Graphic EQ or Parametric EQ. Refer to "Operating the Function Switching Tab" (page 7)....You can also make the necessary corrections. Refer to "Setting the Speaker System (Output System Select)" (page 13)1 "Setting the Speakers (Speaker Setup)/Setting the Subwoofers" (page 14). • Check the playable frequency ranges ofthe connected speakers before making equalizer adjustments. "II " •...

Owners Manual
Page 27
... is equipped with the L.PF off. Adjustments should be made according to the reproduction characteristics of the connected speakers. Over], the X-Over Setup screen will be driven by using a speaker with the H. About the Crossover (X-Over) Crossover (X-Over): This unit is d isplayed. ...• When you click [Mobile Sound Manager] on this point, please consult your authorized Alpine dealer. Thus, each band, and also the slope (how fast the filter rolls off frequency frequency • HPF (high pass filter): Cuts the...
... is equipped with the L.PF off. Adjustments should be made according to the reproduction characteristics of the connected speakers. Over], the X-Over Setup screen will be driven by using a speaker with the H. About the Crossover (X-Over) Crossover (X-Over): This unit is d isplayed. ...• When you click [Mobile Sound Manager] on this point, please consult your authorized Alpine dealer. Thus, each band, and also the slope (how fast the filter rolls off frequency frequency • HPF (high pass filter): Cuts the...


