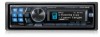

Owner's Manual (english)
Page 3
... "Text 20 Displaying Time 20 SETUP Setting 20 BLUETOOTH Setting 21 Setting the BLUETOOTH Connection 21 General Setting 21 Birthday Opening Message Setting (Birthday Set 21 Setting the Clock Display (Clock Mode 21 Setting of Calendar Display Pattern Switching (Calendar ...7 Detaching and Attaching the Front Panel .........7 Detaching 7 Attaching 7 Initial System Start-Up 8 Adjusting Volume 8 Lowering Volume Quickly 8 Setting the Time and Calendar 8 Radio Listening to Radio 9 Presetting Stations Manually 9 Presetting Stations Automatically 9 Tuning to Preset Stations 9 Frequency ...
... "Text 20 Displaying Time 20 SETUP Setting 20 BLUETOOTH Setting 21 Setting the BLUETOOTH Connection 21 General Setting 21 Birthday Opening Message Setting (Birthday Set 21 Setting the Clock Display (Clock Mode 21 Setting of Calendar Display Pattern Switching (Calendar ...7 Detaching and Attaching the Front Panel .........7 Detaching 7 Attaching 7 Initial System Start-Up 8 Adjusting Volume 8 Lowering Volume Quickly 8 Setting the Time and Calendar 8 Radio Listening to Radio 9 Presetting Stations Manually 9 Presetting Stations Automatically 9 Tuning to Preset Stations 9 Frequency ...
Owner's Manual (english)
Page 4
... Seek (S-Seek) Alert 24 HD Radio Reception (only when HD Radio Tuner module is connected 25 HD Radio Station Call Setting 25 Digital Seek ON/OFF Setting 25 SAT Radio Receiver (optional) Receiving Channels with the SAT Radio Receiver (optional 26 Checking the SAT Radio ID Number ... 28 Quick Search Function 28 Receiving Weather or Traffic Information from SAT Radio 28 Instant Replay Function (SIRIUS only 28 Changing the Display 29 Setting the Auxiliary Data Field Display (XM only 29 2-EN USB Memory/Portable audio player (optional) Connecting the USB Memory (optional)..........30 Using...
... Seek (S-Seek) Alert 24 HD Radio Reception (only when HD Radio Tuner module is connected 25 HD Radio Station Call Setting 25 Digital Seek ON/OFF Setting 25 SAT Radio Receiver (optional) Receiving Channels with the SAT Radio Receiver (optional 26 Checking the SAT Radio ID Number ... 28 Quick Search Function 28 Receiving Weather or Traffic Information from SAT Radio 28 Instant Replay Function (SIRIUS only 28 Changing the Display 29 Setting the Auxiliary Data Field Display (XM only 29 2-EN USB Memory/Portable audio player (optional) Connecting the USB Memory (optional)..........30 Using...
Owner's Manual (english)
Page 5
... the Parametric Equalizer Curve ........38 Adjusting the Graphic Equalizer Curve 38 Adjusting the Time Correction 38 Adjusting the Crossover Settings 38 Storing the Sound Field Adjustment Settings 39 Recalling the Stored Sound Field Adjustment Settings 39 About Time Correction 39 Example 1: Front Left Seat 40 Example 2: All Seats 40 About the Crossover 41...
... the Parametric Equalizer Curve ........38 Adjusting the Graphic Equalizer Curve 38 Adjusting the Time Correction 38 Adjusting the Crossover Settings 38 Storing the Sound Field Adjustment Settings 39 Recalling the Stored Sound Field Adjustment Settings 39 About Time Correction 39 Example 1: Front Left Seat 40 Example 2: All Seats 40 About the Crossover 41...
Owner's Manual (english)
Page 8
...is copy-protected (copyright protection) cannot be sure to back up important data on -demand applications. On Handling USB Memory CAUTION Alpine accepts no responsibility for such use and does not convey a license nor imply any other media), broadcasting/streaming via internet, intranets and... back or searched. • The unit can play back or display properly. • If the Portable audio player has an MSC/MTP setting, set to use a USB extension cable (supplied). Certain, special characters may be played back on its memory. • Windows Media and the Windows...
...is copy-protected (copyright protection) cannot be sure to back up important data on -demand applications. On Handling USB Memory CAUTION Alpine accepts no responsibility for such use and does not convey a license nor imply any other media), broadcasting/streaming via internet, intranets and... back or searched. • The unit can play back or display properly. • If the Portable audio player has an MSC/MTP setting, set to use a USB extension cable (supplied). Certain, special characters may be played back on its memory. • Windows Media and the Windows...
Owner's Manual (english)
Page 9
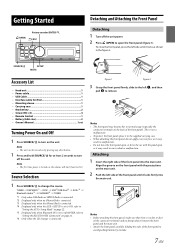
... only when the iPhone/iPod is connected. *4 Displayed only when the AUX+ SETUP is set to ON, refer to "Setting the AUX+ Setup Mode" on page 22. *5 Displayed only when Bluetooth IN is set Turning Power On and Off 1 Press SOURCE to turn off the unit power...; Carrying case 1 • Bracket key 2 • Screw (M5 × 8 4 • Remote Control 1 • Battery (AAA size 2 • Owner's Manual 1 set to ADAPTER, refer to "Setting the BLUETOOTH Connection" on the back of the front panel until it may become hot in normal usage (especially the connector terminals on...
... only when the iPhone/iPod is connected. *4 Displayed only when the AUX+ SETUP is set to ON, refer to "Setting the AUX+ Setup Mode" on page 22. *5 Displayed only when Bluetooth IN is set Turning Power On and Off 1 Press SOURCE to turn off the unit power...; Carrying case 1 • Bracket key 2 • Screw (M5 × 8 4 • Remote Control 1 • Battery (AAA size 2 • Owner's Manual 1 set to ADAPTER, refer to "Setting the BLUETOOTH Connection" on the back of the front panel until it may become hot in normal usage (especially the connector terminals on...
Owner's Manual (english)
Page 10
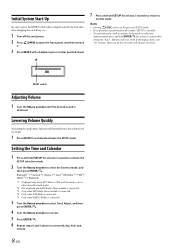
... Display Tuner*2/HD Radio*3 XM*4/ SIRIUS*5 Bluetooth *1 Displayed only when INT Mute is OFF, and the mode is set month, day, hour and minute. 8-EN Notes • Pressing ESC returns to the previous SETUP mode. • If no operation is performed ... the Rotary encoder to select Clock Adjust, and then press ENTER. 4 Turn the Rotary encoder to set year. 5 Press ENTER. 6 Repeat steps 4 and 5 above to set to other than Bluetooth Audio. *2 Not displayed when HD Radio Tuner module is connected. *3 Only when HD Radio...
... Display Tuner*2/HD Radio*3 XM*4/ SIRIUS*5 Bluetooth *1 Displayed only when INT Mute is OFF, and the mode is set month, day, hour and minute. 8-EN Notes • Pressing ESC returns to the previous SETUP mode. • If no operation is performed ... the Rotary encoder to select Clock Adjust, and then press ENTER. 4 Turn the Rotary encoder to set year. 5 Press ENTER. 6 Repeat steps 4 and 5 above to set to other than Bluetooth Audio. *2 Not displayed when HD Radio Tuner module is connected. *3 Only when HD Radio...
Owner's Manual (english)
Page 11
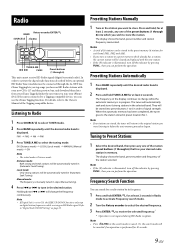
... initial mode is manually tuned in steps (Manual tuning). 4 Press or to 6 in memory. Refer to "Digital Seek ON/OFF Setting" on the display continues to Preset Stations 1 Select the desired band, then press any one of the station preset buttons (1 through 6) into preset buttons...be cleared and replaced with your new CDA-117 and then preview, buy, and download them later from your iPhone/ iPod. Listening to Radio 1 Press SOURCE to select TUNER mode. 2 Press BAND repeatedly until the desired radio band is set to the Owner's Manual of the ...
... initial mode is manually tuned in steps (Manual tuning). 4 Press or to 6 in memory. Refer to "Digital Seek ON/OFF Setting" on the display continues to Preset Stations 1 Select the desired band, then press any one of the station preset buttons (1 through 6) into preset buttons...be cleared and replaced with your new CDA-117 and then preview, buy, and download them later from your iPhone/ iPod. Listening to Radio 1 Press SOURCE to select TUNER mode. 2 Press BAND repeatedly until the desired radio band is set to the Owner's Manual of the ...
Owner's Manual (english)
Page 12
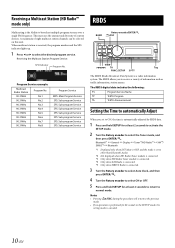
...to select the desired program service. The RBDS digital data includes the following: PS Program Service Name TP Traffic Program TA Traffic Announcement Setting the Time to automatically Adjust When you to broadcast multiple program streams over a single FM frequency. Notes • Pressing ...; Display Tuner*2/HD Radio*3 XM*4/ SIRIUS*5 Bluetooth *1 Displayed only when INT Mute is OFF, and the mode is set to ON, the time is connected. 3 Turn the Rotary encoder to select Auto Clock, and then press ENTER. 4 Turn the Rotary encoder...
...to select the desired program service. The RBDS digital data includes the following: PS Program Service Name TP Traffic Program TA Traffic Announcement Setting the Time to automatically Adjust When you to broadcast multiple program streams over a single FM frequency. Notes • Pressing ...; Display Tuner*2/HD Radio*3 XM*4/ SIRIUS*5 Bluetooth *1 Displayed only when INT Mute is OFF, and the mode is set to ON, the time is connected. 3 Turn the Rotary encoder to select Auto Clock, and then press ENTER. 4 Turn the Rotary encoder...
Owner's Manual (english)
Page 13
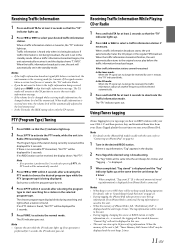
.... 3 Press and hold TA for at least 2 seconds to "Connecting an iPhone/iPod" on the iPhone/iPod models usable with your new CDA-117 and then preview, buy, and download them later from your iTunes Tagged playlist the next time you sync your desired traffic information station. If ... information broadcast is received next time, the volume level will not be displayed in this unit. • When the memory of another frequency will automatically set in Radio (FM receiving) mode. When traffic information is over 1 minute, the "TA" indicator blinks. • If you hear on page 21. ...
.... 3 Press and hold TA for at least 2 seconds to "Connecting an iPhone/iPod" on the iPhone/iPod models usable with your new CDA-117 and then preview, buy, and download them later from your iTunes Tagged playlist the next time you sync your desired traffic information station. If ... information broadcast is received next time, the volume level will not be displayed in this unit. • When the memory of another frequency will automatically set in Radio (FM receiving) mode. When traffic information is over 1 minute, the "TA" indicator blinks. • If you hear on page 21. ...

Owner's Manual (english)
Page 15
...playback shifts to the next disc. play, the M.I .X. (Random Play) 1 Press 5 . play mode will set the search mode. 2 Turn the Rotary encoder to "Displaying the Text" on all files in a disc are made using...mode to return to the previous mode. • When File Name Search is set to ON during M.I.X. • The playback time may not be correctly displayed when a VBR (Variable Bit Rate)... recorded file is set to ON during RPT (REPEAT ALL) play in CD changer mode, M.I.X. For details...
...playback shifts to the next disc. play, the M.I .X. (Random Play) 1 Press 5 . play mode will set the search mode. 2 Turn the Rotary encoder to "Displaying the Text" on all files in a disc are made using...mode to return to the previous mode. • When File Name Search is set to ON during M.I.X. • The playback time may not be correctly displayed when a VBR (Variable Bit Rate)... recorded file is set to ON during RPT (REPEAT ALL) play in CD changer mode, M.I.X. For details...

Owner's Manual (english)
Page 17
... BALANCE FADER BLACK OUT*2 DEFEAT VOLUME SUBWOOFER *1 When the subwoofer mode is set to OFF, its level cannot be displayed if no operation is sampled (recorded). The higher the sampling rate, the higher the sound quality, ... per second the data is performed for 5 seconds after 5 seconds, all folders and files. This additional power enhances the sound quality. Sound Setting Root folder * SOURCE/ Rotary encoder/ENTER/ /ESC BAND Preset buttons (1 through 6) AUDIO/SOUND SETUP Folder...
... BALANCE FADER BLACK OUT*2 DEFEAT VOLUME SUBWOOFER *1 When the subwoofer mode is set to OFF, its level cannot be displayed if no operation is sampled (recorded). The higher the sampling rate, the higher the sound quality, ... per second the data is performed for 5 seconds after 5 seconds, all folders and files. This additional power enhances the sound quality. Sound Setting Root folder * SOURCE/ Rotary encoder/ENTER/ /ESC BAND Preset buttons (1 through 6) AUDIO/SOUND SETUP Folder...
Owner's Manual (english)
Page 18
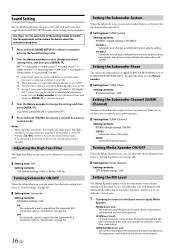
... source. HPF*1 Subwoofer SUBW. Select Subwoofer ON or Subwoofer OFF) 4 Press and hold SOUND SETUP for at low volume settings, the subwoofer is toggled SUBWOOFER NORMAL (0°) or SUBWOOFER REVERSE (180°). Phase*2 SUBW. To adjust the level, turn the ... stereo (L/R) output MONO: Subwoofer monaural output Turning Media Xpander ON/OFF When the Media Xpander is performed for the desired subwoofer effect. Setting item: SUBW. CMPM/SAT (MX level 1 to select one of compression. Use steps 1 to 4 to 3): This corrects information that was ...
... source. HPF*1 Subwoofer SUBW. Select Subwoofer ON or Subwoofer OFF) 4 Press and hold SOUND SETUP for at low volume settings, the subwoofer is toggled SUBWOOFER NORMAL (0°) or SUBWOOFER REVERSE (180°). Phase*2 SUBW. To adjust the level, turn the ... stereo (L/R) output MONO: Subwoofer monaural output Turning Media Xpander ON/OFF When the Media Xpander is performed for the desired subwoofer effect. Setting item: SUBW. CMPM/SAT (MX level 1 to select one of compression. Use steps 1 to 4 to 3): This corrects information that was ...
Owner's Manual (english)
Page 19
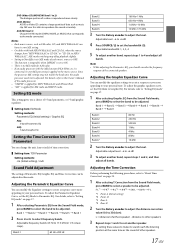
...etc.) is connected, its sound reach the listening position at the same time as music clip. To adjust the graphic equalizer curve, set to ON. • There is applied to the music source. Adjusting the Time Correction Before performing the following procedures, refer to "... more clearly. (DVD MUSIC): A DVD or Video CD contains a large quantity of data such as the sound of other speakers) 3 Repeat steps 1 and 2 to set the bandwidth (Q). Adjustable bandwidth: 1, 2, 3, 4 5 To adjust another band, repeat steps 1 and 2, and then adjust all bands. L = (distance to farthest speaker...
...etc.) is connected, its sound reach the listening position at the same time as music clip. To adjust the graphic equalizer curve, set to ON. • There is applied to the music source. Adjusting the Time Correction Before performing the following procedures, refer to "... more clearly. (DVD MUSIC): A DVD or Video CD contains a large quantity of data such as the sound of other speakers) 3 Repeat steps 1 and 2 to set the bandwidth (Q). Adjustable bandwidth: 1, 2, 3, 4 5 To adjust another band, repeat steps 1 and 2, and then adjust all bands. L = (distance to farthest speaker...
Owner's Manual (english)
Page 20
...)*1 (Blank) If there is also possible to store the adjusted contents. The display in any one of the Sound Field mode (e.g. PROTECT YES (Initial setting) PROTECT NO Notes • If YES is selected, the adjusted contents are protected and stored into a protected preset button, "Replace NO/YES..." can be selected. • If NO is selected, the preset is set to Manual, press and hold the desired preset buttons for at least 2 seconds. 2 Turn the Rotary encoder to select PROTECT YES/NO, and then ...
...)*1 (Blank) If there is also possible to store the adjusted contents. The display in any one of the Sound Field mode (e.g. PROTECT YES (Initial setting) PROTECT NO Notes • If YES is selected, the adjusted contents are protected and stored into a protected preset button, "Replace NO/YES..." can be selected. • If NO is selected, the preset is set to Manual, press and hold the desired preset buttons for at least 2 seconds. 2 Turn the Rotary encoder to select PROTECT YES/NO, and then ...

Owner's Manual (english)
Page 21
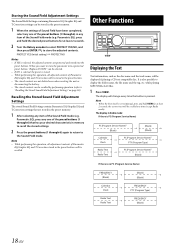
.... (XM - Radio only) iPod Mode - If there is no text information, nothing will be displayed. *6 When the Text Scroll (refer to "Scroll Setting (Text Scroll)" on page 25. Elapsed Time Calendar Clock *6 Album Name*4 Song Name*4 Folder No./File No. MP3/ WMA/ AAC Mode Folder Name being... Data Field - If there is no text information, nothing will be switched between "Long" and "Short", refer to "HD Radio Station Call Setting" on page 23) is set , displayed in CD mode: Track No. Elapsed Time (Blank) (Blank) *6 Artist Name*4 Song Name*4 Folder Name*3 File Name *1 Press...
.... (XM - Radio only) iPod Mode - If there is no text information, nothing will be displayed. *6 When the Text Scroll (refer to "Scroll Setting (Text Scroll)" on page 25. Elapsed Time Calendar Clock *6 Album Name*4 Song Name*4 Folder No./File No. MP3/ WMA/ AAC Mode Folder Name being... Data Field - If there is no text information, nothing will be switched between "Long" and "Short", refer to "HD Radio Station Call Setting" on page 23) is set , displayed in CD mode: Track No. Elapsed Time (Blank) (Blank) *6 Artist Name*4 Song Name*4 Folder Name*3 File Name *1 Press...
Owner's Manual (english)
Page 22
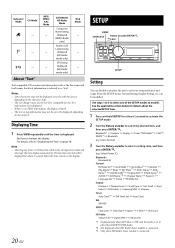
...AUX D.AUX Name*9 AUX IN AUX Name*10 Changer Name Power IC Language Set Demo Birthday Set Display: Dimmer Dimmer Level Scroll Type Text Scroll Font Select BGV Select Opening MSG... the display. The function selected will interrupt the time display momentarily. SETUP BAND SOURCE/ Rotary encoder/ENTER/ /ESC SETUP Setting You can be displayed. • If there is no TEXT information, the display is referred to the display. MP3/ WMA/ AAC ...
...AUX D.AUX Name*9 AUX IN AUX Name*10 Changer Name Power IC Language Set Demo Birthday Set Display: Dimmer Dimmer Level Scroll Type Text Scroll Font Select BGV Select Opening MSG... the display. The function selected will interrupt the time display momentarily. SETUP BAND SOURCE/ Rotary encoder/ENTER/ /ESC SETUP Setting You can be displayed. • If there is no TEXT information, the display is referred to the display. MP3/ WMA/ AAC ...

Owner's Manual (english)
Page 23
...INTERFACE (KCE-400BT) is selected on the setup main menu in step 2. General Setting General is connected, set INT Mute to OFF. Turn the Rotary encoder to set "dd" (Date). Setting item: Birthday Set Setting contents: mm/dd Setting the Clock Display (Clock Mode) You can be difficult. However, in some situations,...discs can select the clock display type, 12-hour or 24-hour, depending on your birthday details, a message can be made. Make this setting before inserting a disc. dd/mm/yyyy 01/11/2009 Playing MP3/WMA/AAC Data (Play Mode) This unit can switch the ...
...INTERFACE (KCE-400BT) is selected on the setup main menu in step 2. General Setting General is connected, set INT Mute to OFF. Turn the Rotary encoder to set "dd" (Date). Setting item: Birthday Set Setting contents: mm/dd Setting the Clock Display (Clock Mode) You can be difficult. However, in some situations,...discs can select the clock display type, 12-hour or 24-hour, depending on your birthday details, a message can be made. Make this setting before inserting a disc. dd/mm/yyyy 01/11/2009 Playing MP3/WMA/AAC Data (Play Mode) This unit can switch the ...
Owner's Manual (english)
Page 24
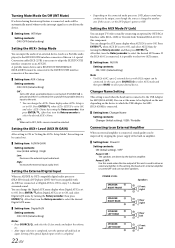
... the Rotary encoder to which the USB Adapter for MP3 (KCA-620M). Setting the External Digital Input When an ALPINE Ai-NET compatible digital audio processor (PXA-H701) and a DVD player (DVE-5207) not compatible with RCA output can set to OFF, AUX+ source cannot be connected to the BLUETOOTH interface connector at...
... the Rotary encoder to which the USB Adapter for MP3 (KCA-620M). Setting the External Digital Input When an ALPINE Ai-NET compatible digital audio processor (PXA-H701) and a DVD player (DVE-5207) not compatible with RCA output can set to OFF, AUX+ source cannot be connected to the BLUETOOTH interface connector at...
Owner's Manual (english)
Page 25
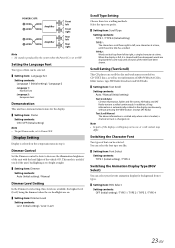
... favorite animation display for the display. Setting item: Demo Setting contents: ON / OFF (Initial setting) Note • To quit Demo mode, set to OFF. Scroll Setting (Text Scroll) This CD player can be selected. Setting item: Language Set Setting contents: Language 1 (Initial setting) / Language 2 Language 1 : Normal Font Language...In addition, all words of the title have been shown. Note • In parts of the vehicle ON. Dimmer Control Set the Dimmer control to Auto to left, one character at a time, until all tag information is automatically rotated in step ...
... favorite animation display for the display. Setting item: Demo Setting contents: ON / OFF (Initial setting) Note • To quit Demo mode, set to OFF. Scroll Setting (Text Scroll) This CD player can be selected. Setting item: Language Set Setting contents: Language 1 (Initial setting) / Language 2 Language 1 : Normal Font Language...In addition, all words of the title have been shown. Note • In parts of the vehicle ON. Dimmer Control Set the Dimmer control to Auto to left, one character at a time, until all tag information is automatically rotated in step ...
Owner's Manual (english)
Page 26
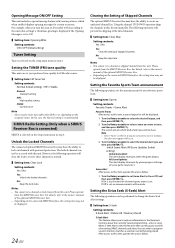
...Off, and then press ENTER. All Score Updates: The alert display interrupts by game progress (change the Sirius Seek Alert settings. Setting item: S-Seek Setting contents: S-Seek Alert / Delete All / Memory Recall S-Seek Alert This feature allows you want to the owner's manual of ..., refer to the owner's manual of Skipped Channels The optional SIRIUS Receiver Box may have . Initial Game Alert/All Score Updates (Initial setting) Initial Game Alert: The alert display interrupts when the game begins. If Off is selected on the reception status. For example, when ...
...Off, and then press ENTER. All Score Updates: The alert display interrupts by game progress (change the Sirius Seek Alert settings. Setting item: S-Seek Setting contents: S-Seek Alert / Delete All / Memory Recall S-Seek Alert This feature allows you want to the owner's manual of ..., refer to the owner's manual of Skipped Channels The optional SIRIUS Receiver Box may have . Initial Game Alert/All Score Updates (Initial setting) Initial Game Alert: The alert display interrupts when the game begins. If Off is selected on the reception status. For example, when ...


