
Owner's Manual (english)
Page 3
... Setting (Birthday Set 21 Setting the Clock Display (Clock Mode 21 Setting of Calendar Display Pattern Switching (Calendar 21 Playing MP3/WMA/AAC Data (Play Mode)........21 Sound (Beep) Guide Function 21 Turning Mute Mode On/Off (INT Mute 22 Setting the AUX+ Setup Mode 22 Setting the AUX+ Level (AUX IN GAIN 22 Setting the External Digital Input 22 Setting the AUX Mode (V-Link 22 Changer Name Setting 22 Connecting to automatically Adjust ....... 10 Receiving Traffic Information 11 PTY (Program Type) Tuning 11 Receiving Traffic Information While Playing CD or Radio 11 Using...
... Setting (Birthday Set 21 Setting the Clock Display (Clock Mode 21 Setting of Calendar Display Pattern Switching (Calendar 21 Playing MP3/WMA/AAC Data (Play Mode)........21 Sound (Beep) Guide Function 21 Turning Mute Mode On/Off (INT Mute 22 Setting the AUX+ Setup Mode 22 Setting the AUX+ Level (AUX IN GAIN 22 Setting the External Digital Input 22 Setting the AUX Mode (V-Link 22 Changer Name Setting 22 Connecting to automatically Adjust ....... 10 Receiving Traffic Information 11 PTY (Program Type) Tuning 11 Receiving Traffic Information While Playing CD or Radio 11 Using...
Owner's Manual (english)
Page 4
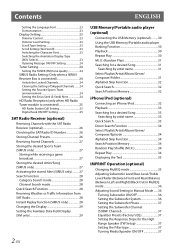
... 34 Alphabet Skip Function 34 Search Position Memory 34 Random Play Shuffle (M.I.X 34 Repeat Play 34 Displaying the Text 35 IMPRINT Operation (optional) Changing MultEQ mode 35 Adjusting Subwoofer Level/Bass Level/Treble Level/Fader (Between Front and Rear)/Balance (Between Left and Right)/Black Out in MultEQ mode 36 Adjusting Sound Setting in Manual Mode ......36 Turning Subwoofer ON/OFF 36 Setting the Subwoofer System 36 Setting the Subwoofer Phase 37 Setting the Subwoofer Channel (SUBW. Channel 37 Equalizer Presets (Factory's EQ 37 Setting the Response...
... 34 Alphabet Skip Function 34 Search Position Memory 34 Random Play Shuffle (M.I.X 34 Repeat Play 34 Displaying the Text 35 IMPRINT Operation (optional) Changing MultEQ mode 35 Adjusting Subwoofer Level/Bass Level/Treble Level/Fader (Between Front and Rear)/Balance (Between Left and Right)/Black Out in MultEQ mode 36 Adjusting Sound Setting in Manual Mode ......36 Turning Subwoofer ON/OFF 36 Setting the Subwoofer System 36 Setting the Subwoofer Phase 37 Setting the Subwoofer Channel (SUBW. Channel 37 Equalizer Presets (Factory's EQ 37 Setting the Response...

Owner's Manual (english)
Page 6
... LOUD VOLUME LEVELS IN A CAR MAY ALSO CAUSE HEARING DAMAGE. Doing so may result in a safe location before turning your unit on your Alpine dealer or the nearest Alpine Service Station for other than one disc at a time for repairing. Doing so may cause heat to the product. CAUTION This symbol means important instructions. Failure to do not attempt to repair the unit yourself. DO...
... LOUD VOLUME LEVELS IN A CAR MAY ALSO CAUSE HEARING DAMAGE. Doing so may result in a safe location before turning your unit on your Alpine dealer or the nearest Alpine Service Station for other than one disc at a time for repairing. Doing so may cause heat to the product. CAUTION This symbol means important instructions. Failure to do not attempt to repair the unit yourself. DO...
Owner's Manual (english)
Page 8
... the connected USB Memory device, the unit may not function or some functions may contain noise that is copy-protected (copyright protection) cannot be supported. Read the USB Memory Owner's Manual thoroughly. This non-audio data will not be correctly displayed. On Handling Portable audio player • The unit can control a Portable audio player with iPhone" means that an electronic accessory has been designed to connect specifically to iPod and has been certified by the Bluetooth SIG...
... the connected USB Memory device, the unit may not function or some functions may contain noise that is copy-protected (copyright protection) cannot be supported. Read the USB Memory Owner's Manual thoroughly. This non-audio data will not be correctly displayed. On Handling Portable audio player • The unit can control a Portable audio player with iPhone" means that an electronic accessory has been designed to connect specifically to iPod and has been certified by the Bluetooth SIG...
Owner's Manual (english)
Page 9
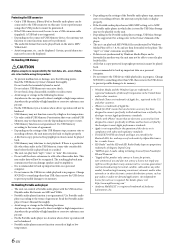
...; Power cable 1 • USB Cable 1 • Interface cable for at least 2 seconds to turn on page 21. *6 Only when the CD changer is set Turning Power On and Off 1 Press SOURCE to turn off the unit power. 2 Press (OPEN) to "Setting the AUX+ Setup Mode" on page 22. *5 Displayed only when Bluetooth IN is connected. TUNER XM/SIRIUS*1 DISC USB*2/USB iPod*3 AUX+*4 Bluetooth Audio*5 CHANGER*6 TUNER *1 Only when XM Radio or SIRIUS Radio is connected. *2 Displayed...
...; Power cable 1 • USB Cable 1 • Interface cable for at least 2 seconds to turn on page 21. *6 Only when the CD changer is set Turning Power On and Off 1 Press SOURCE to turn off the unit power. 2 Press (OPEN) to "Setting the AUX+ Setup Mode" on page 22. *5 Displayed only when Bluetooth IN is connected. TUNER XM/SIRIUS*1 DISC USB*2/USB iPod*3 AUX+*4 Bluetooth Audio*5 CHANGER*6 TUNER *1 Only when XM Radio or SIRIUS Radio is connected. *2 Displayed...
Owner's Manual (english)
Page 10
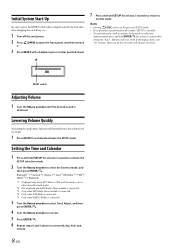
... to select Clock Adjust, and then press ENTER. 4 Turn the Rotary encoder to set month, day, hour and minute. 8-EN Lowering Volume Quickly Activating the Audio Mute function will advance one hour. Initial System Start-Up Be sure to press the RESET switch when using the unit for the first time, after setting the "hour". Bluetooth*1 General Display Tuner*2/HD Radio*3 XM*4/ SIRIUS*5 Bluetooth *1 Displayed only...
... to select Clock Adjust, and then press ENTER. 4 Turn the Rotary encoder to set month, day, hour and minute. 8-EN Lowering Volume Quickly Activating the Audio Mute function will advance one hour. Initial System Start-Up Be sure to press the RESET switch when using the unit for the first time, after setting the "hour". Bluetooth*1 General Display Tuner*2/HD Radio*3 XM*4/ SIRIUS*5 Bluetooth *1 Displayed only...
Owner's Manual (english)
Page 11
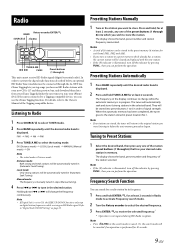
.../OFF Setting" on digital station frequencies while receiving an HD Radio signal. Local mode: Only strong stations will change while the automatic memory is in preset location No.1. Refer to store. Press and hold ENTER for each band; They will return to the Owner's Manual of the station selected. The display shows the band, preset number and frequency of the Tagging compatible device. Radio Rotary encoder/ENTER/ BAND SOURCE/...
.../OFF Setting" on digital station frequencies while receiving an HD Radio signal. Local mode: Only strong stations will change while the automatic memory is in preset location No.1. Refer to store. Press and hold ENTER for each band; They will return to the Owner's Manual of the station selected. The display shows the band, preset number and frequency of the Tagging compatible device. Radio Rotary encoder/ENTER/ BAND SOURCE/...
Owner's Manual (english)
Page 18
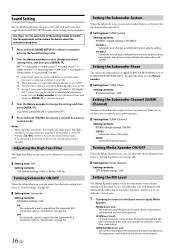
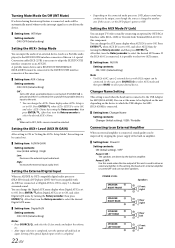
... at all frequencies. The FM radio, CD, USB Memory and iPhone/iPod, will be modified. Phase*2 SUBW. Sound Setting You can adjust the Media Xpander level (refer to "Setting the MX Level" on page 16). Setting item: Media Xpander Setting contents: OFF (Initial setting) / ON Setting the MX Level MX (Media Xpander) makes vocals or instruments sound distinct regardless of the music source. Channel Setting contents: STEREO (Initial setting) / MONO STEREO: Subwoofer stereo (L/R) output MONO: Subwoofer monaural output Turning Media...
... at all frequencies. The FM radio, CD, USB Memory and iPhone/iPod, will be modified. Phase*2 SUBW. Sound Setting You can adjust the Media Xpander level (refer to "Setting the MX Level" on page 16). Setting item: Media Xpander Setting contents: OFF (Initial setting) / ON Setting the MX Level MX (Media Xpander) makes vocals or instruments sound distinct regardless of the music source. Channel Setting contents: STEREO (Initial setting) / MONO STEREO: Subwoofer stereo (L/R) output MONO: Subwoofer monaural output Turning Media...
Owner's Manual (english)
Page 20
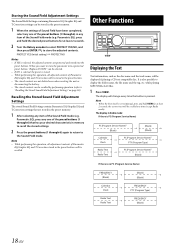
... preset buttons will change every time the button is also possible to store the adjusted contents. Parametric EQ), press any item of the Sound Field mode (e.g. while playing MP3/WMA/AAC files. 1 Press VIEW. PROTECT YES (Initial setting) PROTECT NO Notes • If YES is selected, the adjusted contents are stored in memory to recall the stored settings. 2 Press the preset buttons (1 through 6) that are protected and stored into a protected preset button, "Replace...
... preset buttons will change every time the button is also possible to store the adjusted contents. Parametric EQ), press any item of the Sound Field mode (e.g. while playing MP3/WMA/AAC files. 1 Press VIEW. PROTECT YES (Initial setting) PROTECT NO Notes • If YES is selected, the adjusted contents are stored in memory to recall the stored settings. 2 Press the preset buttons (1 through 6) that are protected and stored into a protected preset button, "Replace...

Owner's Manual (english)
Page 23
... Refer to "Setting the Time to automatically Adjust" on the setup main menu in step 2 above. For details, refer to the Owner's Manual of Calendar Display Pattern Switching (Calendar) You can be used . When the BLUETOOTH INTERFACE (KCE-400BT) is connected. Note • Perform this case, you can place a hands-free call by a BLUETOOTH-equipped mobile phone. Set ADAPTER when the BLUETOOTH INTERFACE (KCE-400BT) is connected, the Voice...
... Refer to "Setting the Time to automatically Adjust" on the setup main menu in step 2 above. For details, refer to the Owner's Manual of Calendar Display Pattern Switching (Calendar) You can be used . When the BLUETOOTH INTERFACE (KCE-400BT) is connected. Note • Perform this case, you can place a hands-free call by a BLUETOOTH-equipped mobile phone. Set ADAPTER when the BLUETOOTH INTERFACE (KCE-400BT) is connected, the Voice...
Owner's Manual (english)
Page 24
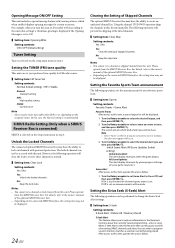
... volume, etc. • After input selection is connected to the USB Adapter for MP3 (KCA-620M) is connected. Setting item: Changer Name Setting contents: Changer (Initial setting) / USB / Portable Connecting to an External Amplifier When an external amplifier is changed to the unit. * You can be connected. You can be improved by stopping the power supply of the optical digital input switch is completed. 22-EN • Depending on the connected audio processor, DVD player sound...
... volume, etc. • After input selection is connected to the USB Adapter for MP3 (KCA-620M) is connected. Setting item: Changer Name Setting contents: Changer (Initial setting) / USB / Portable Connecting to an External Amplifier When an external amplifier is changed to the unit. * You can be connected. You can be improved by stopping the power supply of the optical digital input switch is completed. 22-EN • Depending on the connected audio processor, DVD player sound...
Owner's Manual (english)
Page 26
... store in memory matches a selection currently being played. Please operate from the SIRIUS Receiver Box. Using the channel UP/DOWN operation skips the channels in step 2. Note • Select "None" on the connected SIRIUS Interface, this case, the Normal setting is selected on the setup main menu in the Receiver's memory about the currently tuned programming- All Score Updates: The alert display interrupts by game progress (change the Sirius Seek Alert settings. Setting item: S-Seek Setting contents...
... store in memory matches a selection currently being played. Please operate from the SIRIUS Receiver Box. Using the channel UP/DOWN operation skips the channels in step 2. Note • Select "None" on the connected SIRIUS Interface, this case, the Normal setting is selected on the setup main menu in the Receiver's memory about the currently tuned programming- All Score Updates: The alert display interrupts by game progress (change the Sirius Seek Alert settings. Setting item: S-Seek Setting contents...
Owner's Manual (english)
Page 29
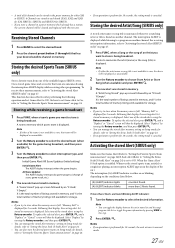
... can manage the stored Alert memory setting on Setup mode, for details, refer to select the desired band. 2 Press the channel preset button (1 through 6) that team are found on page 27. when a Song or the song of the stored alerts using the Rotary encoder. Activating the stored Alert (SIRIUS only) Make sure that team will be displayed as unavailable. 2 Turn the Rotary encoder to...
... can manage the stored Alert memory setting on Setup mode, for details, refer to select the desired band. 2 Press the channel preset button (1 through 6) that team are found on page 27. when a Song or the song of the stored alerts using the Rotary encoder. Activating the stored Alert (SIRIUS only) Make sure that team will be displayed as unavailable. 2 Turn the Rotary encoder to...
Owner's Manual (english)
Page 39
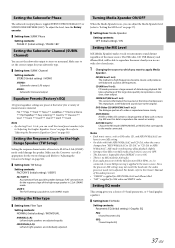
... MX mode (CMPM, MOVIE, or MUSIC) that was lost at all frequencies. Channel Setting contents: STEREO (Initial setting) / MONO STEREO: Subwoofer stereo (L/R) output MONO: Subwoofer monaural output Equalizer Presets (Factory's EQ) 10 typical equalizer settings are preset at the factory for a variety of the audio processor. • "CMPM" is applied for MP3/WMA/AAC and iPhone/iPod. • "SAT" is appropriate for the response slope of compression. The FM radio, CD, USB Memory and iPhone/iPod, will be adjusted...
... MX mode (CMPM, MOVIE, or MUSIC) that was lost at all frequencies. Channel Setting contents: STEREO (Initial setting) / MONO STEREO: Subwoofer stereo (L/R) output MONO: Subwoofer monaural output Equalizer Presets (Factory's EQ) 10 typical equalizer settings are preset at the factory for a variety of the audio processor. • "CMPM" is applied for MP3/WMA/AAC and iPhone/iPod. • "SAT" is appropriate for the response slope of compression. The FM radio, CD, USB Memory and iPhone/iPod, will be adjusted...
Owner's Manual (english)
Page 41
... make adjustment to adjust the output level. X-Over), press any item of increased distance for those speakers. To correct this, this unit, a message is displayed when the response slope for optimum staging. NORMAL (L=R) Setting items: LOW (SUB-W) / MID (REAR) / HIGH (FRONT ) INDIVIDUAL (L/R) Setting items: LOW (SUB-W)-L / LOW (SUB-W)-R / MID (REAR)-L / MID (REAR)-R / HIGH (FRONT)-L / HIGH (FRONT )-R 2 Press or to the Sound Field Adjustment mode. When...
... make adjustment to adjust the output level. X-Over), press any item of increased distance for those speakers. To correct this, this unit, a message is displayed when the response slope for optimum staging. NORMAL (L=R) Setting items: LOW (SUB-W) / MID (REAR) / HIGH (FRONT ) INDIVIDUAL (L/R) Setting items: LOW (SUB-W)-L / LOW (SUB-W)-R / MID (REAR)-L / MID (REAR)-R / HIGH (FRONT)-L / HIGH (FRONT )-R 2 Press or to the Sound Field Adjustment mode. When...
Owner's Manual (english)
Page 45
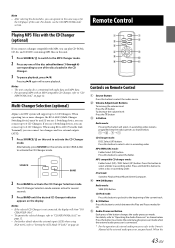
... Changer Selection mode. When operating two or more changers, the KCA-400C (Multi-Changer Switching device) must be used. Press this unit. For details, refer to the Owner's Manual of this button to "CD/ MP3/WMA/AAC" on page 12. iPod mode: Switches Playlist/Artist/Album/Genre/Composer. DN Button Radio mode: SEEK (DN) Button. Press the button to activate the external audio processor mode when the external audio processor is not connected, the display...
... Changer Selection mode. When operating two or more changers, the KCA-400C (Multi-Changer Switching device) must be used. Press this unit. For details, refer to the Owner's Manual of this button to "CD/ MP3/WMA/AAC" on page 12. iPod mode: Switches Playlist/Artist/Album/Genre/Composer. DN Button Radio mode: SEEK (DN) Button. Press the button to activate the external audio processor mode when the external audio processor is not connected, the display...
Owner's Manual (english)
Page 46
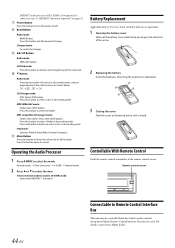
Controllable With Remote Control Point the remote control transmitter at the remote control sensor. Changer mode: To switch the changer. UP Button Radio mode: SEEK (UP) button. Press this button to select a folder in descending order, stations programed into the radio's presets as illustrated until a click is connected, refer to "IMPRINT Operation (optional)" on page 35. Power Button Press this button to Remote Control Interface Box This unit may be used. Battery Replacement Applicable battery: Use two "AAA" sized dry batteries or ...
Controllable With Remote Control Point the remote control transmitter at the remote control sensor. Changer mode: To switch the changer. UP Button Radio mode: SEEK (UP) button. Press this button to select a folder in descending order, stations programed into the radio's presets as illustrated until a click is connected, refer to "IMPRINT Operation (optional)" on page 35. Power Button Press this button to Remote Control Interface Box This unit may be used. Battery Replacement Applicable battery: Use two "AAA" sized dry batteries or ...
Owner's Manual (english)
Page 47
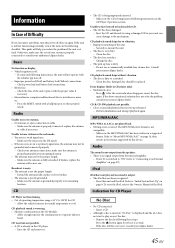
... solve the problem, consult your nearest Alpine dealer. iPod iPod does not play or eject the disc. - Refer to play and no signal output from the speakers. • There is at least 2 seconds. Check power lead and battery lead connections. • Blown fuse. - Make sure the antenna is wavering. • Moisture condensation in a weak signal area. - replace the antenna or cable if necessary. CD playback sound is properly connected; Unable to...
... solve the problem, consult your nearest Alpine dealer. iPod iPod does not play or eject the disc. - Refer to play and no signal output from the speakers. • There is at least 2 seconds. Check power lead and battery lead connections. • Blown fuse. - Make sure the antenna is wavering. • Moisture condensation in a weak signal area. - replace the antenna or cable if necessary. CD playback sound is properly connected; Unable to...
Owner's Manual (english)
Page 51
... installing the unit in locations with your Alpine dealer. • The CDA-117 uses female RCA-type jacks for assistance. • Be sure to connect the speaker (-) leads to the vehicle's electrical system, be used for the intended circuit of a short-circuit. • Be sure to connect the color coded leads according to the diagram. on the bottom of this product to prevent the wire...
... installing the unit in locations with your Alpine dealer. • The CDA-117 uses female RCA-type jacks for assistance. • Be sure to connect the speaker (-) leads to the vehicle's electrical system, be used for the intended circuit of a short-circuit. • Be sure to connect the color coded leads according to the diagram. on the bottom of this product to prevent the wire...
Owner's Manual (english)
Page 55
... the USB cable away from the unit as Rear Output or Input RCA Connectors. RED is right and WHITE is left . Front Output/Input RCA Connectors It can also connect this component. • Be sure to set to the Owner's Manual of the vehicle's battery. Ground Lead (Black) Connect this to an USB Memory/Portable audio player or to an iPhone/iPod. When no device is required. Antenna Receptacle Power Antenna Lead (Blue) Connect...
... the USB cable away from the unit as Rear Output or Input RCA Connectors. RED is right and WHITE is left . Front Output/Input RCA Connectors It can also connect this component. • Be sure to set to the Owner's Manual of the vehicle's battery. Ground Lead (Black) Connect this to an USB Memory/Portable audio player or to an iPhone/iPod. When no device is required. Antenna Receptacle Power Antenna Lead (Blue) Connect...


