

User Manual
Page 6
...product will detect the life of displaying inverted images for ceiling mount installation. There are dangerous high voltages inside may hurt you. Only use acer ceiling mount kit for replacement. • Do not operate lamps beyond the rated lamp life. It can lead to the sun. The ...the filter/ventilation slots clogged with any electronic components unless the projector is securely installed. Please be sure to break on the projector or remote controller. • The lamp becomes extremely hot during operation. In this product to break or drop it to change the lamp when ...
...product will detect the life of displaying inverted images for ceiling mount installation. There are dangerous high voltages inside may hurt you. Only use acer ceiling mount kit for replacement. • Do not operate lamps beyond the rated lamp life. It can lead to the sun. The ...the filter/ventilation slots clogged with any electronic components unless the projector is securely installed. Please be sure to break on the projector or remote controller. • The lamp becomes extremely hot during operation. In this product to break or drop it to change the lamp when ...

User Manual
Page 11
... thing first x Usage notes x Precautions x Introduction 1 Product Features 1 Package Overview 2 Projector Overview 3 Projector Outlook 3 Control Panel 4 Remote Control Layout 6 Getting Started 9 Connecting the Projector 9 Connecting the Projector for Wireless Function 10 Turning the Projector On/Off 11 Turning on ... size and distance 14 How to get a preferred image size by adjusting distance and zoom 18 User Controls 22 Acer Empowering Technology 22 Onscreen Display (OSD) Menus 23 Color setting 24 Image setting 25 Management setting 27 Audio setting ...
... thing first x Usage notes x Precautions x Introduction 1 Product Features 1 Package Overview 2 Projector Overview 3 Projector Outlook 3 Control Panel 4 Remote Control Layout 6 Getting Started 9 Connecting the Projector 9 Connecting the Projector for Wireless Function 10 Turning the Projector On/Off 11 Turning on ... size and distance 14 How to get a preferred image size by adjusting distance and zoom 18 User Controls 22 Acer Empowering Technology 22 Onscreen Display (OSD) Menus 23 Color setting 24 Image setting 25 Management setting 27 Audio setting ...
User Manual
Page 13
...• Empowering Key reveals Acer Empowering Technology utilities (Acer eView, eTimer, eOpening Management) for easy adjustment of settings • P1165/P1165P/P1265/P1265P: Equipped with DVI ...connection supporting HDCP P5260i/P5270/P5280/P5370W series: Equipped with DVI and HDMI™ connections supporting HDCP • Advanced digital keystone correction optimizes presentations • Multi-language onscreen display (OSD) menus • Full-function remote...
...• Empowering Key reveals Acer Empowering Technology utilities (Acer eView, eTimer, eOpening Management) for easy adjustment of settings • P1165/P1165P/P1265/P1265P: Equipped with DVI ...connection supporting HDCP P5260i/P5270/P5280/P5370W series: Equipped with DVI and HDMI™ connections supporting HDCP • Advanced digital keystone correction optimizes presentations • Multi-language onscreen display (OSD) menus • Full-function remote...

User Manual
Page 14
... cord VGA cable Compostive video cable 2 x Batteries Carrying case DVI-D Cable (P5260i/P5270/P5280/ P5370W Series) #A #B Security card Acer Projector 2 x User's Guide (Wireless CD for P5260i Series) PgUp Quick Start Guide PgDn Remote control (#B for P5260i Series ) Wireless antenna (P5260i Series) Check to make sure your dealer immediately if any thing is...
... cord VGA cable Compostive video cable 2 x Batteries Carrying case DVI-D Cable (P5260i/P5270/P5280/ P5370W Series) #A #B Security card Acer Projector 2 x User's Guide (Wireless CD for P5260i Series) PgUp Quick Start Guide PgDn Remote control (#B for P5260i Series ) Wireless antenna (P5260i Series) Check to make sure your dealer immediately if any thing is...

User Manual
Page 15
English 3 Projector Overview Projector Outlook Front / upper side 3 8 1 2 3 4 5 6 7 # Description 1 Zoom ring 2 Focus ring 3 Remote control receiver 4 Zoom lens Rear side # Description 5 Lens cap 6 Elevator button 7 Elevator foot 8 Control panel 1 2345 6 7 8 11 12 9 13 10 14 15 16 17 18
English 3 Projector Overview Projector Outlook Front / upper side 3 8 1 2 3 4 5 6 7 # Description 1 Zoom ring 2 Focus ring 3 Remote control receiver 4 Zoom lens Rear side # Description 5 Lens cap 6 Elevator button 7 Elevator foot 8 Control panel 1 2345 6 7 8 11 12 9 13 10 14 15 16 17 18

User Manual
Page 18
...ZOOM Zooms the projector display in Japanese market. 11 Empowering Unique Acer functions: eOpening, eView, eTimer key Management. 12 KEYSTONE Adjusts the image to activate the laser pointer. transmitter 2 Laser pointer Aim the remote at the viewing screen, press and hold this button to ...6 SOURCE Press "SOURCE" to choose from RGB, Component-p, Component-i, S-Video, Composite, DVI-D, Video and HDTV sources. 7 POWER Refer to the projector. 6 Remote Control Layout 2 1 English 7 10 5 6 3 4 8 31 13 12 9 30 28 29 14 11 16 18 15 17 20 22 19 21...
...ZOOM Zooms the projector display in Japanese market. 11 Empowering Unique Acer functions: eOpening, eView, eTimer key Management. 12 KEYSTONE Adjusts the image to activate the laser pointer. transmitter 2 Laser pointer Aim the remote at the viewing screen, press and hold this button to ...6 SOURCE Press "SOURCE" to choose from RGB, Component-p, Component-i, S-Video, Composite, DVI-D, Video and HDTV sources. 7 POWER Refer to the projector. 6 Remote Control Layout 2 1 English 7 10 5 6 3 4 8 31 13 12 9 30 28 29 14 11 16 18 15 17 20 22 19 21...

User Manual
Page 23
... cables are securely connected. • If you connect to multiple sources at the same time, use the "Source" button on either control panel or the remote control or direct source key on the lens door. 2 Ensure that the power cord and signal cable are securely connected. English 11 Turning the Projector...
... cables are securely connected. • If you connect to multiple sources at the same time, use the "Source" button on either control panel or the remote control or direct source key on the lens door. 2 Ensure that the power cord and signal cable are securely connected. English 11 Turning the Projector...

User Manual
Page 35
... for feature setting. The OSD menu will close and the projector will return to the main menu. • To exit OSD, press "MENU" on the remote control or control panel. • When the OSD is displayed, use the keys to make image adjustments and change a variety of settings. Main menu Sub...; Select the next item to be adjusted in the main menu. Using the OSD menus • To open the OSD menu, press "MENU" on the remote control or control panel again. English 23 Onscreen Display (OSD) Menus The projector has multilingual OSD that allow you to select any item in the...
... for feature setting. The OSD menu will close and the projector will return to the main menu. • To exit OSD, press "MENU" on the remote control or control panel. • When the OSD is displayed, use the keys to make image adjustments and change a variety of settings. Main menu Sub...; Select the next item to be adjusted in the main menu. Using the OSD menus • To open the OSD menu, press "MENU" on the remote control or control panel again. English 23 Onscreen Display (OSD) Menus The projector has multilingual OSD that allow you to select any item in the...

User Manual
Page 39
... Screen Capture Choose "On" to dim the projector lamp which will "lock" the current source channel unless you press "Source" button on the remote control for other signals if the current input signal is lost. Choose "Off" to confirm the action. The projector will take effect when you... exit the OSD menu. • Acer: The default startup screen of your customized startup screen. For details, refer to the "Image Setting" section. • Change the "Startup Screen" from...
... Screen Capture Choose "On" to dim the projector lamp which will "lock" the current source channel unless you press "Source" button on the remote control for other signals if the current input signal is lost. Choose "Off" to confirm the action. The projector will take effect when you... exit the OSD menu. • Acer: The default startup screen of your customized startup screen. For details, refer to the "Image Setting" section. • Change the "Startup Screen" from...

User Manual
Page 40
... refer to enter password when switch on the projector . Press to enable the security function. Timeout(Min.) Once "Security" is enabled, your password on the remote control and press "MENU" to confirm. • Press to delete character. • Enter the password when you see "Confirm Password" displayed. • The password should...
... refer to enter password when switch on the projector . Press to enable the security function. Timeout(Min.) Once "Security" is enabled, your password on the remote control and press "MENU" to confirm. • Press to delete character. • Enter the password when you see "Confirm Password" displayed. • The password should...

User Manual
Page 44
... Click the "Advanced Properties" button. 32 English 2 Partial, scrolling or incorrectly displayed image(For PC • Press "RESYNC" on the remote control or control or incorrectly displayed image (For notebooks) panel. • For an incorrectly displayed image: • Follow the steps for detailed... equal to SXGA (1280 x 1024)(P1165/P1165P) or SXGA+ (1400 x 1050)(P1265/P1265P) or UXGA (1600 x 1200) (P5260i/P5270/P5280/P5370W series). 3 Partial, scrolling • Press "RESYNC" on the remote control or control panel. • For an incorrectly displayed image: • Open...
... Click the "Advanced Properties" button. 32 English 2 Partial, scrolling or incorrectly displayed image(For PC • Press "RESYNC" on the remote control or control or incorrectly displayed image (For notebooks) panel. • For an incorrectly displayed image: • Follow the steps for detailed... equal to SXGA (1280 x 1024)(P1165/P1165P) or SXGA+ (1400 x 1050)(P1265/P1265P) or UXGA (1600 x 1200) (P5260i/P5270/P5280/P5370W series). 3 Partial, scrolling • Press "RESYNC" on the remote control or control panel. • For an incorrectly displayed image: • Open...
User Manual
Page 45
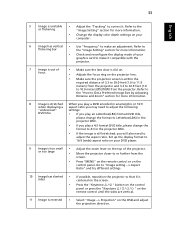
... to correct it is sides centered on the screen. • Press the "Keystone / " button on the control panel or press the "Keystone / / / " on the remote control until the sides are vertical. 11 Image is reversed • Select "Image --> Projection" on the OSD and adjust the projection direction. Refer to the... OSD. • If the image is still stretched, you will also need to or further from the screen. • Press "MENU" on the remote control or on the projector lens. • Make sure the projection screen is slid on. • Adjusts the focus ring on the control panel. ...
... to correct it is sides centered on the screen. • Press the "Keystone / " button on the control panel or press the "Keystone / / / " on the remote control until the sides are vertical. 11 Image is reversed • Select "Image --> Projection" on the OSD and adjust the projection direction. Refer to the... OSD. • If the image is still stretched, you will also need to or further from the screen. • Press "MENU" on the remote control or on the projector lens. • Make sure the projection screen is slid on. • Adjusts the focus ring on the control panel. ...

User Manual
Page 53
...Throw ratio Horizontal scan rate Vertical refresh scan rate Lamp type Keystone correction Audio Weight Dimensions (W x D x H) Remote control DLP® P1165/P1165P: Native: SVGA (800 x 600) , Maximum: SXGA (1280 x 1024), WXGA+ (1440 x 900) P1265/P1265P: Native: XGA (1024 x 768), Maximum: SXGA+ (1400 x 1050), WXGA+ (1440 x 900) P5260i...kg (6.6 lbs.) 299 mm x 229 mm x 93 mm (11.8" x 9.0" x 3.7") Laser pointer function 41 English Specifications The specifications listed below are subject to Acer's published marketing specifications. For final specs, please refer to change without notice.
...Throw ratio Horizontal scan rate Vertical refresh scan rate Lamp type Keystone correction Audio Weight Dimensions (W x D x H) Remote control DLP® P1165/P1165P: Native: SVGA (800 x 600) , Maximum: SXGA (1280 x 1024), WXGA+ (1440 x 900) P1265/P1265P: Native: XGA (1024 x 768), Maximum: SXGA+ (1400 x 1050), WXGA+ (1440 x 900) P5260i...kg (6.6 lbs.) 299 mm x 229 mm x 93 mm (11.8" x 9.0" x 3.7") Laser pointer function 41 English Specifications The specifications listed below are subject to Acer's published marketing specifications. For final specs, please refer to change without notice.

User Manual
Page 54
42 English Digital Zoom Power supply Power consumption Operating temperature I/O connectors Standard package contents 2X AC input 100 - 240 V, 50 - 60 Hz P1165/P1165P/P1265/P1265P: 230 W P5260i series: 275 W P5270/P5370W series: 310 W P5280 series: 355 W 5ºC to 35ºC / 41ºF to 95ºF •... x1 • VGA output x1 • DVI-D x1: with HDCP support • 3.5 mm audio jack input x1 • RS232 x1 • USB x1: for remote computer control Below items are for P5270/P5280/P5370W series only: • HDMI x 1 • VGA input x 2 • 3.5 mm audio jack input x2 Below...
42 English Digital Zoom Power supply Power consumption Operating temperature I/O connectors Standard package contents 2X AC input 100 - 240 V, 50 - 60 Hz P1165/P1165P/P1265/P1265P: 230 W P5260i series: 275 W P5270/P5370W series: 310 W P5280 series: 355 W 5ºC to 35ºC / 41ºF to 95ºF •... x1 • VGA output x1 • DVI-D x1: with HDCP support • 3.5 mm audio jack input x1 • RS232 x1 • USB x1: for remote computer control Below items are for P5270/P5280/P5370W series only: • HDMI x 1 • VGA input x 2 • 3.5 mm audio jack input x2 Below...


