

User Manual
Page 2
... number and purchase information. "HDMI™, the HDMI logo and High-Definition Multimedia Interface are recorded on the label affixed to their respective companies. Acer Incorporated. Acer Projector K135/K135P/K135S/L221/LK-W12/K132/L221F/LK-W12L Series User's Guide Original Issue: 02/2013 Changes may be made periodically to the contents hereof and..., with respect to the information in the space provided below. Record the model number, serial number, purchase date and place of purchase information in this manual or supplementary documents and publications.
... number and purchase information. "HDMI™, the HDMI logo and High-Definition Multimedia Interface are recorded on the label affixed to their respective companies. Acer Incorporated. Acer Projector K135/K135P/K135S/L221/LK-W12/K132/L221F/LK-W12L Series User's Guide Original Issue: 02/2013 Changes may be made periodically to the contents hereof and..., with respect to the information in the space provided below. Record the model number, serial number, purchase date and place of purchase information in this manual or supplementary documents and publications.
User Manual
Page 26
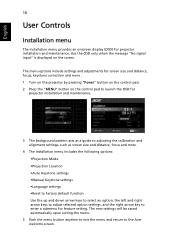
... and more . 4 The Installation menu includes the following options: •Projection Mode •Projection Location •Auto Keystone settings •Manual Keystone settings •Language settings •Reset to factory default function Use the up and down arrow keys to select an option, the left... to adjust selected option settings, and the right arrow key to the Acer welcome screen. The menu options include settings and adjustments for screen size and distance, focus, keystone correction and more . 1 Turn on the projector by pressing "Power" button on the control pad. 2 Press the ...
... and more . 4 The Installation menu includes the following options: •Projection Mode •Projection Location •Auto Keystone settings •Manual Keystone settings •Language settings •Reset to factory default function Use the up and down arrow keys to select an option, the left... to adjust selected option settings, and the right arrow key to the Acer welcome screen. The menu options include settings and adjustments for screen size and distance, focus, keystone correction and more . 1 Turn on the projector by pressing "Power" button on the control pad. 2 Press the ...
User Manual
Page 36
...) aspect ratio on your computer. 6 Image has vertical • Use "Frequency" to Letterbox(LBX) in use. Refer to your computer's manual for detailed information. • If you are using an Apple® Mac® OS based notebook: In System Preferences, open Display and ...], NEC [Fn]+[F3], Toshiba [Fn]+[F5] • If you experience difficulty changing resolutions or your monitor freezes, restart all equipment including the projector. 4 The screen of the notebook computer is not displaying your computer. • Press the toggle output settings. 26 English 3 Partial, scrolling ...
...) aspect ratio on your computer. 6 Image has vertical • Use "Frequency" to Letterbox(LBX) in use. Refer to your computer's manual for detailed information. • If you are using an Apple® Mac® OS based notebook: In System Preferences, open Display and ...], NEC [Fn]+[F3], Toshiba [Fn]+[F5] • If you experience difficulty changing resolutions or your monitor freezes, restart all equipment including the projector. 4 The screen of the notebook computer is not displaying your computer. • Press the toggle output settings. 26 English 3 Partial, scrolling ...


