
Operating Instructions
Page 3
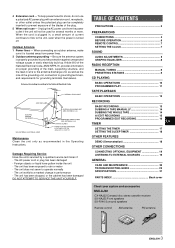
...Requiring Service Have the units serviced by a qualified service technician if: - TABLE OF CONTENTS PRECAUTIONS 2 PREPARATIONS CONNECTIONS 4 BEFORE OPERATION 6 REMOTE CONTROL 7 SETTING THE CLOCK 7 SOUND AUDIO ADJUSTMENTS 8 GRAPHIC EQUALIZER 8 RADIO RECEPTION MANUAL TUNING 9 PRESETTING STATIONS 9 CD PLAYING BASIC ...GUIDE 20 SPECIFICATIONS 21 PARTS INDEX Back cover Check your system and accessories NSX-AJ22 CX-NAJ22 Compact disc stereo cassette receiver SX-NAJ33 Front speakers SX-R140 Surround speakers Remote control AM antenna FM antenna 3 ENGLISH Outdoor Antenna 1 Power lines ...
...Requiring Service Have the units serviced by a qualified service technician if: - TABLE OF CONTENTS PRECAUTIONS 2 PREPARATIONS CONNECTIONS 4 BEFORE OPERATION 6 REMOTE CONTROL 7 SETTING THE CLOCK 7 SOUND AUDIO ADJUSTMENTS 8 GRAPHIC EQUALIZER 8 RADIO RECEPTION MANUAL TUNING 9 PRESETTING STATIONS 9 CD PLAYING BASIC ...GUIDE 20 SPECIFICATIONS 21 PARTS INDEX Back cover Check your system and accessories NSX-AJ22 CX-NAJ22 Compact disc stereo cassette receiver SX-NAJ33 Front speakers SX-R140 Surround speakers Remote control AM antenna FM antenna 3 ENGLISH Outdoor Antenna 1 Power lines ...
Operating Instructions
Page 7
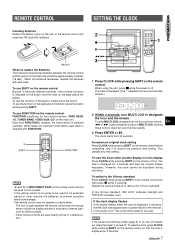
...and "PM12:00" indicates noon. Turning MULTI JOG changes both decks, each deck is selected with new ones. To use FUNCTION on the remote control FUNCTION substitutes for 4 seconds. 7 ENGLISH When tapes are used for 4 seconds and then the original display reappears. To view the ... the hours and minutes flashes.) 2 Within 4 seconds, turn MULTI JOG to replace the batteries The maximum operational distance between the remote control and the remote sensor inside the display window is indicated on the button, and the other on the main unit should be reset. When this ...
...and "PM12:00" indicates noon. Turning MULTI JOG changes both decks, each deck is selected with new ones. To use FUNCTION on the remote control FUNCTION substitutes for 4 seconds. 7 ENGLISH When tapes are used for 4 seconds and then the original display reappears. To view the ... the hours and minutes flashes.) 2 Within 4 seconds, turn MULTI JOG to replace the batteries The maximum operational distance between the remote control and the remote sensor inside the display window is indicated on the button, and the other on the main unit should be reset. When this ...
Operating Instructions
Page 8
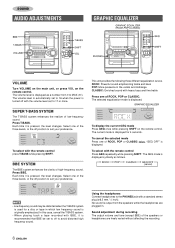
... (except BBE) of ROCK, POP or CLASSIC. SOUND AUDIO ADJUSTMENTS GRAPHIC EQUALIZER VOLUME Turn VOLUME on the main unit, or press VOL on the remote control. The volume level is recommended that BBE be distorted when the T-BASS system is displayed. Each time it is displayed cyclically as a number...or CLASSIC twice. Press BBE. The current mode is displayed for a disc or tape in the vocals and midrange CLASSIC: Enriched sound with the remote control press T-BASS while pressing SHIFT. Select one of the three levels, or the off position to 17 or more. No sound is originally ...
... (except BBE) of ROCK, POP or CLASSIC. SOUND AUDIO ADJUSTMENTS GRAPHIC EQUALIZER VOLUME Turn VOLUME on the main unit, or press VOL on the remote control. The volume level is recommended that BBE be distorted when the T-BASS system is displayed. Each time it is displayed cyclically as a number...or CLASSIC twice. Press BBE. The current mode is displayed for a disc or tape in the vocals and midrange CLASSIC: Enriched sound with the remote control press T-BASS while pressing SHIFT. Select one of the three levels, or the off position to 17 or more. No sound is originally ...
Operating Instructions
Page 9
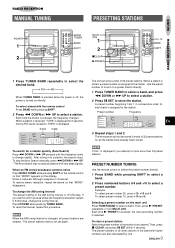
... the AM tuning interval is displayed if you use this procedure. Then, press c PRESET repeatedly or turn MULTI JOG. PRESET NUMBER TUNING Use the remote control to select the preset number directly. 1 Press BAND while pressing SHIFT to select a band. 2 Press numbered buttons 0-9 and +10 to select...Selecting a preset number on the display. A preset number beginning from 1 in an area where the frequency allocation system is turned on the remote control so that "MONO" disappears. The next station will not be cleared. When an FM stereo broadcast contains noise Press MONO TUNER while ...
... the AM tuning interval is displayed if you use this procedure. Then, press c PRESET repeatedly or turn MULTI JOG. PRESET NUMBER TUNING Use the remote control to select the preset number directly. 1 Press BAND while pressing SHIFT to select a band. 2 Press numbered buttons 0-9 and +10 to select...Selecting a preset number on the display. A preset number beginning from 1 in an area where the frequency allocation system is turned on the remote control so that "MONO" disappears. The next station will not be cleared. When an FM stereo broadcast contains noise Press MONO TUNER while ...
Operating Instructions
Page 10
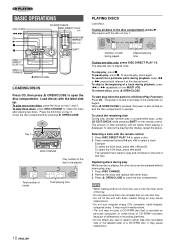
... playing time To play one disc only, press DISC DIRECT PLAY 1-3. To restore the playing time display, repeat the above. Selecting a track with the remote control 1 Press DISC DIRECT PLAY 1-3 to select a disc. 2 Press numbered buttons 0-9 and +10 to rotate the trays after placing two discs. Load... to close the disc compartment. • When loading an 8-cm (3-inch) disc, put it at the desired point. Place the third disc on the remote control. To remove discs, press z OPEN/CLOSE. Example: To select the 25th track, press +10, +10 and 5. Doing so may cause malfunctions....
... playing time To play one disc only, press DISC DIRECT PLAY 1-3. To restore the playing time display, repeat the above. Selecting a track with the remote control 1 Press DISC DIRECT PLAY 1-3 to select a disc. 2 Press numbered buttons 0-9 and +10 to rotate the trays after placing two discs. Load... to close the disc compartment. • When loading an 8-cm (3-inch) disc, put it at the desired point. Place the third disc on the remote control. To remove discs, press z OPEN/CLOSE. Example: To select the 25th track, press +10, +10 and 5. Doing so may cause malfunctions....
Operating Instructions
Page 11
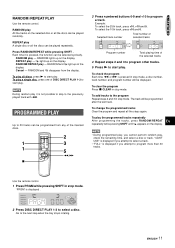
CD PLAYING RANDOM /REPEAT PLAY Use the remote control. RANDOM lights up on the display. RANDOM and " light up on the selected disc or all discs, press c to select a disc. To clear the .... To add tracks to the next step when the tray stops rotating. Each time it is displayed if you attempt to program a track. Use the remote control. 1 Press PRGM while pressing SHIFT in stop mode, a disc number, track number, and program number will be selected cyclically. RANDOM play a single disc, press...
CD PLAYING RANDOM /REPEAT PLAY Use the remote control. RANDOM lights up on the display. RANDOM and " light up on the selected disc or all discs, press c to select a disc. To clear the .... To add tracks to the next step when the tray stops rotating. Each time it is displayed if you attempt to program a track. Use the remote control. 1 Press PRGM while pressing SHIFT in stop mode, a disc number, track number, and program number will be selected cyclically. RANDOM play a single disc, press...
Operating Instructions
Page 15
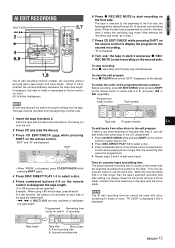
...a point halfway into deck 2. "B" is displayed. 8 Turn over the tape in the CD compartment . 1 Press CD EDIT/CHECK while pressing SHIFT on the remote control to select side A or B. 2 Press DISC DIRECT PLAY 1-3 to be used with the minus mark). The tape must be specified. The AI edit ...recording function cannot be recorded on the remote control to designate the tape length. When the last track programmed for side A of tracks is rearranged so that "EDIT" disappears on the ...
...a point halfway into deck 2. "B" is displayed. 8 Turn over the tape in the CD compartment . 1 Press CD EDIT/CHECK while pressing SHIFT on the remote control to select side A or B. 2 Press DISC DIRECT PLAY 1-3 to be used with the minus mark). The tape must be specified. The AI edit ...recording function cannot be recorded on the remote control to designate the tape length. When the last track programmed for side A of tracks is rearranged so that "EDIT" disappears on the ...
Operating Instructions
Page 16
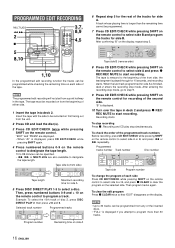
... be recorded on first facing out from the beginning of the programmed track numbers Before recording, press CD EDIT/CHECK while pressing SHIFT on the remote control. "EDIT" and "PRGM" are also available to be specified. • f, g or MULTI JOG are displayed. • When "AI" is displayed,... press CD EDIT/CHECK while pressing SHIFT again. 4 Press numbered buttons 0-9 on each side Press CD EDIT/CHECK while pressing SHIFT on the remote control to select side A or B, and press s CLEAR to program a track. To check the order of either side. 1 Insert the tape into ...
... be recorded on first facing out from the beginning of the programmed track numbers Before recording, press CD EDIT/CHECK while pressing SHIFT on the remote control. "EDIT" and "PRGM" are also available to be specified. • f, g or MULTI JOG are displayed. • When "AI" is displayed,... press CD EDIT/CHECK while pressing SHIFT again. 4 Press numbered buttons 0-9 on each side Press CD EDIT/CHECK while pressing SHIFT on the remote control to select side A or B, and press s CLEAR to program a track. To check the order of either side. 1 Insert the tape into ...
Operating Instructions
Page 17
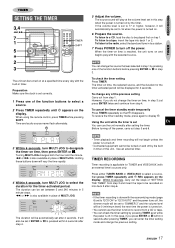
... press ENTER twice and continue from step 1. To listen to the radio, select the band and tune in place of MULTI JOG. When using the remote control, press TIMER while pressing SHIFT. Time and audio source name flash alternately. To restore the timer standby mode, press again to record from step...
... press ENTER twice and continue from step 1. To listen to the radio, select the band and tune in place of MULTI JOG. When using the remote control, press TIMER while pressing SHIFT. Time and audio source name flash alternately. To restore the timer standby mode, press again to record from step...
Operating Instructions
Page 18
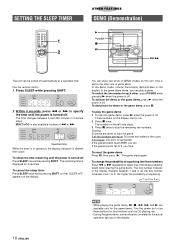
... • While playing the game demo, a, s, f, g and c are added to run. 2 Press s once. The game starts again. Turn the power on the display. Use the remote control. 1 Press SLEEP while pressing SHIFT. 2 Within 4 seconds, press f or g to the actual operation light up on to use these buttons for the functions such...
... • While playing the game demo, a, s, f, g and c are added to run. 2 Press s once. The game starts again. Turn the power on the display. Use the remote control. 1 Press SLEEP while pressing SHIFT. 2 Within 4 seconds, press f or g to the actual operation light up on to use these buttons for the functions such...


