Owner Guide 1st Printing
Page 19
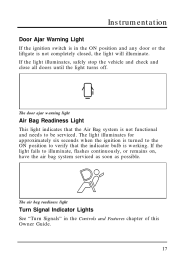
... the ignition is turned to the ON position to verify that the Air Bag system is working. Instrumentation Door Ajar Warning Light If the ignition switch is in the Controls and Features chapter of this Owner Guide. 17 If the light fails to be serviced.
... the ignition is turned to the ON position to verify that the Air Bag system is working. Instrumentation Door Ajar Warning Light If the ignition switch is in the Controls and Features chapter of this Owner Guide. 17 If the light fails to be serviced.
Owner Guide 1st Printing
Page 20
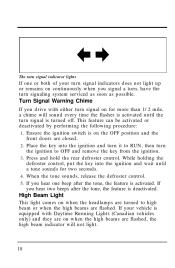
... on continuously when you hear one or both of your vehicle is on the OFF position and the front doors are closed. 2. Ensure the ignition switch is equipped with either turn signaling system serviced as soon as possible. High Beam Light This light comes on for two seconds. 4. Place the key...
... on continuously when you hear one or both of your vehicle is on the OFF position and the front doors are closed. 2. Ensure the ignition switch is equipped with either turn signaling system serviced as soon as possible. High Beam Light This light comes on for two seconds. 4. Place the key...
Owner Guide 1st Printing
Page 29
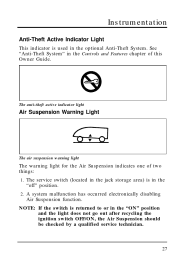
...disabling Air Suspension function. See "Anti-Theft System" in the "ON" position and the light does not go out after recycling the ignition switch OFF/ON, the Air Suspension should be checked by a qualified service technician. 27 The anti-theft active indicator light Air Suspension Warning Light... The air suspension warning light The warning light for the Air Suspension indicates one of this Owner Guide. NOTE: If the switch is returned to or in the Controls and Features chapter of two things: 1. Instrumentation Anti-Theft Active Indicator Light This indicator is used...
...disabling Air Suspension function. See "Anti-Theft System" in the "ON" position and the light does not go out after recycling the ignition switch OFF/ON, the Air Suspension should be checked by a qualified service technician. 27 The anti-theft active indicator light Air Suspension Warning Light... The air suspension warning light The warning light for the Air Suspension indicates one of this Owner Guide. NOTE: If the switch is returned to or in the Controls and Features chapter of two things: 1. Instrumentation Anti-Theft Active Indicator Light This indicator is used...
Owner Guide 1st Printing
Page 31
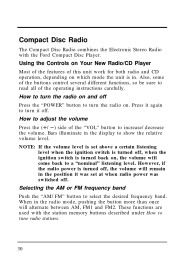
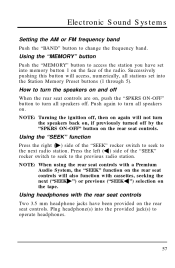
... in . How to turn the radio on and off Press the "POWER" button to turn it was set above a certain listening level when the ignition switch is turned back on, the volume will come back to a "nominal" listening level. Selecting the AM or FM frequency band Push the "AM/FM" button... to select the desired frequency band. These functions are used with the Ford Compact Disc Player. How to adjust the volume Press the (e/ȕ) side of the operating instructions carefully. NOTE: If the volume level is in the...
... in . How to turn the radio on and off Press the "POWER" button to turn it was set above a certain listening level when the ignition switch is turned back on, the volume will come back to a "nominal" listening level. Selecting the AM or FM frequency band Push the "AM/FM" button... to select the desired frequency band. These functions are used with the Ford Compact Disc Player. How to adjust the volume Press the (e/ȕ) side of the operating instructions carefully. NOTE: If the volume level is in the...
Owner Guide 1st Printing
Page 36
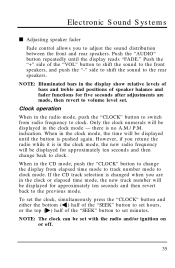
... ten seconds and then revert back to the previous mode. When in the clock mode - When in the radio mode, push the "CLOCK" button to switch from elapsed time mode to track number mode to clock mode. there is pushed again. NOTE: The clock can be displayed until the display reads...
... ten seconds and then revert back to the previous mode. When in the clock mode - When in the radio mode, push the "CLOCK" button to switch from elapsed time mode to track number mode to clock mode. there is pushed again. NOTE: The clock can be displayed until the display reads...
Owner Guide 1st Printing
Page 44
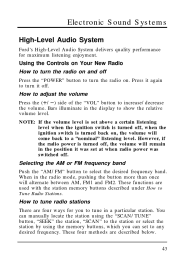
...the "VOL" button to a "nominal" listening level. NOTE: If the volume level is set above a certain listening level when the ignition switch is turned off . How to tune radio stations There are four ways for maximum listening enjoyment. These four methods are used with the station ...to Tune Radio Stations. You can set at when radio power was switched off , when the ignition switch is turned off, the volume will remain in a particular station. Electronic Sound Systems High-Level Audio System Ford's High-Level Audio System delivers quality performance for you can manually locate...
...the "VOL" button to a "nominal" listening level. NOTE: If the volume level is set above a certain listening level when the ignition switch is turned off . How to tune radio stations There are four ways for maximum listening enjoyment. These four methods are used with the station ...to Tune Radio Stations. You can set at when radio power was switched off , when the ignition switch is turned off, the volume will remain in a particular station. Electronic Sound Systems High-Level Audio System Ford's High-Level Audio System delivers quality performance for you can manually locate...
Owner Guide 1st Printing
Page 57
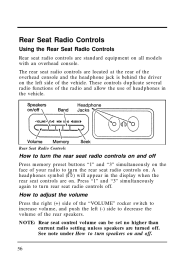
... turn speakers on and off Press memory preset buttons "1" and "3" simultaneously on . How to adjust the volume Press the right (+) side of the "VOLUME" rocker switch to increase volume, and push the left side of your radio to decrease the volume of headphones in the display when the rear seat controls...
... turn speakers on and off Press memory preset buttons "1" and "3" simultaneously on . How to adjust the volume Press the right (+) side of the "VOLUME" rocker switch to increase volume, and push the left side of your radio to decrease the volume of headphones in the display when the rear seat controls...
Owner Guide 1st Printing
Page 58
Press the left (b) side of the "SEEK" rocker switch to seek to change the frequency band. Electronic Sound Systems Setting the AM or FM frequency band Push the "BAND" button to the previous radio ...station. Push again to operate headphones. 57 Plug headphone(s) into the provided jack(s) to turn all speakers on the face of the "SEEK" rocker switch to seek to access the station you have been provided on the tape. Using the "SEEK" function Press the right (a) side of the radio. How...
Press the left (b) side of the "SEEK" rocker switch to seek to change the frequency band. Electronic Sound Systems Setting the AM or FM frequency band Push the "BAND" button to the previous radio ...station. Push again to operate headphones. 57 Plug headphone(s) into the provided jack(s) to turn all speakers on the face of the "SEEK" rocker switch to seek to access the station you have been provided on the tape. Using the "SEEK" function Press the right (a) side of the radio. How...

Owner Guide 1st Printing
Page 61
... it off. Press the left (Ҁ) side of the "VOLUME" button to any desired frequency. 60 Press it was set at when radio power was switched off , the volume will alternate between AM, FM1 and FM2. NOTE: If the volume level is set to increase the volume. Electronic Stereo and Stereo... Push the "AM/FM" button to tune radio stations. These functions are three ways for you can set above a certain listening level when the ignition switch is turned off, when the ignition...
... it off. Press the left (Ҁ) side of the "VOLUME" button to any desired frequency. 60 Press it was set at when radio power was switched off , the volume will alternate between AM, FM1 and FM2. NOTE: If the volume level is set to increase the volume. Electronic Stereo and Stereo... Push the "AM/FM" button to tune radio stations. These functions are three ways for you can set above a certain listening level when the ignition switch is turned off, when the ignition...
Owner Guide 1st Printing
Page 69
... has been incorporated into this system. When several broadcast towers are normal conditions on AM frequencies. While passing the tower, the station may switch back and forth a few times before returning to a weak station and when passing another broadcast tower. This feature automatically... switches a weak stereo signal to a clearer monaural signal, which improves the quality of static are present (common in metropolitan areas), several stations may capture...
... has been incorporated into this system. When several broadcast towers are normal conditions on AM frequencies. While passing the tower, the station may switch back and forth a few times before returning to a weak station and when passing another broadcast tower. This feature automatically... switches a weak stereo signal to a clearer monaural signal, which improves the quality of static are present (common in metropolitan areas), several stations may capture...
Owner Guide 1st Printing
Page 71
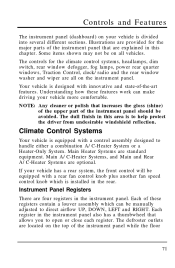
.... Main A/C-Heater Systems, and Main and Rear A/C-Heater Systems are located on the instrument panel. Illustrations are provided for the climate control systems, headlamps, dim switch, rear window defogger, fog lamps, power rear quarter windows, Traction Control, clock/radio and the rear window washer and wiper are explained in this chapter...
.... Main A/C-Heater Systems, and Main and Rear A/C-Heater Systems are located on the instrument panel. Illustrations are provided for the climate control systems, headlamps, dim switch, rear window defogger, fog lamps, power rear quarter windows, Traction Control, clock/radio and the rear window washer and wiper are explained in this chapter...
Owner Guide 1st Printing
Page 79
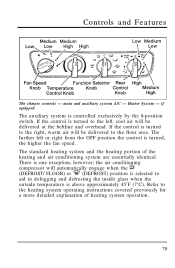
... to the right, warm air will be delivered to the left or right from the OFF position the control is controlled exclusively by the 9-position switch. The further left , cool air will be delivered at the beltline and overhead. Controls and Features The climate controls - if equipped The auxiliary system is...
... to the right, warm air will be delivered to the left or right from the OFF position the control is controlled exclusively by the 9-position switch. The further left , cool air will be delivered at the beltline and overhead. Controls and Features The climate controls - if equipped The auxiliary system is...
Owner Guide 1st Printing
Page 81
... the positions of time in hot weather, place the automatic transaxle gearshift selector lever in Park (P) or in traffic for cooler temperatures. Correct this by switching the Function Control Knob to the position of the air being discharged from the air outlets when using the A/C with outside air. Make sure that...
... the positions of time in hot weather, place the automatic transaxle gearshift selector lever in Park (P) or in traffic for cooler temperatures. Correct this by switching the Function Control Knob to the position of the air being discharged from the air outlets when using the A/C with outside air. Make sure that...
Owner Guide 1st Printing
Page 83
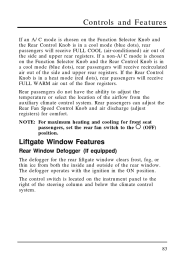
... passengers will receive recirculated air out of the rear window. NOTE: For maximum heating and cooling for front seat passengers, set the rear fan switch to the right of the airflow from both the inside and outside of the side and upper rear registers. Rear passengers can adjust the Rear... not have the ability to adjust the temperature or select the location of the steering column and below the climate control system. 83 The control switch is located on the Function Selector Knob and the Rear Control Knob is chosen on the instrument panel to the m (OFF) position. The defogger...
... passengers will receive recirculated air out of the rear window. NOTE: For maximum heating and cooling for front seat passengers, set the rear fan switch to the right of the airflow from both the inside and outside of the side and upper rear registers. Rear passengers can adjust the Rear... not have the ability to adjust the temperature or select the location of the steering column and below the climate control system. 83 The control switch is located on the Function Selector Knob and the Rear Control Knob is chosen on the instrument panel to the m (OFF) position. The defogger...
Owner Guide 1st Printing
Page 84
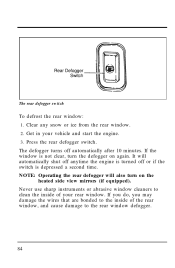
...clear, turn on again. Never use sharp instruments or abrasive window cleaners to the rear window defogger. 84 Press the rear defogger switch. NOTE: Operating the rear defogger will automatically shut off anytime the engine is turned off automatically after 10 minutes. If the window ...is depressed a second time. The rear defogger switch To defrost the rear window: 1. It will also turn the defogger on the heated side view mirrors (if equipped). If you do,...
...clear, turn on again. Never use sharp instruments or abrasive window cleaners to the rear window defogger. 84 Press the rear defogger switch. NOTE: Operating the rear defogger will automatically shut off anytime the engine is turned off automatically after 10 minutes. If the window ...is depressed a second time. The rear defogger switch To defrost the rear window: 1. It will also turn the defogger on the heated side view mirrors (if equipped). If you do,...
Owner Guide 1st Printing
Page 85
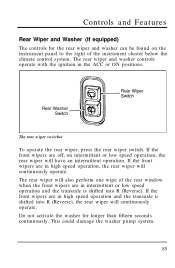
... wiper and washer controls operate with the ignition in high speed operation, the rear wiper will continuously operate. The rear wiper switches To operate the rear wiper, press the rear wiper switch. If the front wipers are in the ACC or ON positions. This could damage the washer pump system. 85 If...
... wiper and washer controls operate with the ignition in high speed operation, the rear wiper will continuously operate. The rear wiper switches To operate the rear wiper, press the rear wiper switch. If the front wipers are in the ACC or ON positions. This could damage the washer pump system. 85 If...
Owner Guide 1st Printing
Page 87
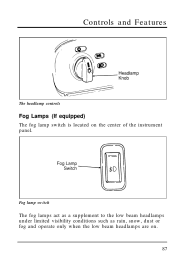
Fog lamp switch The fog lamps act as a supplement to the low beam headlamps under limited visibility conditions such as rain, snow, dust or fog and operate only when the low beam headlamps are on the center of the instrument panel. Controls and Features The headlamp controls Fog Lamps (If equipped) The fog lamp switch is located on . 87
Fog lamp switch The fog lamps act as a supplement to the low beam headlamps under limited visibility conditions such as rain, snow, dust or fog and operate only when the low beam headlamps are on the center of the instrument panel. Controls and Features The headlamp controls Fog Lamps (If equipped) The fog lamp switch is located on . 87
Owner Guide 1st Printing
Page 88
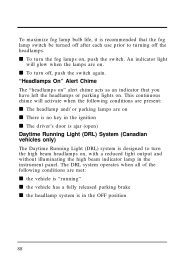
...'s door is ajar (open) Daytime Running Light (DRL) System (Canadian vehicles only) The Daytime Running Light (DRL) system is designed to turning off , push the switch again. "Headlamps On" Alert Chime The "headlamps on , with a reduced light output and without illuminating the high beam indicator lamp in the OFF position 88... s To turn off the headlamps. s To turn the high beam headlamps on " alert chime acts as an indicator that the fog lamp switch be turned off after each use prior to turn the fog lamps on, push the...
...'s door is ajar (open) Daytime Running Light (DRL) System (Canadian vehicles only) The Daytime Running Light (DRL) system is designed to turning off , push the switch again. "Headlamps On" Alert Chime The "headlamps on , with a reduced light output and without illuminating the high beam indicator lamp in the OFF position 88... s To turn off the headlamps. s To turn the high beam headlamps on " alert chime acts as an indicator that the fog lamp switch be turned off after each use prior to turn the fog lamps on, push the...
Owner Guide 1st Printing
Page 89
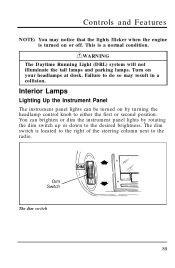
... Turn on or off. You can be turned on by rotating the dim switch up or down to either the first or second position. The dim switch is located to the right of the steering column next to do so may notice that the lights flicker when the engine is a normal condition...
... Turn on or off. You can be turned on by rotating the dim switch up or down to either the first or second position. The dim switch is located to the right of the steering column next to do so may notice that the lights flicker when the engine is a normal condition...
Owner Guide 1st Printing
Page 100
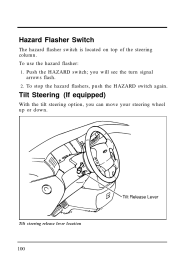
you can move your steering wheel up or down. To stop the hazard flashers, push the HAZARD switch again. Push the HAZARD switch; Tilt Steering (If equipped) With the tilt steering option, you will see the turn signal arrows flash. 2. Tilt steering release lever location 100 Hazard Flasher Switch The hazard flasher switch is located on top of the steering column. To use the hazard flasher: 1.
you can move your steering wheel up or down. To stop the hazard flashers, push the HAZARD switch again. Push the HAZARD switch; Tilt Steering (If equipped) With the tilt steering option, you will see the turn signal arrows flash. 2. Tilt steering release lever location 100 Hazard Flasher Switch The hazard flasher switch is located on top of the steering column. To use the hazard flasher: 1.


